原文地址:http://blog.csdn.net/lu597203933/article/details/16359461
图像遍历主要有三种方法,本节主要介绍和比较这三种方法。
一:简单存取像素值
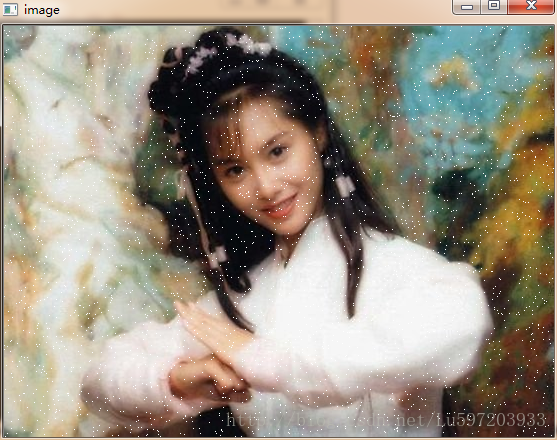
首先介绍一个名词—椒盐噪点:它是一种特殊的噪点,它随机的将图像中的部分像素设置为白色或者黑色。
Code:
-
#include <opencv2highguihighgui.hpp>
-
#include <opencv2imgprocimgproc.hpp>
-
#include <opencv2corecore.hpp>
-
#include <iostream>
-
-
using namespace std;
-
using namespace cv;
-
-
void salt(Mat &image, int n)
-
{
-
for(int k = 0; k < n; k++)
-
{
-
rand();
-
int i = rand() % image.cols;
-
int j = rand() % image.rows;
-
if(image.channels() == 1)
-
{
-
image.at<uchar>(j,i) = 255;
-
}
-
else if(image.channels() == 3)
-
{
-
image.at<Vec3b>(j,i)[0] = 255;
-
image.at<Vec3b>(j,i)[1] = 255;
-
image.at<Vec3b>(j,i)[2] = 255;
-
}
-
}
-
}
-
void salt2(Mat_<Vec3b> image, int n)
-
{
-
for(int k = 0; k < n; k++)
-
{
-
rand();
-
int i = rand() % image.cols;
-
int j = rand() % image.rows;
-
if(image.channels() == 3)
-
{
-
image(j,i)[0] = 255;
-
image(j,i)[1] = 255;
-
image(j,i)[2] = 255;
-
-
}
-
}
-
}
-
int main()
-
{
-
Mat image = imread("F:\huangrong.jpg", 1);
-
salt(image, 3000);
-
namedWindow("image");
-
imshow("image", image);
-
waitKey(0);
-
return 0;
-
-
}
Explaination:
(1) rand()是随机数生成函数。
(2)image.at<Vec3b>(j,i)[0] = 255;
成员函数at(inty, int x)可以用来存取图像元素,但必须在编译时期知道它的数据类型,这样的函数被称为模板函数,即需要指定操作成员的类型at<uchar>(y,x)
Opencv 中的类型Vec3b是由三个uchar组成的向量,可以通过操作符[]来获取。
(3)Mat_<Vec3b> image; image(j,i)[0] =255;
Mat_是Mat的一个模板子类。在事先知道矩阵类型的情况下,使用Mat_可以带来一些便利。这个类定义了一些额外的成员方法,但没有定义成员变量。它重载了操作符(),允许我们可以通过它直接存取矩阵元素。
Result:
二:通过指针遍历图像
需要说明的是:一个宽为W,高为H的三通道图像需要填补一个大小由W*H*3个uchar构成的内存块。但是,出于效率的考虑,图像会在每行行尾填补一些额外的像素。这是因为,如果行的长度是4或8的倍数,一些多媒体处理芯片可以更高效的处理图像。
Mat中的成员函数isContinuous()可以判断这幅图像是否对行进行了填补。如果为真,则没有填补。
Code:
-
-
-
#include <opencv2highguihighgui.hpp>
-
#include <opencv2imgprocimgproc.hpp>
-
#include <opencv2corecore.hpp>
-
#include <iostream>
-
-
using namespace std;
-
using namespace cv;
-
-
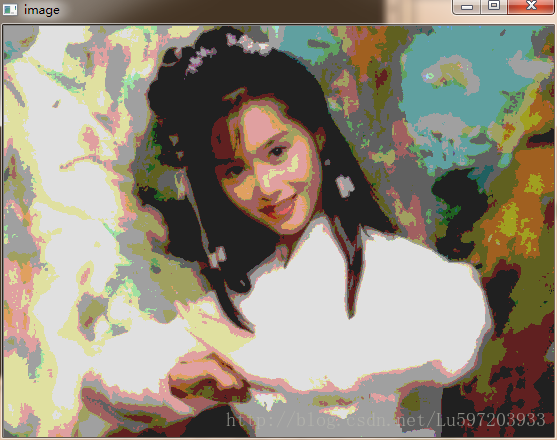
void colorReduce(Mat &image, int div = 64)
-
{
-
-
-
-
-
-
-
-
int n1 = image.rows;
-
int nc = image.cols * image.channels();
-
if(image.isContinuous())
-
{
-
nc = n1 * nc;
-
n1 = 1;
-
}
-
for(int j = 0; j < n1; j++)
-
{
-
uchar *data = image.ptr(j);
-
-
for(int i = 0; i < nc; i++)
-
{
-
data[i] = data[i]/div *div + div/2;
-
}
-
}
-
cout << "一行含有的字节数:" << image.step << endl;
-
cout << "一个像素所含有的字节:" << image.elemSize() << endl;
-
cout << "通道数:" << image.channels()<< endl;
-
cout << "总像素个数:" << image.total() << endl;
-
cout << "" << image.size().width << endl;
-
cout << "" << image.cols << endl;
-
cout << "height:" << image.rows << endl;
-
}
-
void colorReduce2(const Mat &image, Mat &result, int div = 64)
-
{
-
int n1 = image.rows;
-
-
int nc = image.cols ;
-
for(int j = 0; j < n1; j++)
-
{
-
-
-
-
for(int i = 0; i < nc; i++)
-
{
-
uchar *data = image.data + j * image.step + i * image.elemSize();
-
-
data[0] = 0;
-
data[1] = 0;
-
data[2] = 0;
-
}
-
}
-
-
}
-
-
int main()
-
{
-
Mat image = imread("F:\huangrong.jpg", 1);
-
Mat result;
-
result.create(Size(image.cols, image.rows),image.type());
-
-
colorReduce(image);
-
namedWindow("image");
-
imshow("image", image);
-
-
-
waitKey(0);
-
return 0;
-
}
Explaination:
(1) 得到指向第j行的地址有两种方法: image.ptr(j)是成员函数,而data是成员变量image.data+ j * image.step;但后面一种方法复杂点,推荐使用前者。
(2)成员变量step,rows,cols,成员函数elemSize,channels,total,size,create等解释见代码注释。
Result:

三:通过迭代器遍历图像
C++中迭代器不熟的可以看看我转载的一篇blog: http://blog.csdn.net/lu597203933/article/details/16357317
Code:
-
#include <opencv2corecore.hpp>
-
#include <opencv2imgprocimgproc.hpp>
-
#include <opencv2highguihighgui.hpp>
-
#include <iostream>
-
-
using namespace std;
-
using namespace cv;
-
-
void colorReduce(Mat &image, int div = 64)
-
{
-
-
-
MatIterator_<Vec3b> it = image.begin<Vec3b>();
-
MatIterator_<Vec3b> itend = image.end<Vec3b>();
-
for(; it != itend; ++it)
-
{
-
(*it)[0] = (*it)[0]/div * div + div/2;
-
(*it)[1] = (*it)[1]/div * div + div/2;
-
(*it)[2] = (*it)[2]/div * div + div/2;
-
}
-
}
-
void colorReduce2(Mat_<Vec3b> image, int div = 64)
-
{
-
-
-
MatIterator_<Vec3b> it = image.begin();
-
MatIterator_<Vec3b> itend = image.end();
-
for(; it != itend; ++it)
-
{
-
(*it)[0] = (*it)[0]/div * div + div/2;
-
(*it)[1] = (*it)[1]/div * div + div/2;
-
(*it)[2] = (*it)[2]/div * div + div/2;
-
}
-
}
-
-
int main()
-
{
-
Mat image = imread("F:\huangrong.jpg", 1);
-
if(!image.data){
-
cout << "fail to load image" << endl;
-
return 0;
-
}
-
colorReduce(image);
-
namedWindow("image");
-
imshow("image", image);
-
waitKey(0);
-
return 0;
-
}
Explaination:
(1)定义迭代器有两种方法:
MatIterator_<Vec3b>it ; //它是一个Mat实例的迭代器,是一个模板类
Mat_<Vec3b>::iterator it; // 它是定义在Mat_内部的迭代器
<Vec3b>表明是迭代器的类型,各个颜色分量可以通过操作符[]得到。
(2)获得迭代器开始和结束位置也有两种方法:
image.begin<Vec3b>(); //image 是Mat类型,Mat的方法
image.begin(); // image是Mat_类型,通过Mat_实例得到的
(3)指向的mat是const类型所对应的迭代器,此时Mat对象不能修改。
MatConstIterator_<Vec3b>it ; //它是一个Mat实例的迭代器,是一个模板类
Mat_<Vec3b>::const_iteratorit; // 它是定义在Mat_内部的迭代器
Result:
四:三种方法的时间效率比较:
Opencv中提供了两个非常实用的函数getTickCount()和getTickFrequency()可以非常方便的计算一段代码运行的时间;
代码:
-
void timeCalc(Mat &image){
-
double duration;
-
duration = static_cast<double>(getTickCount());
-
colorReduce(image);
-
duration = static_cast<double>(getTickCount()) - duration;
-
duration /= getTickFrequency();
-
}
首先讲下:
static_case<type_id>(expression)
该运算符把expression转换为type-id类型,但没有运行时类型检查来保证转换的安全性。
通过以上计算代码运行时间的方法我们可以得出上面三种遍历方法的运行时间:其中指针遍历时间最快,而迭代遍历最慢。可以说迭代器遍历代码简单,是一种最安全的遍历方法,出错率低。而简单的存取方法一般用来对随机位置的像素进行读写,并不适合用来遍历图像。遍历一般用指针。最后需要说明的是一次性处理一个像素的三个通道比循环处理每个通道所花费的时间要少,效率要高。
作者:小村长 出处:http://blog.csdn.net/lu597203933 欢迎转载或分享,但请务必声明文章出处。