版本基于Quay 3.2 ,Clair 3.2
1.搭建DNS named
参考
https://www.cnblogs.com/ericnie/p/12233269.html
2.搭建Quay的基础服务
参考
https://www.cnblogs.com/ericnie/p/12233269.html
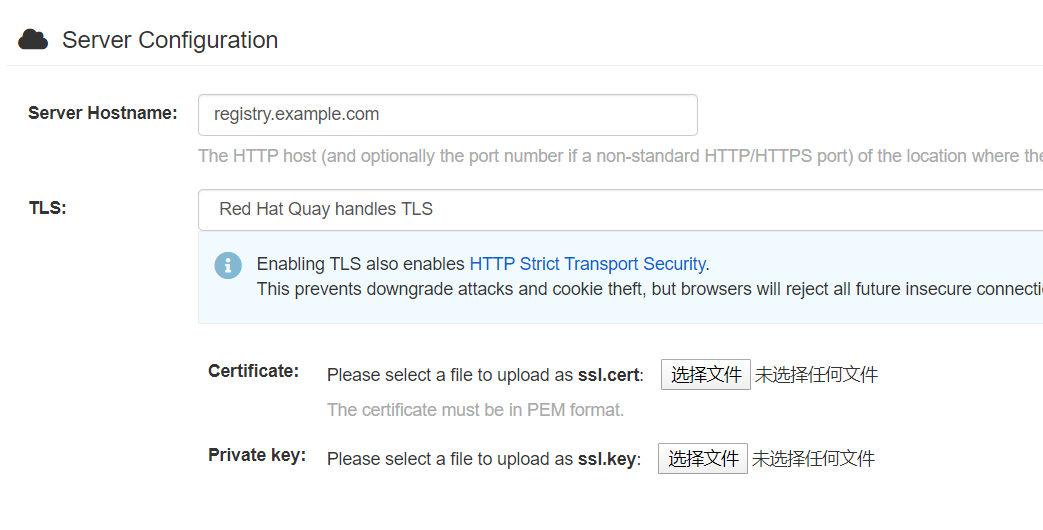
这里更新一个地方,在配置的时候,生成SSL的key后直接写在配置界面上。


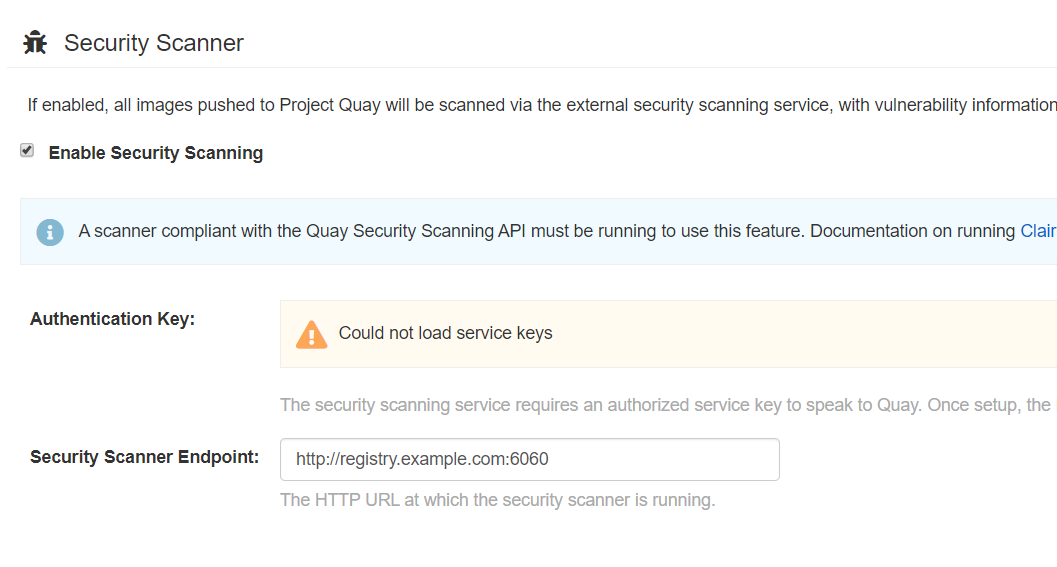
然后选择security scanner,把key id记录下来,比如
700660d27213683afbeafa8da4af9b53ff933dba4b8614e39c1bd717cf84f72c

直接在/mnt/quay/config下解压文件所得
[root@registry config]# ls
config.yaml  extra_ca_certs  quay-config.tar.gz  ssl.cert  ssl.key
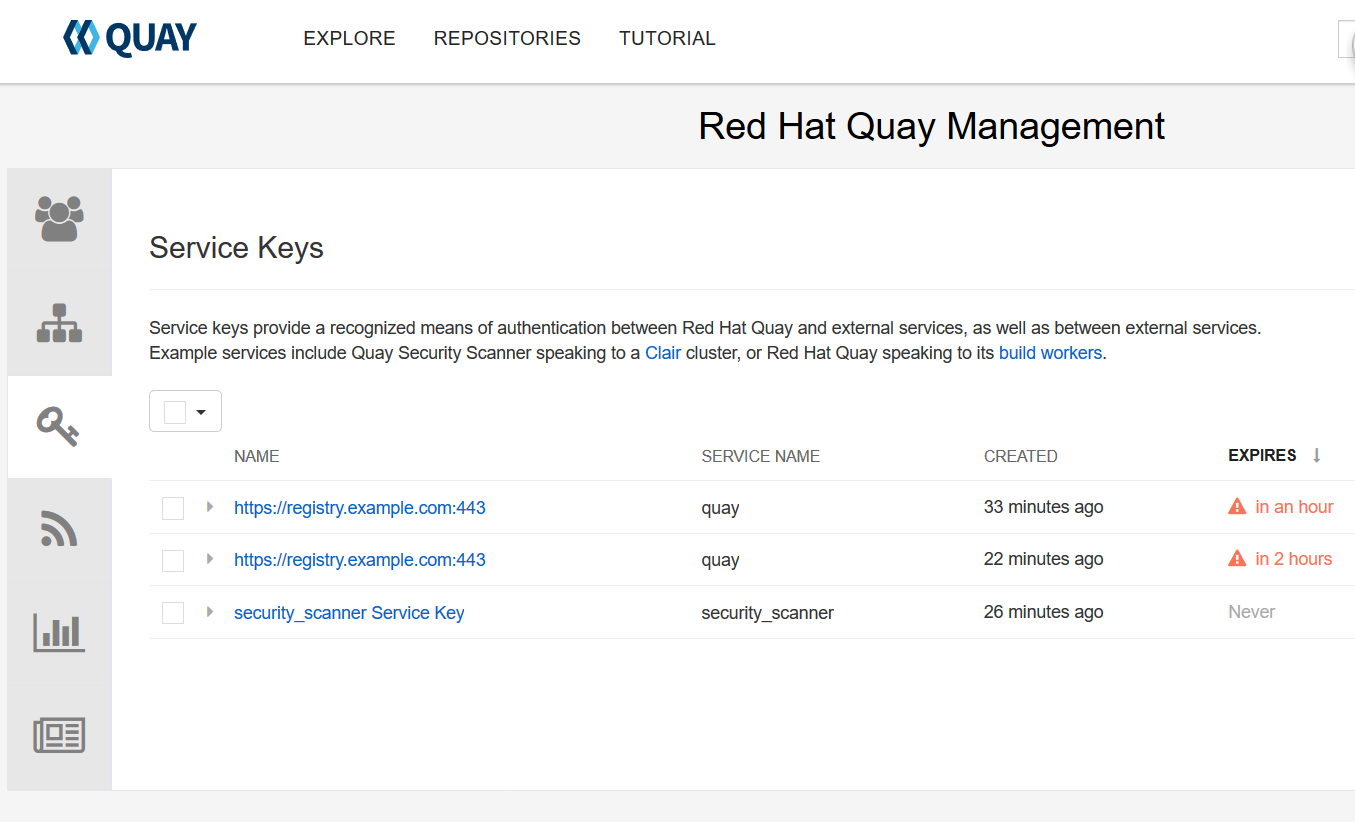
启动quay,打开quay的界面转到superuser可以看到key,千万别删除,千万别删除,千万别删除。

注意启动quay以后,需要保证jwtproxy服务启动
[root@f2072855dcac quay-registry]# ps -aux | grep jwtproxy
root       196  0.0  0.1 303656 13620 ?        Sl   10:14   0:00 /usr/local/bin/jwtproxy --config /quay-registry/conf/jwtproxy_conf.yaml
root       552  0.0  0.0  10692   976 ?        R+   10:43   0:00 grep --color=auto jwtproxy
3.配置clair
docker run --name postgres -p 5432:5432 -d postgres
sleep 5
docker run --rm --link postgres:postgres postgres
   sh -c 'echo "create database clairtest" | psql -h
   "$POSTGRES_PORT_5432_TCP_ADDR" -p
   "$POSTGRES_PORT_5432_TCP_PORT" -U postgres'
mkdir /clair-config
config.xml
[root@registry config]# cat /clair-config/config.yaml
clair:
  database:
    type: pgsql
    options:
      # A PostgreSQL Connection string pointing to the Clair Postgres database.
      # Documentation on the format can be found at: http://www.postgresql.org/docs/9.4/static/libpq-connect.html
      source: postgresql://postgres@192.168.56.107:5432/clairtest?sslmode=disable
      cachesize: 16384
  api:
    # The port at which Clair will report its health status. For example, if Clair is running at
    # https://clair.mycompany.com, the health will be reported at
    # http://clair.mycompany.com:6061/health.
    healthport: 6061

    port: 6062
    timeout: 900s

    # paginationkey can be any random set of characters. *Must be the same across all Clair instances*.
    paginationkey: "XxoPtCUzrUv4JV5dS+yQ+MdW7yLEJnRMwigVY/bpgtQ="

  updater:
    # interval defines how often Clair will check for updates from its upstream vulnerability databases.
    interval: 6h
    notifier:
      attempts: 3
      renotifyinterval: 1h
      http:
        # QUAY_ENDPOINT defines the endpoint at which Quay is running.
        # For example: https://myregistry.mycompany.com
        endpoint: https://registry.example.com/secscan/notify
        proxy: http://localhost:6063
jwtproxy:
  signer_proxy:
    enabled: true
    listen_addr: :6063
    ca_key_file: /certificates/mitm.key # Generated internally, do not change.
    ca_crt_file: /certificates/mitm.crt # Generated internally, do not change.
    signer:
      issuer: security_scanner
      expiration_time: 5m
      max_skew: 1m
      nonce_length: 32
      private_key:
        type: preshared
        options:
          # The ID of the service key generated for Clair. The ID is returned when setting up
          # the key in [Quay Setup](security-scanning.md)
          key_id: 700660d27213683afbeafa8da4af9b53ff933dba4b8614e39c1bd717cf84f72c
          private_key_path: /clair/config/security_scanner.pem


  verifier_proxies:
  - enabled: true
    # The port at which Clair will listen.
    listen_addr: :6060

    # If Clair is to be served via TLS, uncomment these lines. See the "Running Clair under TLS"
    # section below for more information.
    # key_file: /clair/config/clair.key
    # crt_file: /clair/config/clair.crt

    verifier:
      # CLAIR_ENDPOINT is the endpoint at which this Clair will be accessible. Note that the port
      # specified here must match the listen_addr port a few lines above this.
      # Example: https://myclair.mycompany.com:6060
      audience: http://registry.example.com:6060

      upstream: http://localhost:6062
      key_server:
        type: keyregistry
        options:
          # QUAY_ENDPOINT defines the endpoint at which Quay is running.
          # Example: https://myregistry.mycompany.com
          registry: https://registry.example.com/keys/
[root@registry clair-config]# ls
config.yaml  security_scanner.pem
启动clair
docker run --restart=always -p 6060:6060 -p 6061:6061
   -v /clair-config:/clair/config
   -v /mnt/quay/config/extra_ca_certs/rootCA.crt:/etc/pki/ca-trust/source/anchors/ca.crt
   quay.io/redhat/clair-jwt:v3.2.0
4.push镜像,验证
cp rootCA.pem /etc/docker/certs.d/registry.redhat.ren/ca.crt

[root@registry ~]# docker push registry.example.com/admin/debian34:9.5
The push refers to a repository [registry.example.com/admin/debian34]
f715ed19c28b: Pushed
9.5: digest: sha256:bbb3345ed2e7548dc7a53385b724374ecfb166489a1066cc31b345d0d767df78 size: 529
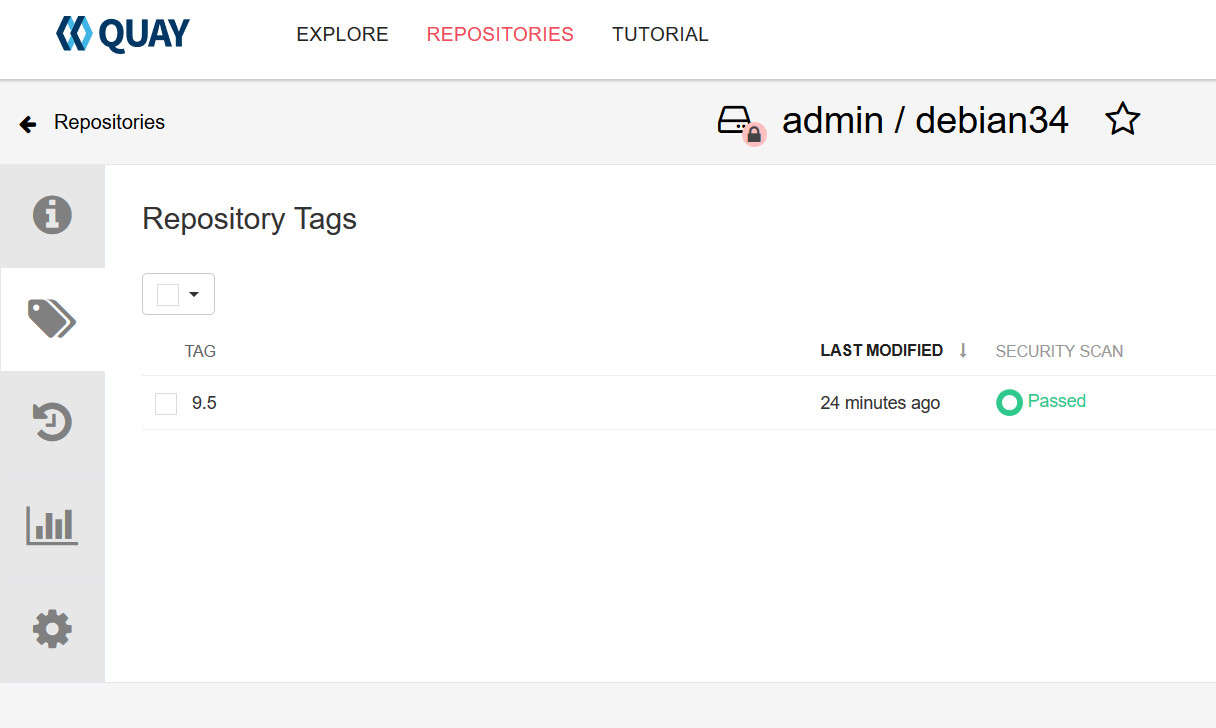
转到quay界面


关键坑
- DNS
因为无论是quay还是clair启动都会需要根据域名访问对方,所以需要配置dns
需要修改宿主机的/etc/reslov.conf, quay和clair启动中会去读取dns记录
虚拟机重启以后/etc/reslov.conf会修改,记住改回
- Quay和Clair间的Key
这个也比较坑,设置为preshard模式吧。
- Jwtproxy
一开始运行的时候会有此进程,但如果docker restart后这个就没有了。
- Clair的config.yaml
折腾好几天。。。。