本片文章续《Spring Boot 入门(七):集成 swagger2》,关于RabbitMQ的介绍请参考《java基础(六):RabbitMQ 入门》
1.增加依赖
1         <!--rabbitMq-->
2         <dependency>
3             <groupId>org.springframework.boot</groupId>
4             <artifactId>spring-boot-starter-amqp</artifactId>
5         </dependency>
2.增加conf
 1 2
 3 import lombok.extern.slf4j.Slf4j;
 4 import org.springframework.amqp.core.*;
 5 import org.springframework.amqp.rabbit.connection.CorrelationData;
 6 import org.springframework.amqp.rabbit.core.RabbitTemplate;
 7 import org.springframework.amqp.rabbit.core.RabbitTemplate.ConfirmCallback;
 8 import org.springframework.amqp.rabbit.core.RabbitTemplate.ReturnCallback;
 9 import org.springframework.beans.factory.annotation.Autowired;
10 import org.springframework.beans.factory.annotation.Value;
11 import org.springframework.context.annotation.Bean;
12 import org.springframework.context.annotation.Configuration;
13
14 import javax.annotation.PostConstruct;
15
16 /**
17  * @program:
18  * @description: Rabbit相关配置
19  * @author: DZ
20  * @create: 2019-10-18 17:07
21  **/
22 @Slf4j
23 @Configuration
24 public class RabbitConfig implements ConfirmCallback, ReturnCallback {
25     @Autowired
26     private RabbitTemplate rabbitTemplate;
27
28     //目前就声明了一个消息队列
29     // 队列名称
30 31     public String queue = "queue";
32     // 交换机名称
33    34     public String exchang="exchange";
35     // 关键字
36     37     public String key="key";
38
39     @PostConstruct
40     public void init() {
41         rabbitTemplate.setConfirmCallback(this);
42         rabbitTemplate.setReturnCallback(this);
43     }
44
45     //此主要用于检查交换机(exChange),当 ack=false,交换机可能错误
46     @Override
47     public void confirm(CorrelationData correlationData, boolean ack, String cause) {
48         //在发送消息的时候correlationData传入的为进件编号
49         if (ack) {
50             log.info("消息发送成功:correlationData = " + correlationData);
51         } else {
52             //如果有多个交换机,这里日志需要优化
53             log.error("消息发送失败,交换机可能错误:correlationData = " + correlationData + ",exchang:" + exchang);
54         }
55     }
56
57     //次方法用于检查队列(queue),当此方法执行时,队列可能错误
58     @Override
59     public void returnedMessage(Message message, int replyCode, String replyText, String exchange, String routingKey) {
60         //如果有多个队列,这里日志需要优化
61         log.error("消息发送失败,队列可能错误:correlationData = " + message.getMessageProperties().getCorrelationId() + ",queue:" + queue);
62     }
63
64     // 声明队列
65     @Bean
66     public Queue queue() {
67         return new Queue(queue, true);//表示持久化
68     }
69
70     // 声明交换机,注意交换机的类别
71     @Bean
72     public FanoutExchange exchange() {
73         return new FanoutExchange(exchang);
74         //return new DirectExchange(exchang);
75         //return new TopicExchange(exchang);
76     }
77
78     // 绑定交换机和队列,如果是fanout,就不需要key
79     @Bean
80     public Binding binding() {
81         return BindingBuilder.bind(queue()).to(exchange());
82         //return BindingBuilder.bind(queue()).to(exchange()).with(key);
83     }
84 }
在实际开发过程中,mq的相关属性都配置在application.yml的配置文件中。
在绑定交换机的过程中,需要注意绑定方式以及key。
3.调用
 1 @Autowired
 2     private RabbitTemplate rabbitTemplate;
 3   6     @RequestMapping(value = "testRabbitMQ", method = RequestMethod.POST)
 7     public String testRabbitMQ() {
 8         String msg = "{"id":"123","msg":"555555"}";
 9         String id = "123456789";
11         CorrelationData correlationId = new CorrelationData(id);
12         log.info("开始发送消息 : correlationId= " + correlationId + ",exchange=" + exchange + ",msg= " + msg);
13         Object response = rabbitTemplate.convertSendAndReceive(exchange, "", msg, correlationId);
14
15         log.info("开始发送结束 : correlationId= " + correlationId);
16         return "testRabbitMQ";
17     }
由于本文中交换机的绑定方式为fanout,所以不需要key,这里在发送消息的时候rabbitTemplate.convertSendAndReceive(exchange, "", msg, correlationId);key直接传入一个空字符串即可。
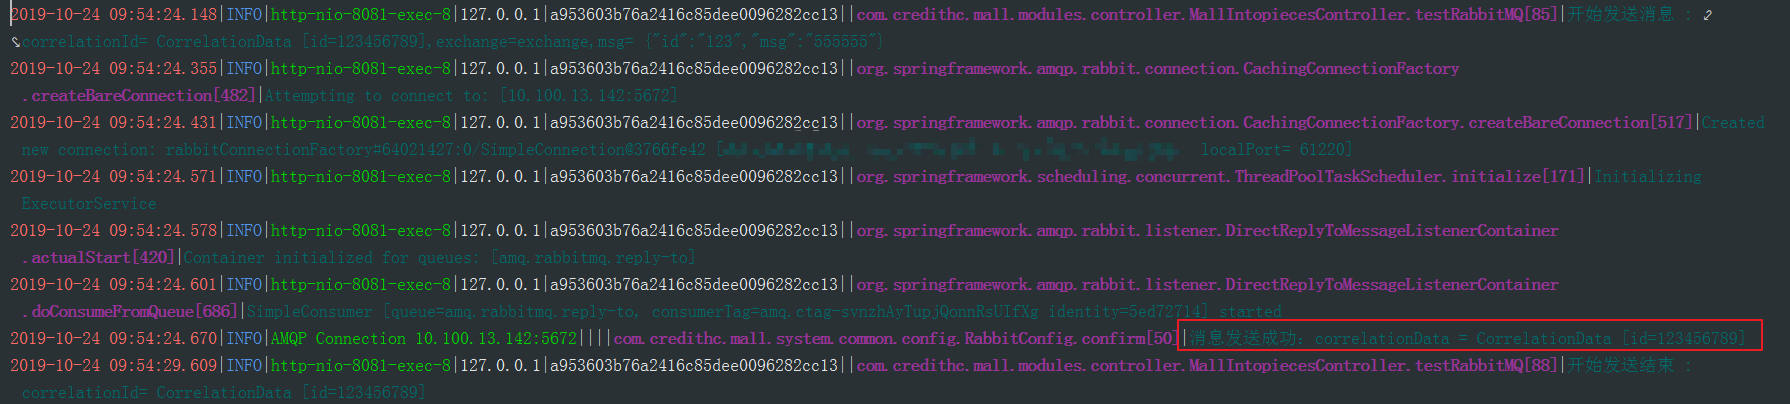
使用swagger测试,发送消息成功:
下面测试一个交换机错误的情况,来说明回调函数的作用于意义
