一、打包vue项目
WebStorm打包vue项目过程参考:Vue_打包并发布项目。
二、部署至nginx
1.上传项目
将打包结果(dist文件夹)通过SFTP上传至Linux服务器(我用的是虚拟机),位置随意,我放到了nginx解压文件夹同级目录下。

2.创建配置文件
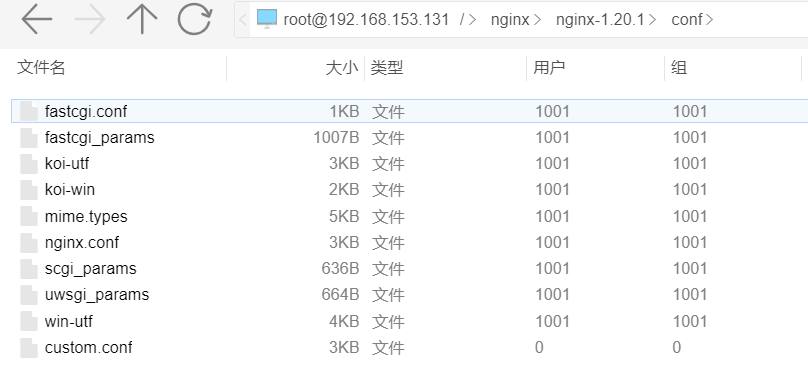
进入nginx解压文件夹下创建配置文件,custom.conf是我创建的配置文件。

custom.conf文件内容如下:
#user  nobody;
worker_processes  1;

#error_log  logs/error.log;
#error_log  logs/error.log  notice;
#error_log  logs/error.log  info;

#pid        logs/nginx.pid;


events {
    worker_connections  1024;
}


http {
    include       mime.types;
    default_type  application/octet-stream;

    #log_format  main  '$remote_addr - $remote_user [$time_local] "$request" '
    #                  '$status $body_bytes_sent "$http_referer" '
    #                  '"$http_user_agent" "$http_x_forwarded_for"';

    #access_log  logs/access.log  main;

    sendfile        on;
    #tcp_nopush     on;

    #keepalive_timeout  0;
    keepalive_timeout  65;

    #gzip  on;

    # 配置后端接口地址
    # 由于tomcat版本原因,upstream的命名不能带下划线
    upstream apiServer{
        server 192.168.153.128:8101 weight=1;
        server 192.168.153.129:8101 weight=1;
    }

    server {
        listen       8080;
        server_name  localhost  192.168.153.131;

        location / {
        # 设置项目路径
            root   /nginx/dist;
            index  index.html index.htm;
        }

        #请求转发,给后端做负载均衡
        location /api/ {
            add_header X-Content-Type-Options nosniff;
            proxy_set_header X-scheme $scheme;
            # 作用是我们可以获取到客户端的真实ip
            proxy_set_header X-Real-IP $remote_addr;
            proxy_set_header X-Forwarded-For $proxy_add_x_forwarded_for;
            proxy_set_header Host $http_host;
            proxy_set_header X-Nginx-Proxy true;
            proxy_hide_header X-Powered-By;
            proxy_hide_header Vary;
            proxy_pass http://apiServer;
        }

        #error_page  404              /404.html;

        # redirect server error pages to the static page /50x.html
        #
        error_page   500 502 503 504  /50x.html;
        location = /50x.html {
            root   html;
        }
    }

}
3.启动nginx
通过命令行启动nginx。
/usr/local/nginx/sbin/nginx -c /nginx/nginx-1.20.1/conf/custom.conf
三、访问项目网址
启动后打开浏览器输入 http://192.168.153.131:8080 测试是否正常运行。这里的192.168.153.131是Linux虚拟机实际IP地址,同时也是上边配置文件server_name中写明的IP。由于虚拟机系统为centos7命令行版,所以在主机浏览器输入地址进行访问。