1. 警告框(UIAlertView)与UIActionSheet
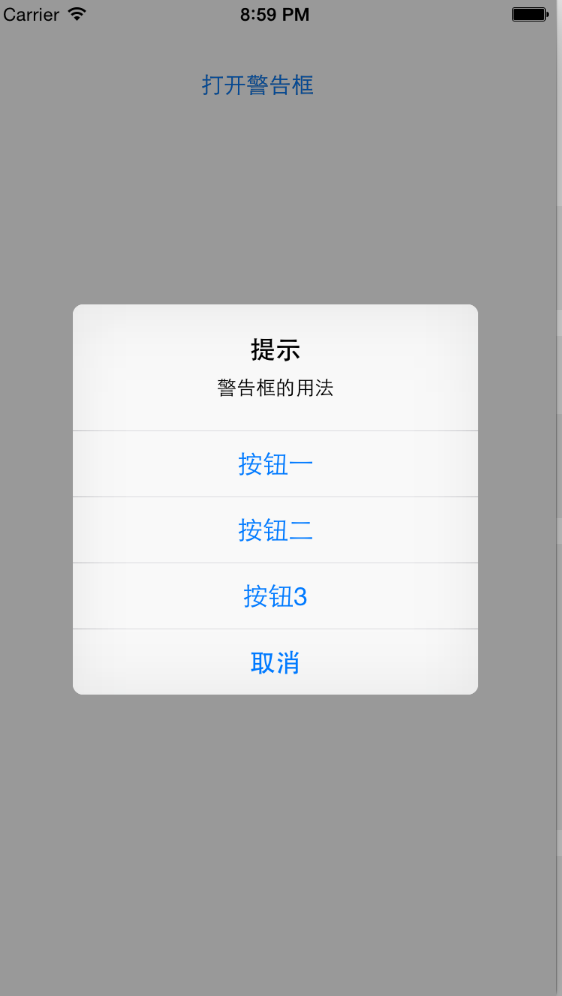
UIAlertView与UIActionSheet都是iOS系统自带的弹出式对话跨。两者的区别是:UIAlertView表现为显示在屏幕中央的弹出式警告框;UIActionSheet则表示为显示在底部的按钮列表。
1.1 UIAlertView的基本用法
使用步骤:
- 创建UIAlertView,创建该对象时可指定该警告框的标题、消息内容,以及该警告框包含的按钮。
- 调用UIAlertView显示出来。
- 如果需要监听用户点击了警告框的那个按钮,为委托对象实现
UIAlertViewDelegate协议中的方法。
案例:点击按钮弹出警告框

实现代码:
- (IBAction)openAlert:(UIButton *)sender {
    //创建UIAlertView控件
    UIAlertView * alert = [[UIAlertView alloc]
                           initWithTitle:@"提示" //指示标题
                           message:@"警告框的用法" //指示消息
                           delegate:self //指定委托对象
                           cancelButtonTitle:@"取消" //为底部的取消按钮设置标题
                           //设置另外三个按钮
                           otherButtonTitles:@"按钮一",@"按钮二",@"按钮三", nil];
    [alert show];
}

-(void) alertView:(UIAlertView *)alertView clickedButtonAtIndex:(NSInteger)buttonIndex
{
    NSString * msg = [NSString stringWithFormat:@"您点击了第%ld个按钮",buttonIndex];
    //创建UIAlertView控件
    UIAlertView * alert = [[UIAlertView alloc]
                           initWithTitle:@"提示" message:msg delegate:nil cancelButtonTitle:@"确定" otherButtonTitles: nil];
    [alert show];
}
UIAlertView控件的事件机制是交给委托对象负责处理。UIAlertViewDelegate协议中定义的常用方法:
-(void)alertView:(UIAlertView*)alertView clickedButtonAtIndex:(NSInteger)buttonIndex:用户单击该警告框中某个按钮是触发,buttonIndex代表用户单击的按钮的索引,从0开始-(void)willPresentAlertView:(UIAlertView*)alertView警告框将要显示出来时触发。-(void)didPresentAlertView:(UIAlertView*)alertView警告框完全显示出来后将会触发。-(BOOL)alertViewShouldEnableFirstOtherButton:(UIAlertView*)alert警告框中第一个非Cancel按钮被启用时触发。-(void)alertView:(UIAlertView*)alertView willDismissWithButtonIndex:(NSInteger)buttonIndex单击某个按钮完全隐藏该警告框时触发-(void)alertViewCancel:(UIAlertView*)alertView对话框被取消时触发。
1.2 带输入框的UIAlertView
UIAlertView支持一个actionSheetStyle属性,用于设置UIAlertView的风格,支持如下枚举值:
UIAlertViewStyleDefault默认的警告框风格UIAlertViewStyleSecureTextInput包含一个密码输入框UIAlertViewStylePlainTextInput包含一个普通的输入框UIAlertViewStyleLoginAndPasswordInput包含用户名、密码两个输入框
获取警告框中的输入框:
-(UITextField)textFieldAtIndex:(NSInteger)textFieldIndex: 获取textFieldIndex索引对应的文本框。第一个文本框的索引默认为0.
案例:带输入框的UIAlertView
效果图:
实现代码:
1.绑定按钮点击事件
- (IBAction)openTextAlert:(UIButton *)sender {
    textAlert = [[UIAlertView alloc]
                 initWithTitle:@"登录" message:@"请输入用户名和密码" delegate:self cancelButtonTitle:@"取消" otherButtonTitles:@"确定", nil];
    //设置该警告框显示为输入用户名和密码框
    textAlert.alertViewStyle = UIAlertViewStyleLoginAndPasswordInput;
    //设置第二个文本管理的键盘只是数字键盘
    [textAlert textFieldAtIndex:1].keyboardType = UIKeyboardTypeNumberPad;
    //显示UIAlertView
    [textAlert show];
}
2.重写alertView中的逻辑
//如果用户单击了第一个按钮
        if(buttonIndex == 1)
        {
            UITextField* nameField = [textAlert textFieldAtIndex:0];
            UITextField* passField = [textAlert textFieldAtIndex:1];
            NSString* msg = [NSString stringWithFormat:@"输入的用户名和密码为:%@,%@",nameField.text,passField.text];
            UIAlertView * msgAlert = [[UIAlertView alloc]
                                      initWithTitle:@"提示" message:msg delegate:nil cancelButtonTitle:@"确定" otherButtonTitles: nil];
            [msgAlert show];
        }
1.3 UIActionSheet
UIActionSheet表现为显示在底部的按钮列表。默认情况下,UIActionSheet支持一个标题和多个按钮,UIActionSheet会有两个固定的按钮和多个其他按钮:
- 灰色背景的取消按钮
- 红色背景的销毁按钮
UIActionSheet也可以通过ActionSheetStyle 属性来控制控件的风格:
UIActionSheetStyleDefault默认风格,灰色背景上显示白色文字UIActionSheetStyleBlackTranslucent在透明的黑色背景上显示白色文字UIActionSheetStyleBlackOpaque在纯黑的背景上显示白色文字
事件委托类是:UIActionSheetDelegate
2. 日期选择器(UIDatePicker)
UIDatePicker可以用来选择日期和事件,也可作为倒计时控件。继承了UIControl。
支持的属性如下:
- Mode 模式
- Locale 国际化
- Interval 设置两个事件的间隔
- Constraints 设置最大时间和最小时间
- Timer 采用Count Down Time模式有效,设置控件作为倒计时剩下的秒数
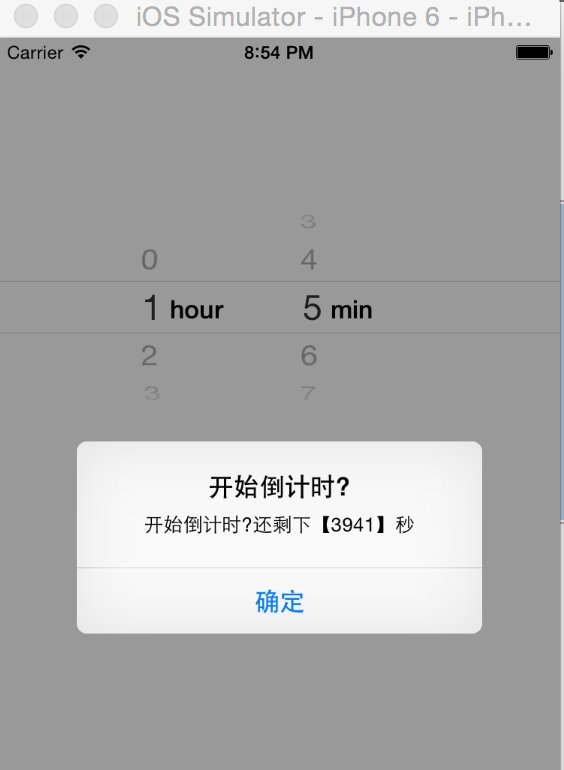
案例: 倒计时器

NSTimer * timer1;
NSInteger leftSeconds;

-(void) viewDidLoad
{
    [super viewDidLoad];
    self.countDown.datePickerMode = UIDatePickerModeCountDownTimer;
}


-(void) tickDown
{
    leftSeconds -= 60;
    self.countDown.countDownDuration = leftSeconds;
    if(leftSeconds <=0)
    {
        [timer1 invalidate];
        self.countDown.enabled = YES;
        self.startBn1.enabled = YES;
    }

}
- (IBAction)click1:(UIButton *)sender {
    //获取倒计时器的剩余时间
    leftSeconds = self.countDown.countDownDuration;
    self.countDown.enabled = NO;
    [sender setEnabled:NO];
    NSString* message=[NSString stringWithFormat:@"开始倒计时?还剩下【%d】秒",leftSeconds];
    UIAlertView* alert = [[UIAlertView alloc]
                          initWithTitle:@"开始倒计时?" message:message delegate:nil cancelButtonTitle:@"确定" otherButtonTitles: nil];
    [alert show];
    //启动计时器,每隔60秒执行一次tickDown方法

    timer1 = [NSTimer scheduledTimerWithTimeInterval:60 target:self selector:@selector(tickDown) userInfo:nil repeats:YES];

}