安卓中的drawable资源位我们在开发过程中提供了很大的便利之处,所以在此要做一下小小的总结。
一.StateListDrawable
1,用于组织多个Drawable对象
指定selector,每一个状态的Drawable被定义到一个item中
2,主要的属性
android:state_activated 已激活状态
android:state_active 是否处于激活
android:state_checkable 是否处于勾选
android:state_checked 已勾选
android:state_enabled 是否可用
android:state_first 是否处于开始
android:state_focused 是否已得焦点
android:state_last 是否处于结束
android:state_middle 是否处于中间
android:state_pressed 是否处于已按下
android:state_selected 是否处于已选中状态
android:state_window_focused 是否窗口已获得焦点
在drawable中的xml文件

1 <?xml version="1.0" encoding="utf-8"?>
2 <selector xmlns:android="http://schemas.android.com/apk/res/android" >
3
4     <item android:state_selected="true" android:drawable="@drawable/tab_address_pressed"/>
5     <item android:state_selected="false" android:drawable="@drawable/tab_address_normal"/>
6     <item android:state_press="false" android:drawable="@drawable/ic_preference_pressed"/>
7     <item android:state_press="true" android:drawable="@drawable/ic_preference_first_normal"/>
8
9 </selector>
在layout的xml中引用
android:drawableTop="@drawable/tab_address"
二.LayerDrawable
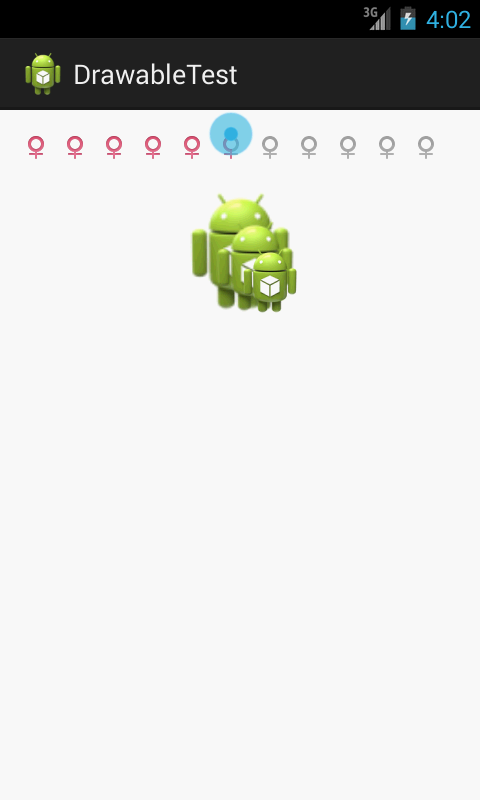
使用LayoutDrawable要在drawable下的layer-list标签中使用
drawable中配置的文件,seek.xml
 1 <?xml version="1.0" encoding="utf-8"?>
 2 <layer-list xmlns:android="http://schemas.android.com/apk/res/android" >
 3
 4     <!-- 定义seekbar的背景颜色 ,id应为系统自带的 android:id="@android:id/background"-->
 5     <item
 6         android:id="@android:id/background"
 7         android:drawable="@drawable/lbs_popup_female"/>
 8
 9     <!-- 定义seekbar滑动后的背景颜色 ,id应为系统自带的id, android:id="@android:id/progress"-->
10
11     <item
12         android:id="@android:id/progress"
13         android:drawable="@drawable/lbs_popup_female_selected"/>
14
15 </layer-list>
seek_image.xml
 1 <?xml version="1.0" encoding="utf-8"?>
 2 <layer-list xmlns:android="http://schemas.android.com/apk/res/android" >
 3
 4 <!--     定义第一个背景图片 ,并且bitmap的位置要居中,让其在中心位置变化,不然它会拉伸-->
 5     <item>
 6         <bitmap
 7             android:gravity="center"
 8             android:src="@drawable/ic_launcher" />
 9     </item>
10
11     <!-- 定义第一个背景图片,并且让它向左和上浮动20dp -->
12     <item
13         android:left="20dp"
14         android:top="20dp">
15         <bitmap
16             android:gravity="center"
17             android:src="@drawable/ic_launcher" />
18     </item>
19
20         <!-- 定义第一个背景图片,并且让它向左和上浮动40dp -->
21     <item
22         android:left="40dp"
23         android:top="40dp">
24         <bitmap
25             android:gravity="center"
26             android:src="@drawable/ic_launcher" />
27     </item>
28
29 </layer-list>
seek_image.xml中没有设置android:gravity="center"的效果与配置了的效果对比
layout中xml文件

 1  <SeekBar
 2         android:id="@+id/seekBar1"
 3         android:layout_width="match_parent"
 4         android:layout_height="50dp"
 5         android:progressDrawable="@drawable/seek"/>
 6
 7     <ImageView
 8         android:id="@+id/imageView1"
 9         android:layout_width="wrap_content"
10         android:layout_height="wrap_content"
11         android:layout_below="@+id/seekBar1"
12         android:layout_centerHorizontal="true"
13         android:src="@drawable/seek_image" />
三.ShapeDrawable
1,根标签使用sharp,并且在根标签中药定义sharp的类型,
- rectangle---矩阵,这也是默认的sharp
- oval--------椭圆
- line --------一条水平的直线,这个sharp必须使用<stroke/>元素来定义这个线的宽度
- ring--------圆环
实例:<shape xmlns:android="http://schemas.android.com/apk/res/android"
android:shape="rectangle" >
2,sharp中的属性
<corners
        android:radius="integer"
        android:topLeftRadius="integer"
        android:topRightRadius="integer"
        android:bottomLeftRadius="integer"
        android:bottomRightRadius="integer" />
    <gradient
        android:angle="integer"
        android:centerX="integer"
        android:centerY="integer"
        android:centerColor="integer"
        android:endColor="color"
        android:gradientRadius="integer"
        android:startColor="color"
        android:type=["linear" | "radial" | "sweep"]
        android:useLevel=["true" | "false"] />
    <padding
        android:left="integer"
        android:top="integer"
        android:right="integer"
        android:bottom="integer" />
    <size
        android:width="integer"
        android:height="integer" />
    <solid
        android:color="color" />
    <stroke
        android:width="integer"
        android:color="color"
        android:dashWidth="integer"
        android:dashGap="integer" />
- corners是为Shape创建一个圆角,只有shape是rectangle时候才使用。
- gradient是设置渐变效果的
- padding是 内容与视图边界的距离
- size是sharp的大小
- solid是用来填充sharp的纯色
- stroke是这个shape使用的笔画,当android:shape="line"的时候,必须设置改元素。
drawabl文件中,sharp1.xml
 1 <?xml version="1.0" encoding="utf-8"?>
 2 <shape xmlns:android="http://schemas.android.com/apk/res/android"
 3     android:shape="rectangle" >
 4
 5     <!-- gradient是创建渐变,angle是渐变为45度角 -->
 6     <gradient
 7         android:angle="45"
 8         android:endColor="#F69"
 9         android:startColor="#E83" />
10
11     <!-- 设置圆角,只有share为rectangle的时候才能使用corners属性 -->
12     <corners android:radius="45dp" />
13     <padding
14         android:left="30dp"
15         android:right="30dp"
16         android:top="30dp"/>
17
18 </shape>
sharp2.xml
 1 <?xml version="1.0" encoding="utf-8"?>
 2 <shape xmlns:android="http://schemas.android.com/apk/res/android"
 3     android:shape="oval" >
 4
 5     <gradient
 6         android:centerColor="#0F0"
 7         android:endColor="#00F"
 8         android:startColor="#F00" />
 9
10 </shape>
layout中应用
 1 <TextView
 2             android:layout_width="match_parent"
 3             android:layout_height="90dp"
 4             android:background="@drawable/sharp1"
 5             android:gravity="center"
 6             android:text="渐变风格1"/>
 7         <TextView
 8             android:layout_width="match_parent"
 9             android:layout_height="90dp"
10             android:background="@drawable/sharp2"
11             android:gravity="center"
12             android:text="渐变风格2"/>
效果图:
四,clipDrawable
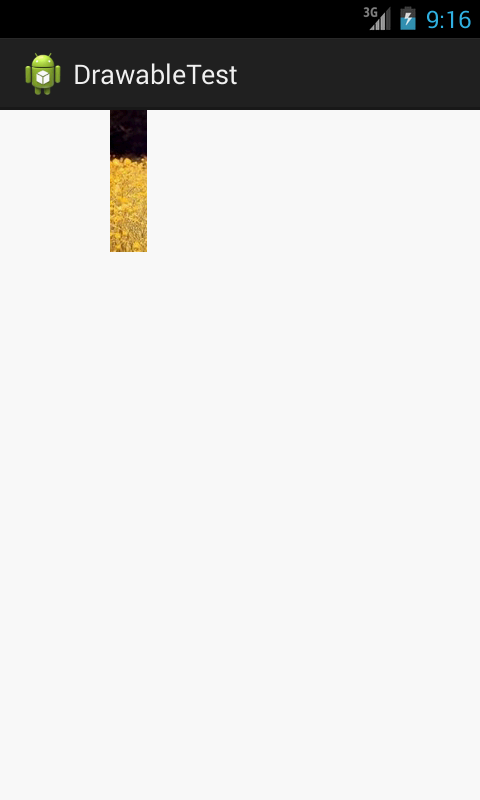
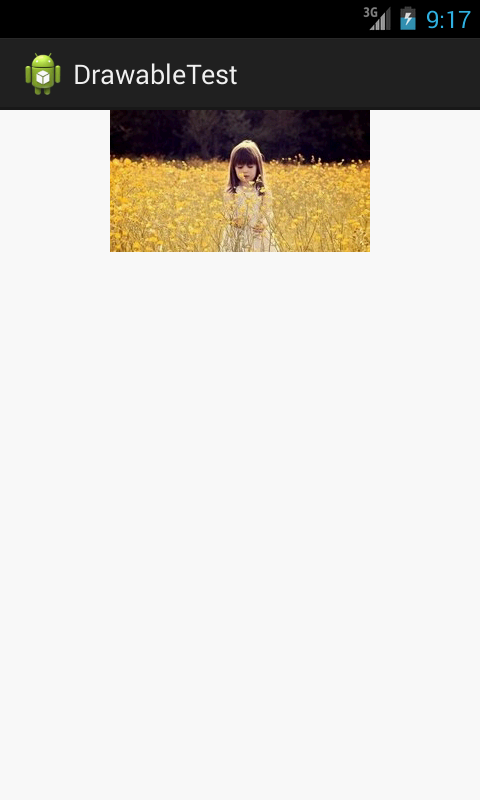
drawable中的配置文件 , clip.xml
1 <?xml version="1.0" encoding="utf-8"?>
2 <clip xmlns:android="http://schemas.android.com/apk/res/android"
3     android:clipOrientation="horizontal"
4     android:drawable="@drawable/a"
5     android:gravity="left" >
6
7 <!-- 在clip中直接设置属性,clipOrientation表示水平运动,gravity="left",表示图片从左边开始展开,类似于卷轴的打开 -->
8 </clip>
layout文件中引用配置文件

<ImageView
        android:id="@+id/imageView1"
        android:layout_width="match_parent"
        android:layout_height="wrap_content"
        android:src="@drawable/clip" />
java代码:
 1 import java.util.Timer;
 2 import java.util.TimerTask;
 3
 4 import android.annotation.SuppressLint;
 5 import android.app.Activity;
 6 import android.graphics.drawable.Drawable;
 7 import android.os.Bundle;
 8 import android.os.Handler;
 9 import android.os.Message;
10 import android.view.Window;
11 import android.widget.ImageView;
12
13 public class MainActivity extends Activity {
14     private static final int TAG=1;
15     @SuppressLint("HandlerLeak")
16     @Override
17     protected void onCreate(Bundle savedInstanceState) {
18         super.onCreate(savedInstanceState);
19         requestWindowFeature(Window.FEATURE_NO_TITLE);
20         setContentView(R.layout.activity_main);
21         ImageView image=(ImageView) findViewById(R.id.imageView1);
22         ////获取图片所显示的ClipDrawble对象
23         final Drawable drawable = image.getDrawable();
24
25         //用Handler跟新消息
26         final Handler handler=new Handler(){
27             @Override
28             public void handleMessage(Message msg) {
29                 //设置drawable的level值
30                 drawable.setLevel(drawable.getLevel()+200);
31                 super.handleMessage(msg);
32             }
33         };
34
35         final Timer timer=new Timer();
36         timer.scheduleAtFixedRate(new TimerTask() {
37
38             @Override
39             public void run() {
40                 Message msg=new Message();
41                 msg.what=TAG;
42                 handler.sendMessage(msg);
43                 //level的取值为0-10000,大于其值就取消定时器
44                 if (drawable.getLevel()>10000) {
45                     timer.cancel();
46                 }
47             }
48         }, 0, 300);
49
50     }
51
52 }
效果图展示:
五,AnimationDrawable
此资源是在res下的anim文件夹中配置xml文件的
animation的动画效果有四种:
- alpha ------>渐变透明度动画效果
- scale------->渐变缩放动画效果
- translate--->位置的移动效果
- rotate------>旋转效果
1,alpha
<alpha xmlns:android="http://schemas.android.com/apk/res/android" >
  android:fromAlpha="0.1"
  android:toAlpha="1.0"
  android:duration="3000"
  />
<!-- 透明度控制动画效果 alpha
浮点型值:
fromAlpha 属性为动画起始时透明度
toAlpha 属性为动画结束时透明度
说明:
0.0表示完全透明
1.0表示完全不透明
以上值取0.0-1.0之间的float数据类型的数字
长整型值:
duration 属性为动画持续时间
说明:
时间以毫秒为单位
-->
2,scale
 1 <?xml version="1.0" encoding="utf-8"?>
 2 <scale xmlns:android="http://schemas.android.com/apk/res/android"
 3
 4           android:interpolator "@android:anim/accelerate_decelerate_interpolator"
 5           android:fromXScale="0.0"
 6           android:toXScale="1.4"
 7           android:fromYScale="0.0"
 8           android:toYScale="1.4"
 9           android:pivotX="50%"
10           android:pivotY="50%"
11           android:fillAfter="false"
12           android:duration="700" />
<!-- 尺寸伸缩动画效果 scale
属性:interpolator 指定一个动画的插入器
在我试验过程中,使用android.res.anim中的资源时候发现
有三种动画插入器:
accelerate_decelerate_interpolator 加速-减速 动画插入器
accelerate_interpolator 加速-动画插入器
decelerate_interpolator 减速- 动画插入器
其他的属于特定的动画效果
浮点型值:
fromXScale 属性为动画起始时 X坐标上的伸缩尺寸
toXScale 属性为动画结束时 X坐标上的伸缩尺寸
fromYScale 属性为动画起始时Y坐标上的伸缩尺寸
toYScale 属性为动画结束时Y坐标上的伸缩尺寸
说明:以上四种属性值
0.0表示收缩到没有
1.0表示正常无伸缩
值小于1.0表示收缩
值大于1.0表示放大
pivotX 属性为动画相对于物件的X坐标的开始位置
pivotY 属性为动画相对于物件的Y坐标的开始位置
说明:以上两个属性值 从0%-100%中取值
50%为物件的X或Y方向坐标上的中点位置
长整型值:
duration 属性为动画持续时间
说明: 时间以毫秒为单位
布尔型值:
fillAfter 属性 当设置为true ,该动画转化在动画结束后被应用
-->
3,translate
1 <?xml version="1.0" encoding="utf-8"?>
2 <translate xmlns:android="http://schemas.android.com/apk/res/android"
3
4 android:fromXDelta="30"
5 android:toXDelta="-80"
6 android:fromYDelta="30"
7 android:toYDelta="300"
8 android:duration="2000"
9 translate/>
<!-- translate 位置转移动画效果
整型值:
fromXDelta 属性为动画起始时 X坐标上的位置
toXDelta 属性为动画结束时 X坐标上的位置
fromYDelta 属性为动画起始时 Y坐标上的位置
toYDelta 属性为动画结束时 Y坐标上的位置
注意:
没有指定fromXType toXType fromYType toYType 时候,
默认是以自己为相对参照物
长整型值:
duration 属性为动画持续时间
说明: 时间以毫秒为单位
-->
4,rotate
1 <?xml version="1.0" encoding="utf-8"?>
2 <rotate xmlns:android="http://schemas.android.com/apk/res/android"
3
4         android:interpolator="@android:anim/accelerate_decelerate_interpolator"
5         android:fromDegrees="0"
6         android:toDegrees="+350"
7         android:pivotX="50%"
8         android:pivotY="50%"
9         android:duration="3000" />
<!-- rotate 旋转动画效果
属性:interpolator 指定一个动画的插入器
在我试验过程中,使用android.res.anim中的资源时候发现
有三种动画插入器:
accelerate_decelerate_interpolator 加速-减速 动画插入器
accelerate_interpolator 加速-动画插入器
decelerate_interpolator 减速- 动画插入器
其他的属于特定的动画效果
浮点数型值:
fromDegrees 属性为动画起始时物件的角度
toDegrees 属性为动画结束时物件旋转的角度 可以大于360度
说明:
当角度为负数——表示逆时针旋转
当角度为正数——表示顺时针旋转
(负数from——to正数:顺时针旋转)
(负数from——to负数:逆时针旋转)
(正数from——to正数:顺时针旋转)
(正数from——to负数:逆时针旋转)
pivotX 属性为动画相对于物件的X坐标的开始位置
pivotY 属性为动画相对于物件的Y坐标的开始位置
说明: 以上两个属性值 从0%-100%中取值
50%为物件的X或Y方向坐标上的中点位置
长整型值:
duration 属性为动画持续时间
说明: 时间以毫秒为单位
-->
注意:
以上四种效果是单独使用的,如果想叠加效果在可以在set标签下设置多种效果
 1 <?xml version="1.0" encoding="utf-8"?>
 2 <set xmlns:android="http://schemas.android.com/apk/res/android" >
 3
 4     <alpha
 5         android:duration="4000"
 6         android:fromAlpha="0.1"
 7         android:toAlpha="1.0" />
 8     <translate
 9         android:fromXDelta="10"
10         android:toXDelta="10"
11         android:fromYDelta="0"
12         android:toYDelta="200"
13         android:duration="4000"/>
14
15 </set>
最后在java代码中开启我们的动画
 1 import android.app.Activity;
 2 import android.os.Bundle;
 3 import android.view.Window;
 4 import android.view.animation.Animation;
 5 import android.view.animation.AnimationUtils;
 6 import android.widget.ImageView;
 7
 8 public class AnimationActivity extends Activity {
 9     @Override
10     protected void onCreate(Bundle savedInstanceState) {
11         super.onCreate(savedInstanceState);
12         requestWindowFeature(Window.FEATURE_NO_TITLE);
13         setContentView(R.layout.activity_animation);
14         final ImageView image=(ImageView) findViewById(R.id.imageView1);
15         //加载动画资源
16         Animation animation = AnimationUtils.loadAnimation(this, R.anim.alpha);
17         //设置动画结束后保留结束的状态
18         animation.setFillAfter(true);
19         //让图片开始动画
20         image.startAnimation(animation);
21     }
22
23 }
动画效果截图不方便,就不留图片了。


