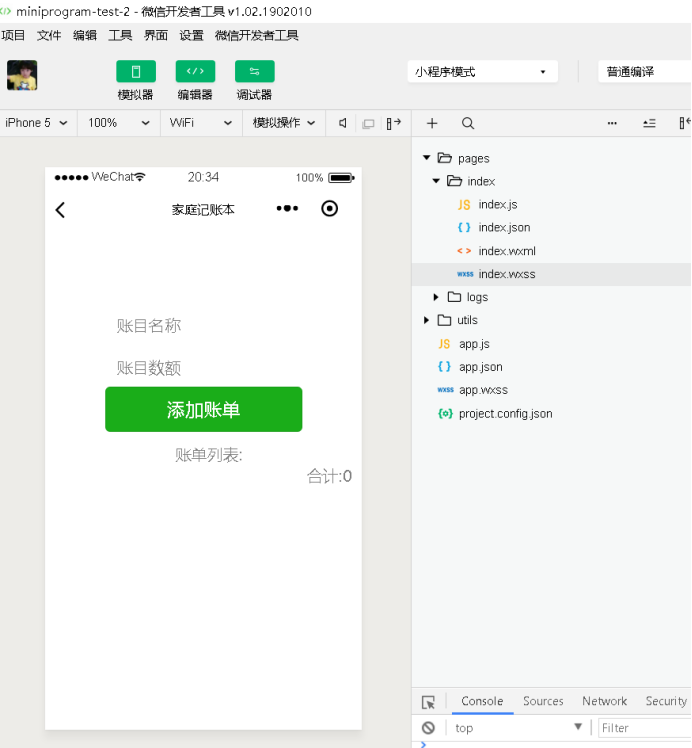
最后成果
在经过对微信小程序的简单学习后,对于微信小程序也稍有理解,在浏览学习过别人的东西后自己也制作了一个,觉得就是有点low,在今后的学习中会继续完善这个微信小程序
//index.js
//获取应用实例
const app = getApp()
Page({
data: {
motto: '欢迎使用家庭小账本',
userInfo: {},
hasUserInfo: false,
canIUse: wx.canIUse('button.open-type.getUserInfo')
},
//事件处理函数
bindViewTap: function() {
wx.navigateTo({
url: '../logs/logs'
})
},
onLoad: function () {
if (app.globalData.userInfo) {
this.setData({
userInfo: app.globalData.userInfo,
hasUserInfo: true
})
} else if (this.data.canIUse){
// 由于 getUserInfo 是网络请求,可能会在 Page.onLoad 之后才返回
// 所以此处加入 callback 以防止这种情况
app.userInfoReadyCallback = res => {
this.setData({
userInfo: res.userInfo,
hasUserInfo: true
})
}
} else {
// 在没有 open-type=getUserInfo 版本的兼容处理
wx.getUserInfo({
success: res => {
app.globalData.userInfo = res.userInfo
this.setData({
userInfo: res.userInfo,
hasUserInfo: true
})
}
})
}
},
getUserInfo: function(e) {
console.log(e)
app.globalData.userInfo = e.detail.userInfo
this.setData({
userInfo: e.detail.userInfo,
hasUserInfo: true
})
}
})
{
"usingComponents": {}
}
<!--index.wxml-->
<view class="container">
<view class="userinfo">
<button wx:if="{{!hasUserInfo && canIUse}}" open-type="getUserInfo" bindgetuserinfo="getUserInfo"> 获取头像昵称 </button>
<block wx:else>
<image bindtap="bindViewTap" class="userinfo-avatar" src="{{userInfo.avatarUrl}}" mode="cover"></image>
<text class="userinfo-nickname">{{userInfo.nickName}}</text>
</block>
</view>
<view class="usermotto">
<text class="user-motto">{{motto}}</text>
</view>
</view>
/**index.wxss**/
.userinfo {
display: flex;
flex-direction: column;
align-items: center;
}
.userinfo-avatar {
128rpx;
height: 128rpx;
margin: 20rpx;
border-radius: 50%;
}
.userinfo-nickname {
color: #aaa;
}
.usermotto {
margin-top: 200px;
}
