IOC概念
- IoC控制反转(IoC,Inversion of Control),
是一个概念,是一种思想。控制反转就
是对对象控制权的转移,从程序代码本身反转到了外部容器。把对象的创建、初始化、
销毁等工作交给spring容器来做。由spring容器控制对象的生命周期。 - DI依赖注入:Dependency Injection。
依赖注入DI是指程序运行过程中,若需要调用另
一个对象协助时,无须在代码中创建被调用者,而是依赖于外部容器,由外部容器创
建后传递给程序。
依赖注入是目前最优秀的解耦方式。依赖注入让Spring的Bean之间以配置文件的方式
组织在一起,而不是以硬编码的方式耦合在一起的。 - IoC与DI的关系
IoC是一个概念,是一种思想,其实现方式多种多样。当前比较流行的实现方式之一
是DI。
IOC:控制反转, 将 new 的过程交给spring容器去处理
XML配置方式
一、普通构造注入
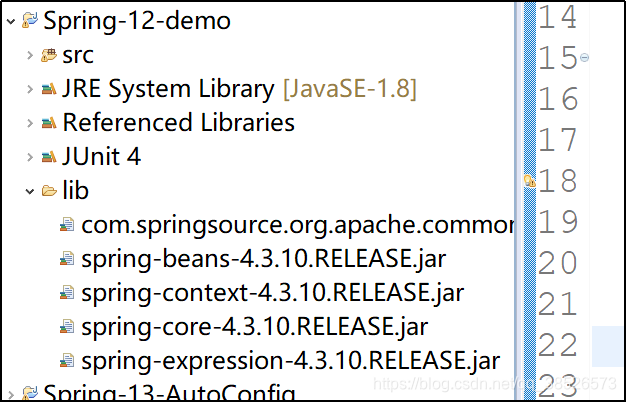
- 创建Spring工程
- 创建Spring的XML配置文件applicationContext.xml
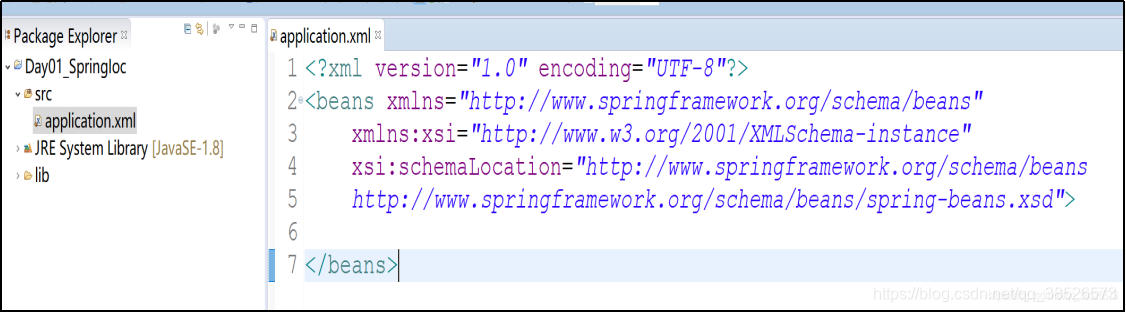
<?xml version="1.0" encoding="UTF-8"?> <beans xmlns="http://www.springframework.org/schema/beans" xmlns:xsi="http://www.w3.org/2001/XMLSchema-instance" xsi:schemaLocation="http://www.springframework.org/schema/beans http://www.springframework.org/schema/beans/spring-beans.xsd"> </beans> - 在Spring的配置文件中声明User Bean:
<?xml version="1.0" encoding="UTF-8"?>
<beans xmlns="http://www.springframework.org/schema/beans"
 xmlns:xsi="http://www.w3.org/2001/XMLSchema-instance"
 xsi:schemaLocation="http://www.springframework.org/schema/beans
 http://www.springframework.org/schema/beans/spring-beans.xsd">
 	<!-- 在容器中注册UserBean -->
 	<bean class="com.dpb.javabean.UserBean" id="userBean"></bean>
 </beans>
所谓的声明,就是将自己的信息告诉Spring容器,例如id和class,Spring容器根据class,通过反射(默认使用的是无参构造方法)就可以创建一个名为user1的User对象。
- 初始化容器
public static void main(String[] args) {
   	//初始化Spring容器,当Spring容器初始化时,会自动加载配置文件,然后根据配置文件中的内容初始化Bean
   	ApplicationContext ac =
   			new ClassPathXmlApplicationContext("application.xml");
   }
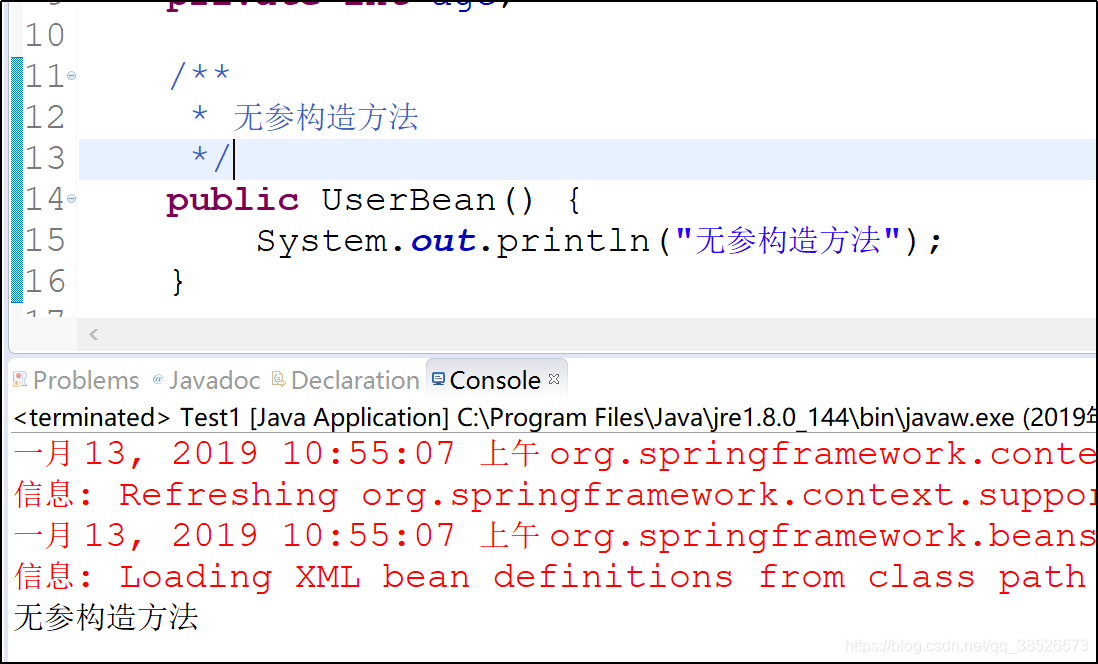
5. 初识化Spring容器之后,可以看到User已经被创建出来了。
注意:上面这种初始化方式,要求User必须有一个无参构造方法,如果没有无参构造方法,会抛出如下异常:

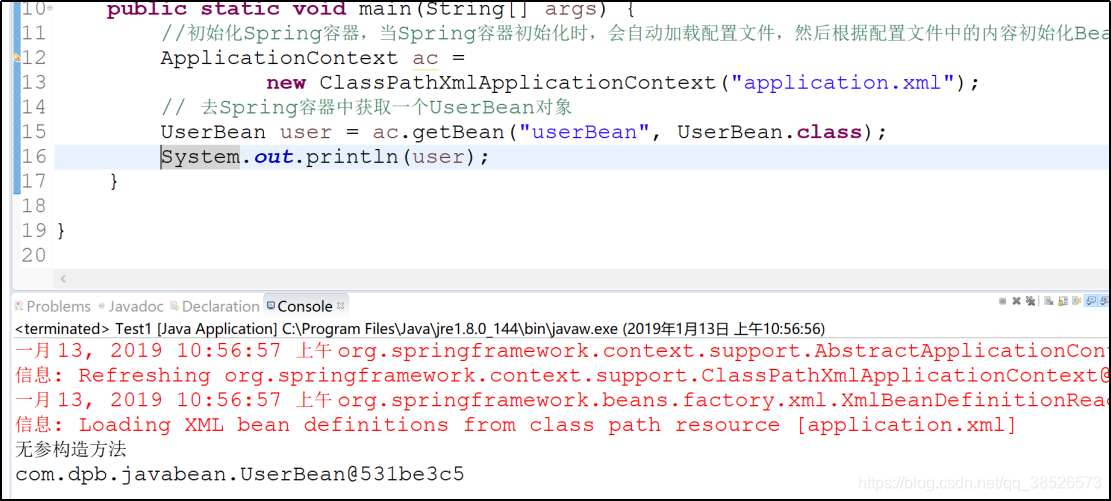
6.通过调用容器中的getBean方法可以获取Spring容器中的对象
public static void main(String[] args) {
		//初始化Spring容器,当Spring容器初始化时,会自动加载配置文件,然后根据配置文件中的内容初始化Bean
		ApplicationContext ac =
				new ClassPathXmlApplicationContext("application.xml");
		// 去Spring容器中获取一个UserBean对象
		UserBean user = ac.getBean("userBean", UserBean.class);
		System.out.println(user);
	}
7. 也可以通过类型直接获取一个Bean的实例
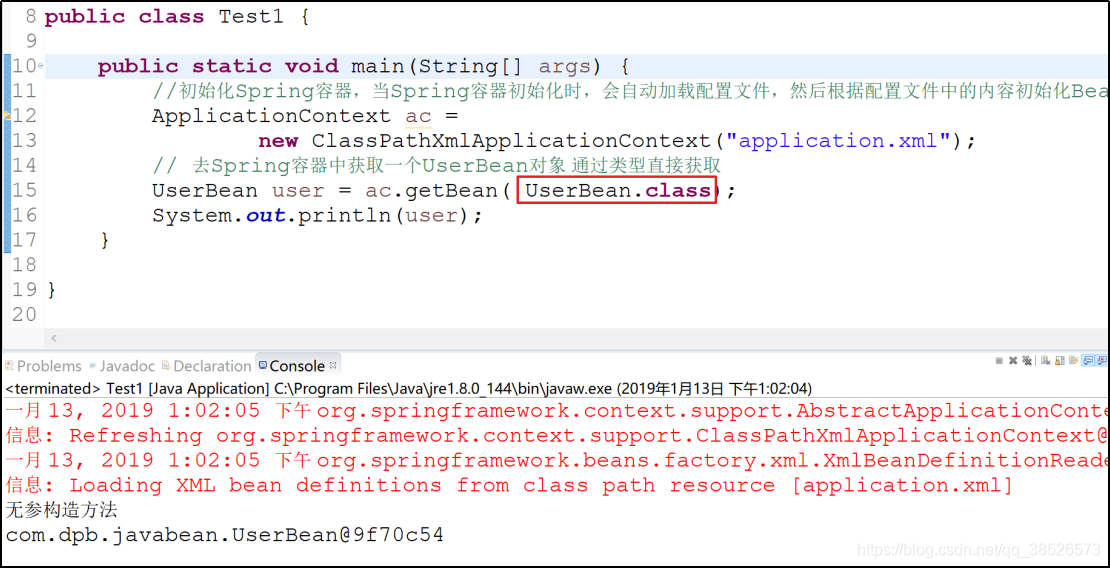
public static void main(String[] args) {
		//初始化Spring容器,当Spring容器初始化时,会自动加载配置文件,然后根据配置文件中的内容初始化Bean
		ApplicationContext ac =
				new ClassPathXmlApplicationContext("application.xml");
		// 去Spring容器中获取一个UserBean对象 通过类型直接获取
		UserBean user = ac.getBean( UserBean.class);
		System.out.println(user);
	}
这种方式有潜在的隐患:如果Spring容器中有多个User的实例,此时就会报错

id和name的区别
实际开发过程中我们可以忽略id和name的区别。可以混合使用。通过getBean()方法都可以获取,这个是个重载的方法。
id="user1,user2,user3"
表示bean有一个名字,这个名字就是user1,user2,user3
name="user1,user2,user3"
表示bean有多个名字,多个名字分别是user1、user2以及user3
在同一配置文件中ID不要出现重复的。
BeanFactory和ApplicationContext的区别
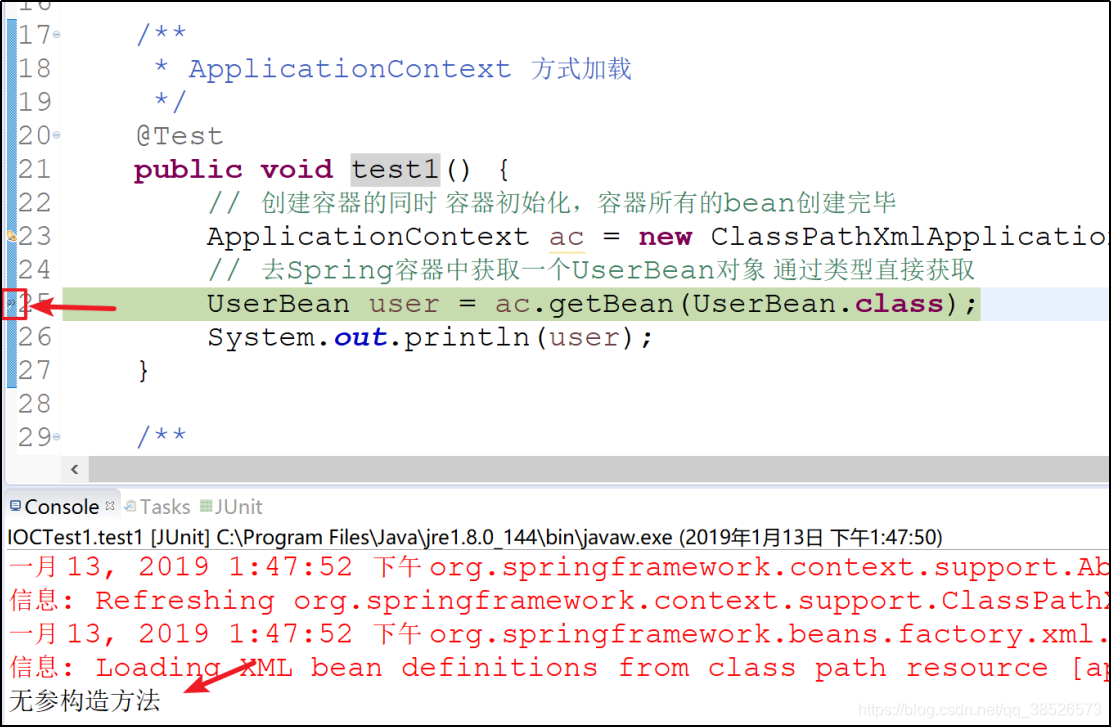
/**
* ApplicationContext 方式加载
*/
@Test
public void test1() {
// 创建容器的同时 容器初始化,容器所有的bean创建完毕
ApplicationContext ac = new ClassPathXmlApplicationContext("application.xml");
// 去Spring容器中获取一个UserBean对象 通过类型直接获取
UserBean user = ac.getBean(UserBean.class);
System.out.println(user);
}
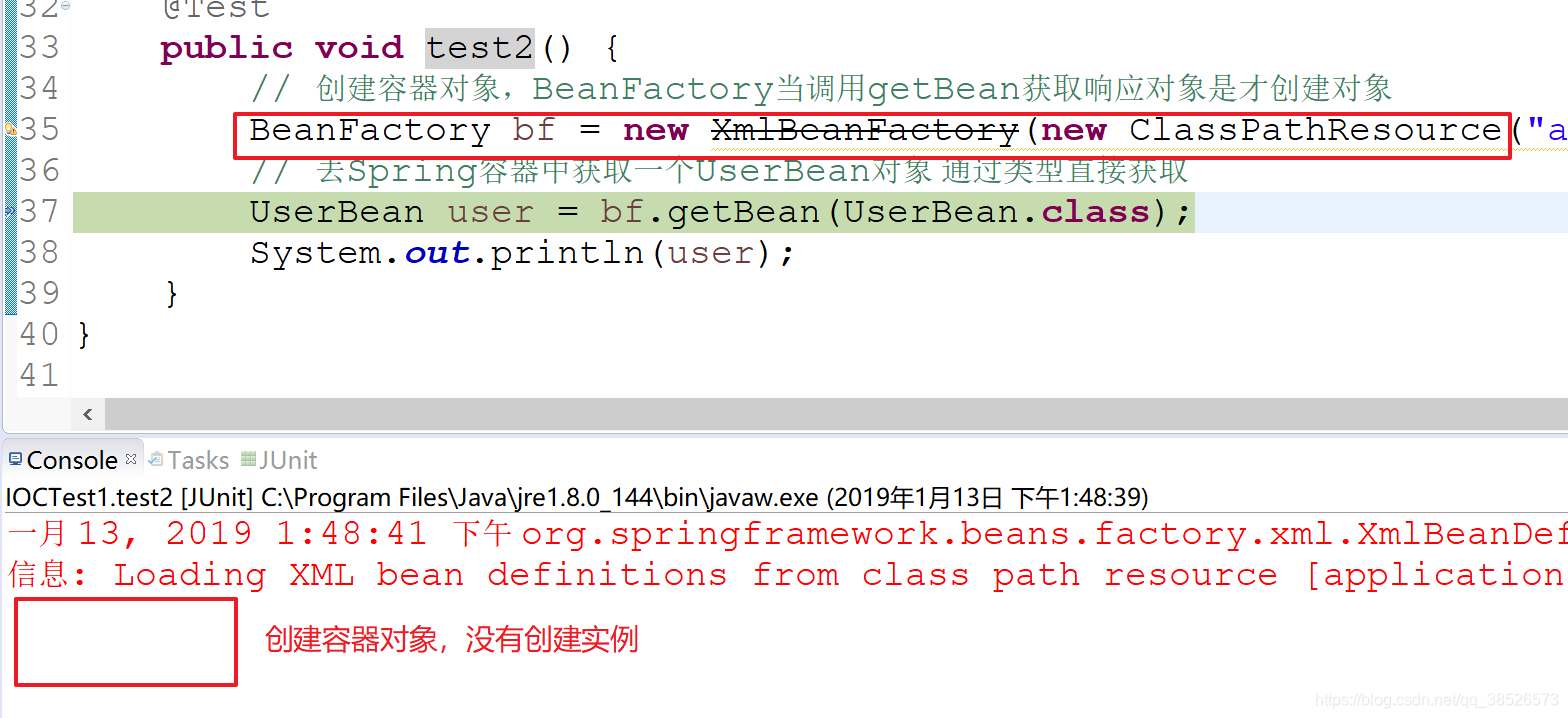
/**
* BeanFactory 方式加载
*/
@Test
public void test2() {
// 创建容器对象,BeanFactory当调用getBean获取响应对象是才创建对象
BeanFactory bf = new XmlBeanFactory(new ClassPathResource("application.xml"));
// 去Spring容器中获取一个UserBean对象 通过类型直接获取
UserBean user = bf.getBean(UserBean.class);
System.out.println(user);
}
二、静态工厂注入
创建静态工厂类
/**
 * User 工厂类
 * @author dpb[波波烤鸭]
 *
 */
public class UserFactory {

	/**
	 * 必须是static方法
	 * @return
	 */
	public static UserBean getInstance(){
		return new UserBean();
	}
}
application.xml文件中注册
<beans xmlns="http://www.springframework.org/schema/beans"
	xmlns:xsi="http://www.w3.org/2001/XMLSchema-instance"
	xsi:schemaLocation="http://www.springframework.org/schema/beans
	http://www.springframework.org/schema/beans/spring-beans.xsd">
	<!-- 静态工厂方式配置 配置静态工厂及方法 -->
	<bean class="com.dpb.factory.UserFactory" factory-method="getInstance" id="user2"/>
</beans>
获取相应的实例
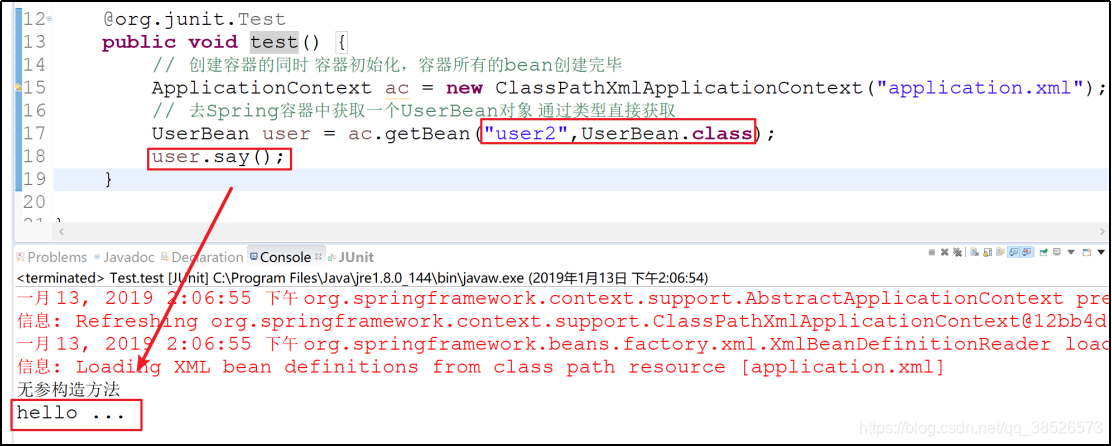
应用场景
在一些第三方框架使用过程 中,可能不得不使用静态工厂注入或者实例工厂注入。
HttpUrlConnection
HttpClient
OkHttp
这里以OkHttp为例说明为何需要静态工厂注入
由于OkHttpClient需要通过Builder进行创建,因此无法直接使用构造方法注入。此时可以通过静态工厂注入。
三、动态工厂注入
创建动态工厂类
/**
 * User 工厂类
 * @author dpb[波波烤鸭]
 *
 */
public class UserFactory {

	/**
	 * 动态工厂方式获取
	 * 普通方法
	 * @return
	 */
	public  UserBean getInstance(){
		return new UserBean();
	}
}
application.xml注册
<beans xmlns="http://www.springframework.org/schema/beans"
	xmlns:xsi="http://www.w3.org/2001/XMLSchema-instance"
	xsi:schemaLocation="http://www.springframework.org/schema/beans
	http://www.springframework.org/schema/beans/spring-beans.xsd">
	<!-- 注册动态工厂bean -->
	<bean class="com.dpb.factory.UserFactory" id="userFactory"/>
	<!-- 从工厂中获取UserBean对象 -->
	<bean id="user" factory-bean="userFactory" factory-method="getInstance"/>
</beans>
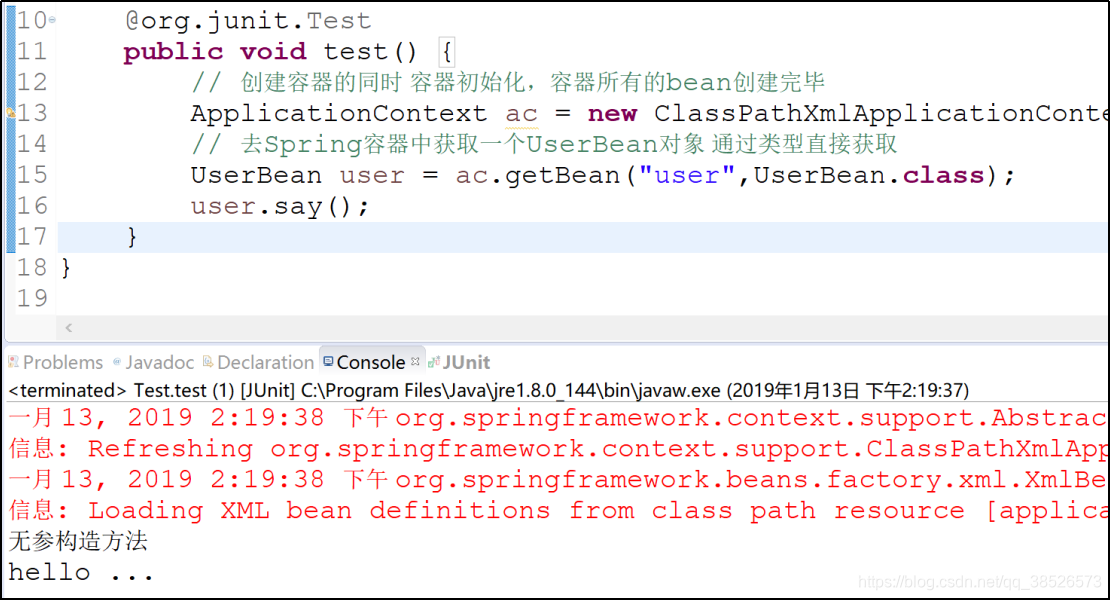
获取实例
四、属性注入
属性注入主要是指如何给对象中的属性赋值
构造注入
创建有参构造方法,同时必须提供无参构造方法
application.xml中注入
<beans xmlns="http://www.springframework.org/schema/beans"
	xmlns:xsi="http://www.w3.org/2001/XMLSchema-instance"
	xsi:schemaLocation="http://www.springframework.org/schema/beans
	http://www.springframework.org/schema/beans/spring-beans.xsd">
	<!-- 注册UserBean -->
	<bean class="com.dpb.javabean.UserBean" id="userBean">
		<!-- 通过构造注入设置 -->
		<constructor-arg name="id" value="1"/>
		<constructor-arg name="name" value="波波烤鸭"/>
		<constructor-arg name="age" value="18"/>
	</bean>
</beans>
还可以通过下标定位参数
<beans xmlns="http://www.springframework.org/schema/beans"
	xmlns:xsi="http://www.w3.org/2001/XMLSchema-instance"
	xsi:schemaLocation="http://www.springframework.org/schema/beans
	http://www.springframework.org/schema/beans/spring-beans.xsd">
	<!-- 注册UserBean -->
	<bean class="com.dpb.javabean.UserBean" id="userBean">
		<!-- 通过构造注入设置 通过index 定位设置 -->
		<constructor-arg index="0" value="1"/>
		<constructor-arg index="1" value="波波烤鸭"/>
		<constructor-arg index="2" value="18"/>
	</bean>
</beans>
测试结果

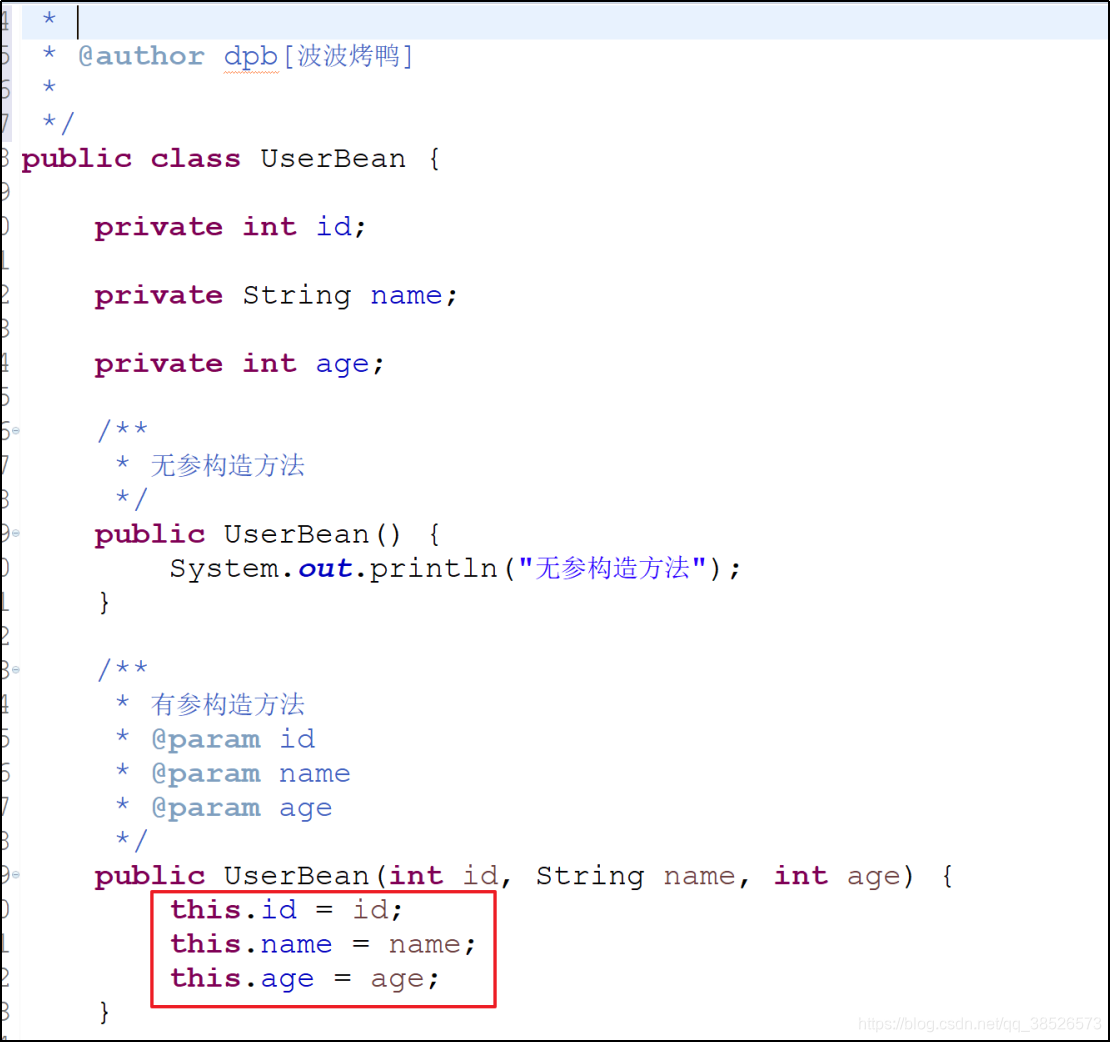
设值注入
Java对象中提供对应的setter方法
有参构造方法不是必须的了,无参方法是必须的!!!
set方法注入就是利用对象属性的set方法给属性赋值,实际上,相当于首先使用无参构造方法创建一个Book对象,然后调用对象中的set方法给各个属性赋值。
/**
*
* @author dpb[波波烤鸭]
*
*/
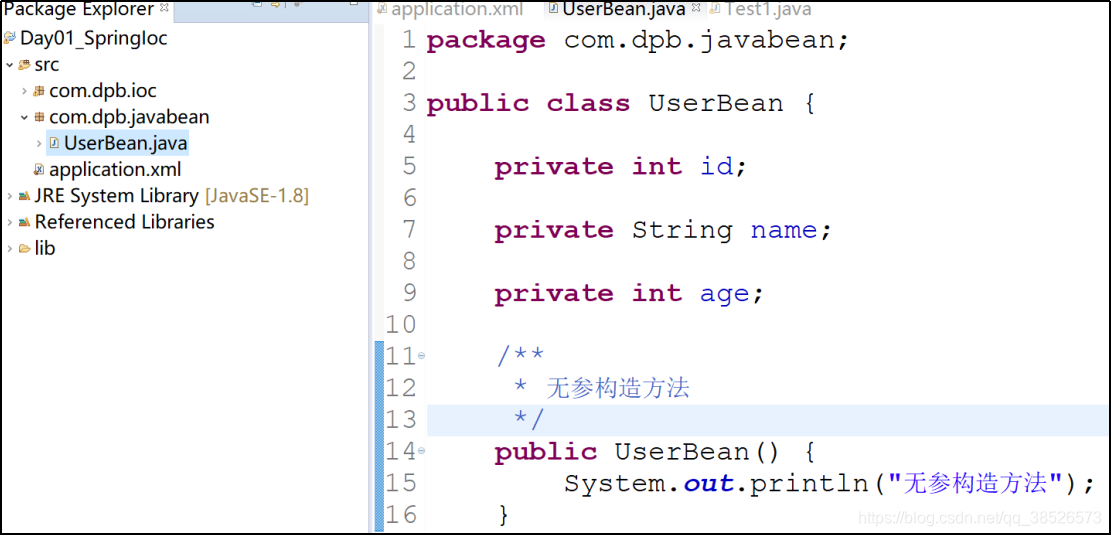
public class UserBean {
private int id;
private String name;
private int age;
/**
* 无参构造方法
*/
public UserBean() {
System.out.println("无参构造方法");
}
public int getId() {
return id;
}
/**
* 设值注入 必须提供对应的setter方法
* @param id
*/
public void setId(int id) {
this.id = id;
}
public String getName() {
return name;
}
/**
* 设值注入 必须提供对应的setter方法
* @param name
*/
public void setName(String name) {
this.name = name;
}
public int getAge() {
return age;
}
/**
* 设值注入 必须提供对应的setter方法
* @param age
*/
public void setAge(int age) {
this.age = age;
}
@Override
public String toString() {
return "UserBean [id=" + id + ", name=" + name + ", age=" + age + "]";
}
public void say(){
System.out.println("hello ...");
}
}
application.xml配置
<beans xmlns="http://www.springframework.org/schema/beans"
	xmlns:xsi="http://www.w3.org/2001/XMLSchema-instance"
	xsi:schemaLocation="http://www.springframework.org/schema/beans
	http://www.springframework.org/schema/beans/spring-beans.xsd">
	<!-- 注册UserBean -->
	<bean class="com.dpb.javabean.UserBean" id="userBean">
		<!--通过设值注入的方式注入  -->
		<property name="id" value="2"/>
		<property name="name" value="bobo烤鸭"/>
		<property name="age" value="32"/>
	</bean>
</beans>
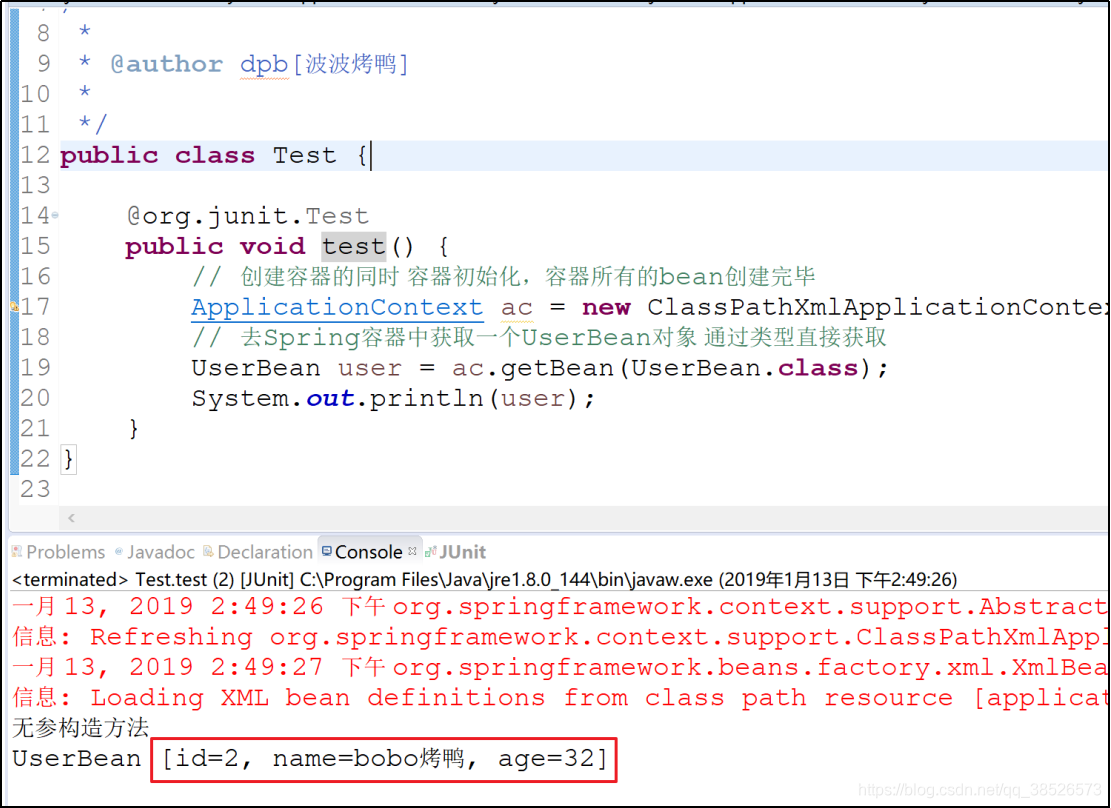
测试
p名称空间注入
p名称空间注入本质上还是set方法注入,只是写法不同(注意:p名称空间注入,需要有无参构造方法)。
JavaBean对象
/**
 * p名称空间注入
 * @author dpb[波波烤鸭]
 *
 */
public class Person {

	private int id;
	private String name;
	private String address;

	public int getId() {
		return id;
	}
	public void setId(int id) {
		this.id = id;
	}
	public String getName() {
		return name;
	}
	public void setName(String name) {
		this.name = name;
	}
	public String getAddress() {
		return address;
	}
	public void setAddress(String address) {
		this.address = address;
	}
	@Override
	public String toString() {
		return "Person [id=" + id + ", name=" + name + ", address=" + address + "]";
	}
}
application.xml注入
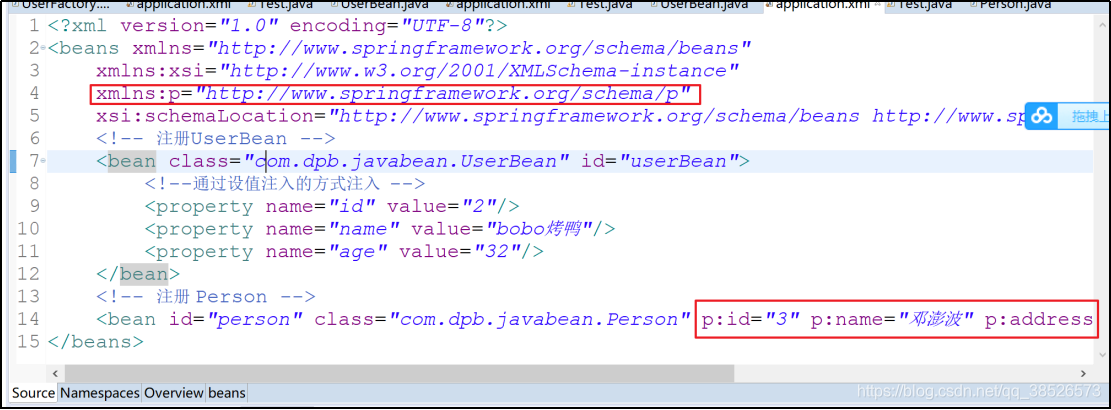
<!-- 注册 Person -->
<bean id="person" class="com.dpb.javabean.Person" p:id="3" p:name="邓澎波" p:address="深圳"/>
测试
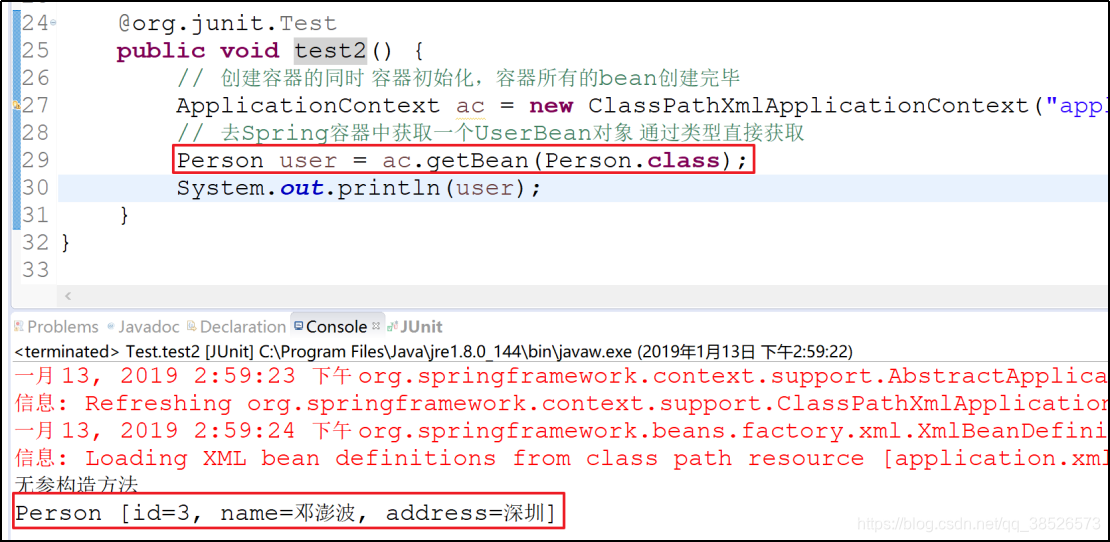
这种注入方式了解即可,实际开发中使用较少。
对象注入
对象可以通过构造方法、set方法或者p名称空间注入,步骤如下:
Student类和Cat类
/**
 * 学生
 * @author dpb[波波烤鸭]
 *
 */
public class Student {

	private int id;
	private String name;
	// 拥有的 cat
	private Cat cat;
	public int getId() {
		return id;
	}
	public void setId(int id) {
		this.id = id;
	}
	public String getName() {
		return name;
	}
	public void setName(String name) {
		this.name = name;
	}
	public Cat getCat() {
		return cat;
	}
	public void setCat(Cat cat) {
		this.cat = cat;
	}
	@Override
	public String toString() {
		return "Student [id=" + id + ", name=" + name + ", cat=" + cat + "]";
	}

}
/**
 * 猫
 * @author dpb[波波烤鸭]
 *
 */
public class Cat {

	private int id;

	private String color;

	public int getId() {
		return id;
	}

	public void setId(int id) {
		this.id = id;
	}

	public String getColor() {
		return color;
	}

	public void setColor(String color) {
		this.color = color;
	}

	@Override
	public String toString() {
		return "Cat [id=" + id + ", color=" + color + "]";
	}

}
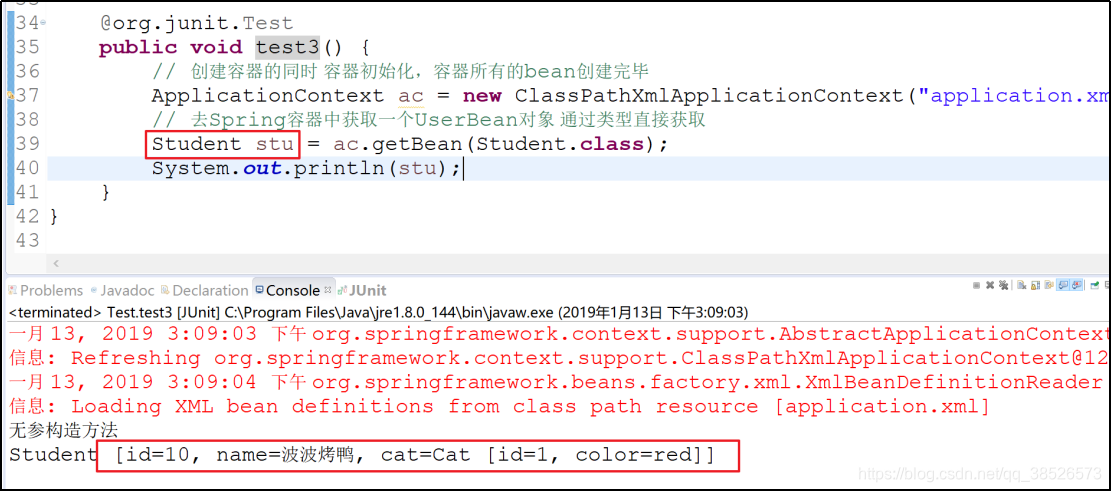
application.xml配置
	<!-- 配置 cat -->
	<bean id="catId" class="com.dpb.javabean.Cat">
		<property name="id" value="1"/>
		<property name="color" value="red"></property>
	</bean>
	<!-- 配置 student对象 -->
	<bean class="com.dpb.javabean.Student">
		<property name="id" value="10"/>
		<property name="name" value="波波烤鸭"/>
		<!-- 对象注入 -->
		<property name="cat" ref="catId"></property>
	</bean>
测试
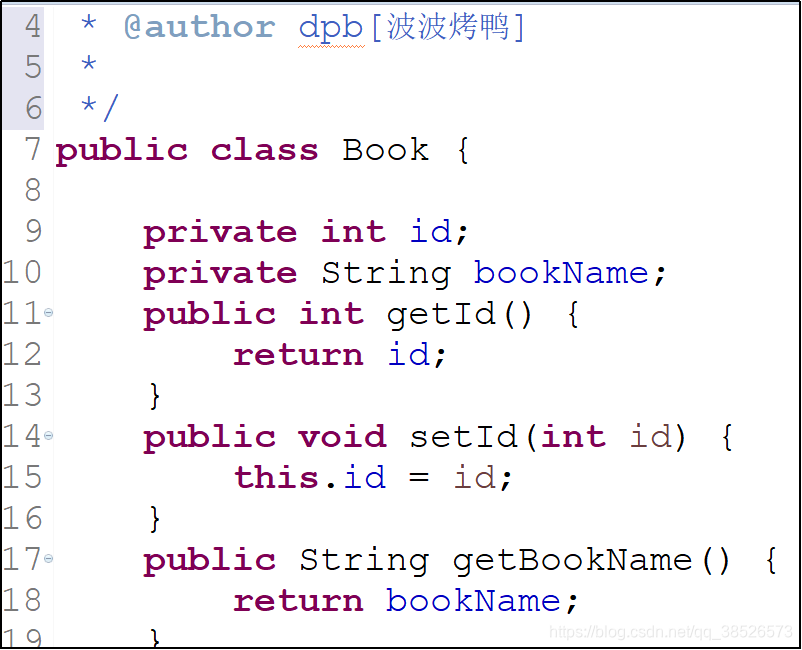
数组和集合注入
数组和集合的注入方式是一致的,无论是基本数据类型还是一个引用,注入方式都是一样。 首先声明一个对象,对象中包含集合和数组
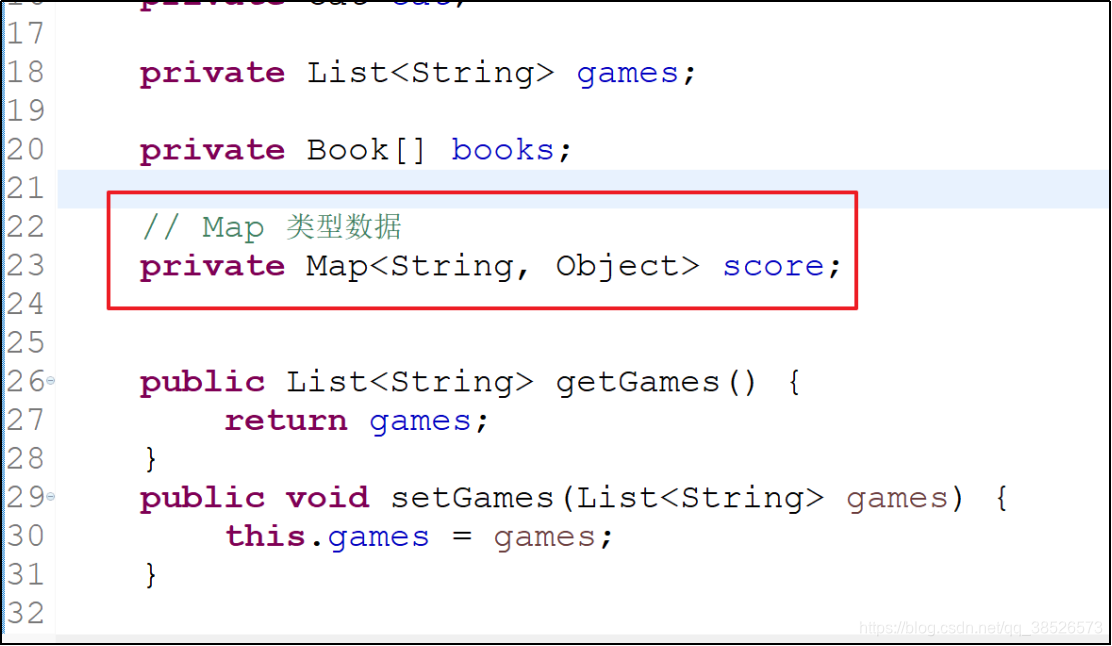
对象中添加对应的类型数据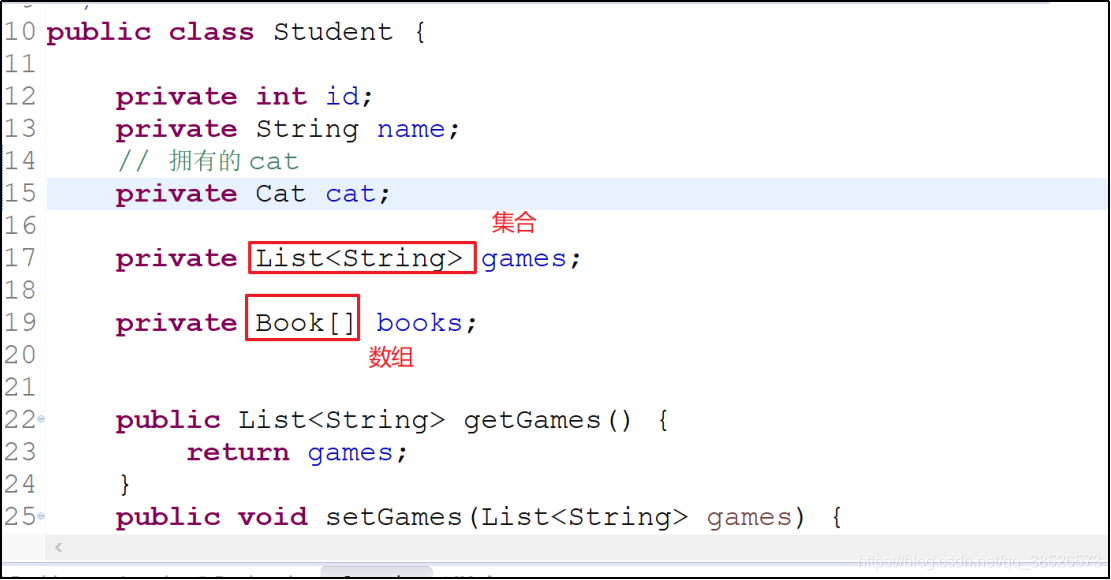
application.xml注入
<!-- 配置 student对象 -->
	<bean class="com.dpb.javabean.Student">
		<property name="id" value="10"/>
		<property name="name" value="波波烤鸭"/>
		<!-- 对象注入 -->
		<property name="cat" ref="catId"></property>
		<!-- List集合注入 -->
		<property name="games">
			<list>
				<value>LOL</value>
				<value>DNF</value>
				<value>CS</value>
			</list>
		</property>
		<!-- 数组注入 -->
		<property name="books">
			<list>
				<bean class="com.dpb.javabean.Book">
					<property name="id" value="1001"/>
					<property name="bookName" value="西游记"/>
				</bean>
				<bean class="com.dpb.javabean.Book">
					<property name="id" value="1002"/>
					<property name="bookName" value="红楼梦"/>
				</bean>
			</list>
		</property>
	</bean>
测试

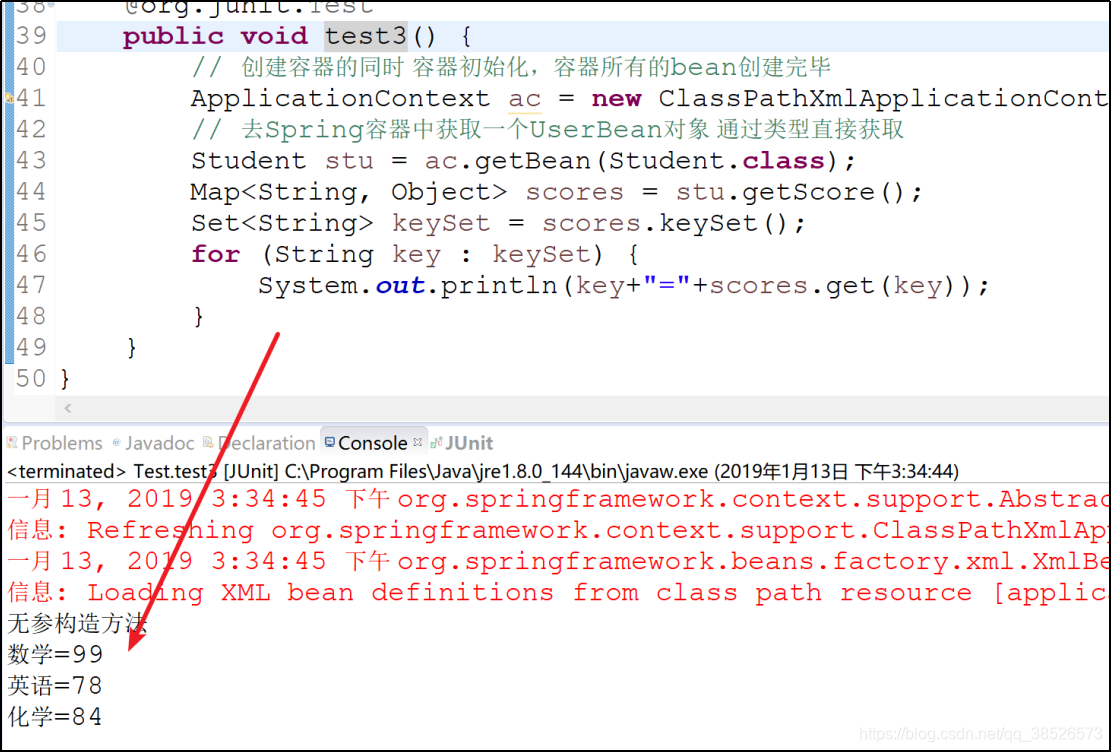
Map注入
声明Map属性,注意属性的key和value的数据类型需要提前定义好,然后在xml文件中直接使用(xml文件中配置时,key和属性的值必须要满足声明的要求,否则就会出错)。
对象中添加 Map属性
配置文件注入
<property name="score">
	<map>
		<entry key="数学" value="99"/>
		<entry key="英语" value="78"/>
		<entry key="化学" value="84"/>
	</map>
</property>
测试
props注入
properties注入与map注入类似
对象中添加properties属性

配置文件中注入
<property name="props">
	<props>
		<prop key="userName">admin</prop>
		<prop key="password">123</prop>
	</props>
</property>
测试

综合案例
1.创建项目
2.创建dao层
public interface IUserDao {
	public String add();
}
public class UserDaoImpl implements IUserDao {

	@Override
	public String add() {
		// TODO Auto-generated method stub
		return "hello ... ";
	}
}
3.创建service层
public interface IUserService {
	public String add();
}
public class UserServiceImpl implements IUserService {

	private IUserDao dao;
	// 设值注入 必须的方法
	public void setDao(IUserDao dao) {
		this.dao = dao;
	}

	@Override
	public String add() {
		return dao.add();
	}
}
4.创建controller层
/**
 * 控制层
 * @author dpb
 *
 */
public class UserController {

	private IUserService service;

	// 设值注入必须的方法
	public void setService(IUserService service) {
		this.service = service;
	}
	public String add(){
		return service.add();
	}
}
5.配置文件
<!-- 配置 dao -->
<bean class="com.sxt.dao.impl.UserDaoImpl" id="userDaoImpl"/>

<!-- 配置 service -->
<bean class="com.sxt.service.impl.UserServiceImpl" id="userServiceImpl">
	<!-- 设值注入 dao对象 -->
	<property name="dao" ref="userDaoImpl"></property>
</bean>

<!-- 配置controller -->
<bean class="com.sxt.controller.UserController">
	<!-- 设值注入service对象 -->
	<property name="service" ref="userServiceImpl"></property>
</bean>
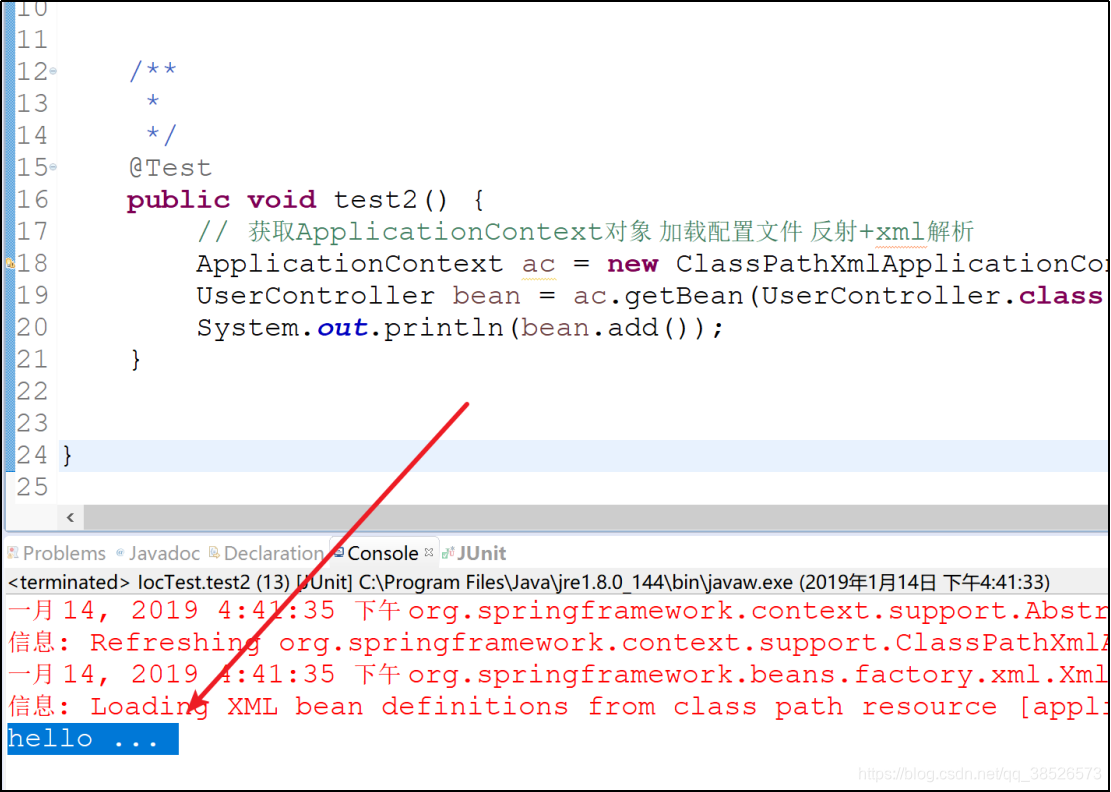
测试
@Test
public void test2() {
	// 获取ApplicationContext对象 加载配置文件 反射+xml解析
	ApplicationContext ac = new ClassPathXmlApplicationContext("application.xml");
	UserController bean = ac.getBean(UserController.class);
	System.out.println(bean.add());
}