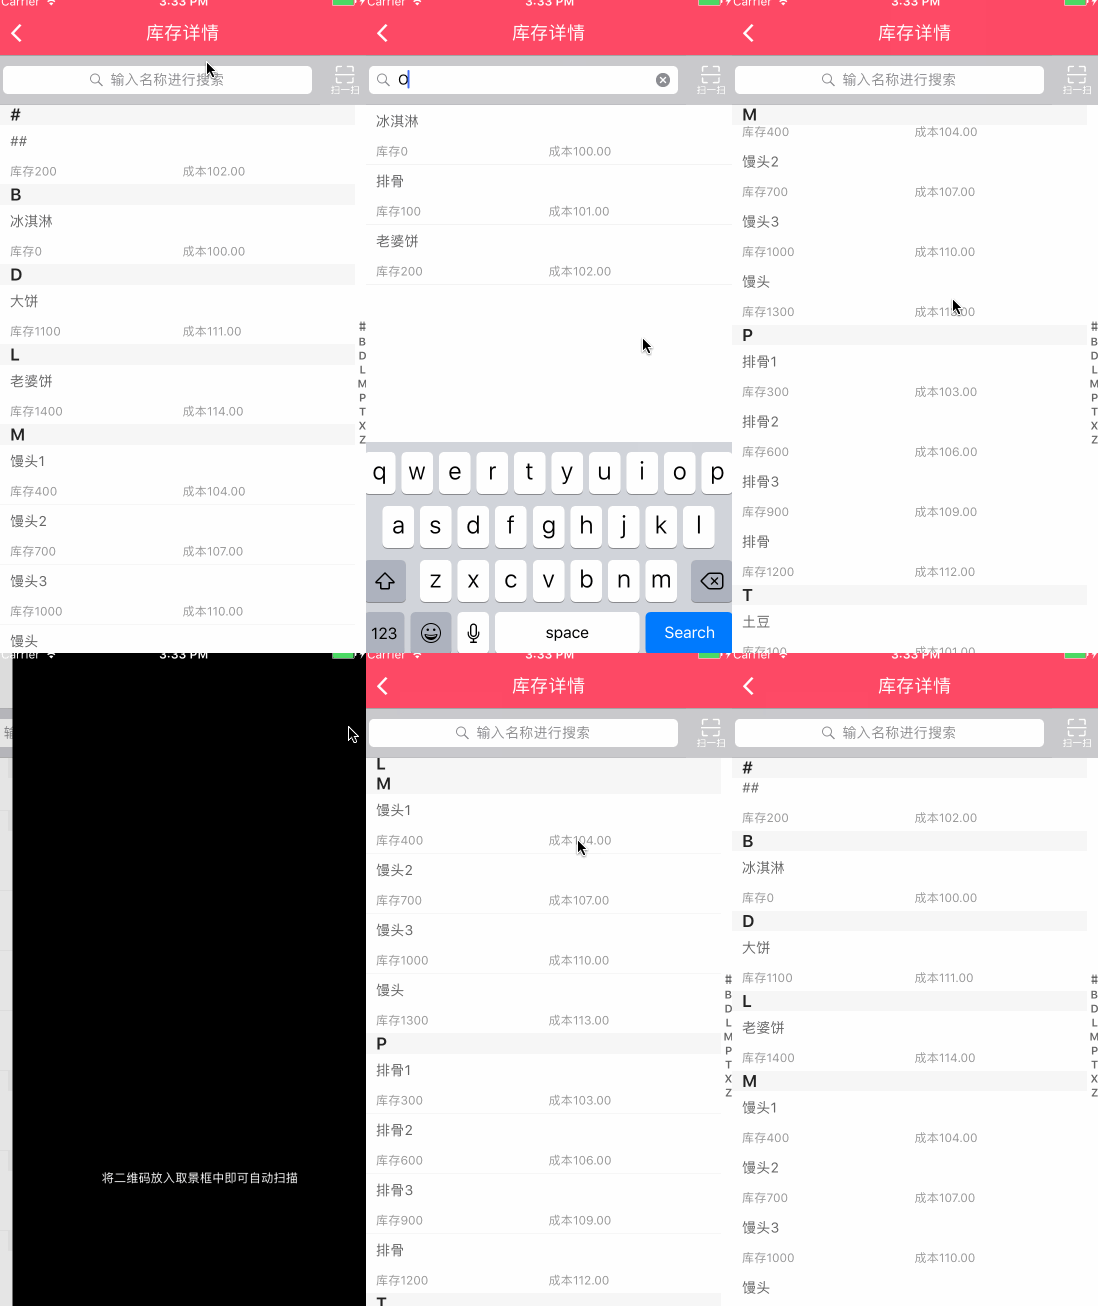
概述
详细
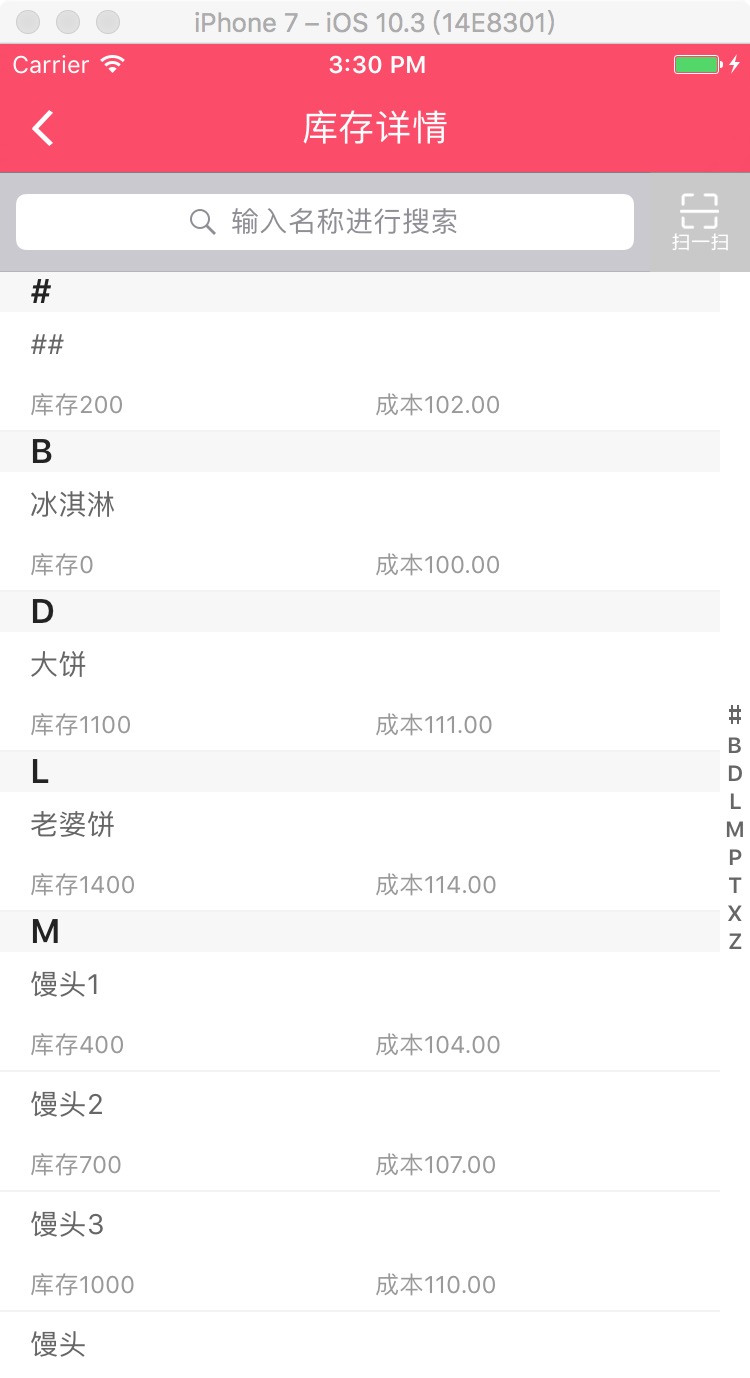
项目中像一些商品搜索类界面, TableView添加右侧索引的使用越来越多, 的确用户体验提高了许多.

一、主要思路
大致思路:
-
1. 添加并设置右侧索引
-
2. 自定义汉字转化成拼音文件,通过拼音去匹配首字母
-
3. 将库存数据按照索引分组排序
-
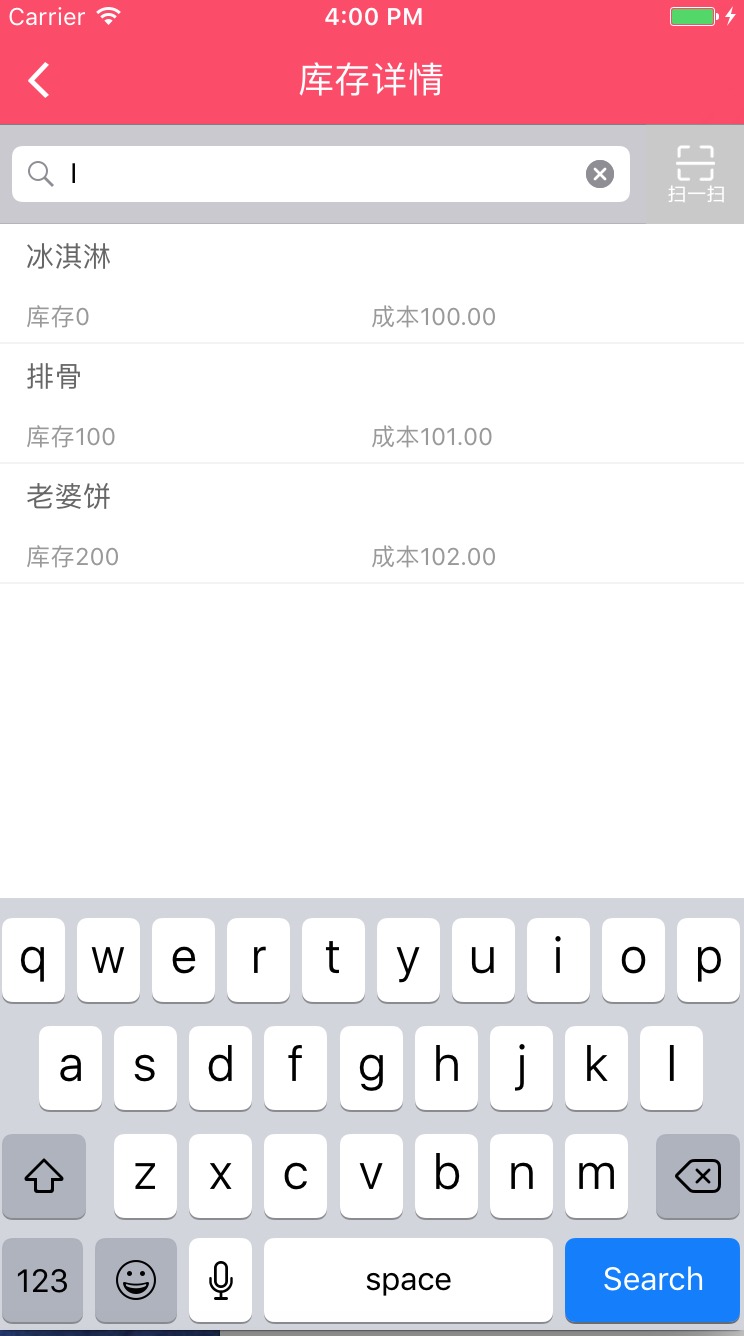
4. 添加搜索功能
-
5. 搜索界面复用库存界面, 增加标识判断显示界面
二、程序实现
Step1. 添加并设置右侧索引
设置右侧索引数组:
// 索引标题数组
@property (nonatomic, strong) NSMutableArray * indexArr;
 // 设置右侧索引数组
 _indexArr = [[NSMutableArray alloc]init];
for(char c = 'A'; c<='Z'; c++) {
     [_indexArr addObject:[NSString stringWithFormat:@"%c", c]];
 }
 [_indexArr addObject:[NSString stringWithFormat:@"#"]];
设置右侧索引字体颜色:
self.tableView.sectionIndexColor = [UIColor grayColor];
设置右侧索引背景色:
self.tableView.sectionIndexBackgroundColor = [UIColor whiteColor];
设置标签数(其实就是分区数目):
- (NSInteger)numberOfSectionsInTableView:(UITableView *)tableView {
    return indexArr.count;
}
显示每组标题索引 (如果不实现 就不显示右侧索引):
- (NSArray *)sectionIndexTitlesForTableView:(UITableView *)tableView {

    return indexArr;
}
设置索引section的高度:
- (CGFloat)tableView:(UITableView *)tableView heightForHeaderInSection:(NSInteger)section
{
    return 20;
}
返回每个索引的内容:
- (NSString *)tableView:(UITableView *)tableView titleForHeaderInSection:(NSInteger)section{

    return indexArr[section];
}
这时候基本的索引展现了, 需要响应点击索引则添加下面方法 及 将数据分类展现.
响应点击索引时的委托方法(点击右侧索引表项时调用):
- (NSInteger)tableView:(UITableView *)tableView sectionForSectionIndexTitle:(NSString *)title atIndex:(NSInteger)index {
      NSInteger count = 0;
    for(NSString *character in _toBeReturned) {
        if([character isEqualToString:title]) {
            return count;
        }
        count ++;
    }
    return 0;
}
Step2. 自定义汉字转化成拼音文件,通过拼音去匹配首字母
将数据分类展现则是一个大问题!
因为后台返回给我们是所有数据,没法通过分区去控制各个分区数据的数据, 这个时候就**考虑到汉字转化成拼音,然后通过拼音去匹配首字母然后排序**解决这个问题.
封装一个汉字转化成拼音YYPChineseToPinyin 文件
1.根据汉字返回汉字的拼音:
/**
 *  根据汉字返回汉字的拼音
 *
 *  @param word 一个汉字
 *
 *  @return 拼音的字符串
 */
+ (NSString *)transformChinese:(NSString *)word {
    NSMutableString *pinyin = [word mutableCopy];
    CFStringTransform((__bridge CFMutableStringRef)pinyin, NULL, kCFStringTransformMandarinLatin, NO);
    CFStringTransform((__bridge CFMutableStringRef)pinyin, NULL, kCFStringTransformStripCombiningMarks, NO);

    return [pinyin uppercaseString];
}
2.比较对象数组:
/**
 *  排序后的首字母(不重复)用于tableView的右侧索引
 *
 *  @param objectArray  需要排序的对象数组
 *  @param key          需要比较的对象的字段
 *
 *  @return 排序后的首字母(不重复)
 */
+ (NSMutableArray *)indexWithArray:(NSArray *)objectArray Key:(NSString *)key;
/**
 *  给对象数组排序
 *
 *  @param objectArray 需要排序的对象数组
 *  @param key       需要比较的对象的字段
 *
 *  @return 根据字段排序后的对象数组(同首写字母的在一个数组中)
 */
+ (NSMutableArray *)sortObjectArray:(NSArray *)objectArray Key:(NSString *)key;
3.比较字符串数组:
/**
 *  排序后的首字母(不重复)用于tableView的右侧索引
 *
 *  @param stringArr 需要排序的字符数组
 *
 *  @return 排序后的首字母(不重复)
 */
+ (NSMutableArray*)indexArray:(NSArray*)stringArr;
/**
 *  返回名称
 *
 *  @param stringArr 需要排序的字符数组
 *
 *  @return 更具首字母排序后的字符数组
 */
+ (NSMutableArray *)letterSortArray:(NSArray *)stringArr;
Step3. 将库存数据按照索引分组排序
解决匹配首字母问题后, 则需要在所需控制器内去解决分组排序问题了
// 库存详情列表数组
@property (nonatomic, strong) NSMutableArray *inventoryList;
// 索引标题数组(排序后的出现过的拼音首字母数组)
@property(nonatomic, strong) NSMutableArray *indexArr;
// 排序好的结果数组
@property(nonatomic, strong) NSMutableArray *resultArr;
 // 根据YYPGoodsModel对象的 name 属性 按中文 对 YYPGoodsModel数组 排序
    self.indexArr = [YYPChineseToPinyin indexWithArray:self.inventoryList Key:@"name"];
    self.resultArr = [YYPChineseToPinyin sortObjectArray:self.inventoryList Key:@"name"];
模拟加载库存数据:
- (void)loadInventoryData {
    NSArray *inventoryArr = [NSArray arrayWithObjects:
                              @"冰淇淋",@"土豆",@"##",
                              @"排骨",@"馒头",@"老婆饼",
                              nil];

    self.inventoryList = [[NSMutableArray alloc] initWithCapacity:0];
    for (int i = 0; i < [inventoryArr count]; i++) {
        YYPGoodsModel *good = [[YYPGoodsModel alloc] init];
        good.name = [inventoryArr objectAtIndex:i];
        good.num = i * 100;
        good.cost = i + 100;
        [self.inventoryList addObject:good];
    }
}
Step4. 添加搜索功能
// 保存搜索状态下的搜索数组
@property (strong, nonatomic) NSMutableArray *searchList;
添加手势去移除键盘:
- (void)scrollViewWillBeginDragging:(UIScrollView *)scrollView {
    [self.searchBar resignFirstResponder];
}
- (void)tapAction{
    [self.tableView removeGestureRecognizer:_tap];
    [_searchBar resignFirstResponder];
}
使用代理UISearchBarDelegate做相应操作:
#pragma mark - UISearchBarDelegate -
- (BOOL)searchBarShouldBeginEditing:(UISearchBar *)searchBar{
    if (!_tap) {
        _tap = [[UITapGestureRecognizer alloc] initWithTarget:self action:@selector(tapAction)];
    }
    [self.tableView addGestureRecognizer:_tap];

    return YES;
}
- (void)searchBarSearchButtonClicked:(UISearchBar *)searchBar {

    [self.searchList removeAllObjects];

    // 模拟加载搜索数据
    [self loadSearchData];

    self.showSearch = YES;
    [self.tableView reloadData];
}
- (void)searchBar:(UISearchBar *)searchBar textDidChange:(NSString *)searchText {

    if ([searchBar.text isEqualToString:@""]) {

        self.showSearch = NO;

        [self.tableView reloadData];

    } else {

        [self.searchList removeAllObjects];

        // 模拟加载搜索数据
        [self loadSearchData];

        self.showSearch = YES;
        [self.tableView reloadData];
    }

}
模拟加载搜索数据:
- (void)loadSearchData {
    NSArray *searchArr = [NSArray arrayWithObjects:
                              @"排骨",@"馒头",@"老婆饼",
                              nil];

    self.searchList = [[NSMutableArray alloc] initWithCapacity:0];
    for (int i = 0; i < [searchArr count]; i++) {
        YYPGoodsModel *search = [[YYPGoodsModel alloc] init];
        search.name = [searchArr objectAtIndex:i];
        search.num = i * 100;
        search.cost = i + 100;
        [self.searchList addObject:search];
    }
}
一般搜索来说是固定在顶部的,我这边是用的UIViewController, 将搜索块当作子视图放在内. 然后创建了myTableView去实现滚动这些页面.

Step5. 搜索界面复用库存界面, 增加标识判断显示界面
由于我们搜索界面就是在当前库存页面上搜索结果后直接展现,并不存在跳转下个界面,并且两个界面的 cell 布局完全一样. 这个时候只需要稍作处理复用即可(因为搜索不存在索引提示记得去掉索引title).
定义一个是否标识showSearch, 用于判断是否显示搜索结果
@property (assign, nonatomic) BOOL showSearch;
这个时候就修改上面的相关索引设置了, 增加判断若是搜索状态则不需要设置的逻辑
#pragma mark - Table view data source
// 标签数
- (NSInteger)numberOfSectionsInTableView:(UITableView *)tableView {

    if (self.showSearch) {
        return 1;
    }

    return self.indexArr.count;
}
- (NSInteger)tableView:(UITableView *)tableView numberOfRowsInSection:(NSInteger)section {

    if (self.showSearch) {
        return self.searchList.count;
    }
    return [[self.resultArr objectAtIndex:section] count];
}
- (UITableViewCell *)tableView:(UITableView *)tableView cellForRowAtIndexPath:(NSIndexPath *)indexPath {

    YYPInventoryDetailsCell *cell =[YYPInventoryDetailsCell cellWithTableView:tableView];

    if (self.showSearch) {
        if (self.searchList.count) {
            YYPGoodsModel *model = self.searchList[indexPath.row];
            cell.model = model;
        }
        return cell;
    }

    YYPGoodsModel *model = [[self.resultArr objectAtIndex:indexPath.section] objectAtIndex:indexPath.row];
    cell.model = model;
    return cell;

}
显示每组标题索引 (如果不实现 就不显示右侧索引)
- (NSArray *)sectionIndexTitlesForTableView:(UITableView *)tableView {


    if (self.showSearch) {
        return nil;
    }
    return self.indexArr;
}
设置索引section的高度
- (CGFloat)tableView:(UITableView *)tableView heightForHeaderInSection:(NSInteger)section {
    if (self.showSearch) {
        return 0.0;
    }
    return 20;
}
返回每个索引的内容
- (NSString *)tableView:(UITableView *)tableView titleForHeaderInSection:(NSInteger)section{

    if (self.showSearch) {
        return @"";
    }

    return self.indexArr[section];
}
响应点击索引时的委托方法(点击右侧索引表项时调用)
- (NSInteger)tableView:(UITableView *)tableView sectionForSectionIndexTitle:(NSString *)title atIndex:(NSInteger)index {

    return index;
}
如果需要修改分区header 索引的文字颜色及背景颜色, 和在tableview 里设置表头一样的修改方法.
// 设置索引背景颜色及标题
- (UIView *)tableView:(UITableView *)tableView viewForHeaderInSection:(NSInteger)section {
    UIView *header = [[UIView alloc] initWithFrame:CGRectMake(0, 0, UI_View_Width, 20)];
    header.backgroundColor = YYPBackgroundColor;

    // Create label with section title
    UILabel *label = [[UILabel alloc] init];
    label.frame = CGRectMake(15, 0, UI_View_Width - 15, header.height);
    label.textColor = YYPColor(255, 255, 255);
    label.font = [UIFont systemFontOfSize:16.0];
    label.text = [[self.inventoryList objectAtIndex:section] valueForKey:@"name"];
    label.backgroundColor = [UIColor clearColor];
    [header addSubview:label];

    if (self.showSearch) {
        label.text = @"";
    } else {
        label.text = self.indexArr[section];
    }

    return header;
}
是不是思路很明了了,希望对大家有用!

三、压缩文件截图
采用的 MVC 设计模式

界面性问题可以根据自己项目需求调整即可, 具体可参考代码, 项目能够直接运行!