Oracle 10g RAC On Windows 2003 Using VMware ServerThis article describes the installation of Oracle 10g release 2 (10.2.0.1) RAC on Windows 2003 Server Standard Edition using VMware Server with no additional shared disk devices.
Using VMware Server you can run multiple Virtual Machines (VMs) on a single server, allowing you to run both RAC nodes on a single machine. In additon, it allows you to set up shared virtual disks, overcoming the obstacle of expensive shared storage.
Before you launch into this installation, here are a few things to consider.
VMware Server InstallationFor this article, I used CentOS 4.3 as the host operating systems. To use Windows as the host operating system, simply run the executable installation file and ignore the following VMware Server installation information.
First, install the VMware Server software. On Linux you do this with the following command as the root user.
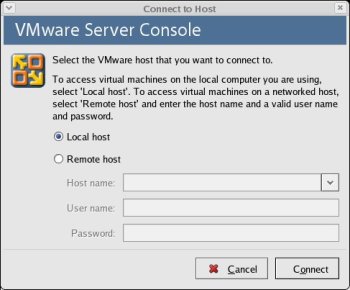
On the "Connect to Host" dialog, accept the "Local host" option by clicking the "Connect" button.
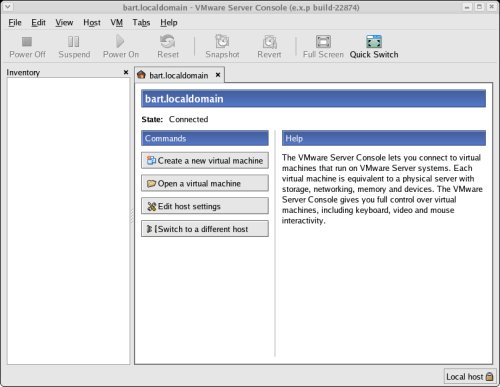
You are then presented with the main VMware Server Console screen.
The VMware Server is now installed and ready to use.
Virtual Machine SetupNow we must define the two virtual RAC nodes. We can save time by defining one VM, then cloning it when it is installed. In this article I use Linux as my host operating system, so all the file paths are UNIX style paths. If you are using a Windows host operating system you would expect to use Windows style paths to the various VMware files, so adjust the paths as necessary.
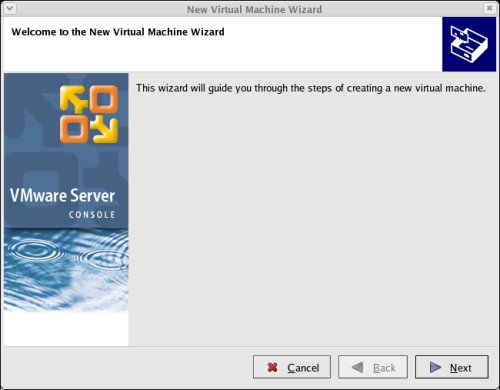
Click the "Create a new virtual machine" button to start the "New Virtual Machine Wizard". Click the "Next" button onthe welcome page.
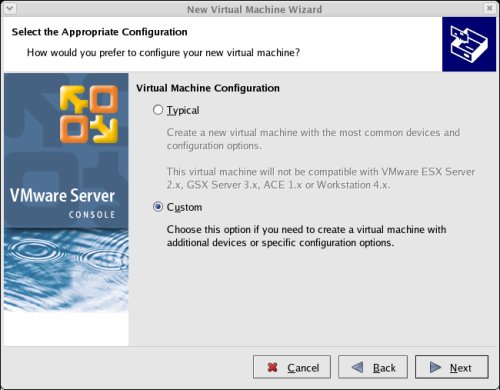
Select the "Custom" virtual machine configuration and click the "Next" button.
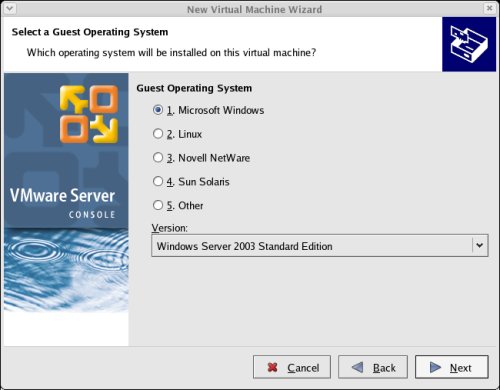
Select the "Windows" guest operating system option, and set the version to "Windows Server 2003 Standard Edition", then click the "Next" button.
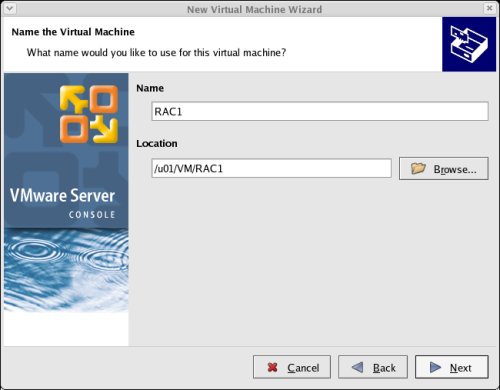
Enter the name "RAC1" and the location should default to "/u01/VM/RAC1", then click the "Next" button.
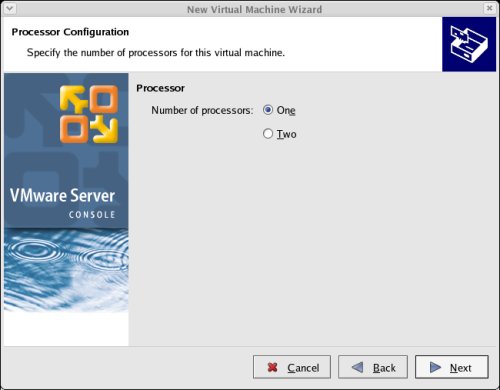
Select the required number of processors and click the "Next" button.
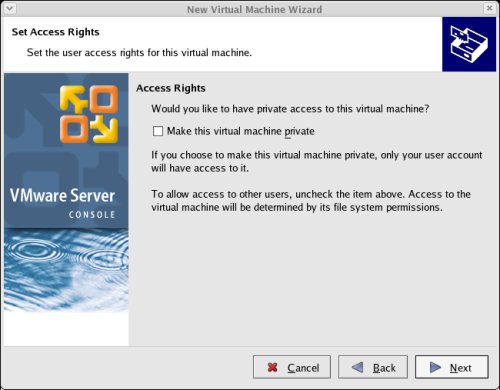
Uncheck the "Make this virtual machine private" checkbox and click the "Next" button.
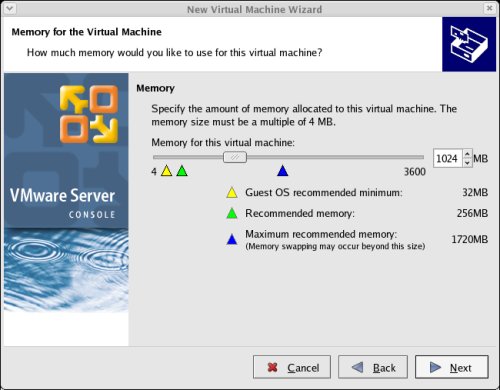
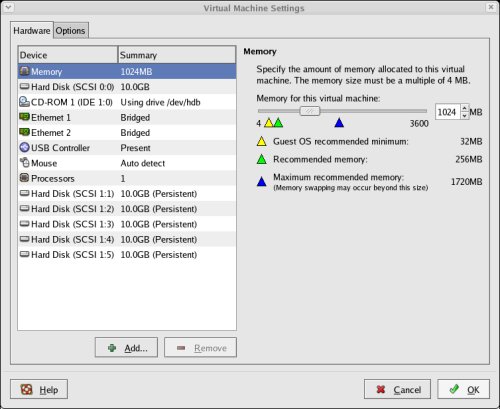
Select the amount of memory to associate with the virtual machine. Remember, you are going to need two instances, so don't associate too much, but you are going to need approximately 1 Gig (1024 Meg) to compete the installation successfully.
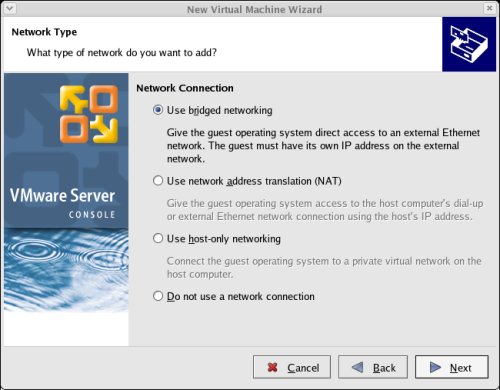
Accept the "Use bridged networking" option by clicking the "Next" button.
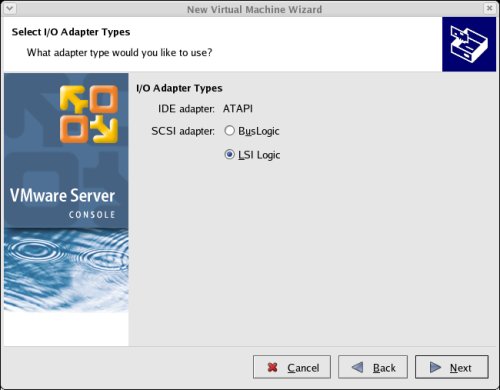
Accept the "LSI Logic" option by clicking the "Next" button.
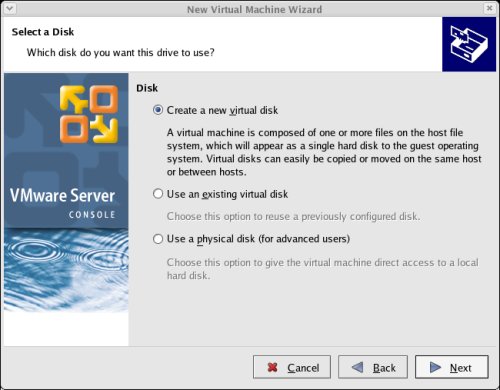
Select the "Create a new virtual disk" option and click the "Next" button.
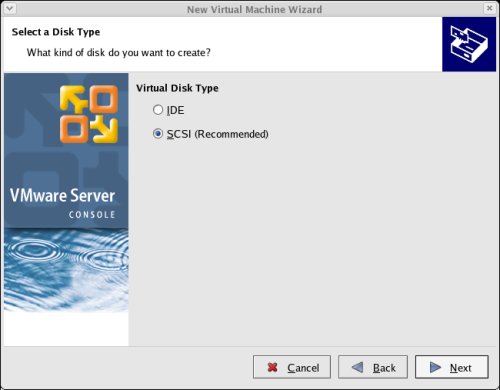
Accept the "SCSI" option by clicking the "Next" button. It's a virtual disk, so you can still use this option even if your physical disk is IDE or SATA.
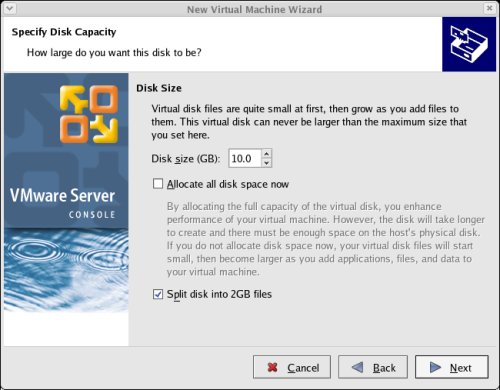
Set the disk size to "10.0" GB and uncheck the "Allocate all disk space now" option. The latter will make disk access slower, but will save you wasting disk space.
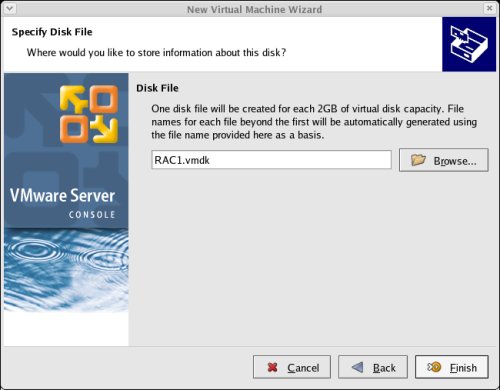
Accept "RAC1.vmdk" as the disk file name and complete the VM creation by clicking the "Finish" button.
On the "VMware Server Console" screen, click the "Edit virtual machine settings" button.
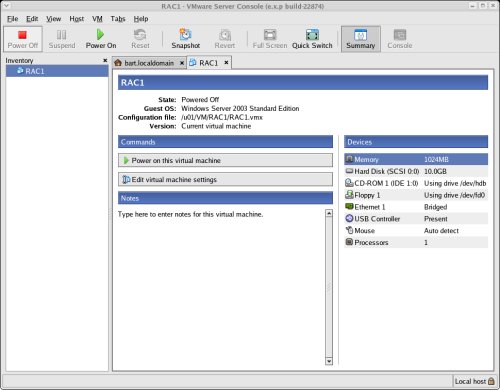
On the "Virtual Machine Settings" screen, highlight the "Floppy 1" drive and click the "- Remove" button.
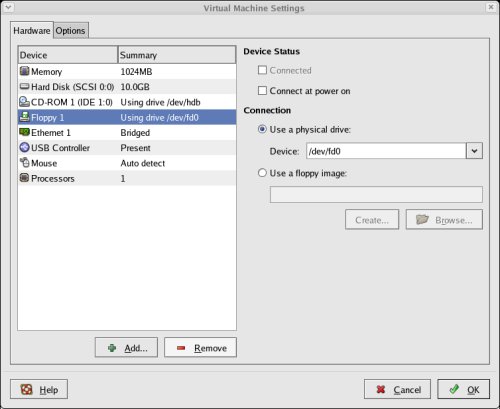
Click the "+ Add" button and select a hardware type of "Ethernet Adapter", then click the "Next" button.
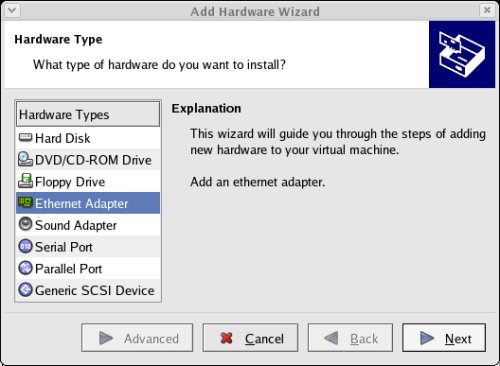
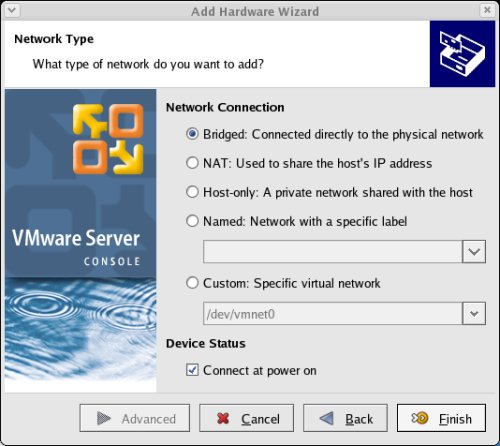
Accept the "Bridged" option by clicking the "Finish" button.
Click on the "Options" tab, highlight the "Startup/Shutdown" setting and select the "Don't power on virtual machine" in the "On host startup" option. Finish by clicking the "OK" button.
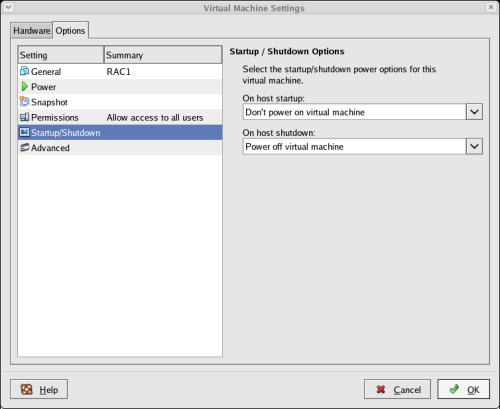
The virtual machine is now configured so we can start the guest operating system installation.
Guest Operating System InstallationPlace the first Windows 2003 SE disk in the CD drive and start the virtual machine by clicking the "Power on this virtual machine" button. The right pane of the VMware Server Console should display a boot loader, then the Windows installation screen.
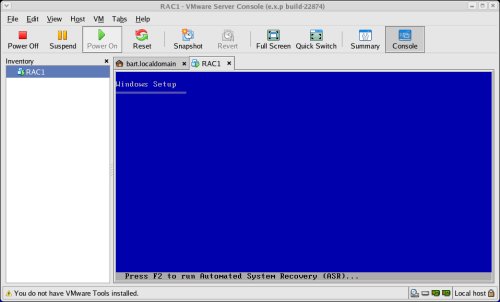
Continue through the Windows installation as you would for a normal server. To be consistent with the rest of the article, the following information should be set during the installation:
Oracle Installation PrerequisitesPerform the following steps whilst logged into the RAC1 virtual machine.
Amend the C:\windows\system32\drivers\etc\hosts file to contain the following information.
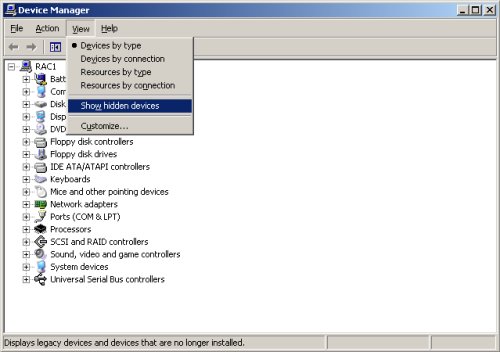
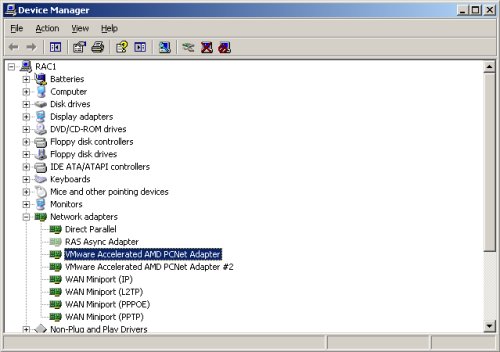
Now check for extra network adapters. You would expect two, but if there are more than this, uninstall the greyed out adapters.
Open the "Network Connections" screen (Start > All Programs > Accessories > Communications > Network Connections). Rename the two connections to "public" and "private" respectively, making sure you apply the names to the appropriate connections.
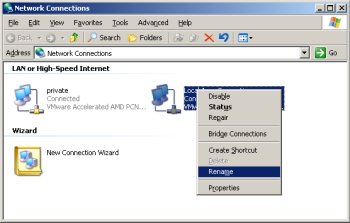
Check that the network settings are correct for both connections.
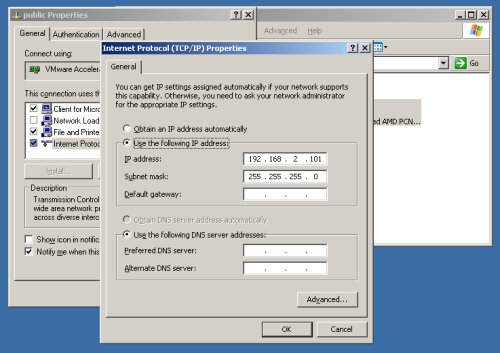
The Clusterware installation is very sensitive, so make sure you read the Checking Network Requirements section of the documentation, and make any necessary changes.
In addition to the configuration mentioned above, the documentation suggests two more configuration changes that I did not find necessary on VMware Server. Even so, it is advisable to make the changes.
First, ensure the public interface is first in the bind order:
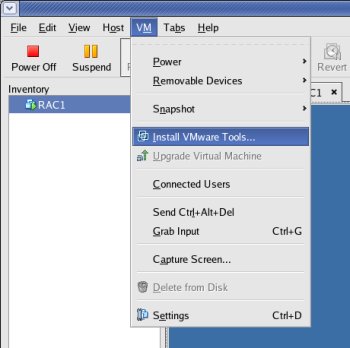
Install VMware Client ToolsLogin on the RAC1 virtual machine, then select the "VM > Install VMware Tools..." option from the main VMware Server Console menu.
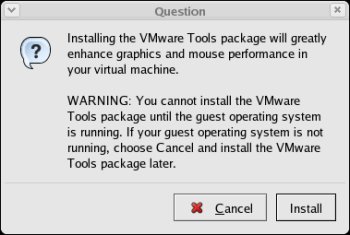
Click the "Install" button on the subsequent screen.
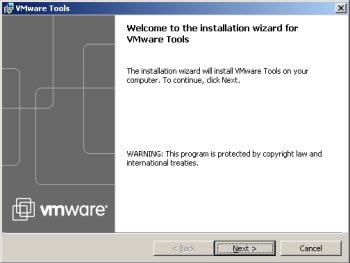
Click the "Next" button to continue.
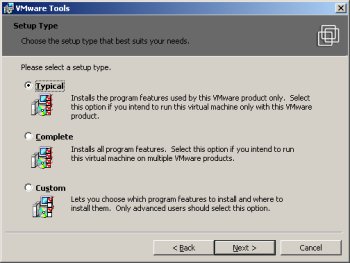
Accept the "Typical" option by clicking the "Next" button.
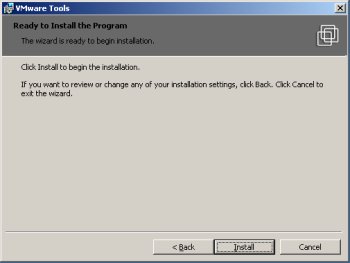
Click the "Install" button to continue.
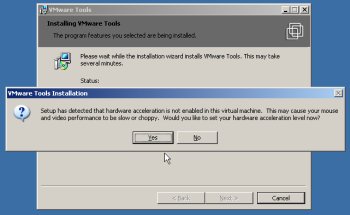
Set the hardware acceleration when prompted by clicking the "Yes" button and following the instructions on the subsequent screens.
Once the installatin is complete, click the "Finish" button.
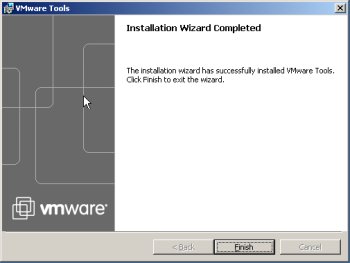
The VMware client tools are now installed.
Create Shared DisksShut down the RAC1 virtual machine and create a directory on the host system to hold the shared virtual disks.
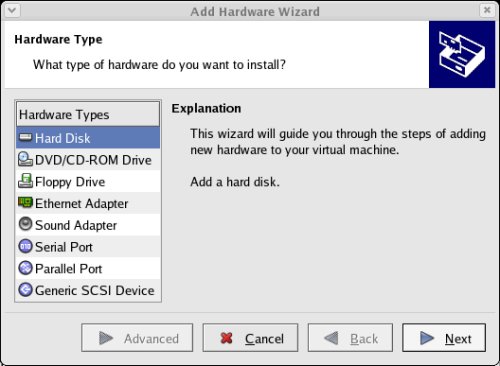
Select the hardware type of "Hard Disk" and click the "Next" button.
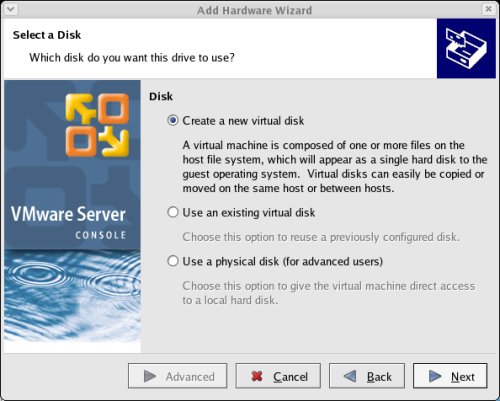
Accept the "Create a new virtual disk" option by clicking the "Next" button.
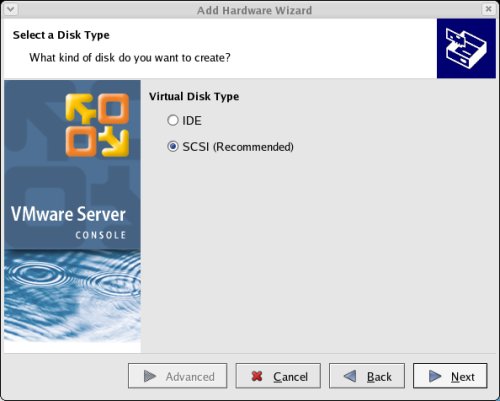
Accept the "SCSI" option by clicking the "Next" button.
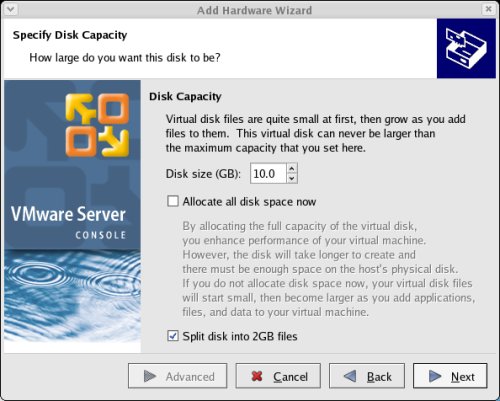
Set the disk size to "10.0" GB and uncheck the "Allocate all disk space now" option, then click the "Next" button.
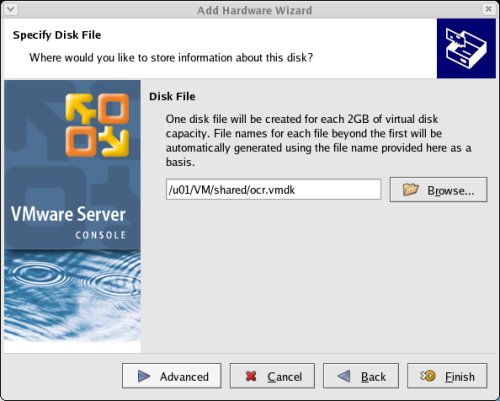
Set the disk name to "/u01/VM/shared/ocr.vmdk" and click the "Advanced" button.
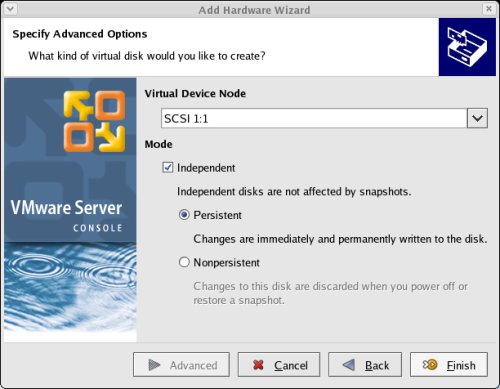
Set the virtual device node to "SCSI 1:1" and the mode to "Independent" and "Persistent", then click the "Finish" button.
Repeat the previous hard disk creation steps 4 more times, using the following values:
Edit the contents of the "/u01/VM/RAC1/RAC1.vmx" file using a text editor, making sure the following entries are present. Some of the tries will already be present, some will not.
Prior to partitioning the disks on Windows Server 2003, you must enable disk automounting. I didn't need to do this, but I guess it makes sense to do as you're told. To enable automounting do the following command at the command prompt, then restart the server.
Initialize all 5 disks by clicking the "Next" button.
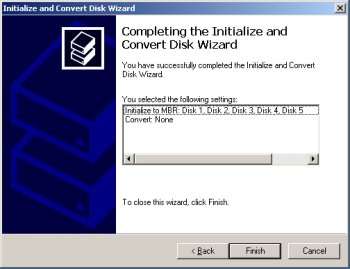
Don't convert any of the disks. Make sure all 5 disks are unchecked, then "Next" button.
Complete the process by clicking the "Finish" button.
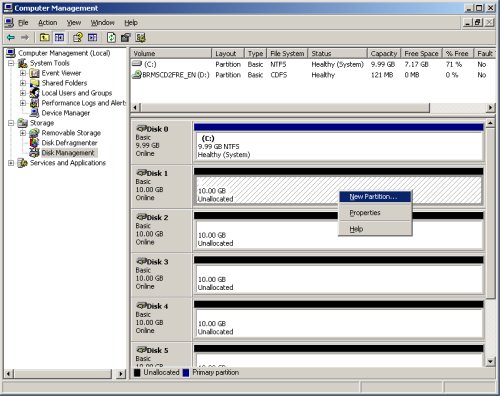
Right-click on "Disk 1" and select the "New Partition..." option to start the "New Partition Wizard".
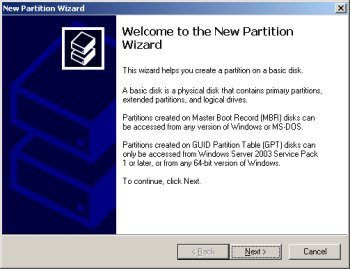
Click the "Next" button to continue.
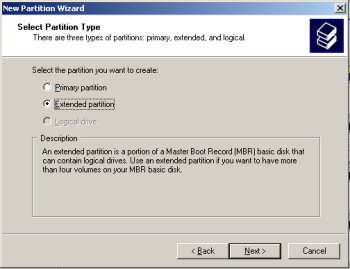
Select the "Extended partition" option, then click the "Next" button.
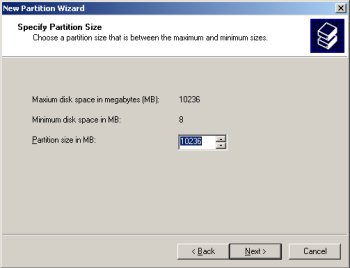
Accept the default partition size by clicking the "Next" button.
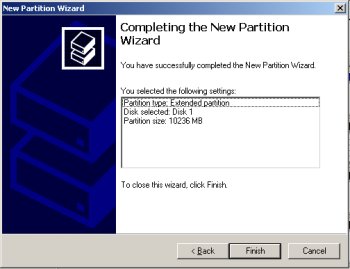
Complete the partition by clicking the "Finish" button.
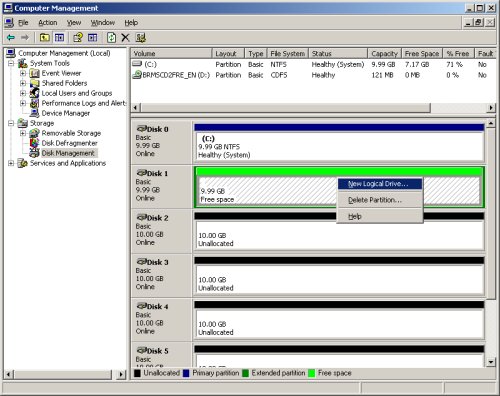
The partition will now be displayed with a green bar. Right-click on the partition and select the "New Logical Drive" option to restart the "New Partition Wizard".
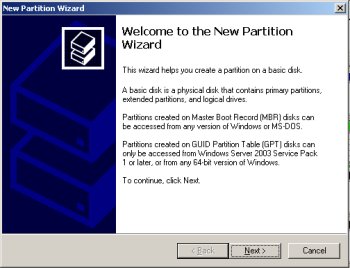
Click the "Next" button to continue.
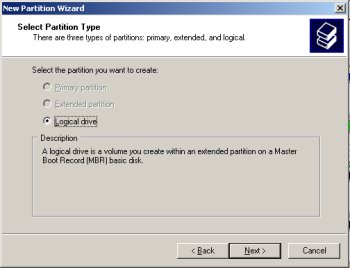
Accept the "Logical drive" option by clicking the "Next" button.
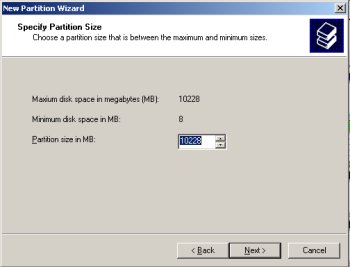
Accept the default partition size by clicking the "Next" button.
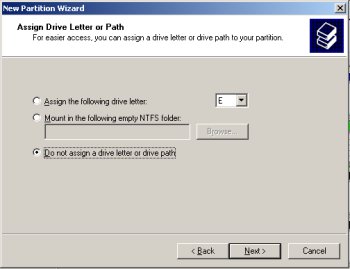
Select the "Do not assign a drive letter or drive path" option, then click the "Next" button.
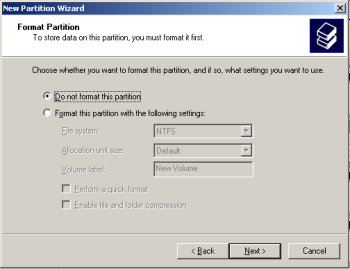
Select the "Do not format this partition" option, then click the "Next" button.
Complete the logical drive by clicking the "Finish" button.
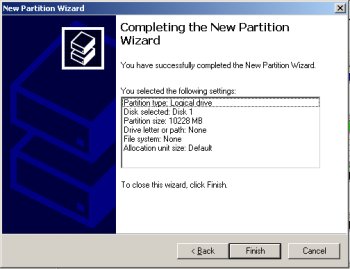
The drive should now be displayed as a healthy drive with a blue bar.
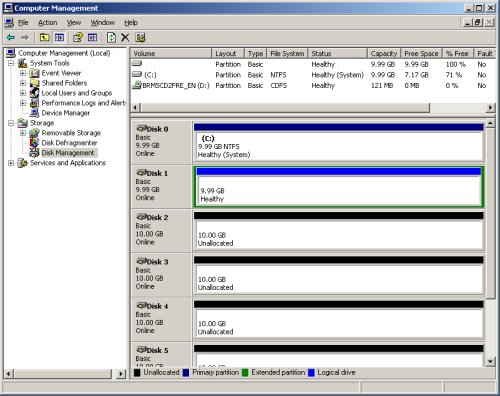
Repeat the previous partitioning steps for the remaining 4 disks.
The shared disks are now configured.
Clone the Virtual MachineThe current version of VMware Server does not include an option to clone a virtual machine, but the following steps illustrate how this can be achieved manually.
Shut down the RAC1 virtual machine and copy the RAC1 virtual machine using the following command.
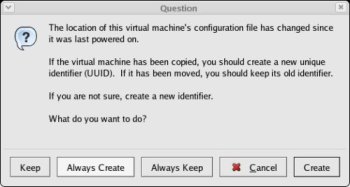
In the VMware Server Console, select the File > Open menu options and browse for the "/u01/VM/RAC2/RAC1.vmx" file. Once opened, the RAC2 virtual machine is visible on the console. Start the RAC2 virtual machine by clicking the "Power on this virtual machine" button and click the "Create" button on the subsequent "Question" screen.
Open the "Network Connections" screen (Start > All Programs > Accessories > Communications > Network Connections). Amend the IP Addresses of both connections to the correct values for the RAC2 node.
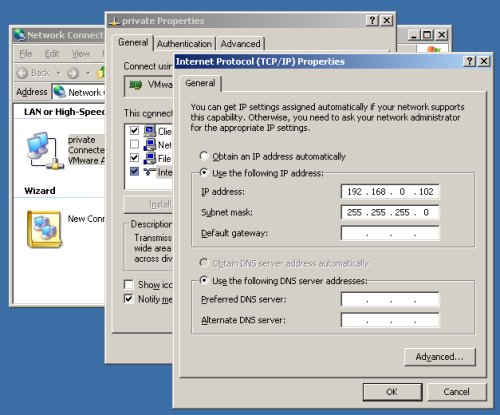
The cloning process sometimes alters the network connection setup, so repeat the steps mentioned previously for removing extra network adapters and renaming the connections.
Open the "System Properties" dialog (Start > Control Panel > System), click on the "Computer Name" tab and click the "Change" button. Enter the name "rac2" then click the "OK" button.
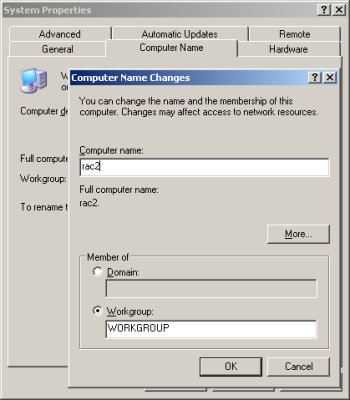
Click all subsequent "OK" buttons to exit the "System Properties" dialog and restart the server when prompted.
Once the RAC2 virtual machine has restarted, start the RAC1 virtual machine. When both nodes have started, check they can both ping all the public and private IP addresses using the following commands.
It's a good idea to take a snapshot of the virtual machines, so you can repeat the following stages if you run into any problems. To do this, shutdown both virtual machines and issue the following commands.
Install the Clusterware SoftwareStart the RAC1 and RAC2 virtual machines. The Oracle Clusterware for Windows is very sensitive, so before you start, check the network connection setup on each machine again. Remove and extra network adapters, rename the connections appropriately and check the nodes ping correctly. Make sure your network configuration matches the Checking Network Requirements section of the documentation.
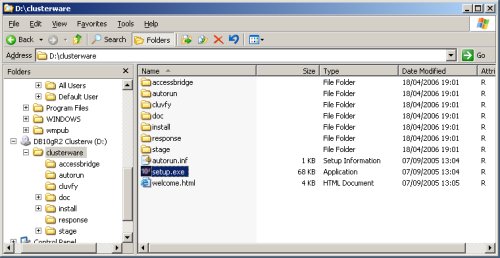
Start the Oracle installer on RAC1.
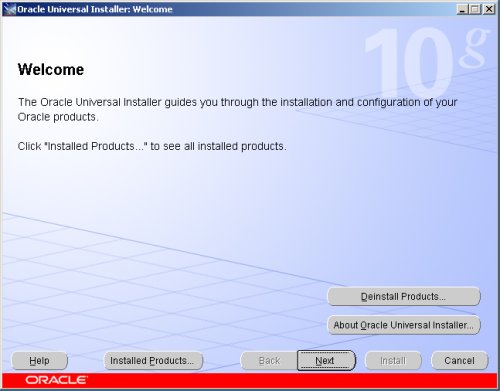
On the "Welcome" screen, click the "Next" button.
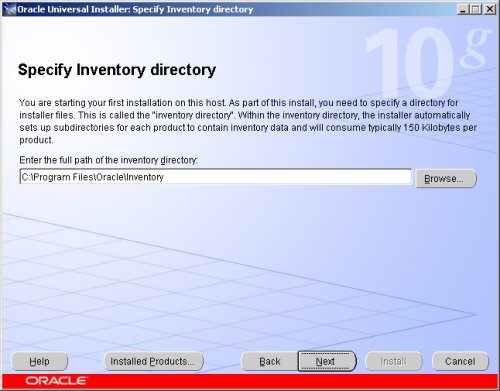
Accept the default inventory location by clicking the "Next" button.
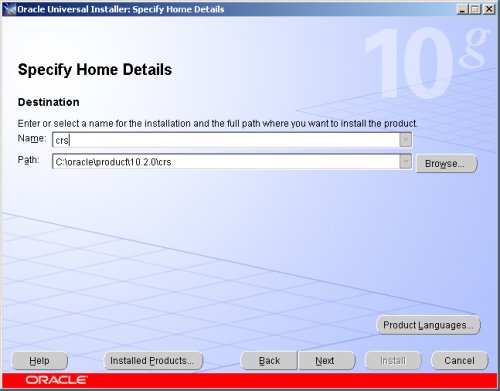
Enter the appropriate name and path for the Oracle Home and click the "Next" button.
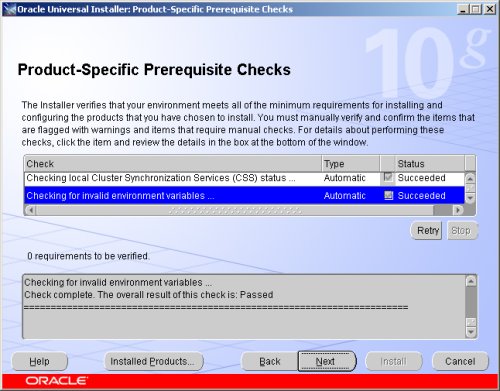
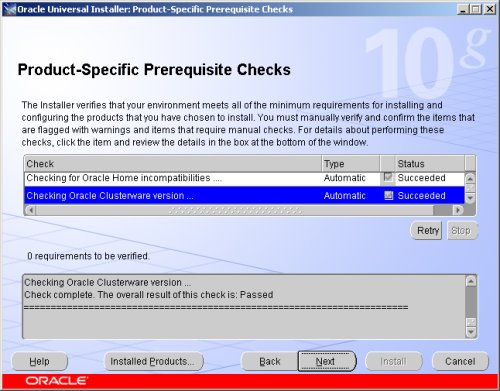
Wait while the prerequisite checks are done. If you have any failures correct them and retry the tests before clicking the "Next" button.
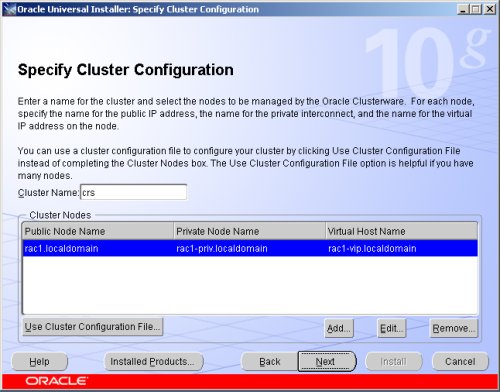
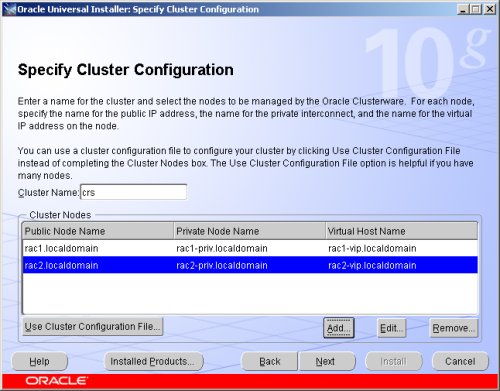
The "Specify Cluster Configuration" screen shows only the RAC1 node in the cluster. Click the "Add" button to continue.
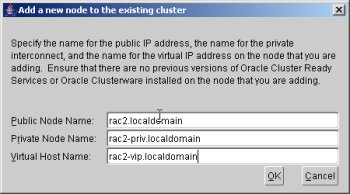
Enter the details for the RAC2 node and click the "OK" button.
Click the "Next" button to continue.
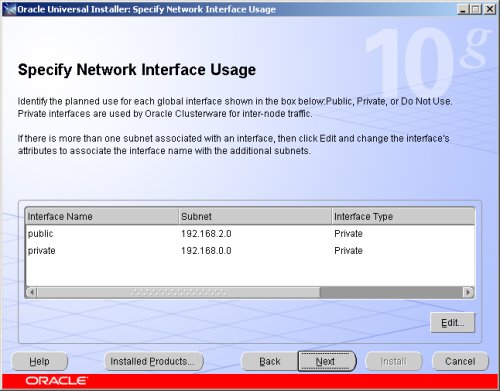
The "Specific Network Interface Usage" screen defines how each network interface will be used. Highlight the "public" interface and click the "Edit" button.
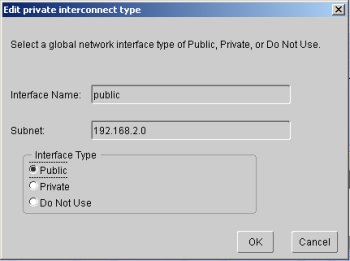
Set the "public" interface type to "Public" and click the "OK" button.
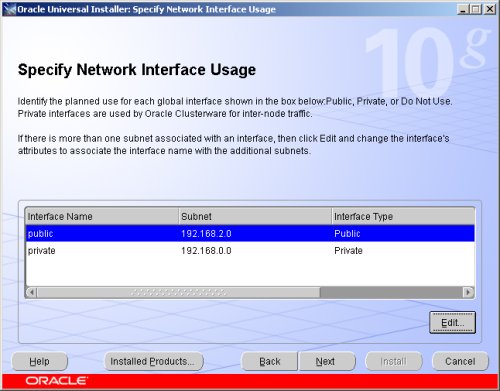
Leave the "private" interface as private and click the "Next" button.
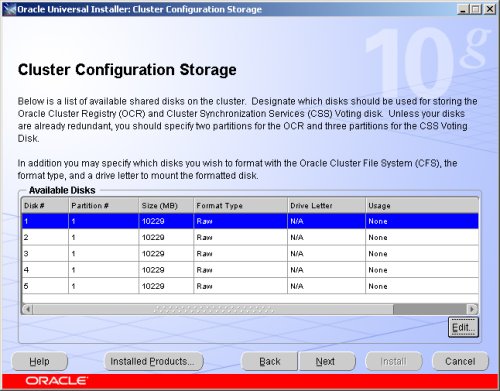
On the "Cluster Configuration Storage" screen, highlight disk 1 and click the "Edit" button.
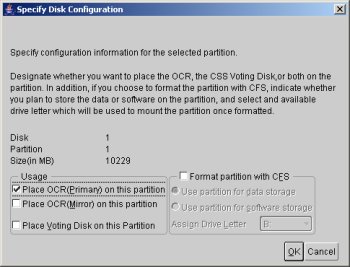
Select the "Place OCR(Primary) on this Partition" option and click the "OK" button.
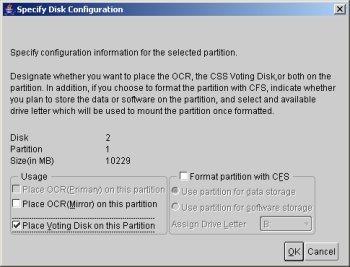
Highlight disk 2 and click the "Edit" button. Select the "Place Voting Disk on this Partition" option and click the "OK" button.
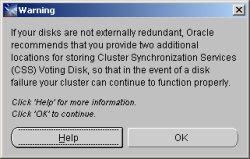
On the "Cluster Configuration Storage" screen, click the "Next" button and ignore the redundancy warnings by clicking the "OK" button.
On the "Summary" screen, click the "Install" button to continue.
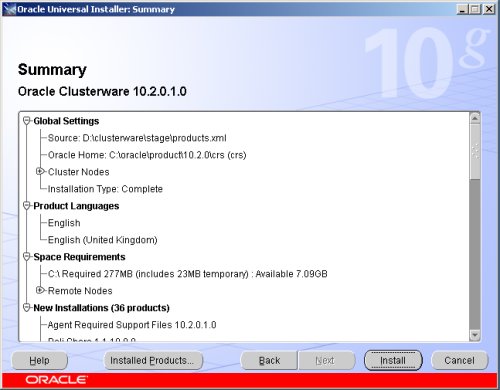
Wait while the installation takes place.
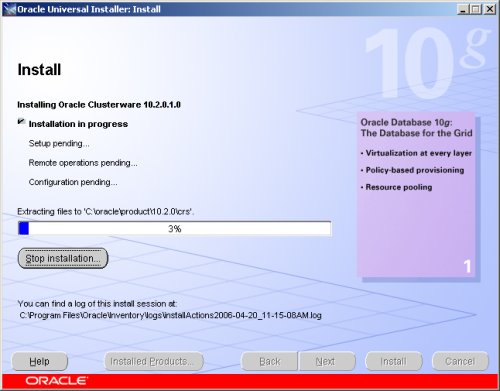
Wait while the configuration assistants run.
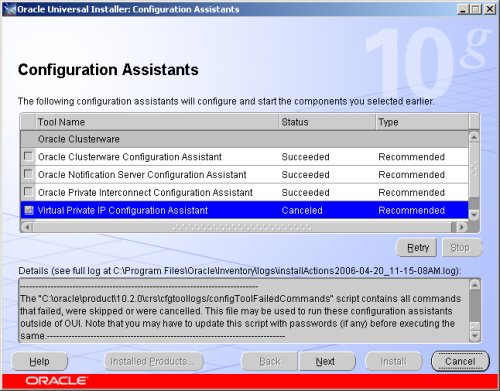
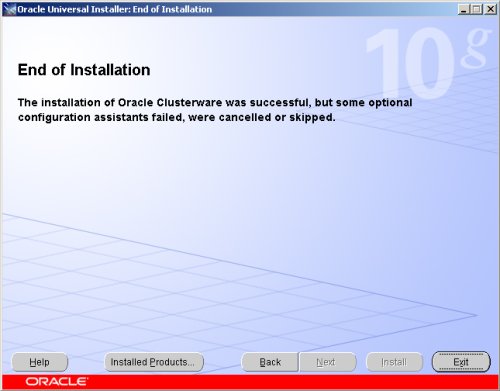
The VIPCA will fail, so click the "OK" button on the resulting error screen.
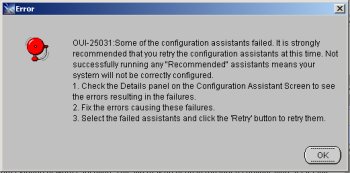
Click the "Next" button and accept the subsequent warning, then click the "Exit" button to leave the installer.
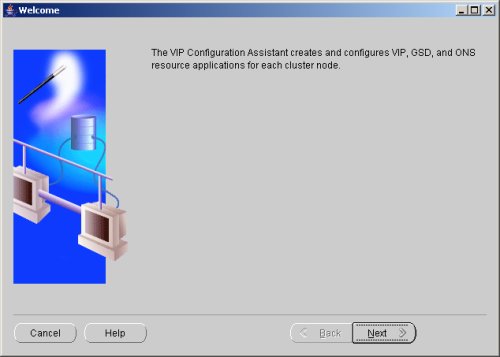
On the RAC1 virtual machine, run the VIPCA manually by issuing the following commands in a command prompt.
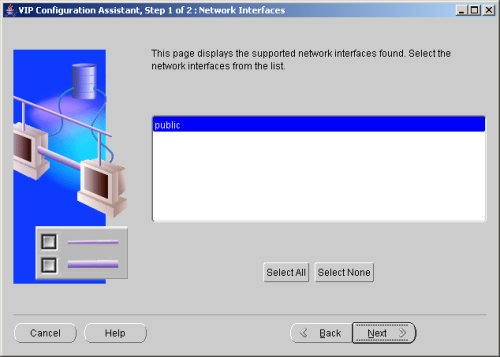
Highlight the "public" interface and click the "Next" button.
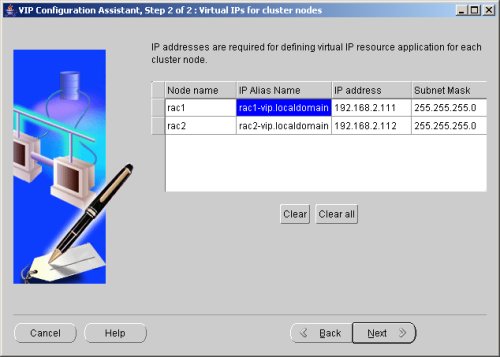
Enter the vitual IP alias and address for each node. Once you enter the first alias, the remaining values should default automatically. Click the "Next" button to continue.
Accept the summary information by clicking the "Finish" button.
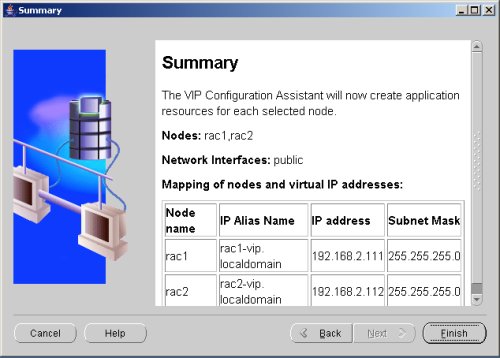
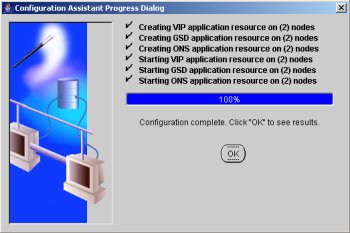
Wait until the configuration is complete, then click the "OK" button.
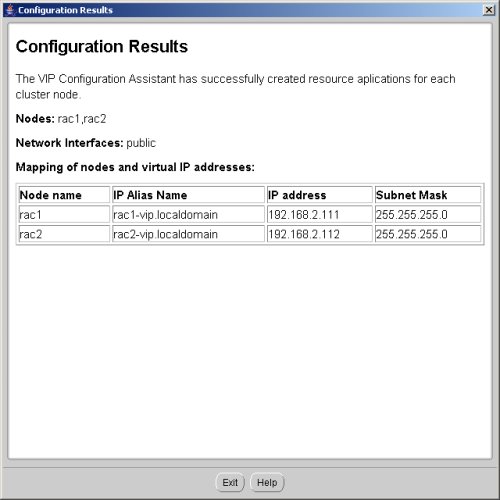
Accept the VIPCA results by clicking the "Exit" button.
The status of the finished cluster can be checked by running the cluvfy.bat script as shown below.
Install the Database Software and Create an ASM InstanceStart the RAC1 and RAC2 virtual machines, login to RAC1 and start the Oracle installer.
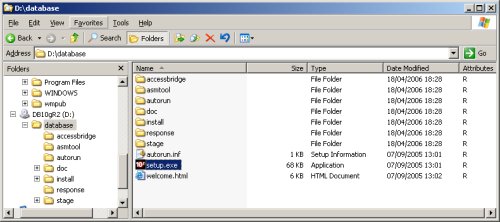
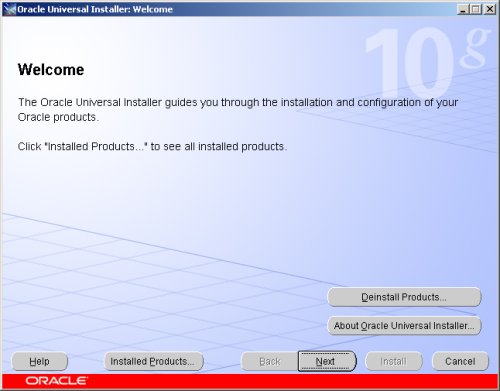
On the "Welcome" screen, click the "Next" button.
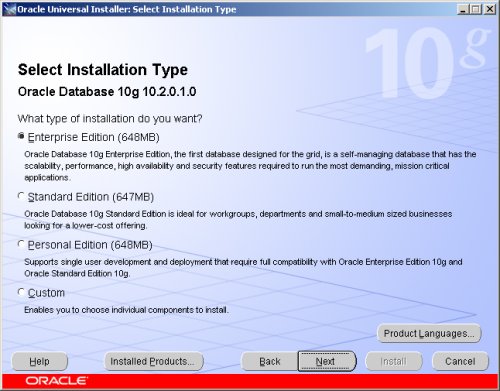
Select the "Enterprise Edition" option and click the "Next" button.
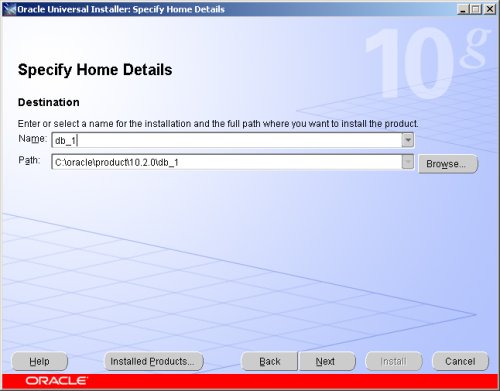
Enter the name and path for the Oracle Home and click the "Next" button.
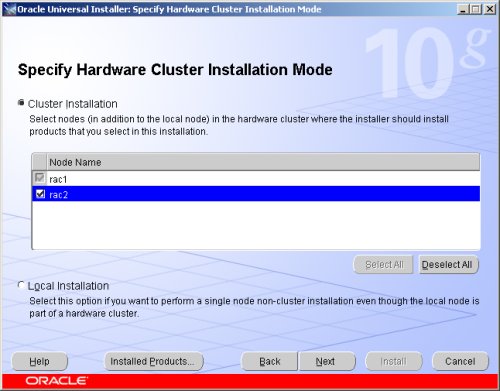
Select the "Cluster Installation" option and make sure both RAC nodes are selected, then click the "Next" button.
Wait while the prerequisite checks are done. If you have any failures correct them and retry the tests before clicking the "Next" button.
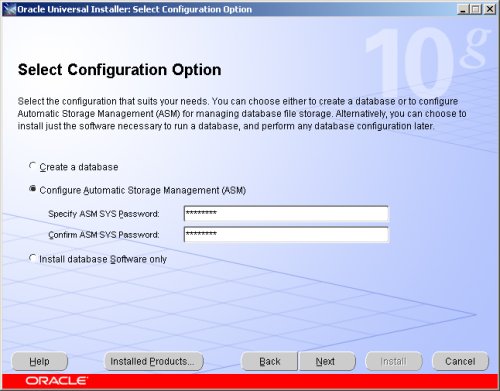
Select the "Configure Automatic Storage Management (ASM)" option, enter the SYS password for the ASM instance, then click the "Next" button.
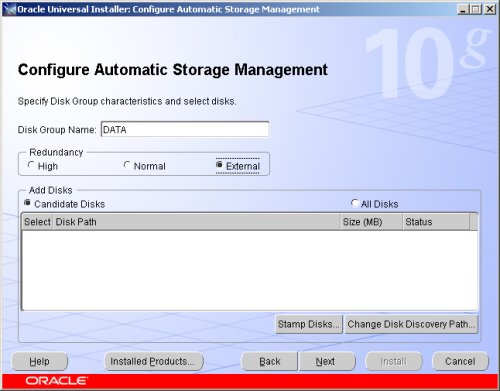
Select the "External" redundancy option (no mirroring) and click the "Stamp Disks..." button.
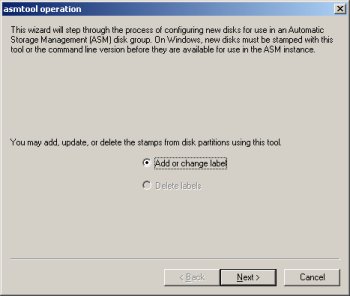
Select the "Add or change label" option and click the "Next" button.
Highlight disks 3-5 and click the "Next" button. Remember, disk0 is the OS, disk1 is the OCR location and disk2 is the voting disk.
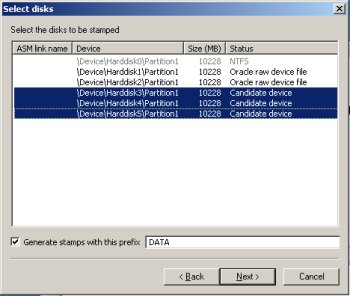
Confirm your selection by clicking the "Next" button.
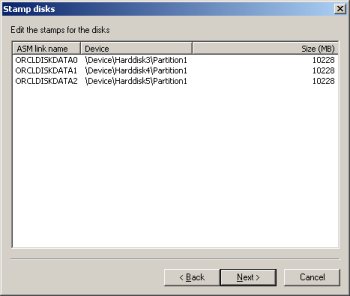
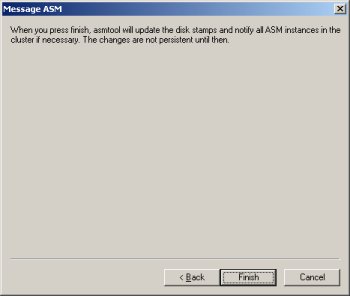
Complete the disk stamp by clicking the "Finish" button.
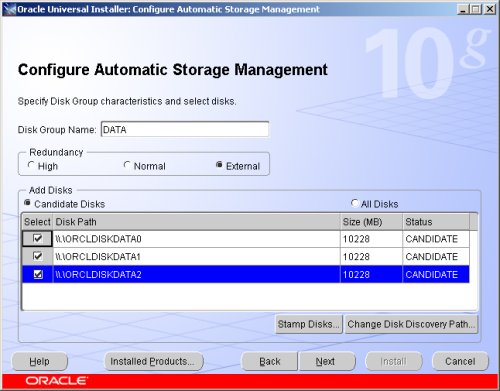
Select the candidate disks and click the "Next" button.
On the "Summary" screen, click the "Install" button to continue.
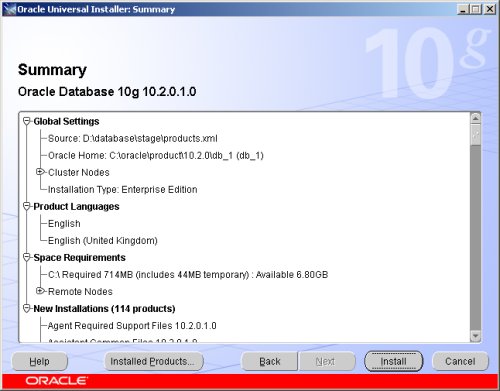
Wait while the database software installs.
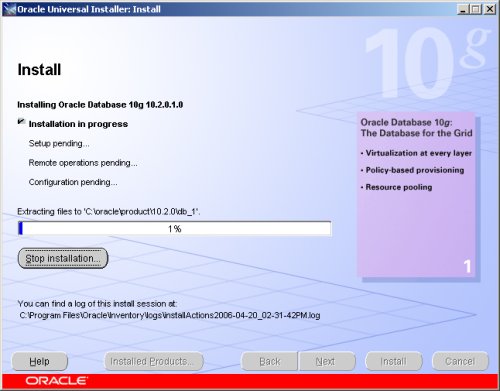
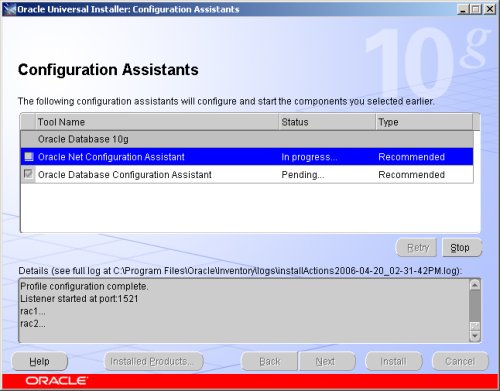
Once the installation is complete, wait while the configuration assistants run.
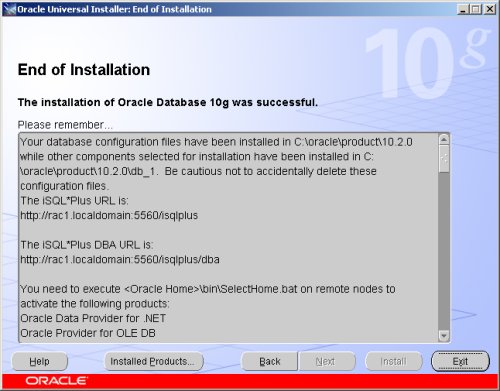
When the installation is complete, click the "Exit" button to leave the installer.
It's a good idea to take a snapshot of the virtual machines, so you can repeat the following stages if you run into any problems. To do this, shutdown both virtual machines and issue the following commands.
Create a Database using the DBCAStart the RAC1 and RAC2 virtual machines, login to RAC1 start the Database Configuration Assistant (Start > All Programs > Oracle - db_1 > Configuration and Migration Tools > Database Configuration Assistant).
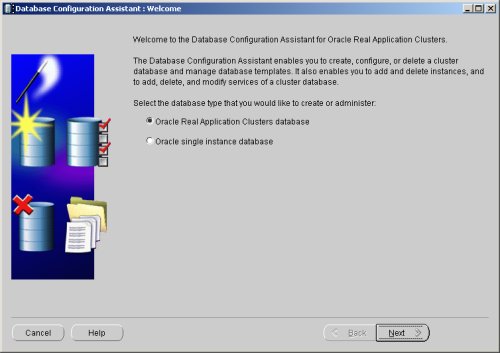
On the "Welcome" screen, select the "Oracle Real Application Clusters database" option and click the "Next" button.
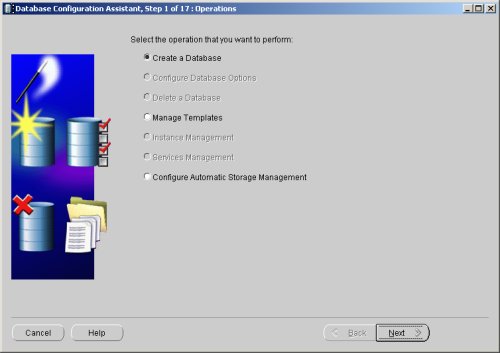
Select the "Create a Database" option and click the "Next" button.
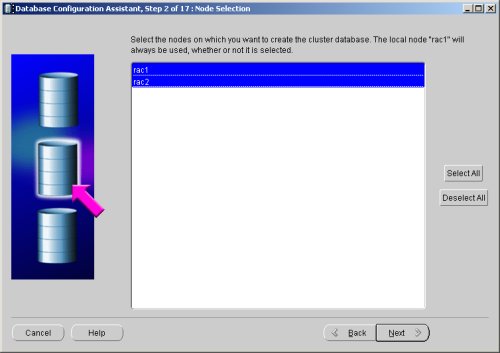
Highlight both RAC nodes and click the "Next" button.
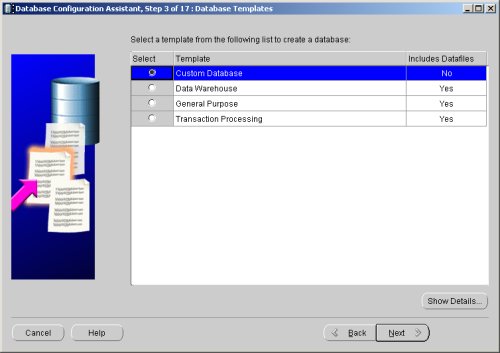
Select the "Custom Database" option and click the "Next" button.
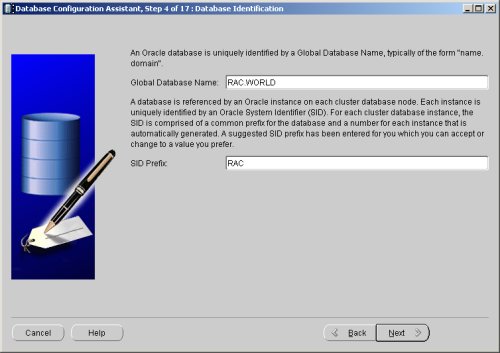
Enter the values "RAC.WORLD" and "RAC" for the Global Database Name and SID Prefix respectively, then click the "Next" button.
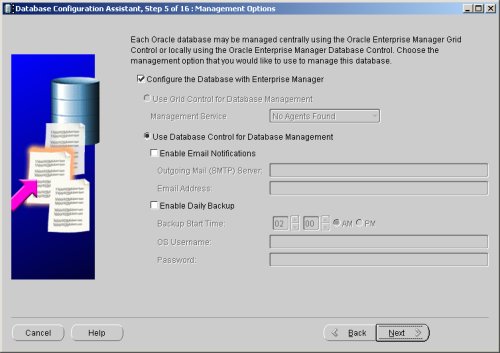
Accept the management options by clicking the "Next" button. If you are attempting the installation on a server with limited memory, you may prefer not to configure Enterprise Manager at this time.
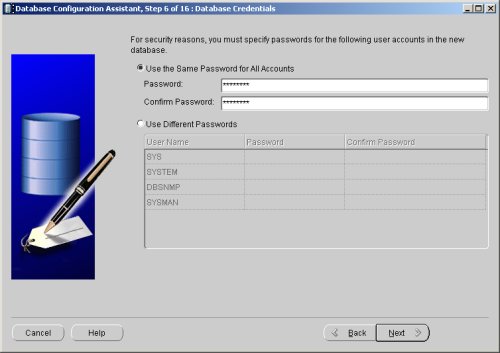
Enter database passwords then click the "Next" button.
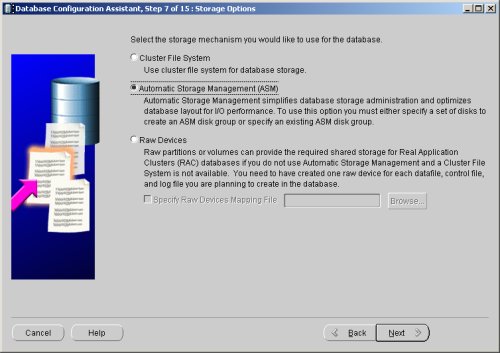
Select the "Automatic Storage Management (ASM)" option, then click the "Next" button.
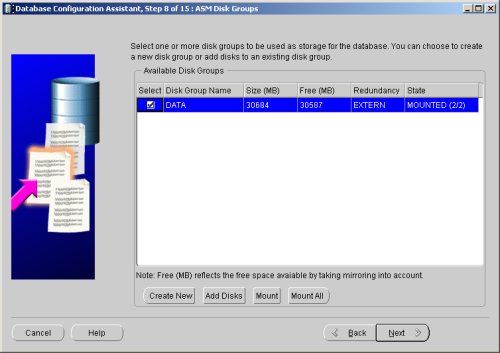
Select the "DATA" disk group, then click the "Next" button.
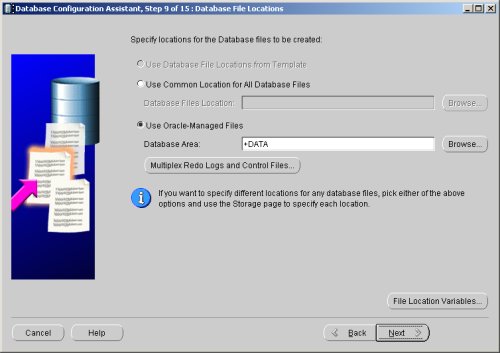
Accept the "Use Oracle-Managed Files" database location by the "Next" button.
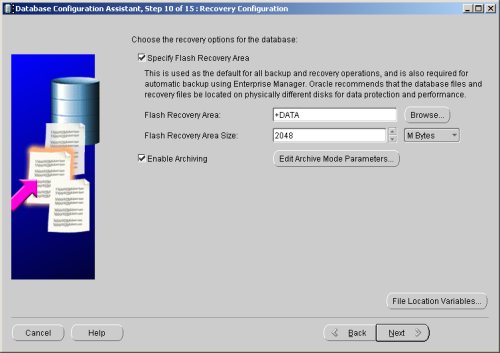
Check both the "Specify Flash Recovery Area" and "Enable Archiving" options. Enter "+DATA" as the Flash Recovery Area, then click the "Next" button.
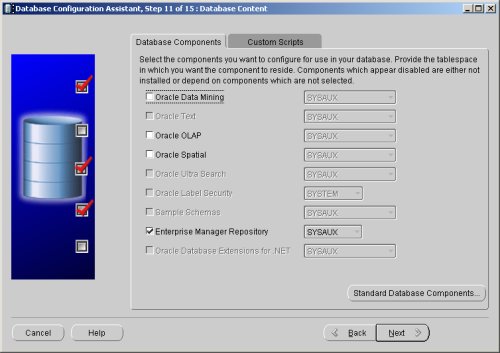
Uncheck all but the "Enterprise Manager Repository" option, then click the "Standard Database Components..." button.
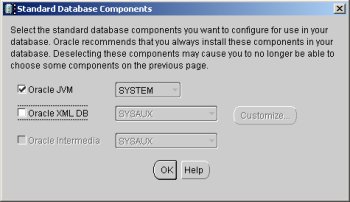
Uncheck all but the "Oracle JVM" option, then click the "OK" button, followed by the "Next" button on the previous screen. If you are attempting the installation on a server with limited memory, you may prefer not to install the JVM at this time.
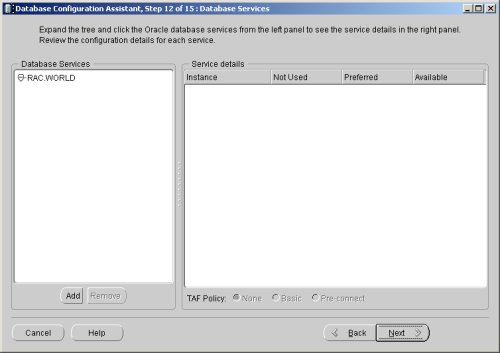
Accept the current database services configuration by clicking the "Next" button.
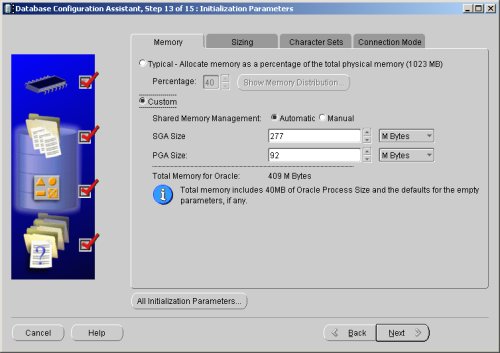
Select the "Custom" memory management option and accept the default settings by clicking the "Next" button.
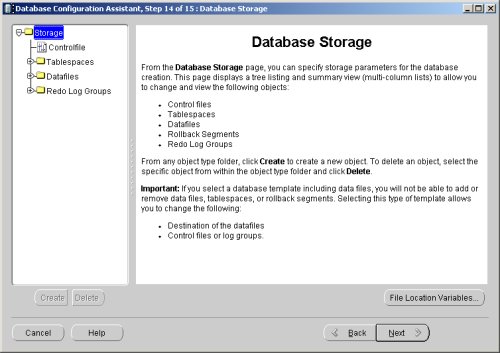
Accept the database storage settings by clicking the "Next" button.
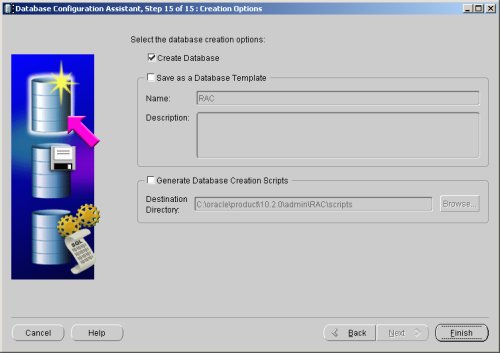
Accept the database creation options by clicking the "Finish" button.
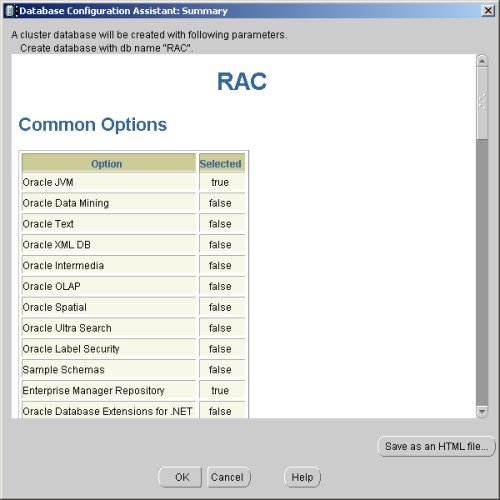
Accept the summary information by clicking the "OK" button.
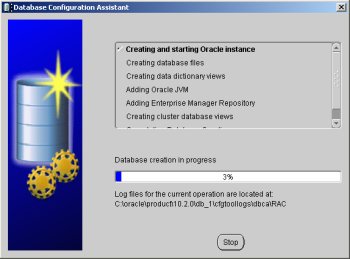
Wait while the database is created.
Once the database creation is complete you are presented with the following screen. Make a note of the information on the screen and click the "Exit" button.
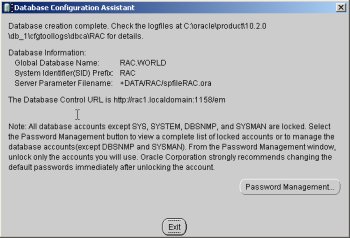
The RAC database creation is now complete.
TNS ConfigurationOnce the installation is complete, the "%ORACLE_HOME%\network\admin\listener.ora" file on each RAC node will contain entries similar to the following.
For more information see:
- Introduction
- Download Software
- VMware Server Installation
- Virtual Machine Setup
- Guest Operating System Installation
- Oracle Installation Prerequisites
- Install VMware Client Tools
- Create Shared Disks
- Clone the Virtual Machine
- Install the Clusterware Software
- Install the Database Software and Create an ASM Instance
- Create a Database using the DBCA
- TNS Configuration
- Check the Status of the RAC
Using VMware Server you can run multiple Virtual Machines (VMs) on a single server, allowing you to run both RAC nodes on a single machine. In additon, it allows you to set up shared virtual disks, overcoming the obstacle of expensive shared storage.
Before you launch into this installation, here are a few things to consider.
- The finished system includes the host operating system, two guest operating systems, two sets of Oracle Clusterware, two ASM instances and two Database instances all on a single server. As you can imagine, this requires a significant amount of disk space, CPU and memory. To complete this installation I used a dual 3.0G Xeon server with 4G of memory.
- This procedure provides a bare bones installation to get the RAC working. There is no redundancy in the Clusterware installation or the ASM installation. To add this, simply create double the amount of shared disks and select the "Normal" redundancy option when it is offered. Of course, this will take more disk space.
- During the virtual disk creation, I always choose not to preallocate the disk space. This makes virtual disk access slower during the installation, but saves on wasted disk space.
- This is not, and should not be considered, a production-ready system. It's simply to allow you to get used to installing and using RAC.
VMware Server InstallationFor this article, I used CentOS 4.3 as the host operating systems. To use Windows as the host operating system, simply run the executable installation file and ignore the following VMware Server installation information.
First, install the VMware Server software. On Linux you do this with the following command as the root user.
# rpm -Uvh VMware-server-*.rpm Preparing... ########################################### [100%] 1:VMware-server ########################################### [100%] #Then finish the configuration by running the vmware-config.pl script as the root user. Most of the questions can be answered with the default response by pressing the return key. The output below shows my responses to the questions.
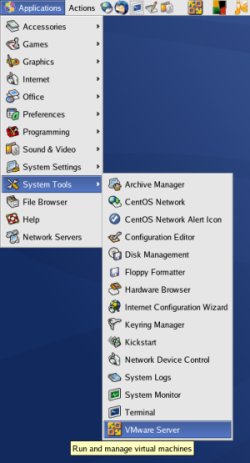
# vmware-config.pl Making sure services for VMware Server are stopped. Stopping VMware services: Virtual machine monitor [ OK ] You must read and accept the End User License Agreement to continue. Press enter to display it. VMWARE, INC. SOFTWARE BETA TEST AGREEMENT *** Editied out license agreement *** Do you accept? (yes/no) yes Thank you. Configuring fallback GTK+ 2.4 libraries. In which directory do you want to install the mime type icons? [/usr/share/icons] What directory contains your desktop menu entry files? These files have a .desktop file extension. [/usr/share/applications] In which directory do you want to install the application's icon? [/usr/share/pixmaps] Trying to find a suitable vmmon module for your running kernel. The module bld-2.6.9-5.EL-i686smp-RHEL4 loads perfectly in the running kernel. Do you want networking for your virtual machines? (yes/no/help) [yes] Configuring a bridged network for vmnet0. The following bridged networks have been defined: . vmnet0 is bridged to eth0 All your ethernet interfaces are already bridged. Do you want to be able to use NAT networking in your virtual machines? (yes/no) [yes] Configuring a NAT network for vmnet8. Do you want this program to probe for an unused private subnet? (yes/no/help) [yes] Probing for an unused private subnet (this can take some time)... The subnet 172.16.210.0/255.255.255.0 appears to be unused. The following NAT networks have been defined: . vmnet8 is a NAT network on private subnet 172.16.210.0. Do you wish to configure another NAT network? (yes/no) [no] Do you want to be able to use host-only networking in your virtual machines? [yes] no Trying to find a suitable vmnet module for your running kernel. The module bld-2.6.9-5.EL-i686smp-RHEL4 loads perfectly in the running kernel. Please specify a port for remote console connections to use [902] Stopping xinetd: [ OK ] Starting xinetd: [ OK ] Configuring the VMware VmPerl Scripting API. Building the VMware VmPerl Scripting API. Using compiler "/usr/bin/gcc". Use environment variable CC to override. The installation of the VMware VmPerl Scripting API succeeded. Do you want this program to set up permissions for your registered virtual machines? This will be done by setting new permissions on all files found in the "/etc/vmware/vm-list" file. [no] yes Generating SSL Server Certificate In which directory do you want to keep your virtual machine files? [/var/lib/vmware/Virtual Machines] /u01/VM Do you want to enter a serial number now? (yes/no/help) [no] yes Please enter your 20-character serial number. Type XXXXX-XXXXX-XXXXX-XXXXX or 'Enter' to cancel: ENTER-YOUR-SERIAL-NUMBER Starting VMware services: Virtual machine monitor [ OK ] Virtual ethernet [ OK ] Bridged networking on /dev/vmnet0 [ OK ] Host-only networking on /dev/vmnet8 (background) [ OK ] NAT service on /dev/vmnet8 [ OK ] Starting VMware virtual machines... [ OK ] The configuration of VMware Server e.x.p build-22874 for Linux for this running kernel completed successfully. #The VMware Server Console is started by issuing the command "vmware" at the command prompt, or by selecting it from the "System Tools" menu.

On the "Connect to Host" dialog, accept the "Local host" option by clicking the "Connect" button.

You are then presented with the main VMware Server Console screen.

The VMware Server is now installed and ready to use.
Virtual Machine SetupNow we must define the two virtual RAC nodes. We can save time by defining one VM, then cloning it when it is installed. In this article I use Linux as my host operating system, so all the file paths are UNIX style paths. If you are using a Windows host operating system you would expect to use Windows style paths to the various VMware files, so adjust the paths as necessary.
Click the "Create a new virtual machine" button to start the "New Virtual Machine Wizard". Click the "Next" button onthe welcome page.

Select the "Custom" virtual machine configuration and click the "Next" button.

Select the "Windows" guest operating system option, and set the version to "Windows Server 2003 Standard Edition", then click the "Next" button.

Enter the name "RAC1" and the location should default to "/u01/VM/RAC1", then click the "Next" button.

Select the required number of processors and click the "Next" button.

Uncheck the "Make this virtual machine private" checkbox and click the "Next" button.

Select the amount of memory to associate with the virtual machine. Remember, you are going to need two instances, so don't associate too much, but you are going to need approximately 1 Gig (1024 Meg) to compete the installation successfully.

Accept the "Use bridged networking" option by clicking the "Next" button.

Accept the "LSI Logic" option by clicking the "Next" button.

Select the "Create a new virtual disk" option and click the "Next" button.

Accept the "SCSI" option by clicking the "Next" button. It's a virtual disk, so you can still use this option even if your physical disk is IDE or SATA.

Set the disk size to "10.0" GB and uncheck the "Allocate all disk space now" option. The latter will make disk access slower, but will save you wasting disk space.

Accept "RAC1.vmdk" as the disk file name and complete the VM creation by clicking the "Finish" button.

On the "VMware Server Console" screen, click the "Edit virtual machine settings" button.

On the "Virtual Machine Settings" screen, highlight the "Floppy 1" drive and click the "- Remove" button.

Click the "+ Add" button and select a hardware type of "Ethernet Adapter", then click the "Next" button.

Accept the "Bridged" option by clicking the "Finish" button.

Click on the "Options" tab, highlight the "Startup/Shutdown" setting and select the "Don't power on virtual machine" in the "On host startup" option. Finish by clicking the "OK" button.

The virtual machine is now configured so we can start the guest operating system installation.
Guest Operating System InstallationPlace the first Windows 2003 SE disk in the CD drive and start the virtual machine by clicking the "Power on this virtual machine" button. The right pane of the VMware Server Console should display a boot loader, then the Windows installation screen.

Continue through the Windows installation as you would for a normal server. To be consistent with the rest of the article, the following information should be set during the installation:
- hostname: RAC1
- IP Address eth0: 192.168.2.101 (public address)
- IP Address eth1: 192.168.0.101 (private address)
Oracle Installation PrerequisitesPerform the following steps whilst logged into the RAC1 virtual machine.
Amend the C:\windows\system32\drivers\etc\hosts file to contain the following information.
127.0.0.1 localhost.localdomain localhost # Public 192.168.2.101 rac1.localdomain rac1 192.168.2.102 rac2.localdomain rac2 #Private 192.168.0.101 rac1-priv.localdomain rac1-priv 192.168.0.102 rac2-priv.localdomain rac2-priv #Virtual 192.168.2.111 rac1-vip.localdomain rac1-vip 192.168.2.112 rac2-vip.localdomain rac2-vipVMware sometimes creates additional network adapters, which will prevent the clusterware from loading. Delete any additional adapters as follows. Open a command prompt on RAC1 and issue the following commands.
set devmgr_show_nonpresent_devices=1 devmgmt.mscOn the resulting "Device Manager" screen, pick the "View > Show hidden devices" menu option.

Now check for extra network adapters. You would expect two, but if there are more than this, uninstall the greyed out adapters.

Open the "Network Connections" screen (Start > All Programs > Accessories > Communications > Network Connections). Rename the two connections to "public" and "private" respectively, making sure you apply the names to the appropriate connections.

Check that the network settings are correct for both connections.

The Clusterware installation is very sensitive, so make sure you read the Checking Network Requirements section of the documentation, and make any necessary changes.
In addition to the configuration mentioned above, the documentation suggests two more configuration changes that I did not find necessary on VMware Server. Even so, it is advisable to make the changes.
First, ensure the public interface is first in the bind order:
- Open the "Network Connections" dialog by right-clicking on the "My Network Places" icon and selecting the "Properties" menu option.
- Select the "Advanced > Advanced Settings..." menu option.
- On the "Adapters and Bindings" tab, make sure the public interface is the first interface listed.
- Accept any modifications by clicking on the "OK" button and exiting the "Network Connections" dialog.
- Backup the Windows registry.
- Run the Registry Editor (Regedt32.exe) and find the following key:
HKEY_LOCAL_MACHINE\System\CurrentControlSet\Services\Tcpip\Parameters
- Add the following registry value:
Value Name: DisableDHCPMediaSense Data Type: REG_DWORD -Boolean Value: 1
- This change will not take effect until the computer is restarted.
Install VMware Client ToolsLogin on the RAC1 virtual machine, then select the "VM > Install VMware Tools..." option from the main VMware Server Console menu.

Click the "Install" button on the subsequent screen.

Click the "Next" button to continue.

Accept the "Typical" option by clicking the "Next" button.

Click the "Install" button to continue.

Set the hardware acceleration when prompted by clicking the "Yes" button and following the instructions on the subsequent screens.

Once the installatin is complete, click the "Finish" button.

The VMware client tools are now installed.
Create Shared DisksShut down the RAC1 virtual machine and create a directory on the host system to hold the shared virtual disks.
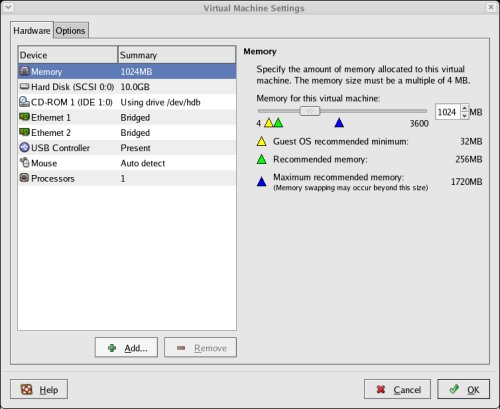
# mkdir -p /u01/VM/sharedOn the VMware Server Console, click the "Edit virtual machine settings" button. On the "Virtual Machine Settings" screen, click the "+ Add" button.

Select the hardware type of "Hard Disk" and click the "Next" button.

Accept the "Create a new virtual disk" option by clicking the "Next" button.

Accept the "SCSI" option by clicking the "Next" button.

Set the disk size to "10.0" GB and uncheck the "Allocate all disk space now" option, then click the "Next" button.

Set the disk name to "/u01/VM/shared/ocr.vmdk" and click the "Advanced" button.

Set the virtual device node to "SCSI 1:1" and the mode to "Independent" and "Persistent", then click the "Finish" button.

Repeat the previous hard disk creation steps 4 more times, using the following values:
- File Name: /u01/VM/shared/votingdisk.vmdk
Virtual Device Node: SCSI 1:2
Mode: Independent and Persistent - File Name: /u01/VM/shared/asm1.vmdk
Virtual Device Node: SCSI 1:3
Mode: Independent and Persistent - File Name: /u01/VM/shared/asm2.vmdk
Virtual Device Node: SCSI 1:4
Mode: Independent and Persistent - File Name: /u01/VM/shared/asm3.vmdk
Virtual Device Node: SCSI 1:5
Mode: Independent and Persistent

Edit the contents of the "/u01/VM/RAC1/RAC1.vmx" file using a text editor, making sure the following entries are present. Some of the tries will already be present, some will not.
disk.locking = "FALSE" diskLib.dataCacheMaxSize = "0" diskLib.dataCacheMaxReadAheadSize = "0" diskLib.dataCacheMinReadAheadSize = "0" diskLib.dataCachePageSize = "4096" diskLib.maxUnsyncedWrites = "0" scsi1.present = "TRUE" scsi1.virtualDev = "lsilogic" scsi1.sharedBus = "VIRTUAL" scsi1:1.present = "TRUE" scsi1:1.mode = "independent-persistent" scsi1:1.fileName = "/u01/VM/shared/ocr.vmdk" scsi1:1.deviceType = "plainDisk" scsi1:1.redo = "" scsi1:2.present = "TRUE" scsi1:2.mode = "independent-persistent" scsi1:2.fileName = "/u01/VM/shared/votingdisk.vmdk" scsi1:2.deviceType = "plainDisk" scsi1:2.redo = "" scsi1:3.present = "TRUE" scsi1:3.mode = "independent-persistent" scsi1:3.fileName = "/u01/VM/shared/asm1.vmdk" scsi1:3.deviceType = "plainDisk" scsi1:3.redo = "" scsi1:4.present = "TRUE" scsi1:4.mode = "independent-persistent" scsi1:4.fileName = "/u01/VM/shared/asm2.vmdk" scsi1:4.deviceType = "plainDisk" scsi1:4.redo = "" scsi1:5.present = "TRUE" scsi1:5.mode = "independent-persistent" scsi1:5.fileName = "/u01/VM/shared/asm3.vmdk" scsi1:5.deviceType = "plainDisk" scsi1:5.redo = ""Start the RAC1 virtual machine by clicking the "Power on this virtual machine" button on the VMware Server Console. When the server has started, log in so you can partition the disks.
Prior to partitioning the disks on Windows Server 2003, you must enable disk automounting. I didn't need to do this, but I guess it makes sense to do as you're told. To enable automounting do the following command at the command prompt, then restart the server.
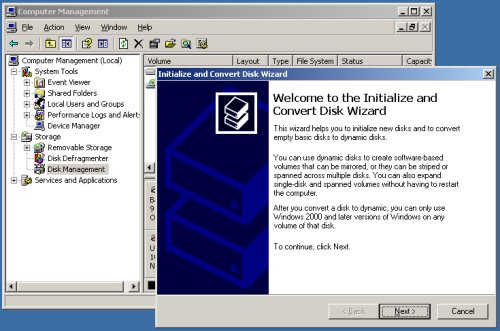
C:\> diskpart DISKPART> automount enable DISKPART> exit C:\>When the server restarts, open the "Computer Management" dialog (Start > All Programs > Administrative Tools > Computer Management) and click on the Disk Management tree node. This action should initiate the "Initialize and Convert Disk Wizard". Click the "Next" button to continue.

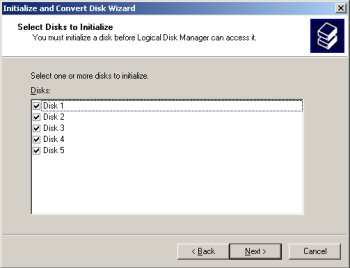
Initialize all 5 disks by clicking the "Next" button.

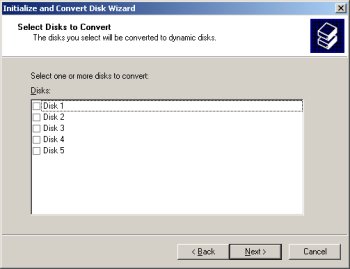
Don't convert any of the disks. Make sure all 5 disks are unchecked, then "Next" button.

Complete the process by clicking the "Finish" button.

Right-click on "Disk 1" and select the "New Partition..." option to start the "New Partition Wizard".

Click the "Next" button to continue.

Select the "Extended partition" option, then click the "Next" button.

Accept the default partition size by clicking the "Next" button.

Complete the partition by clicking the "Finish" button.

The partition will now be displayed with a green bar. Right-click on the partition and select the "New Logical Drive" option to restart the "New Partition Wizard".

Click the "Next" button to continue.

Accept the "Logical drive" option by clicking the "Next" button.

Accept the default partition size by clicking the "Next" button.

Select the "Do not assign a drive letter or drive path" option, then click the "Next" button.

Select the "Do not format this partition" option, then click the "Next" button.

Complete the logical drive by clicking the "Finish" button.

The drive should now be displayed as a healthy drive with a blue bar.

Repeat the previous partitioning steps for the remaining 4 disks.
The shared disks are now configured.
Clone the Virtual MachineThe current version of VMware Server does not include an option to clone a virtual machine, but the following steps illustrate how this can be achieved manually.
Shut down the RAC1 virtual machine and copy the RAC1 virtual machine using the following command.
# cp -R /u01/VM/RAC1 /u01/VM/RAC2Edit the contents of the "/u01/VM/RAC2/RAC1.vmx" file, making the following change.
displayName = "RAC2"Ignore discrepancies with the file names in the "/u01/VM/RAC2" directory. This does not affect the action of the virtual machine.
In the VMware Server Console, select the File > Open menu options and browse for the "/u01/VM/RAC2/RAC1.vmx" file. Once opened, the RAC2 virtual machine is visible on the console. Start the RAC2 virtual machine by clicking the "Power on this virtual machine" button and click the "Create" button on the subsequent "Question" screen.

Open the "Network Connections" screen (Start > All Programs > Accessories > Communications > Network Connections). Amend the IP Addresses of both connections to the correct values for the RAC2 node.

The cloning process sometimes alters the network connection setup, so repeat the steps mentioned previously for removing extra network adapters and renaming the connections.
Open the "System Properties" dialog (Start > Control Panel > System), click on the "Computer Name" tab and click the "Change" button. Enter the name "rac2" then click the "OK" button.

Click all subsequent "OK" buttons to exit the "System Properties" dialog and restart the server when prompted.
Once the RAC2 virtual machine has restarted, start the RAC1 virtual machine. When both nodes have started, check they can both ping all the public and private IP addresses using the following commands.
ping -c 3 rac1 ping -c 3 rac1-priv ping -c 3 rac2 ping -c 3 rac2-privAt this point the virtual IP addresses defined in the hosts file will not work, so don't bother testing them.
It's a good idea to take a snapshot of the virtual machines, so you can repeat the following stages if you run into any problems. To do this, shutdown both virtual machines and issue the following commands.
# cd /u01/VM # tar -cvf RAC-PreClusterware.tar RAC1 RAC2 shared # gzip RAC-PreClusterware.tarThe virtual machine setup is now complete.
Install the Clusterware SoftwareStart the RAC1 and RAC2 virtual machines. The Oracle Clusterware for Windows is very sensitive, so before you start, check the network connection setup on each machine again. Remove and extra network adapters, rename the connections appropriately and check the nodes ping correctly. Make sure your network configuration matches the Checking Network Requirements section of the documentation.
Start the Oracle installer on RAC1.

On the "Welcome" screen, click the "Next" button.

Accept the default inventory location by clicking the "Next" button.

Enter the appropriate name and path for the Oracle Home and click the "Next" button.

Wait while the prerequisite checks are done. If you have any failures correct them and retry the tests before clicking the "Next" button.

The "Specify Cluster Configuration" screen shows only the RAC1 node in the cluster. Click the "Add" button to continue.

Enter the details for the RAC2 node and click the "OK" button.

Click the "Next" button to continue.

The "Specific Network Interface Usage" screen defines how each network interface will be used. Highlight the "public" interface and click the "Edit" button.

Set the "public" interface type to "Public" and click the "OK" button.

Leave the "private" interface as private and click the "Next" button.

On the "Cluster Configuration Storage" screen, highlight disk 1 and click the "Edit" button.

Select the "Place OCR(Primary) on this Partition" option and click the "OK" button.

Highlight disk 2 and click the "Edit" button. Select the "Place Voting Disk on this Partition" option and click the "OK" button.

On the "Cluster Configuration Storage" screen, click the "Next" button and ignore the redundancy warnings by clicking the "OK" button.

On the "Summary" screen, click the "Install" button to continue.

Wait while the installation takes place.

Wait while the configuration assistants run.

The VIPCA will fail, so click the "OK" button on the resulting error screen.

Click the "Next" button and accept the subsequent warning, then click the "Exit" button to leave the installer.

On the RAC1 virtual machine, run the VIPCA manually by issuing the following commands in a command prompt.
cd c:\oracle\product\10.2.0\crs\bin vipca.batClick the "Next" button on the VIPCA welcome screen.

Highlight the "public" interface and click the "Next" button.

Enter the vitual IP alias and address for each node. Once you enter the first alias, the remaining values should default automatically. Click the "Next" button to continue.

Accept the summary information by clicking the "Finish" button.

Wait until the configuration is complete, then click the "OK" button.

Accept the VIPCA results by clicking the "Exit" button.

The status of the finished cluster can be checked by running the cluvfy.bat script as shown below.
C:\oracle\product\10.2.0\crs\BIN>cluvfy.bat stage -post crsinst -n rac1,rac2 Performing post-checks for cluster services setup Checking node reachability... Node reachability check passed from node "rac1". Checking user equivalence... User equivalence check passed for user "Administrator". Checking Cluster manager integrity... Checking CSS daemon... Daemon status check passed for "CSS daemon". Cluster manager integrity check passed. Checking cluster integrity... Cluster integrity check passed Checking OCR integrity... Checking the absence of a non-clustered configuration... All nodes free of non-clustered, local-only configurations. Uniqueness check for OCR device passed. Checking the version of OCR... OCR of correct Version "2" exists. Checking data integrity of OCR... Data integrity check for OCR passed. OCR integrity check passed. Checking CRS integrity... Checking daemon liveness... Liveness check passed for "CRS daemon". Checking daemon liveness... Liveness check passed for "CSS daemon". Checking daemon liveness... Liveness check passed for "EVM daemon". Checking CRS health... CRS health check passed. CRS integrity check passed. Checking node application existence... Checking existence of VIP node application (required) Check passed. Checking existence of ONS node application (optional) Check passed. Checking existence of GSD node application (optional) Check passed. Post-check for cluster services setup was successful. C:\oracle\product\10.2.0\crs\BIN>It's a good idea to take a snapshot of the virtual machines, so you can repeat the following stages if you run into any problems. To do this, shutdown both virtual machines and issue the following commands.
# cd /u01/VM # tar -cvf RAC-PostClusterware.tar RAC1 RAC2 shared # gzip RAC-PostClusterware.tarThe clusterware installation is now complete.
Install the Database Software and Create an ASM InstanceStart the RAC1 and RAC2 virtual machines, login to RAC1 and start the Oracle installer.

On the "Welcome" screen, click the "Next" button.

Select the "Enterprise Edition" option and click the "Next" button.

Enter the name and path for the Oracle Home and click the "Next" button.

Select the "Cluster Installation" option and make sure both RAC nodes are selected, then click the "Next" button.

Wait while the prerequisite checks are done. If you have any failures correct them and retry the tests before clicking the "Next" button.

Select the "Configure Automatic Storage Management (ASM)" option, enter the SYS password for the ASM instance, then click the "Next" button.

Select the "External" redundancy option (no mirroring) and click the "Stamp Disks..." button.

Select the "Add or change label" option and click the "Next" button.

Highlight disks 3-5 and click the "Next" button. Remember, disk0 is the OS, disk1 is the OCR location and disk2 is the voting disk.

Confirm your selection by clicking the "Next" button.

Complete the disk stamp by clicking the "Finish" button.

Select the candidate disks and click the "Next" button.

On the "Summary" screen, click the "Install" button to continue.

Wait while the database software installs.

Once the installation is complete, wait while the configuration assistants run.

When the installation is complete, click the "Exit" button to leave the installer.

It's a good idea to take a snapshot of the virtual machines, so you can repeat the following stages if you run into any problems. To do this, shutdown both virtual machines and issue the following commands.
# cd /u01/VM # tar -cvf RAC-PostASM.tar RAC1 RAC2 shared # gzip RAC-PostASM.tarThe database software installation and ASM creation step is now complete.
Create a Database using the DBCAStart the RAC1 and RAC2 virtual machines, login to RAC1 start the Database Configuration Assistant (Start > All Programs > Oracle - db_1 > Configuration and Migration Tools > Database Configuration Assistant).
On the "Welcome" screen, select the "Oracle Real Application Clusters database" option and click the "Next" button.

Select the "Create a Database" option and click the "Next" button.

Highlight both RAC nodes and click the "Next" button.

Select the "Custom Database" option and click the "Next" button.

Enter the values "RAC.WORLD" and "RAC" for the Global Database Name and SID Prefix respectively, then click the "Next" button.

Accept the management options by clicking the "Next" button. If you are attempting the installation on a server with limited memory, you may prefer not to configure Enterprise Manager at this time.

Enter database passwords then click the "Next" button.

Select the "Automatic Storage Management (ASM)" option, then click the "Next" button.

Select the "DATA" disk group, then click the "Next" button.

Accept the "Use Oracle-Managed Files" database location by the "Next" button.

Check both the "Specify Flash Recovery Area" and "Enable Archiving" options. Enter "+DATA" as the Flash Recovery Area, then click the "Next" button.

Uncheck all but the "Enterprise Manager Repository" option, then click the "Standard Database Components..." button.

Uncheck all but the "Oracle JVM" option, then click the "OK" button, followed by the "Next" button on the previous screen. If you are attempting the installation on a server with limited memory, you may prefer not to install the JVM at this time.

Accept the current database services configuration by clicking the "Next" button.

Select the "Custom" memory management option and accept the default settings by clicking the "Next" button.

Accept the database storage settings by clicking the "Next" button.

Accept the database creation options by clicking the "Finish" button.

Accept the summary information by clicking the "OK" button.

Wait while the database is created.

Once the database creation is complete you are presented with the following screen. Make a note of the information on the screen and click the "Exit" button.

The RAC database creation is now complete.
TNS ConfigurationOnce the installation is complete, the "%ORACLE_HOME%\network\admin\listener.ora" file on each RAC node will contain entries similar to the following.
LISTENER_RAC1 = (DESCRIPTION_LIST = (DESCRIPTION = (ADDRESS = (PROTOCOL = IPC)(KEY = EXTPROC1)) (ADDRESS = (PROTOCOL = TCP)(HOST = rac1-vip.localdomain)(PORT = 1521)(IP = FIRST)) (ADDRESS = (PROTOCOL = TCP)(HOST = 192.168.2.101)(PORT = 1521)(IP = FIRST)) ) ) SID_LIST_LISTENER_RAC1 = (SID_LIST = (SID_DESC = (SID_NAME = PL***tProc) (ORACLE_HOME = C:\oracle\product\10.2.0\db_1) (PROGRAM = extproc) ) )The "%ORACLE_HOME%\network\admin\tnsnames.ora" file on each RAC node will contain entries similar to the following.
RAC = (DESCRIPTION = (ADDRESS = (PROTOCOL = TCP)(HOST = rac1-vip.localdomain)(PORT = 1521)) (ADDRESS = (PROTOCOL = TCP)(HOST = rac2-vip.localdomain)(PORT = 1521)) (LOAD_BALANCE = yes) (CONNECT_DATA = (SERVER = DEDICATED) (SERVICE_NAME = RAC.WORLD) ) ) LISTENERS_RAC = (ADDRESS_LIST = (ADDRESS = (PROTOCOL = TCP)(HOST = rac1-vip.localdomain)(PORT = 1521)) (ADDRESS = (PROTOCOL = TCP)(HOST = rac2-vip.localdomain)(PORT = 1521)) ) RAC2 = (DESCRIPTION = (ADDRESS = (PROTOCOL = TCP)(HOST = rac2-vip.localdomain)(PORT = 1521)) (CONNECT_DATA = (SERVER = DEDICATED) (SERVICE_NAME = RAC.WORLD) (INSTANCE_NAME = RAC2) ) ) RAC1 = (DESCRIPTION = (ADDRESS = (PROTOCOL = TCP)(HOST = rac1-vip.localdomain)(PORT = 1521)) (CONNECT_DATA = (SERVER = DEDICATED) (SERVICE_NAME = RAC.WORLD) (INSTANCE_NAME = RAC1) ) )This configuration allows direct connections to specific instance, or using a load balanced connection to the main service.
C:\>sqlplus / as sysdba SQL*Plus: Release 10.2.0.1.0 - Production on Thu Apr 20 16:58:37 2006 Copyright (c) 1982, 2005, Oracle. All rights reserved. Connected to: Oracle Database 10g Enterprise Edition Release 10.2.0.1.0 - Production With the Partitioning, Real Application Clusters, OLAP and Data Mining options SQL> CONN sys/password@rac1 AS SYSDBA Connected. SQL> SELECT instance_name, host_name FROM v$instance; INSTANCE_NAME HOST_NAME ---------------- ---------------------------------------------------------------- rac1 RAC1 SQL> CONN sys/password@rac2 AS SYSDBA Connected. SQL> SELECT instance_name, host_name FROM v$instance; INSTANCE_NAME HOST_NAME ---------------- ---------------------------------------------------------------- rac2 RAC2 SQL> CONN sys/password@rac AS SYSDBA Connected. SQL> SELECT instance_name, host_name FROM v$instance; INSTANCE_NAME HOST_NAME ---------------- ---------------------------------------------------------------- rac2 RAC2 SQL>Check the Status of the RACThere are several ways to check the status of the RAC. The srvctl utility shows the current configuration and status of the RAC database.
C:\>srvctl config database -d RAC rac1 RAC1 C:\oracle\product\10.2.0\db_1 rac2 RAC2 C:\oracle\product\10.2.0\db_1 C:\> C:\>srvctl status database -d RAC Instance RAC1 is running on node rac1 Instance RAC2 is running on node rac2 C:\>The V$ACTIVE_INSTANCES view can also display the current status of the instances.
C:\>sqlplus / as sysdba SQL*Plus: Release 10.2.0.1.0 - Production on Thu Apr 20 16:58:37 2006 Copyright (c) 1982, 2005, Oracle. All rights reserved. Connected to: Oracle Database 10g Enterprise Edition Release 10.2.0.1.0 - Production With the Partitioning, Real Application Clusters, OLAP and Data Mining options SQL> SELECT * FROM v$active_instances; INST_NUMBER INST_NAME ----------- ------------------------------------------------------------ 1 RAC1:rac1 2 RAC2:rac2 SQL>Finally, the GV$ allow you to display global information for the whole RAC.
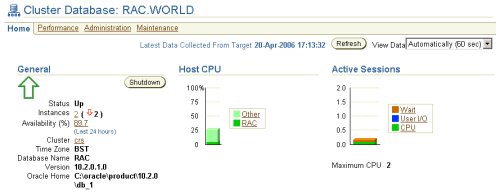
SQL> SELECT inst_id, username, sid, serial# FROM gv$session WHERE username IS NOT NULL; INST_ID USERNAME SID SERIAL# ---------- ------------------------------ ---------- ---------- 2 SYSMAN 126 12 2 DBSNMP 127 41 2 SYS 128 13 2 SYS 130 339 2 SYS 131 2 2 SYS 132 2 2 SYS 133 3 2 DBSNMP 135 43 2 SYS 153 13 1 SYSMAN 119 36 1 SYSMAN 120 7 INST_ID USERNAME SID SERIAL# ---------- ------------------------------ ---------- ---------- 1 SYSMAN 121 25 1 SYS 122 1 1 SYS 123 3 1 SYS 124 4 1 SYSMAN 125 12 1 SYSMAN 130 5 1 SYSMAN 132 3 1 DBSNMP 133 1 1 DBSNMP 137 11 1 SYS 143 126 1 SYS 152 30 22 rows selected. SQL>If you have configured Enterprise Manager, it can be used to view the configuration and current status of the database.

For more information see:
- Oracle Database 10g Release 2 (10.2.0.1) RAC Installation On CentOS 4 Using VMware Server
- Build Your Own Oracle RAC 10g Release 2 Cluster on Linux and FireWire
- RACing ahead with Oracle on VMware Series (Start of series)
- Installation Guide for Microsoft Windows (10.2)
- Oracle Clusterware and Oracle Real Application Clusters Installation Guide for Microsoft Windows Platforms (10.2)