我们知道,在实际开发中为了解耦,或者提高用户体验,都会采用到异步的方式。这里举个简单的例子,在用户注册的sh时候,一般我们都会要求手机验证码验证,邮箱验证,而这都依赖于第三方。这种情况下,我们一般会通过新起一个线程或者消息中间件的方式去处理。
其实在spring中,本身就提供了publish-event-listener机制还有异步任务机制。通过这两种机制,能很好的帮助我们解耦我们的应用跟代码的管理
publish-event-listener机制:
我们先看代码:
/**
 * 配置类,主要为了扫面组件
 */
@Configuration
@ComponentScan("com.spring.publishevent")
public class Config {
}


/**
 *
 * @Description: 事件类,必须实现ApplicationEvent
 *
 */
public class MyEvent extends ApplicationEvent {

    private String msg;

    public MyEvent(Object source, String msg) {
        super(source);
        this.msg = msg;
    }

    public String getMsg() {
        return msg;
    }
}

/**
 * @Author: dmz
 * @Description: 观察者,必须实现ApplicationListener,并指定泛型为我们的自定义事件
 * @Date: Create in 0:23 2019/3/15
 */
@Component
public class MyListener implements ApplicationListener<MyEvent> {
    @Override
    public void onApplicationEvent(MyEvent event) {
        System.out.println(event.getMsg());
    }
}

/**
 * @Author: dmz
 * @Description: 发布者,直接用我们的上下文对象进行发布,它继承了ApplicationEventPublisher
 * @Date: Create in 0:42 2019/3/15
 */
@Component
public class MyPublisher {
    @Autowired
    private ApplicationContext applicationContext;

    public void publish() {
        applicationContext.publishEvent(new MyEvent(this, "hello event"));
    }
}
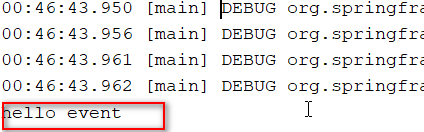
运行结果:
原理分析:我们debug追踪下代码

核心代码就是上面这一句:
先看第一个方法:getApplicationEventMulticaster()

它其实就是返回当前类持有的ApplicationEventMulticaster这个接口的实现的引用,我们看下这个接口上的注释
/**
 * Interface to be implemented by objects that can manage a number of
 * {@link ApplicationListener} objects, and publish events to them.
...........
英文稍微好些的同学就能知道,这个接口其实就是管理了我们的listener,并且可以向它们发布事件
现在我们知道了getApplicationEventMulticaster()返回的其实一个发布者,我们的容器applicationContext其实就是调用这个对象去发布事件
并且它管理了我们所有的listener。
接下来我们继续看:multicastEvent(......)这个方法
 getApplicationListeners(event, type),其实就是返回了当前对象所管理的监听了当前事件的listener,之后在调用listener的invokeListener(listener, event)方法。
 这段代码我们暂时忽略,稍后再讲
现在我们继续跟进invokeListener(....)方法,发现最终会调用到
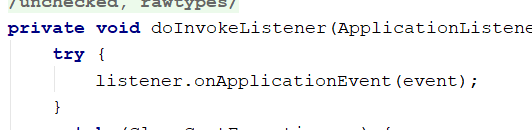
也就是我们实现了applicationListener接口所实现的方法,不难发现整个过程是同步的。
不过虽然是同步的,也能解耦我们的代码,这并不冲突。不仅如此,还能提高我们代码的复用性
在spring4.2以后,有一种更优雅的方式实现发布监听模式,不再需要我们去实现那么多接口,采用注解即可实现,代码如下:(配置类代码不变)
/**
 * @Author: dmz
 * @Description:
 * @Date: Create in 0:20 2019/3/15
 */
public class MyEvent {

    private String msg;

    public MyEvent(String msg) {
        this.msg = msg;
    }

    public String getMsg() {
        return msg;
    }
}


/**
 * @Author: dmz
 * @Description:
 * @Date: Create in 1:32 2019/3/15
 */
@Data
@AllArgsConstructor
public class MySecondEvent {
    private String msg;
}
/**
 * @Author: dmz
 * @Description:
 * @Date: Create in 0:23 2019/3/15
 */
@Component
public class MyListener{
    @EventListener
    public void onApplicationEvent(MyEvent event) {
        System.out.println(event.getMsg());
    }

    @EventListener
    public void onApplicationEvent(MySecondEvent event) {
        System.out.println(event.getMsg());
    }

}
/**
 * @Author: dmz
 * @Description:
 * @Date: Create in 0:32 2019/3/15
 */
public class Main {
    public static void main(String[] args) {
        AnnotationConfigApplicationContext applicationContext =
                new AnnotationConfigApplicationContext(Config.class);
        applicationContext.publishEvent(new MyEvent("hello event"));
        applicationContext.publishEvent(new MySecondEvent("hello secondEvent"));
    }
}
运行结果如下:
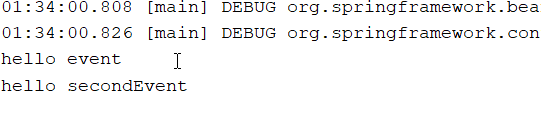
原理不再分析了,其实跟第一种差不多
异步处理机制(多线程):
先看代码:
package com.spring.asycn.config;

import org.springframework.aop.interceptor.AsyncUncaughtExceptionHandler;
import org.springframework.context.annotation.ComponentScan;
import org.springframework.context.annotation.Configuration;
import org.springframework.scheduling.annotation.AsyncConfigurer;
import org.springframework.scheduling.annotation.EnableAsync;
import org.springframework.scheduling.concurrent.ThreadPoolTaskExecutor;

import java.lang.reflect.Method;
import java.util.concurrent.Executor;

/**
 * @Author: dmz
 * @Description:
 * @Date: Create in 0:23 2019/3/16
 */
@Configuration
@EnableAsync
@ComponentScan("com.spring.asycn.service")
public class AsyncConfig implements AsyncConfigurer {

    @Override
    public Executor getAsyncExecutor() {
        ThreadPoolTaskExecutor threadPoolTaskExecutor = new ThreadPoolTaskExecutor();
        threadPoolTaskExecutor.setCorePoolSize(10);
        threadPoolTaskExecutor.setMaxPoolSize(50);
        threadPoolTaskExecutor.setQueueCapacity(5);
        threadPoolTaskExecutor.setKeepAliveSeconds(1);
        threadPoolTaskExecutor.initialize();
        return threadPoolTaskExecutor;
    }

    @Override
    public AsyncUncaughtExceptionHandler getAsyncUncaughtExceptionHandler() {
        return new AsyncUncaughtExceptionHandler() {
            @Override
            public void handleUncaughtException(Throwable throwable, Method method, Object... objects) {
                System.out.println("出现异常啦~~~~~~");
            }
        };
    }
}


package com.spring.asycn.service;

import org.springframework.stereotype.Component;

/**
 * @Author: dmz
 * @Description:
 * @Date: Create in 0:24 2019/3/16
 */
@Component
public class SyncService {
    //@Async
    public  void test(int i) {
            System.out.println(Thread.currentThread().getName() + "执行方法______________"+i);
    }
}

package com.spring.asycn;

import com.spring.asycn.config.AsyncConfig;
import com.spring.asycn.service.SyncService;
import org.springframework.context.annotation.AnnotationConfigApplicationContext;

/**
 * @Author: dmz
 * @Description:
 * @Date: Create in 0:23 2019/3/16
 */
public class Main {
    public static void main(String[] args) {
        AnnotationConfigApplicationContext applicationContext =
                new AnnotationConfigApplicationContext(AsyncConfig.class);
        SyncService bean = applicationContext.getBean(SyncService.class);
        for (int i = 0; i < 100; i++) {
            bean.test(i);
        }
    }
}
我们将test方法上的@Async注解打开跟注释分别执行可以得到如下结果:
这个注释掉的结果:
 :
:
这是打开的结果:

很明显,一个是单线程,一个是多线程并发执行,线程池就是我们配置的线程池