我们的网站一般放在虚拟空间或者服务器上,图片如果存在本地目录,会占用很多空间和流量,还增加了负担,好的办法是把图片存放到云储存服务里面,平时用url去拿
云储存:普遍说又拍云和七牛比较好,看到七牛免费额度很大,网上评价也挺好的,我就选了七牛
编辑器:我用的是百度的UEditor编辑器,之后需要修改一些的开放的类和js文件
下面写一下c#版本的修改方法(java版本在下一篇)
一、集成UEditor
1、在项目中加入UEditor
在UEditor的下载页,可以下载到最新的1.4.3.3 .Net版本(UTF-8)
把解压出的文件夹放进项目
2、添加Newtonsoft.Json.dll引用
项目 -> 引用 -> 添加引用 -> 浏览(最近),找到UEditor etBinNewtonsoft.Json.dll添加引用
3、将UEditor嵌入页面
新建一个页面,内容是:
<%@ Page Language="C#" AutoEventWireup="true" CodeBehind="UEditorPage.aspx.cs" Inherits="NetImgUpload.UEditorPage" %>

<!DOCTYPE html>

<html xmlns="http://www.w3.org/1999/xhtml">
<head runat="server">
<meta http-equiv="Content-Type" content="text/html; charset=utf-8"/>
    <title>UEditor上传图片到七牛(.net)</title>
    <script src="/UEditor/ueditor.config.js" type="text/javascript"></script>
    <script src="/UEditor/ueditor.all.js" type="text/javascript"></script>
</head>
<body>
    <form id="form1" runat="server">
        <script type="text/plain" id="editor" name="editContent" style="600px; height:300px;"></script>
        <script type="text/javascript">
            var ue = UE.getEditor('editor');
        </script>
    </form>
</body>
</html>
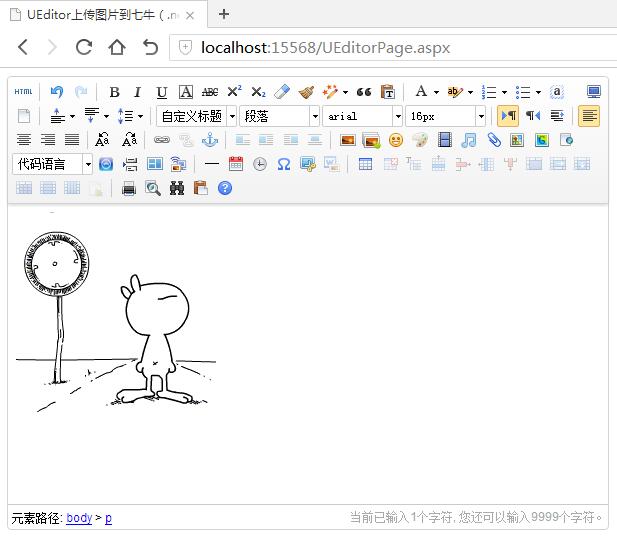
4、运行效果
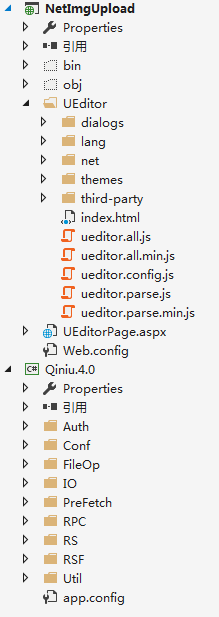
最后的文件目录:

页面的运行效果:

二、集成七牛sdk
1、下载七牛sdk
在七牛sdk的下载页,找到c#(服务端)点击安装,下载最新的v6.1.5版本
把解压出的文件夹放在项目同一目录
(sdk是为了方便我们开发而写的一个工具包,七牛账户的申请、添加对象储存都非常简单,这里就不说了)
2、引入七牛sdk
解决方案 -> 添加 -> 现有项目,找到QiniuSDKQiniuQiniu.4.0.csproj添加现有项目
项目 -> 引用 -> 项目(解决方案),勾选Qiniu.4.0添加引用
3、修改Newtonsoft.Json.dll引用
七牛sdk里面默认引用了.net 2.0的Newtonsoft.Json.dll,和之前UEditor里引用的.net 4.0版不一样,需要改成一样的,不然之后图片上传会失败
删除七牛sdk项目引用里的Newtonsoft.Json.dll,然后添加引用UEditor里的Newtonsoft.Json.dll,步骤和上面一样
最后的文件目录:
三、上传图片到七牛
1、添加QiniuHelper.cs帮助类
这是为了接下来方便修改写的一个工具类,使用它可以省一些重复代码
using System;
using System.Collections.Generic;
using System.Configuration;
using System.IO;
using Qiniu.IO;
using Qiniu.RS;

namespace NetImgUpload
{
    /// <summary>
    /// 七牛工具类
    /// </summary>
    public class QiniuHelper
    {
        /// <summary>
        /// 空间名
        /// </summary>
        private static readonly string Scope = ConfigurationManager.AppSettings["QiniuScope"];

        /// <summary>
        /// 域名
        /// </summary>
        private static readonly string Url = ConfigurationManager.AppSettings["QiniuUrl"];

        /// <summary>
        /// 插入数据并返回交互结果
        /// </summary>
        /// <param name="imageFile"></param>
        /// <returns></returns>
        public static PutRet GetResult(byte[] imageFile)
        {
            var target = new IOClient();
            var extra = new PutExtra
            {
                MimeType = "text/plain",
                Crc32 = 123,
                CheckCrc = CheckCrcType.CHECK,
                Params = new Dictionary<string, string>()
            };
            var put = new PutPolicy(Scope);
            return target.Put(put.Token(), Guid.NewGuid().ToString(), new MemoryStream(imageFile), extra);
        }

        /// <summary>
        /// 获得url地址
        /// </summary>
        /// <returns></returns>
        public static string GetUrl(string key)
        {
            return GetPolicy.MakeBaseUrl(Url, key);
        }

        /// <summary>
        /// 删除数据
        /// </summary>
        /// <param name="key"></param>
        public static void DeleteData(string key)
        {
            var client = new RSClient();
            client.Delete(new EntryPath(Scope, key));
        }

        /// <summary>
        /// 批量删除数据
        /// </summary>
        /// <param name="keys"></param>
        public static void DeleteDatas(string keys)
        {
            var client = new RSClient();
            var entryPaths = new List<EntryPath>();
            foreach (string key in keys.Split(','))
            {
                entryPaths.Add(new EntryPath(Scope, key.Replace("'", "")));
            }
            client.BatchDelete(entryPaths.ToArray());
        }
    }
}
2、修改UploadHandler.cs类
找到UEditor etApp_CodeUploadHandler.cs类,找到以下代码:
if (!Directory.Exists(Path.GetDirectoryName(localPath)))
{
    Directory.CreateDirectory(Path.GetDirectoryName(localPath));
}
File.WriteAllBytes(localPath, uploadFileBytes);
Result.Url = savePath;
Result.State = UploadState.Success;
修改成:
#region 不再需要储存文件到服务器

//if (!Directory.Exists(Path.GetDirectoryName(localPath)))
//{
//    Directory.CreateDirectory(Path.GetDirectoryName(localPath));
//}
//File.WriteAllBytes(localPath, uploadFileBytes);
//Result.Url = savePath;
//Result.State = UploadState.Success;

#endregion

#region 上传文件到七牛

var ret = QiniuHelper.GetResult(uploadFileBytes);

if (ret.OK)
{
    Result.Url = QiniuHelper.GetUrl(ret.key);
    Result.State = UploadState.Success;
}

#endregion
这样原来图片上传到本地的方式就改成上传到七牛了
3、修改七牛sdk的Config.cs
找到QiniuSDKQiniuConfConfig.cs类,找到以下代码:
#region 帐户信息
/// <summary>
/// 七牛提供的公钥,用于识别用户
/// </summary>
public static string ACCESS_KEY = "<Please apply your access key>";
/// <summary>
/// 七牛提供的秘钥,不要在客户端初始化该变量
/// </summary>
public static string SECRET_KEY = "<Dont send your secret key to anyone>";
#endregion
修改成:
#region 帐户信息
/// <summary>
/// 七牛提供的公钥,用于识别用户
/// </summary>
public static string ACCESS_KEY = ConfigurationManager.AppSettings["QiniuAccessKey"];
/// <summary>
/// 七牛提供的秘钥,不要在客户端初始化该变量
/// </summary>
public static string SECRET_KEY = ConfigurationManager.AppSettings["QiniuSecretKey"];
#endregion
4、修改网站的web.config
在configuration节点的appSettings节点下增加:
<!--七牛的相关配置-->
<add key="QiniuScope" value="xxxx" />
<add key="QiniuUrl" value="xxxxxxxxx.bkt.clouddn.com" />
<add key="QiniuAccessKey" value="xxxxxxxxxxxxxxxxxxxxxxxxxxxxxxxxxxxxxxxx" />
<add key="QiniuSecretKey" value="xxxxxxxxxxxxxxxxxxxxxxxxxxxxxxxxxxxxxxxx" />
QiniuScope是存储空间的名称
QiniuUrl是存储空间的域名(也可以用自己的正式域名)
QiniuAccessKey和QiniuSecretKey是用户的一对密钥,在个人面板 -> 个人中心 -> 密钥管理 界面中可以创建、查看
5、修改UEditor的配置
(1)、修改config.json
找到UEditor etconfig.json文件,修改imageUrlPrefix(图片访问路径前缀)为空(因为上传到七牛了,url是一个完整的路径,不需要前缀)
(2)、关闭自动本地保存
找到UEditorueditor.all.js文件,查找"'contentchange': function () {",在这个函数内增加代码:
'contentchange': function () {

    //关闭自动本地保存
    if (!me.getOpt('enableAutoSave')) {
        return;
    }
这样就不会经常跳出烦人的提示框了
6、图片上传运行效果
最后测试一下图片上传是否成功
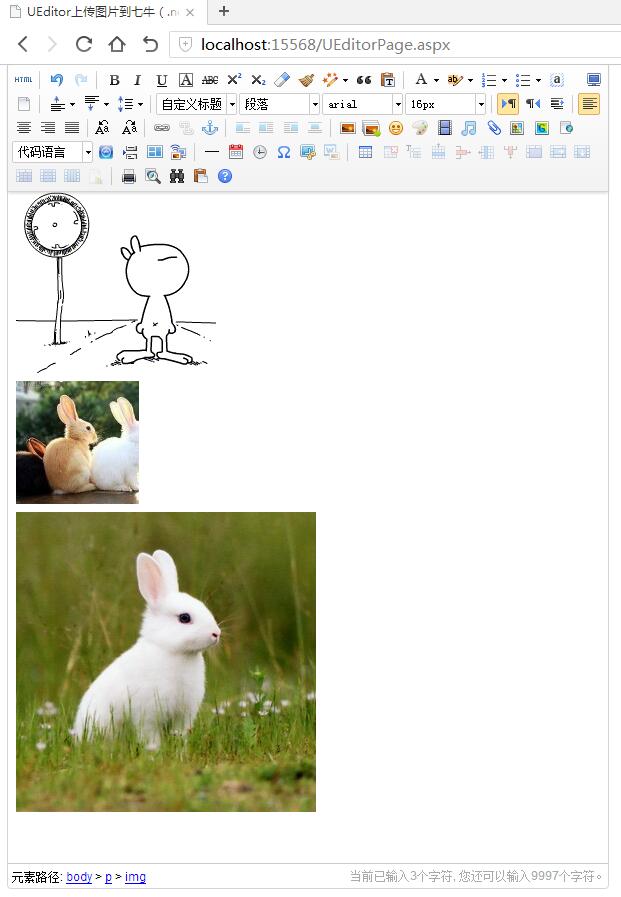
单图片上传:
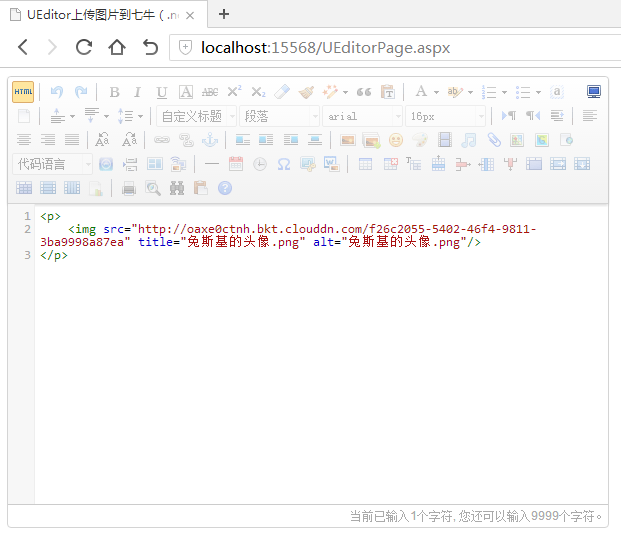
内容里src已经变成了七牛的地址了
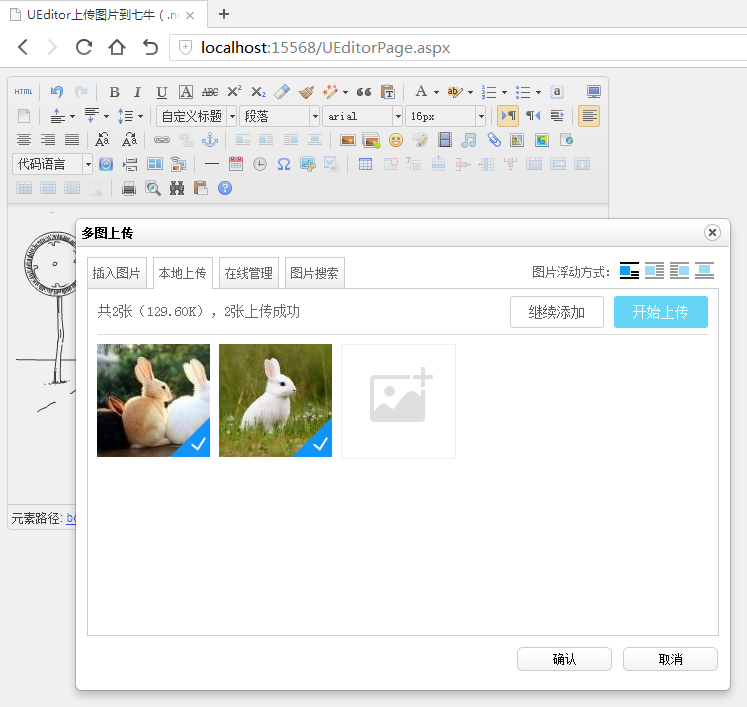
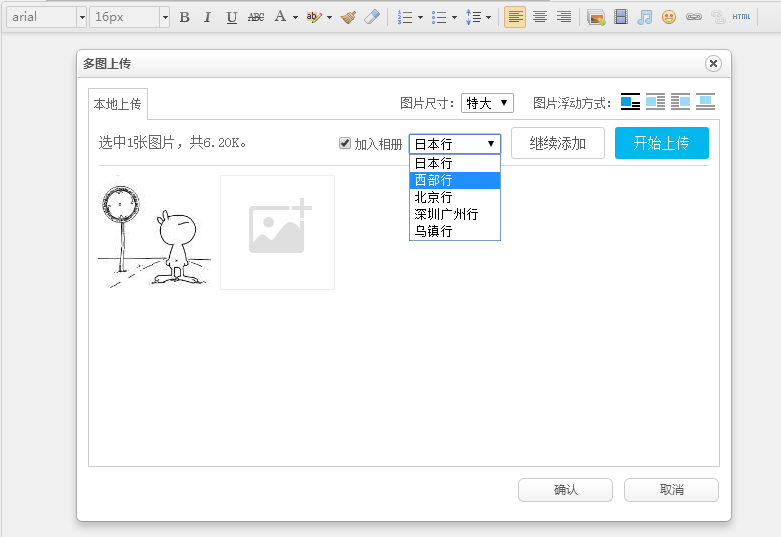
再看多图片上传:
7、demo下载
最新的代码地址:https://github.com/ctxsdhy/cnblogs-example
四、其他扩展
这是我的博客里面使用的,设置所有图片尺寸和加入相册功能,其实就是在UEditor里修改几处js,然后增加一个加入相册服务
方法暂时不整理了,博客的代码在这里:https://github.com/ctxsdhy/xsblog