转载自上海-悠悠:https://www.cnblogs.com/yoyoketang/p/8269713.html
python提供了两个模块来实现多线程thread 和threading ,thread 有一些缺点,在threading 得到了弥补,为了不浪费你和时间,所以我们直接学习threading 就可以了。
Python中使用线程有两种方式:函数或者用类来包装线程对象
1、threading.Thread参数介绍:
class Thread(_Verbose)

   __init__(self, group=None, target=None, name=None, args=(), kwargs=None, verbose=None)

       *group*:group参数必须为空,参数group是预留的,用于将来扩展;

       *target*: 参数target是一个可调用对象(也称为活动[activity]),在线程启动后执行

       *name*: 参数name是线程的名字。默认值为“Thread-N“,N是一个数字。

       *args*:传递给线程函数target的参数,他必须是个tuple类型.

       *kwargs*:kwargs表示关键字参数。字典类型 {}.
2、函数式
1)不带参数
# 多进程函数式-无参数
import threading
import time
def eat():
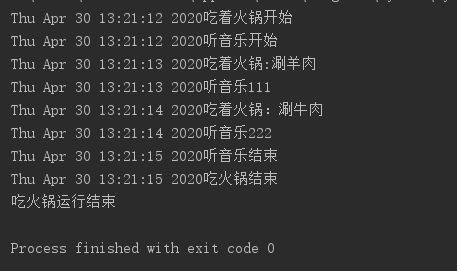
print("%s吃着火锅开始"%time.ctime())
time.sleep(1)
print("%s吃着火锅:涮羊肉"%time.ctime())
time.sleep(1)
print("%s吃着火锅:涮牛肉" % time.ctime())
time.sleep(1)
print("%s吃火锅结束" % time.ctime())
def listen():
print("%s听音乐开始"%time.ctime())
time.sleep(1)
print("%s听音乐111"%time.ctime())
time.sleep(1)
print("%s听音乐222"%time.ctime())
time.sleep(1)
print("%s听音乐结束"%time.ctime())
if __name__ == '__main__':
threads=[]#创建线程组数
#创建线程1,并添加到线程组数
t1=threading.Thread(target=eat)
threads.append(t1)
#创建线程2,并添加到线程组数
t2=threading.Thread(target=listen)
threads.append(t2)
#启动线程
for i in threads:
i.start()

2)带参数
# 多进程函数式-带参数
import threading
import time
def eat(threadname,name):
    print("%s吃着%s开始"%(time.ctime(),threadname))
    time.sleep(1)
    print("%s吃着火锅:涮羊肉"%time.ctime())
    time.sleep(1)
    print("%s吃着火锅:涮牛肉" % time.ctime())
    time.sleep(1)
    print("%s吃%s结束" % (time.ctime(),threadname))
    print("%s运行结束"%name)

def listen(threadname):
    print("%s听%s开始"%(time.ctime(),threadname))
    time.sleep(1)
    print("%s听音乐111"%time.ctime())
    time.sleep(1)
    print("%s听音乐222"%time.ctime())
    time.sleep(1)
    print("%s听音乐结束"%time.ctime())

if __name__ == '__main__':
    threads=[]#创建线程组数
    #参数使用args,传元组
    t1=threading.Thread(target=eat,args=("火锅","吃火锅",))
    #参数使用kwargs,传字典
    # t1=threading.Thread(target=eat,kwargs={"threadname":"火锅","name":"吃火锅"})
    threads.append(t1)
    t2=threading.Thread(target=listen,args=("音乐",))
    threads.append(t2)
    #启动线程
    for i in threads:
        i.start()
 注意:参数后面需要多加一个“,”,不然会报错。
3、类封装式
我们可以通过直接从 threading.Thread 继承创建一个新的子类,并实例化后调用 start() 方法启动新线程,即它调用了线程的 run() 方法。
start()和run()方法的区别
1.start()方法 开始线程活动。
对每一个线程对象来说它只能被调用一次,它安排对象在一个另外的单独线程中调用run()方法(而非当前所处线程)。
当该方法在同一个线程对象中被调用超过一次时,会引入RuntimeError(运行时错误)。
2.run()方法 代表了线程活动的方法。
你可以在子类中重写此方法。标准run()方法调用了传递给对象的构造函数的可调对象作为目标参数,如果有这样的参数的话,顺序和关键字参数分别从args和kargs取得
#类封装式
import threading
import time
def eat(people):
    print("%s吃火锅的小伙伴-羊肉:%s"%(time.ctime(),people))
    time.sleep(1)
    print("%s吃火锅的小伙伴-牛肉:%s"%(time.ctime(),people))

class myThread(threading.Thread):#继承父类的threading.Thread
    def __init__(self,people,name):
        '''重写threading.Thread初始化内容'''
        threading.Thread.__init__(self)
        self.threadname=name
        self.people=people

    def run(self):#把要执行的代码写到run函数里面  线程在创建后会直接运行run函数
        '''重写run方法'''
        print("开始线程"+self.threadname)
        eat(self.people)#执行任务
        print("结束线程:%s"%self.threadname)

if __name__ == '__main__':
    #创建线程
    thread_1=myThread("小明","Thread-1")
    thread_2=myThread("小红","Thread_2")

    thread_1.start()
    thread_2.start()

    time.sleep(1)
    print("退出主线程")
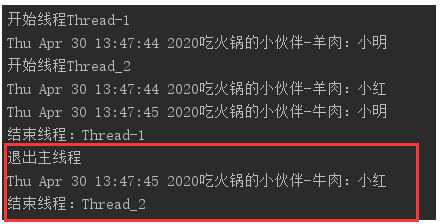
备注:这里运行结果会有个问题,主线程已经退出了,子线程Thread-1和Thread-2还在跑。这就是后面需要讲的守护线程了。。。
4、守护线程和阻塞
上面的演示中,出现了主线程结束,子线程还在继续跑的情景。
所以需要修改该情景:
场景一:主线程结束了,子线程必须也跟着结束
场景二:主线程等待子线程结束后再运行。
1)守护线程setDaemon()
实现场景一:
主线程中调用了thread.setDaemon(),这个的意思是,把主线程设置为守护线程,这时候,要是主线程执行结束了,就不管子线程是否完成,一并和主线程退出.(敲黑板:必须在start()方法调用之前设置,如果不设置为守护线程,程序会被无限挂起。)
#使用守护进程
# coding=utf-8
import threading
import time

def eat(people):
    print("%s 吃火锅的小伙伴-羊肉:%s" % (time.ctime(),people))
    time.sleep(1)
    print("%s 吃火锅的小伙伴-鱼丸:%s" % (time.ctime(),people))

class myThread (threading.Thread):   # 继承父类threading.Thread
    def __init__(self, people, name):
        '''重写threading.Thread初始化内容'''
        threading.Thread.__init__(self)
        self.threadName = name
        self.people = people

    def run(self):   # 把要执行的代码写到run函数里面 线程在创建后会直接运行run函数
        '''重写run方法'''
        print("开始线程: " + self.threadName)

        eat(self.people)     # 执行任务
        print("结束线程: " + self.name)

if __name__ == '__main__':
    print("请小伙伴开始吃火锅:!!!")
    # 创建新线程
    thread1 = myThread("小明", "Thread-1")
    thread2 = myThread("小红", "Thread-2")

    # 守护线程setDaemon(True)
    thread1.setDaemon(True)       # 必须在start之前
    thread2.setDaemon(True)

    # 开启线程
    thread1.start()
    thread2.start()

    time.sleep(1)
    print("退出主线程:吃火锅结束,结账走人")

2)阻塞主线程join(timeout)
1.如果想让主线程等待子线程结束后再运行的话,就需要用到join(),此方法是在start之后(与setDaemon相反)
2.join(timeout)此方法有个timeout参数,是线程超时时间设置。
#阻塞主线程案例
import threading
import time

def eat(people):
    print("%s吃火锅的小伙伴-羊肉%s"%(time.ctime(),people))
    time.sleep(1)
    print("%s吃火锅的小伙伴-牛肉%s"%(time.ctime(),people))

class myThread(threading.Thread):
    def __init__(self,people,threadname):
        threading.Thread.__init__(self)
        self.people=people
        self.threadname=threadname

    def run(self):#把要执行的代码写到run函数里面 线程在创建后会直接运行run函数
        print("开始线程:"+self.threadname)
        eat(self.people)#执行任务
        print("结束线程:"+self.threadname)

if __name__ == '__main__':
    print("请小伙伴们吃火锅")
    #创建新线程
    thread_1=myThread("小明","thread_1")
    thread_2=myThread("小红","thread-2")
    #开启线程
    thread_1.start()
    thread_2.start()
    #阻塞主线程,等子线程结束
    thread_1.join()
    thread_2.join()

    time.sleep(1)
    print("主线程结束,吃火锅结束")

5、线程同步
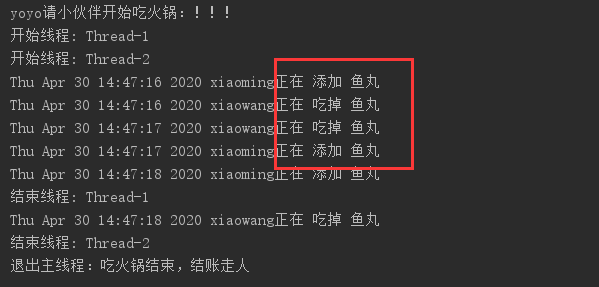
关于吃火锅的场景,小伙伴并不陌生,吃火锅的时候a同学往锅里下鱼丸,b同学同时去吃掉鱼丸,有可能会导致吃到生的鱼丸。
为了避免这种情况,在下鱼丸的过程中,先锁定操作,让吃火锅的小伙伴停一会,等鱼丸熟了再开吃,那么python如何模拟这种场景呢?
1)未加锁
import threading
import time

def chiHuoGuo(people, do):
    for i in range(3):
        time.sleep(1)
        print("%s %s正在 %s 鱼丸"% (time.ctime(), people, do))


class myThread (threading.Thread):   # 继承父类threading.Thread
    def __init__(self, people, name, do):
        '''重写threading.Thread初始化内容'''
        threading.Thread.__init__(self)
        self.threadName = name
        self.people = people
        self.do = do

    def run(self):   # 把要执行的代码写到run函数里面 线程在创建后会直接运行run函数
        '''重写run方法'''
        print("开始线程: " + self.threadName)
        chiHuoGuo(self.people, self.do)     # 执行任务
        print("结束线程: " + self.name)
if __name__ == '__main__':
    print("yoyo请小伙伴开始吃火锅:!!!")
    # 设置线程组
    threads = []
    # 创建新线程
    thread1 = myThread("xiaoming", "Thread-1", "添加")
    thread2 = myThread("xiaowang", "Thread-2", "吃掉")
    # 添加到线程组
    threads.append(thread1)
    threads.append(thread2)
    # 开启线程
    for thread in threads:
        thread.start()
    # 阻塞主线程,等子线程结束
    for thread in threads:
        thread.join()
    time.sleep(1)
    print("退出主线程:吃火锅结束,结账走人")
2)线程同步(加锁)
import threading
import time

def chiHuoGuo(people, do):
    for i in range(3):
        time.sleep(1)
        print("%s %s正在 %s 鱼丸"% (time.ctime(), people, do))


class myThread (threading.Thread):   # 继承父类threading.Thread
    lock=threading.Lock()#生成一个全局锁

    def __init__(self, people, name, do):
        '''重写threading.Thread初始化内容'''
        threading.Thread.__init__(self)
        self.threadName = name
        self.people = people
        self.do = do

    def run(self):   # 把要执行的代码写到run函数里面 线程在创建后会直接运行run函数
        '''重写run方法'''
        print("开始线程: " + self.threadName)
        self.lock.acquire()#执行任务前锁定线程
        chiHuoGuo(self.people, self.do)     # 执行任务
        self.lock.release()#执行完成后,释放锁
        print("结束线程: " + self.name)
if __name__ == '__main__':
    print("yoyo请小伙伴开始吃火锅:!!!")
    # 设置线程组
    threads = []
    # 创建新线程
    thread1 = myThread("xiaoming", "Thread-1", "添加")
    thread2 = myThread("xiaowang", "Thread-2", "吃掉")
    # 添加到线程组
    threads.append(thread1)
    threads.append(thread2)
    # 开启线程
    for thread in threads:
        thread.start()
    # 阻塞主线程,等子线程结束
    for thread in threads:
        thread.join()
    time.sleep(1)
    print("退出主线程:吃火锅结束,结账走人")

6、python的多线程是假的多线程
因为Python解释器执行代码时,有一个GIL锁:Global Interpreter Lock,任何Python线程执行前,必须先获得GIL锁,然后,每执行100条字节码,解释器就自动释放GIL锁,让别的线程有机会执行。这个GIL全局锁实际上把所有线程的执行代码都给上了锁,所以,多线程在Python中只能交替执行,即使100个线程跑在100核CPU上,也只能用到1个核。GIL是Python解释器设计的历史遗留问题,通常我们用的解释器是官方实现的CPython,要真正利用多核,除非重写一个不带GIL的解释器。
所以,在Python中,可以使用多线程,但不要指望能有效利用多核。如果一定要通过多线程利用多核,那只能通过C扩展来实现,不过这样就失去了Python简单易用的特点。
不过,也不用过于担心,Python虽然不能利用多线程实现多核任务,但可以通过多进程实现多核任务。多个Python进程有各自独立的GIL锁,互不影响。