两种模式:队列模式/主题模式
pom.xml

<dependency>
        <groupId>org.apache.activemq</groupId>
        <artifactId>activemq-all</artifactId>
        <version>5.15.9</version>
</dependency>
队列模式,其实就是分食模式。
比如生产方发了 10条消息到 activeMQ 服务器, 而此时有多个 消费方,那么这些消费方就会瓜分这些10条消息,一条消息只会被一个消费方得到。
主题模式,就是订阅模式。
比如生产方发了10条消息,而此时有多个消费方,那么多个消费方都能得到这 10条消息,就如同订阅公众号那样。
队列模式:
1. 首先运行两次 TestConsumer 类,以启动两个不同的消费者
2. 运行一次 TestProducer, 以启动 生产者
生产者生产100个,两个消费者瓜分
消费者:
public class TestConsumer {
    //服务地址,端口默认61616
    private static final String url="tcp://127.0.0.1:61616";
    //这次消费的消息名称
    private static final String topicName="queue_style";

    //消费者有可能是多个,为了区分不同的消费者,为其创建随机名称
    private static final String consumerName="consumer-" + RandomUtil.randomString(5);
    public static void main(String[] args) throws JMSException {
        //0. 先判断端口是否启动了 Active MQ 服务器
        ActiveMQUtil.checkServer();
        System.out.printf("%s 消费者启动了。 %n", consumerName);

        //1.创建ConnectiongFactory,绑定地址
        ConnectionFactory factory=new ActiveMQConnectionFactory(url);
        //2.创建Connection
        Connection connection= factory.createConnection();
        //3.启动连接
        connection.start();
        //4.创建会话
        Session session=connection.createSession(false, Session.AUTO_ACKNOWLEDGE);
        //5.创建一个目标 (主题类型)
        Destination destination=session.createQueue(topicName);
        //6.创建一个消费者
        MessageConsumer consumer=session.createConsumer(destination);
        //7.创建一个监听器
        consumer.setMessageListener(new MessageListener() {

            public void onMessage(Message arg0) {
                // TODO Auto-generated method stub
                TextMessage textMessage=(TextMessage)arg0;
                try {
                    System.out.println(consumerName +" 接收消息:"+textMessage.getText());
                } catch (JMSException e) {
                    // TODO Auto-generated catch block
                    e.printStackTrace();
                }

            }
        });

        //8. 因为不知道什么时候有,所以没法主动关闭,就不关闭了,一直处于监听状态
        //connection.close();
    }
}
生产者:
public class TestProducer {

    //服务地址,端口默认61616
    private static final String url="tcp://127.0.0.1:61616";
    //这次发送的消息名称
    private static final String topicName="queue_style";
    public static void main(String[] args) throws JMSException {
        //0. 先判断端口是否启动了  Active MQ 服务器
        ActiveMQUtil.checkServer();
        //1.创建ConnectiongFactory,绑定地址
        ConnectionFactory factory=new ActiveMQConnectionFactory(url);
        //2.创建Connection
        Connection connection= factory.createConnection();
        //3.启动连接
        connection.start();
        //4.创建会话
        Session session=connection.createSession(false, Session.AUTO_ACKNOWLEDGE);
        //5.创建一个目标 (队列类型)
        Destination destination=session.createQueue(topicName);
        //6.创建一个生产者
        MessageProducer producer=session.createProducer(destination);


        for (int i = 0; i < 100; i++) {
            //7.创建消息
            TextMessage textMessage=session.createTextMessage("队列消息-"+i);
            //8.发送消息
            producer.send(textMessage);
            System.out.println("发送:"+textMessage.getText());
        }
        //7. 关闭连接
        connection.close();
    }
}
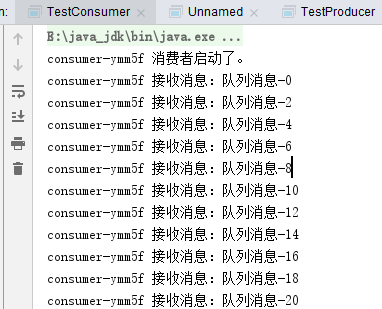
2个consumer:

生产者生产:


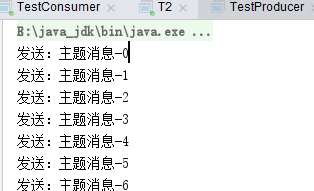
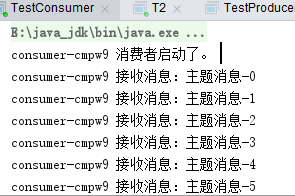
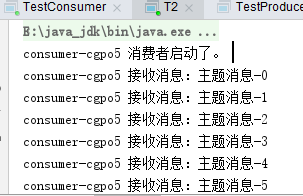
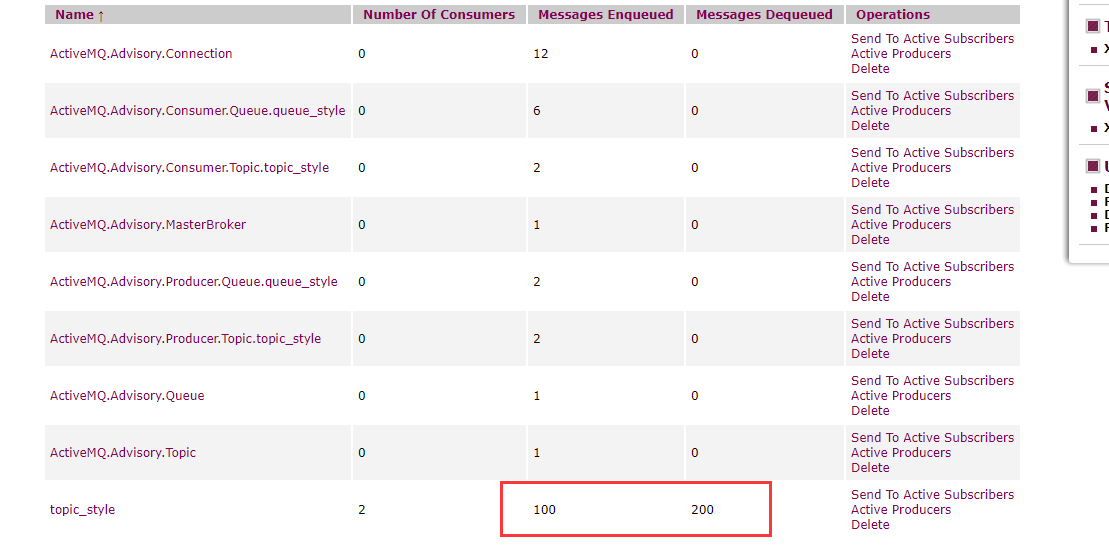
主题模式:
消费者,生产者
public class TestConsumer {
    //服务地址,端口默认61616
    private static final String url="tcp://127.0.0.1:61616";
    //这次消费的消息名称
    private static final String topicName="topic_style";

    //消费者有可能是多个,为了区分不同的消费者,为其创建随机名称
    private static final String consumerName="consumer-" + RandomUtil.randomString(5);
    public static void main(String[] args) throws JMSException {


        //0. 先判断端口是否启动了 Active MQ 服务器
        ActiveMQUtil.checkServer();
        System.out.printf("%s 消费者启动了。 %n", consumerName);
        //1.创建ConnectiongFactory,绑定地址
        ConnectionFactory factory=new ActiveMQConnectionFactory(url);
        //2.创建Connection
        Connection connection= factory.createConnection();
        //3.启动连接
        connection.start();
        //4.创建会话
        Session session=connection.createSession(false, Session.AUTO_ACKNOWLEDGE);

        //5.创建一个目标 (主题类型)
        Destination destination=session.createTopic(topicName);

        //6.创建一个消费者
        MessageConsumer consumer=session.createConsumer(destination);
        //7.创建一个监听器
        consumer.setMessageListener(new MessageListener() {

            public void onMessage(Message arg0) {
                // TODO Auto-generated method stub
                TextMessage textMessage=(TextMessage)arg0;
                try {
                    System.out.println(consumerName +" 接收消息:"+textMessage.getText());
                } catch (JMSException e) {
                    // TODO Auto-generated catch block
                    e.printStackTrace();
                }

            }
        });

        //8. 因为不知道什么时候有,所以没法主动关闭,就不关闭了,一直处于监听状态
        //connection.close();
    }
}
public class TestProducer {

    //服务地址,端口默认61616
    private static final String url="tcp://127.0.0.1:61616";
    //这次发送的消息名称
    private static final String topicName="topic_style";
    public static void main(String[] args) throws JMSException {
        //0. 先判断端口是否启动了  Active MQ 服务器
        ActiveMQUtil.checkServer();
        //1.创建ConnectiongFactory,绑定地址
        ConnectionFactory factory=new ActiveMQConnectionFactory(url);
        //2.创建Connection
        Connection connection= factory.createConnection();
        //3.启动连接
        connection.start();
        //4.创建会话
        Session session=connection.createSession(false, Session.AUTO_ACKNOWLEDGE);
        //5.创建一个目标 (主题类型)
        Destination destination=session.createTopic(topicName);
        //6.创建一个生产者
        MessageProducer producer=session.createProducer(destination);


        for (int i = 0; i < 100; i++) {
            //7.创建消息
            TextMessage textMessage=session.createTextMessage("主题消息-"+i);
            //8.发送消息
            producer.send(textMessage);
            System.out.println("发送:"+textMessage.getText());
        }
        //7. 关闭连接
        connection.close();
    }
}
生产者生产100个,两个消费者都分别接受了100个