一、openstack介绍
部署openstack,创建属于openstack的虚拟机;
准备:两台虚拟机 linux-node1.oldboyedu.com控制节点
linux-node2.oldboyedu.com计算节点
理解OPenstack架构和各个服务的功能、组件、运行原理才是最重要的;
openstack热迁移是虚拟机的KVM的功能;
标准统一的API;
openstack做公有云和私有云:金山、乐视、华为、IBM、京东、携程。
openstack最早期包含两个模块:Nova和Swift。
SOA:服务的注册中心 keystone;
开源SOA:DOBBO;
G版:比较稳定;
www.openstack.org
docs.openstack.org
openstack:管理三大资源
计算:计算资源池;
网络
存储
Dashboard:Horizon,不需要数据库,基于openstack的API接口开发的管理界面;
compute:Nova;:通过虚拟化技术提供计算资源;
Networking:Neutron,实现了虚拟机的网络资源管理;
存储:
object storage:swift
block storage
Keystone:认证
openstack概念架构:
vm:云主机;所有的资源都是vm提供的;
openstack主机名不能改
时间必须同步

二、openstack基础环境
cp /usr/share/mysql/my-medium.cnf /etc/my.cnf
需要安装mariadb、mariadb-server两个包;
数据库配置:
	mysql配置文件/etc/my.cnf:
		datadir=/var/lib/mysql
		socket=/var/lib/mysql/mysql.sock
		default-storage-engine=innodb
		innodb_file_per_table    #独享的表空间
		collation-server=utf8_general_ci
		init-connect='SET NAMES utf8'
		character-set-server=utf8
		port            =3306
mysql_secure_installation #设置密码
1、时间同步
	[root@linux-node1 ~]# yum -y install  chrony
	# Allow NTP client access from local network.
		allow 192.168/16
	[root@linux-node1 ~]# systemctl enable chronyd
	[root@linux-node1 ~]# systemctl start chronyd

	[root@linux-node1 ~]# timedatectl set-timezone Asia/Shanghai    #设置时区
CentOS的数据库为:Mariadb
数据库安装完成之后,使用mysql_secure_installation 初始化数据库
	[root@linux-node2 ~]# mysql -u root -p    #登录
	Enter password:
	Welcome to the MariaDB monitor.  Commands end with ; or g.
	Your MariaDB connection id is 14
	Server version: 5.5.52-MariaDB MariaDB Server

	Copyright (c) 2000, 2016, Oracle, MariaDB Corporation Ab and others.

	Type 'help;' or 'h' for help. Type 'c' to clear the current input statement.
2、创建数据库和授权(注意:生成数据库一定要做好备份和主从)
a、创建keystone数据库并授权
	[root@linux-node1 ~]# mysql -u root -p -e "CREATE DATABASE keystone;"
	Enter password:
	[root@linux-node1 ~]# mysql -u root -p -e "GRANT ALL PRIVILEGES ON keystone.* TO 'keystone'@'localhost' IDENTIFIED BY 'keystone';"
	Enter password:
	[root@linux-node1 ~]# mysql -u root -p -e "GRANT ALL PRIVILEGES ON keystone.* TO 'keystone'@'%' IDENTIFIED BY 'keystone';"
	Enter password:
b、创建glance数据库并授权
	[root@linux-node1 ~]# mysql -u root -p -e "CREATE DATABASE glance;"
	Enter password:
	[root@linux-node1 ~]# mysql -u root -p -e "GRANT ALL PRIVILEGES ON glance.* TO 'glance'@'%' IDENTIFIED BY 'glance';"
	Enter password:
	[root@linux-node1 ~]# mysql -u root -p -e "GRANT ALL PRIVILEGES ON glance.* TO 'glance'@'localhost' IDENTIFIED BY 'glance';"
	Enter password:
c、创建nova数据库并授权
	[root@linux-node1 ~]# mysql -u root -p -e "CREATE DATABASE nova;"
	[root@linux-node1 ~]# mysql -u root -p -e "GRANT ALL PRIVILEGES ON nova.* TO 'nova'@'localhost' IDENTIFIED BY 'nova';"
	Enter password:
	[root@linux-node1 ~]# mysql -u root -p -e "GRANT ALL PRIVILEGES ON nova.* TO 'nova'@'%' IDENTIFIED BY 'nova';"
d、创建neutron数据库并授权
	[root@linux-node1 ~]# mysql -u root -p -e "CREATE DATABASE neutron;"
	Enter password:
	[root@linux-node1 ~]# mysql -u root -p -e "GRANT ALL PRIVILEGES ON neutron.*TO 'neutron'@'%' IDENTIFIED BY 'neutron';"
	Enter password:
	[root@linux-node1 ~]# mysql -u root -p -e "GRANT ALL PRIVILEGES ON neutron.*TO 'neutron'@'localhost' IDENTIFIED BY 'neutron';"
	Enter password:
3、SOA
服务化:不同的系统之间通信需要消息队列完成;
松耦合系统
安装MySQL:[root@linux-node1 ~]# yum -y install mariadb mariadb-server MySQL-python
安装rabbitmq:[root@linux-node1 ~]# yum -y install rabbitmq-server
4、安装mq
rabbitmq的端口号为5671,管理插件使用的web管理端口是15672
[root@linux-node1 /]# yum install -y rabbitmq-server
[root@linux-node1 /]# systemctl enable rabbitmq-server.service
Created symlink from /etc/systemd/system/multi-user.target.wants/rabbitmq-server.service to /usr/lib/systemd/system/rabbitmq-server.service.
[root@linux-node2 ~]# systemctl enable rabbitmq-server.service
Created symlink from /etc/systemd/system/multi-user.target.wants/rabbitmq-server.service to /usr/lib/systemd/system/rabbitmq-server.service.
[root@linux-node2 ~]# systemctl start  rabbitmq-server.service
[root@linux-node1 ~]# netstat -ntlp
Active Internet connections (only servers)
Proto Recv-Q Send-Q Local Address           Foreign Address         State       PID/Program name
tcp        0      0 0.0.0.0:25672           0.0.0.0:*               LISTEN      6293/beam
tcp        0      0 0.0.0.0:4369            0.0.0.0:*               LISTEN      6308/epmd
tcp        0      0 192.168.122.1:53        0.0.0.0:*               LISTEN      1818/dnsmasq
tcp        0      0 0.0.0.0:22              0.0.0.0:*               LISTEN      1150/sshd
tcp        0      0 127.0.0.1:631           0.0.0.0:*               LISTEN      1140/cupsd
tcp        0      0 0.0.0.0:4505            0.0.0.0:*               LISTEN      2815/python
tcp        0      0 127.0.0.1:25            0.0.0.0:*               LISTEN      1738/master
tcp        0      0 0.0.0.0:4506            0.0.0.0:*               LISTEN      2821/python
tcp        0      0 0.0.0.0:514             0.0.0.0:*               LISTEN      785/rsyslogd
tcp6       0      0 :::5672                 :::*                    LISTEN      6293/beam       #rabbitmq的端口
tcp6       0      0 :::3306                 :::*                    LISTEN      2814/mysqld
tcp6       0      0 :::235                  :::*                    LISTEN      1139/dockerd-curren
tcp6       0      0 :::4369                 :::*                    LISTEN      6308/epmd
tcp6       0      0 :::22                   :::*                    LISTEN      1150/sshd
tcp6       0      0 ::1:631                 :::*                    LISTEN      1140/cupsd
tcp6       0      0 ::1:25                  :::*                    LISTEN      1738/master
tcp6       0      0 :::514                  :::*                    LISTEN      785/rsyslogd
rabbitmq端口:
[root@linux-node2 ~]# lsof -i:5672    #rabbitmq的端口号
COMMAND  PID     USER   FD   TYPE DEVICE SIZE/OFF NODE NAME
beam    3992 rabbitmq   14u  IPv6  32030      0t0  TCP *:amqp (LISTEN)
创建用户:
[root@linux-node2 ~]# rabbitmqctl add_user openstack openstack    #创建一个用户
Creating user "openstack" ...
...done.
给用户授权:
[root@linux-node2 ~]# rabbitmqctl set_permissions openstack ".*" ".*" ".*"    #给用户授权,所有vhost的所有权限
Setting permissions for user "openstack" in vhost "/" ...
...done.
使用web界面管理rabbitmq,需要安装rabbitmq的插件:
[root@linux-node2 ~]# rabbitmq-plugins list    #rabbitmq的插件
[ ] amqp_client                       3.3.5
[ ] cowboy                            0.5.0-rmq3.3.5-git4b93c2d
[ ] eldap                             3.3.5-gite309de4
[ ] mochiweb                          2.7.0-rmq3.3.5-git680dba8
[ ] rabbitmq_amqp1_0                  3.3.5
[ ] rabbitmq_auth_backend_ldap        3.3.5
[ ] rabbitmq_auth_mechanism_ssl       3.3.5
[ ] rabbitmq_consistent_hash_exchange 3.3.5
[ ] rabbitmq_federation               3.3.5
[ ] rabbitmq_federation_management    3.3.5
[ ] rabbitmq_management               3.3.5
[ ] rabbitmq_management_agent         3.3.5
[ ] rabbitmq_management_visualiser    3.3.5
[ ] rabbitmq_mqtt                     3.3.5
[ ] rabbitmq_shovel                   3.3.5
[ ] rabbitmq_shovel_management        3.3.5
[ ] rabbitmq_stomp                    3.3.5
[ ] rabbitmq_test                     3.3.5
[ ] rabbitmq_tracing                  3.3.5
[ ] rabbitmq_web_dispatch             3.3.5
[ ] rabbitmq_web_stomp                3.3.5
[ ] rabbitmq_web_stomp_examples       3.3.5
[ ] sockjs                            0.3.4-rmq3.3.5-git3132eb9
[ ] webmachine                        1.10.3-rmq3.3.5-gite9359c7
启用管理插件:
[root@linux-node2 ~]# rabbitmq-plugins enable rabbitmq_management  #启用管理插件
The following plugins have been enabled:
  mochiweb
  webmachine
  rabbitmq_web_dispatch
  amqp_client
  rabbitmq_management_agent
  rabbitmq_management
Plugin configuration has changed. Restart RabbitMQ for changes to take effect.
重启服务:
关闭防火墙:
[root@linux-node1 ~]# systemctl stop firewalld.service
[root@linux-node1 ~]# systemctl disable firewalld.service
Removed symlink /etc/systemd/system/dbus-org.fedoraproject.FirewallD1.service.
Removed symlink /etc/systemd/system/basic.target.wants/firewalld.service.
[root@linux-node2 ~]# systemctl restart rabbitmq-server.service   #重启服务
[root@linux-node2 ~]# netstat -ntlp
Active Internet connections (only servers)
Proto Recv-Q Send-Q Local Address           Foreign Address         State       PID/Program name
tcp        0      0 0.0.0.0:3306            0.0.0.0:*               LISTEN      3586/mysqld
tcp        0      0 0.0.0.0:111             0.0.0.0:*               LISTEN      1/systemd
tcp        0      0 0.0.0.0:4369            0.0.0.0:*               LISTEN      8190/epmd
tcp        0      0 192.168.122.1:53        0.0.0.0:*               LISTEN      1449/dnsmasq
tcp        0      0 0.0.0.0:22              0.0.0.0:*               LISTEN      988/sshd
tcp        0      0 127.0.0.1:631           0.0.0.0:*               LISTEN      962/cupsd
tcp        0      0 0.0.0.0:15672           0.0.0.0:*               LISTEN      8173/beam
tcp        0      0 127.0.0.1:25            0.0.0.0:*               LISTEN      1398/master
tcp        0      0 0.0.0.0:25672           0.0.0.0:*               LISTEN      8173/beam
tcp6       0      0 :::111                  :::*                    LISTEN      1/systemd
tcp6       0      0 :::4369                 :::*                    LISTEN      8190/epmd
tcp6       0      0 :::22                   :::*                    LISTEN      988/sshd
tcp6       0      0 ::1:631                 :::*                    LISTEN      962/cupsd
tcp6       0      0 ::1:25                  :::*                    LISTEN      1398/master
tcp6       0      0 :::5672                 :::*                    LISTEN      8173/beam
这样就可以使用15672端口进行web管理rabbitmq了:http://192.168.74.21:15672,默认的用户名和密码都是guest;
rabbitmq是可以做集群的;
rabbitmq默认只有tag为administrator的用户才可以登录;
openstack用户名和密码、权限设置:
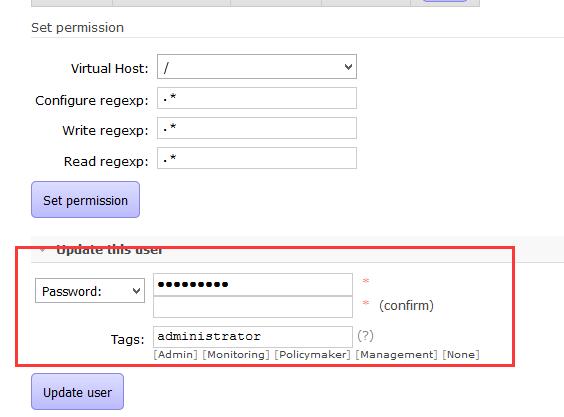
查看http的api,可以用作监控:


使用新的用户名和密码登录

rabbitmq是支持集群的;
使用消息队列可以实现分布式的事物;
到此openstack基础环境就做完啦~~~
下面安装openstack的组件
三、keystone
openstack验证服务:
	用户与认证:用户权限与用户行为跟踪;(有权限分配一个token,拿着这个token就可以连了)
	服务目录:提供一个服务目录,包括所有服务项与相关Api的端点;(也就是注册中心,ETCD也可以做注册中心;所有的服务需要在keystone上做服务的注册,这样才可以被别的服务调用);
角色认证:
	User:用户
	Tenant:租户 项目(资源的组合)
	Token:令牌     (使用用户名和密码拿到令牌,拿到令牌就可以访问资源了)
	Role:角色  (权限的集合)    (admin权限最大)
服务目录:
	Service:服务
	Endpoint:端点     (API:URL)
1、安装
配置好openstack的yum源
先安装好epel源
yum -y install centos-release-openstack-liberty.noarch #安装l版的yum源
https://mirrors.aliyun.com/centos/7/extras/x86_64/Packages/centos-release-openstack-liberty-1-4.el7.noarch.rpm #阿里yun的yum源
yum install -y openstack-selinux
yum install -y python-openstackclient
安装keystone,这个过程非常慢,用的应该不是国内的yum源...
[root@linux-node2 ~]# yum install -y openstack-keystone httpd mod_wsgi memcached python-memcached #登录发送用户名和密码,keystone返回token,将token放入到memcache中;
keystone的作用:用户认证和服务目录;keystone本身也需要注册;
2、配置keystone配置文件
token最好使用随机码
[root@linux-node2 ~]# openssl rand -hex 10    #产生随机码
04e25bc530dbe9acc8d0
token和数据库的配置
/etc/keystone/keystone.conf   #编辑配置文件:
	admin_token = 04e25bc530dbe9acc8d0   #设置admin_token,用于用户登录keystone,免用户名和密码
	[database]
	onnection = mysql://keystone:keystone@192.168.74.21/keystone    #用户名:密码   库
同步数据库keystone数据库
	su -s /bin/sh  -c "keystone-manage db_sync" keystone    #需要切换到keystone用户来同步数据库,因为日志文件需要属于keystone用户;   注意:同步数据库不能报错
	[root@linux-node2 keystone]# cd /var/log/keystone/      #查看数据库
	[root@linux-node2 keystone]# ls
	-rw-r--r-- 1 keystone keystone 7501 2月  14 22:30 keystone.log
验证同步结果
	[root@linux-node2 ~]# mysql -ukeystone -pkeystone
	Welcome to the MariaDB monitor.  Commands end with ; or g.
	Your MariaDB connection id is 3
	Server version: 5.5.52-MariaDB MariaDB Server

	Copyright (c) 2000, 2016, Oracle, MariaDB Corporation Ab and others.

	Type 'help;' or 'h' for help. Type 'c' to clear the current input statement.

	MariaDB [(none)]> show databases;
	+--------------------+
	| Database           |
	+--------------------+
	| information_schema |
	| keystone           |
	+--------------------+
	2 rows in set (0.00 sec)

	MariaDB [(none)]> use keystone;
	Reading table information for completion of table and column names
	You can turn off this feature to get a quicker startup with -A

	Database changed
	MariaDB [keystone]> show tables;
	+------------------------+
	| Tables_in_keystone     |
	+------------------------+
	| access_token           |
	| assignment             |
	| config_register        |
	| consumer               |
	| credential             |
	| domain                 |
	| endpoint               |
	| endpoint_group         |
	| federation_protocol    |
	| group                  |
	| id_mapping             |
	| identity_provider      |
	| idp_remote_ids         |
	| mapping                |
	| migrate_version        |
	| policy                 |
	| policy_association     |
	| project                |
	| project_endpoint       |
	| project_endpoint_group |
	| region                 |
	| request_token          |
	| revocation_event       |
	| role                   |
	| sensitive_config       |
	| service                |
	| service_provider       |
	| token                  |
	| trust                  |
	| trust_role             |
	| user                   |
	| user_group_membership  |
	| whitelisted_config     |
	+------------------------+
	33 rows in set (0.00 sec)

	MariaDB [keystone]>
配置memcache和token:使用用户名和密码可以拿到token,将token存储在memche中
	[memcache]
	servers = 192.168.74.21:11211
	[token]
	provider = uuid
	driver = memcache   #默认token是写在数据库中的,这里改为memcache
	[revoke]
	driver = sql    #回滚
全部配置如下
	[root@linux-node2 ~]# grep '^[a-z]' /etc/keystone/keystone.conf
	admin_token = 04e25bc530dbe9acc8d0
	connection = mysql://keystone:keystone@192.168.74.21/keystone
	servers = 192.168.74.21:11211
	driver = sql
	provider = uuid
	driver = memcache
	verbose = true    #打开debug,详细输出打开
启动memcache
systemctl start memcached.service
新建apache keystone的配置文件,keystone使用apache来代理
[root@linux-node1 ~]# cat  /etc/httpd/conf.d/wsgi-keystone.conf
Listen 5000
Listen 35357

<VirtualHost *:5000>
    WSGIDaemonProcess keystone-public processes=5 threads=1 user=keystone group=keystone display-name=%{GROUP}
    WSGIProcessGroup keystone-public
    WSGIScriptAlias / /usr/bin/keystone-wsgi-public
    WSGIApplicationGroup %{GLOBAL}
    WSGIPassAuthorization On
    <IfVersion >= 2.4>
      ErrorLogFormat "%{cu}t %M"
    </IfVersion>
    ErrorLog /var/log/httpd/keystone-error.log
    CustomLog /var/log/httpd/keystone-access.log combined

    <Directory /usr/bin>
        <IfVersion >= 2.4>
            Require all granted
        </IfVersion>
        <IfVersion < 2.4>
            Order allow,deny
            Allow from all
        </IfVersion>
    </Directory>
</VirtualHost>

<VirtualHost *:35357>
    WSGIDaemonProcess keystone-admin processes=5 threads=1 user=keystone group=keystone display-name=%{GROUP}
    WSGIProcessGroup keystone-admin
    WSGIScriptAlias / /usr/bin/keystone-wsgi-admin
    WSGIApplicationGroup %{GLOBAL}
    WSGIPassAuthorization On
    <IfVersion >= 2.4>
      ErrorLogFormat "%{cu}t %M"
    </IfVersion>
    ErrorLog /var/log/httpd/keystone-error.log
    CustomLog /var/log/httpd/keystone-access.log combined

    <Directory /usr/bin>
        <IfVersion >= 2.4>
            Require all granted
        </IfVersion>
        <IfVersion < 2.4>
            Order allow,deny
            Allow from all
        </IfVersion>
    </Directory>
</VirtualHost>
配置apache的servername,事先要关闭selinux
/etc/httpd/conf/httpd.conf
ServerName 192.168.74.20:80
systemctl start httpd
[root@linux-node1 ~]# netstat -ntlp   #keystone的端口,5000和35357, 35357是管理端口,5000是给别人用的
Active Internet connections (only servers)
Proto Recv-Q Send-Q Local Address           Foreign Address         State       PID/Program name
tcp        0      0 0.0.0.0:25672           0.0.0.0:*               LISTEN      8712/beam
tcp        0      0 127.0.0.1:11211         0.0.0.0:*               LISTEN      13382/memcached
tcp        0      0 0.0.0.0:4369            0.0.0.0:*               LISTEN      8728/epmd
tcp        0      0 192.168.122.1:53        0.0.0.0:*               LISTEN      1818/dnsmasq
tcp        0      0 0.0.0.0:22              0.0.0.0:*               LISTEN      1150/sshd
tcp        0      0 127.0.0.1:631           0.0.0.0:*               LISTEN      1140/cupsd
tcp        0      0 0.0.0.0:15672           0.0.0.0:*               LISTEN      8712/beam
tcp        0      0 0.0.0.0:4505            0.0.0.0:*               LISTEN      2815/python
tcp        0      0 127.0.0.1:25            0.0.0.0:*               LISTEN      1738/master
tcp        0      0 0.0.0.0:4506            0.0.0.0:*               LISTEN      2821/python
tcp        0      0 0.0.0.0:514             0.0.0.0:*               LISTEN      785/rsyslogd
tcp6       0      0 :::5000                 :::*                    LISTEN      15720/httpd
tcp6       0      0 :::5672                 :::*                    LISTEN      8712/beam
tcp6       0      0 :::3306                 :::*                    LISTEN      2814/mysqld
tcp6       0      0 ::1:11211               :::*                    LISTEN      13382/memcached
tcp6       0      0 :::235                  :::*                    LISTEN      1139/dockerd-curren
tcp6       0      0 :::80                   :::*                    LISTEN      15720/httpd
tcp6       0      0 :::4369                 :::*                    LISTEN      8728/epmd
tcp6       0      0 :::22                   :::*                    LISTEN      1150/sshd
tcp6       0      0 ::1:631                 :::*                    LISTEN      1140/cupsd
tcp6       0      0 ::1:25                  :::*                    LISTEN      1738/master
tcp6       0      0 :::35357                :::*                    LISTEN      15720/httpd
tcp6       0      0 :::514                  :::*                    LISTEN      785/rsyslogd
下面做keystone权限管理:
设置环境变量
[root@linux-node1 ~]# export os_TOKEN=08b73cd71e0d52a88afe   #这里和配置文件中Admin_Token相同
[root@linux-node1 ~]# export OS_URL=http://192.168.74.20:35357/v3
You have new mail in /var/spool/mail/root
[root@linux-node1 ~]#
[root@linux-node1 ~]# export OS_INDENTITY_API_VERSION=3
可以将上述环境变量写入admin.rc中,然后source该文件就可以了;
安装参考:http://m.2cto.com/net/201609/546061.html
创建域default:
服务注册:(keystone本身也需要注册)
[root@linux-node1 ~]#  openstack service create --name keystone --description "OpenStack Identity" identity
+-------------+----------------------------------+
| Field       | Value                            |
+-------------+----------------------------------+
| description | OpenStack Identity               |
| enabled     | True                             |
| id          | b6e52bfac70d46cc83f78d29031fe34a |
| name        | keystone                         |
| type        | identity                         |
+-------------+----------------------------------+
API注册:(三种endpoint,admin(使用35357端口,这儿比较特殊)、public、internal)
[root@linux-node1 ~]# openstack endpoint create --region RegionOne  identity public http://192.168.74.20:5000/v2.0
+--------------+----------------------------------+
| Field        | Value                            |
+--------------+----------------------------------+
| enabled      | True                             |
| id           | 4b24a5bbde1c4c9783fd435dbd8e8d56 |
| interface    | public                           |
| region       | RegionOne                        |
| region_id    | RegionOne                        |
| service_id   | b6e52bfac70d46cc83f78d29031fe34a |
| service_name | keystone                         |
| service_type | identity                         |
| url          | http://192.168.74.20:5000/v2.0   |
+--------------+----------------------------------+
[root@linux-node1 ~]# openstack endpoint create --region RegionOne identity internal http://192.168.74.20:5000/v2.0
+--------------+----------------------------------+
| Field        | Value                            |
+--------------+----------------------------------+
| enabled      | True                             |
| id           | 3dc98f48a013436fb38c9e2f799f19fe |
| interface    | internal                         |
| region       | RegionOne                        |
| region_id    | RegionOne                        |
| service_id   | b6e52bfac70d46cc83f78d29031fe34a |
| service_name | keystone                         |
| service_type | identity                         |
| url          | http://192.168.74.20:5000/v2.0   |
+--------------+----------------------------------+
[root@linux-node1 ~]# openstack endpoint create --region RegionOne identity admin http://192.168.74.20:35357/v2.0
+--------------+----------------------------------+
| Field        | Value                            |
+--------------+----------------------------------+
| enabled      | True                             |
| id           | d6cdfc10f49244788288fbf2693d0dae |
| interface    | admin                            |
| region       | RegionOne                        |
| region_id    | RegionOne                        |
| service_id   | b6e52bfac70d46cc83f78d29031fe34a |
| service_name | keystone                         |
| service_type | identity                         |
| url          | http://192.168.74.20:35357/v2.0  |
+--------------+----------------------------------+
这样,已经有用户名和密码了,unset OS_TOKEN OS_URL去掉,获取token,如果可以获取到,表示keystone成功了
openstack --os-auth-url http://192.168.74.30:35357/v3 --os-project-domain-name default --os-user-domain-name default --os-project-name admin --os-username admin token issue
也可以使用环境变量请求
[root@linux-node1 ~]# cat admin_openrc
export OS_PROJECT_DOMAIN_NAME=default
export OS_USER_DOMAIN_NAME=default
export OS_PROJECT_NAME=admin
export OS_USERNAME=admin
export OS_PASSWORD=openstack
export OS_AUTH_URL=http://192.168.74.30:35357/v3
export OS_IDENTITY_API_VERSION=3
export OS_IMAGE_API_VERSION=2
[root@linux-node1 ~]# cat admin.rc
export OS_TOKEN=1696840151503cd32783
export OS_URL=http://192.168.74.30:35357/v3
export OS_IDENTITY_API_VERSION=3
[root@linux-node1 ~]# openstack token issue #如果成功,也可以证明keystone是成功的
创建项目、用户以及规则
[root@linux-node1 ~]# openstack project create --domain default --description "Admin Project" admin
+-------------+----------------------------------+
| Field       | Value                            |
+-------------+----------------------------------+
| description | Admin Project                    |
| domain_id   | default                          |
| enabled     | True                             |
| id          | 86b7b7c4d5ce410c83c3829ea46bb422 |
| is_domain   | False                            |
| name        | admin                            |
| parent_id   | None                             |
+-------------+----------------------------------+


创建Admin用户,密码为openstack
[root@linux-node1 ~]# openstack user create --domain default --password-prompt admin
User Password:
Repeat User Password:
+-----------+----------------------------------+
| Field     | Value                            |
+-----------+----------------------------------+
| domain_id | default                          |
| enabled   | True                             |
| id        | 74f89ba1ea7646db95bcf8d1d90648a1 |
| name      | admin                            |
+-----------+----------------------------------+


创建admin规则
[root@linux-node1 ~]# openstack role create admin
+-------+----------------------------------+
| Field | Value                            |
+-------+----------------------------------+
| id    | e1c2ecc5c78e49db886d7c46ce680f8c |
| name  | admin                            |


将admin项目,admin规则,admin用户关联起来
openstack role add --project admin --user admin admin
创建服务,并创建demo项目及其关联
创建service服务
[root@linux-node1 ~]# openstack project create --domain default --description "Service Project" service
+-------------+----------------------------------+
| Field       | Value                            |
+-------------+----------------------------------+
| description | Service Project                  |
| domain_id   | default                          |
| enabled     | True                             |
| id          | 5243c874661d4224a1ff25d45e983d7c |
| is_domain   | False                            |
| name        | service                          |
| parent_id   | None                             |
+-------------+----------------------------------+

创建demo服务
[root@linux-node1 ~]# openstack project create --domain default --description "Demo project" demo
+-------------+----------------------------------+
| Field       | Value                            |
+-------------+----------------------------------+
| description | Demo project                     |
| domain_id   | default                          |
| enabled     | True                             |
| id          | 15a66e217c4f4558a67f7c51f1348e3c |
| is_domain   | False                            |
| name        | demo                             |
| parent_id   | None                             |
+-------------+----------------------------------+


创建demo用户,密码为openstack
[root@linux-node1 ~]# openstack user create --domain default --password-prompt demo
User Password:
Repeat User Password:
+-----------+----------------------------------+
| Field     | Value                            |
+-----------+----------------------------------+
| domain_id | default                          |
| enabled   | True                             |
| id        | 5f66996d34ce432f8b081abb27a4a525 |
| name      | demo                             |
+-----------+----------------------------------+

创建user规则
[root@linux-node1 ~]# openstack role create user
+-------+----------------------------------+
| Field | Value                            |
+-------+----------------------------------+
| id    | ef9222a715bd470083138c8ef8409c59 |
| name  | user                             |
+-------+----------------------------------+

将demo项目,demo用户,user规则关联起立
openstack role add --project demo --user demo user
验证:
1)为了安全起见
[root@linux-node1 ~]# cp  /etc/keystone/keystone-paste.ini /etc/keystone/keystone-paste.ini.ori
[root@linux-node1 ~]# vim /etc/keystone/keystone-paste.ini

[pipeline:public_api]
# The last item in this pipeline must be public_service or an equivalent
# application. It cannot be a filter.
pipeline = cors sizelimit url_normalize request_id  build_auth_context token_auth json_body ec2_extension public_service

[pipeline:admin_api]
# The last item in this pipeline must be admin_service or an equivalent
# application. It cannot be a filter.
pipeline = cors sizelimit url_normalize request_id  build_auth_context token_auth json_body ec2_extension s3_extension admin_service

[pipeline:api_v3]
# The last item in this pipeline must be service_v3 or an equivalent
# application. It cannot be a filter.
pipeline = cors sizelimit url_normalize request_id build_auth_context token_auth json_body ec2_extension_v3 s3_extension service_v3
2)
[root@linux-node1 ~]# unset OS_TOKEN
[root@linux-node1 ~]# unset OS_URL
3)
admin
[root@linux-node1 ~]# openstack --os-auth-url http://192.168.74.30:35357/v3 --os-project-domain-name default --os-user-domain-name default  --os-project-name admin --os-username admin token issue
Password:
+------------+-------------------------------------------------------------------------------------------------------------------------------------------------------------+
| Field      | Value                                                                                                                                                       |
+------------+-------------------------------------------------------------------------------------------------------------------------------------------------------------+
| expires    | 2017-04-21T17:17:29.303334Z                                                                                                                                 |
| id         | gAAAAABY-jCZsewdRMaqAwSIRkv8fd1wpdPHKl5xcIHfxPGJDTi2MNa_WgIpMjU7OXHjGaauXHFRX_tNeHCFl5c75zuTQ9OJ0KWX75FpKpoMt1IxQTKMP3jMbboXExQrveFaKCvTvsgiphifh671ij0N6lY |
|            | nbSpHfLe8SGUUaCtEOa4VOD8FEa4                                                                                                                                |
| project_id | fb771edbe62f40c4abe7f33b87b09e19                                                                                                                            |
| user_id    | 821fc3ccb5c84289a2e5015390839efa                                                                                                                            |
demo
[root@linux-node1 ~]# openstack --os-auth-url http://192.168.74.30:35357/v3 --os-project-domain-name default --os-user-domain-name default  --os-project-name demo --os-username demo token issue
Password:
+------------+-------------------------------------------------------------------------------------------------------------------------------------------------------------+
| Field      | Value                                                                                                                                                       |
+------------+-------------------------------------------------------------------------------------------------------------------------------------------------------------+
| expires    | 2017-04-21T17:19:23.422786Z                                                                                                                                 |
| id         | gAAAAABY-jELsNMxpZP2OU2C_YZNi2Jxv0WWGac7p_flM0BXaqn3FUUs5vpMtixIMYAW4VqnI0r6Y8IEZlw1oCyr4cVI1Z0nPOQN5pKIq_qurxjeylFrCcY0kPCAoIvdVM7pBWW1garNxV6EZB7s8sxIn18 |
|            | FJNcknJsCzkYLwjif4sHkEjmOJQQ                                                                                                                                |
| project_id | 27eaaefd663148fab9345ed68c0c2262                                                                                                                            |
| user_id    | e68fc48bfb6d4759b2d1c3655366c203                                                                                                                            |
+------------+-------------------------------------------------------------------------------------------------------------------------------------------------------------+
使用环境变量脚本
admin
[root@linux-node1 ~]# cat admin_openrc
export OS_PROJECT_DOMAIN_NAME=default
export OS_USER_DOMAIN_NAME=default
export OS_PROJECT_NAME=admin
export OS_USERNAME=admin
export OS_PASSWORD=openstack
export OS_AUTH_URL=http://192.168.74.30:35357/v3
export OS_IDENTITY_API_VERSION=3
export OS_IMAGE_API_VERSION=2
demo
[root@linux-node1 ~]# cat demo_openrc
export OS_PROJECT_DOMAIN_NAME=default
export OS_USER_DOMAIN_NAME=default
export OS_PROJECT_NAME=demo
export OS_USERNAME=demo
export OS_PASSWORD=openstack
export OS_AUTH_URL=http://192.168.74.30:35357/v3
export OS_IDENTITY_API_VERSION=3
export OS_IMAGE_API_VERSION=2
加载 source admin_rc
[root@linux-node1 ~]# openstack token issue
+------------+-------------------------------------------------------------------------------------------------------------------------------------------------------------+
| Field      | Value                                                                                                                                                       |
+------------+-------------------------------------------------------------------------------------------------------------------------------------------------------------+
| expires    | 2017-04-21T17:29:34.766137Z                                                                                                                                 |
| id         | gAAAAABY-jNu3p8_-bFQqvylXzn66b0UH7zbcdY9hvpygGuQpU-G6_8NaHO8EGSFNFbtK85C59nDzcRHttUY-                                                                       |
|            | Erw4FK_Vtbm00QQeJZ7Ra8SnZ9IZxW7wme8F45thnfQAAALLUSJHm2A7-R1JNkOgR98SoOk3YHLzt95XKDoAsMBnhuKIJyhHPk                                                          |
| project_id | fb771edbe62f40c4abe7f33b87b09e19                                                                                                                            |
| user_id    | 821fc3ccb5c84289a2e5015390839efa                                                                                                                            |
+------------+-------------------------------------------------------------------------------------------------------------------------------------------------------------+
glance安装配置
创建glance用户
[root@linux-node1 ~]# openstack user create --domain default --password-prompt glance
User Password:
Repeat User Password:
+-----------+----------------------------------+
| Field     | Value                            |
+-----------+----------------------------------+
| domain_id | b4aaee3c8d314a609dbbb49dd490f45b |
| enabled   | True                             |
| id        | 8f368b9230d94a4b830de585ba40b980 |
| name      | glance                           |
+-----------+----------------------------------+
添加admin角色到glance用户和service项目上
[root@linux-node1 ~]# openstack role add --project service --user glance admin
创建glance服务实体
[root@linux-node1 ~]# openstack service create --name glance --description "Openstack Image" image
+-------------+----------------------------------+
| Field       | Value                            |
+-------------+----------------------------------+
| description | Openstack Image                  |
| enabled     | True                             |
| id          | 4dd9bed0f6404eb8886d90644f715808 |
| name        | glance                           |
| type        | image                            |
+-------------+----------------------------------+
创建镜像服务的API端点
[root@linux-node1 ~]# openstack endpoint create --region RegionOne  image public http://192.168.74.30:9292
+--------------+----------------------------------+
| Field        | Value                            |
+--------------+----------------------------------+
| enabled      | True                             |
| id           | 04b7df17bfa14510b904dc98655481b1 |
| interface    | public                           |
| region       | RegionOne                        |
| region_id    | RegionOne                        |
| service_id   | 4dd9bed0f6404eb8886d90644f715808 |
| service_name | glance                           |
| service_type | image                            |
| url          | http://192.168.74.30:9292        |
+--------------+----------------------------------+
[root@linux-node1 ~]# openstack endpoint create --region RegionOne  image internal  http://192.168.74.30:9292
+--------------+----------------------------------+
| Field        | Value                            |
+--------------+----------------------------------+
| enabled      | True                             |
| id           | baee5baa38984fdb81c930e1af4fffeb |
| interface    | internal                         |
| region       | RegionOne                        |
| region_id    | RegionOne                        |
| service_id   | 4dd9bed0f6404eb8886d90644f715808 |
| service_name | glance                           |
| service_type | image                            |
| url          | http://192.168.74.30:9292        |
+--------------+----------------------------------+
[root@linux-node1 ~]# openstack endpoint create --region RegionOne  image admin  http://192.168.74.30:9292
+--------------+----------------------------------+
| Field        | Value                            |
+--------------+----------------------------------+
| enabled      | True                             |
| id           | d1f5e003725f4a5e86108a0cb5bf182a |
| interface    | admin                            |
| region       | RegionOne                        |
| region_id    | RegionOne                        |
| service_id   | 4dd9bed0f6404eb8886d90644f715808 |
| service_name | glance                           |
| service_type | image                            |
| url          | http://192.168.74.30:9292        |
+--------------+----------------------------------+
安装glance包
[root@linux-node1 ~]# yum install openstack-glance
编辑配置文件/etc/glance/glance-api.conf
[database]
connection = mysql+pymysql://glance:glance@192.168.74.30/glance
验证使用的小影像地址:https://launchpadlibrarian.net/83305348/cirros-0.3.0-x86_64-disk.img
AIN_NAME or auth.domain_name
[root@linux-node1 ~]# source admin_openrc
[root@linux-node1 ~]#
[root@linux-node1 ~]#
[root@linux-node1 ~]# openstack image create "cirros" --file cirros-0.3.0-x86_64-disk.img --disk-format qcow2 --container-format bare --public
+------------------+------------------------------------------------------+
| Field            | Value                                                |
+------------------+------------------------------------------------------+
| checksum         | 50bdc35edb03a38d91b1b071afb20a3c                     |
| container_format | bare                                                 |
| created_at       | 2017-04-21T17:24:54Z                                 |
| disk_format      | qcow2                                                |
| file             | /v2/images/f9f0e696-8c65-421f-a16c-43a0ec4d5d74/file |
| id               | f9f0e696-8c65-421f-a16c-43a0ec4d5d74                 |
| min_disk         | 0                                                    |
| min_ram          | 0                                                    |
| name             | cirros                                               |
| owner            | fb771edbe62f40c4abe7f33b87b09e19                     |
| protected        | False                                                |
| schema           | /v2/schemas/image                                    |
| size             | 9761280                                              |
| status           | active                                               |
| tags             |                                                      |
| updated_at       | 2017-04-21T17:24:55Z                                 |
| virtual_size     | None                                                 |
| visibility       | public                                               |
kvm只能模拟CPU 和内存,qemu模拟网卡、PCI设备;
查看时间
[root@linux-node1 ~]# timedatectl
      Local time: 六 2017-04-22 19:16:25 CST
  Universal time: 六 2017-04-22 11:16:25 UTC
        RTC time: 六 2017-04-22 11:51:41
       Time zone: Asia/Shanghai (CST, +0800)
     NTP enabled: n/a
NTP synchronized: no
 RTC in local TZ: no
      DST active: n/a
Glance:镜像服务
glance-api:请求云系统镜像的创建、删除、读取请求。
glance-Registry:云系统的镜像注册服务;
image store:
glance一定会连接数据库和keystone,一定会有存储的服务,以及日志相关。
创建glance用户
openstack user create --domain default --password-prompt glance
创建admin角色
openstack role add --project service --user glance admin
配置keystone(/etc/glance/glance-api.conf),配置项有mysql,keystone,镜像存储位置
[keystone_authtoken]
auth_uri = http://192.168.74.30:5000
auth_url = http://192.168.74.30:35357
memcached_servers = 192.168.74.30:11211
auth_type = password
project_domain_name = default
user_domain_name = default
project_name = service
username = glance
password = openstack
[paste_deploy]
flavor = keystone    #解析使用keystone
镜像位置
[glance_store]
stores = file,http
default_store = file
filesystem_store_datadir = /var/lib/glance/images/
配置resistry:/etc/glance/glance-registry.conf,配置项有mysql、keystone
[keystone_authtoken]
auth_uri = http://192.168.74.30:5000
auth_url = http://192.168.74.30:35357
memcached_servers = 192.168.74.30:11211
auth_type = password
project_domain_name = default
user_domain_name = default
project_name = service
username = glance
password = openstack
[paste_deploy]
flavor = keystone
启动glance-api和glance-registry
  199  systemctl enable openstack-glance-api.service openstack-glance-registry.service
  200  systemctl start  openstack-glance-api.service openstack-glance-registry.service
glance-api和glance-resgitry的端口分别是9292和9191
[root@linux-node1 ~]# netstat -ntlp|egrep '9292|9191'
tcp        0      0 0.0.0.0:9292            0.0.0.0:*               LISTEN      860/python2
tcp        0      0 0.0.0.0:9191            0.0.0.0:*               LISTEN      872/python2
[root@linux-node1 ~]# ps -ef|grep 860
glance     860     1  1 15:52 ?        00:07:23 /usr/bin/python2 /usr/bin/glance-api
glance    2536   860  0 15:52 ?        00:00:00 /usr/bin/python2 /usr/bin/glance-api
glance    2537   860  0 15:52 ?        00:00:00 /usr/bin/python2 /usr/bin/glance-api
root      9424  7024  0 22:33 pts/0    00:00:00 grep --color=auto 860
[root@linux-node1 ~]# ps -ef|grep 872
glance     872     1  0 15:52 ?        00:00:02 /usr/bin/python2 /usr/bin/glance-registry
glance    2496   872  0 15:52 ?        00:00:00 /usr/bin/python2 /usr/bin/glance-registry
glance    2499   872  0 15:52 ?        00:00:00 /usr/bin/python2 /usr/bin/glance-registry
root      9434  7024  0 22:33 pts/0    00:00:00 grep --color=auto 872
下面还需要到keystone注册中心去注册,将glance注册到keystone中
创建glance的服务和三个提供服务的endpoint
  186  openstack service create --name glance --description "Openstack Image" image
  187  openstack endpoint create --region RegionOne  image public http://192.168.74.30:9292
  188  openstack endpoint create --region RegionOne  image internal  http://192.168.74.30:9292
  190  openstack endpoint create --region RegionOne  image admin  http://192.168.74.30:9292
好了,到这里可以小小的总结一下了,openstack的流程为:安装-->改配置(mysql、keystone)-->同步数据库-->创建用户和角色-->注册服务和endpiont(就可以被调用了);
验证glance
加环境变量
export OS_IMAGE_API_VERSION=2
[root@linux-node1 ~]# glance image-list
+--------------------------------------+--------+
| ID                                   | Name   |
+--------------------------------------+--------+
| f9f0e696-8c65-421f-a16c-43a0ec4d5d74 | cirros |
+--------------------------------------+--------+
下载镜像,上传
openstack image create "cirros" --file cirros-0.3.0-x86_64-disk.img --disk-format qcow2 --container-format bare --public
镜像的ID需要一致
[root@linux-node1 images]# pwd
/var/lib/glance/images
[root@linux-node1 images]# ls
f9f0e696-8c65-421f-a16c-43a0ec4d5d74
[root@linux-node1 images]# glance image-list
+--------------------------------------+--------+
| ID                                   | Name   |
+--------------------------------------+--------+
| f9f0e696-8c65-421f-a16c-43a0ec4d5d74 | cirros |
+--------------------------------------+--------+
NOVA(nova的每一个服务都可以安装在不同的机器/集群上)
api:负责接收和响应外部氢气,支持opentack api,ec2API;
Cert:负责身份认证;
scheduler:用于云主机调度;
Conductor:计算节点访问数据的中间件。
Consoeauth:用户控制台的授权验证;
Novncproxy:VNC代理;
nova-api:实现了restful api功能,是外部访问nova的唯一途径;接收外部请求并通过消息队列将请求发送到其他组件,支持ec2 api;
nova Scheduler:决策虚拟机创建在哪个主机上的;
决策分为两个步骤: 过滤(Filter)和计算权重(weight);
想想需要配置的内容:数据库、keystone、rabbitmq、网络相关、注册...
配置数据库:/etc/nova/nova.conf
数据库配置完成之后,就可以同步数据库了;
配置rabbitmq
rpc_backend = rabbit
[oslo_messaging_rabbit]
rabbit_host = 192.168.74.30
rabbit_userid = openstack
rabbit_password = openstack
注册
openstack user create --domain default --password-prompt nova
openstack role add --project service --user nova admin
配置keystone
[keystone_authtoken]
auth_uri = http://192.168.74.30:5000
auth_url = http://192.168.74.30:35357
memcached_servers = 192.168.74.30:11211
auth_type = password
project_domain_name = default
user_domain_name = default
project_name = service
username = nova
password = openstack
[DEFAULT]
enabled_apis = osapi_compute,metadata
rpc_backend = rabbit
auth_strategy = keystone
network_api_class=nova.network.neutronv2.api.API #表示在python的安装目录下,有一个API的类
security_group_api=neturon #设置安全组
use_neutron = True
firewall_driver = nova.virt.firewall.NoopFirewallDriver    #使用neutron驱动
服务启动
systemctl start openstack-nova-api.service openstack-nova-consoleauth.service openstack-nova-scheduler.service openstack-nova-conductor.service openstack-nova-novncproxy.service
systemctl start openstack-nova-cert.service
注册: source admin_rc(在keystone上)
   82  openstack service create --name nova --description "Openstack Compute" compute
   83  openstack endpoint create --region RegionOne compute public http://192.168.74.30:8774/v2.1/%(tenant_id)s
   84  openstack endpoint create --region RegionOne compute internal http://192.168.74.30:8774/v2.1/%(tenant_id)s
   85  openstack endpoint create --region RegionOne compute admin http://192.168.74.30:8774/v2.1/%(tenant_id)s
检查
[root@linux-node1 ~]# openstack host list
+-------------+-------------+----------+
| Host Name   | Service     | Zone     |
+-------------+-------------+----------+
| linux-node1 | conductor   | internal |
| linux-node1 | consoleauth | internal |
| linux-node1 | scheduler   | internal |
| linux-node2 | compute     | nova     |
| linux-node1 | cert        | internal |
+-------------+-------------+----------+
这样nova的控制节点就完成了
Nova计算节点
nova compute:一般运行在计算节点上,通过消息队列接受并管理vm的生命周期;
通过libvirt管理kvm,通过xenAPI管理Xen等;
linux-node2关闭selinux ,iptables,配置/etc/hosts
[root@linux-node2 ~]# cat /etc/sysconfig/selinux

# This file controls the state of SELinux on the system.
# SELINUX= can take one of these three values:
#     enforcing - SELinux security policy is enforced.
#     permissive - SELinux prints warnings instead of enforcing.
#     disabled - No SELinux policy is loaded.
SELINUX=disabled
# SELINUXTYPE= can take one of three two values:
#     targeted - Targeted processes are protected,
#     minimum - Modification of targeted policy. Only selected processes are protected.
#     mls - Multi Level Security protection.
SELINUXTYPE=targeted


[root@linux-node2 ~]# iptables -VNL
iptables v1.4.21
[root@linux-node2 ~]# iptables -vnL
Chain INPUT (policy ACCEPT 145K packets, 11M bytes)
 pkts bytes target     prot opt in     out     source               destination

Chain FORWARD (policy ACCEPT 0 packets, 0 bytes)
 pkts bytes target     prot opt in     out     source               destination

Chain OUTPUT (policy ACCEPT 147K packets, 16M bytes)
 pkts bytes target     prot opt in     out     source               destination
[root@linux-node2 ~]# cat /etc/hosts
127.0.0.1   localhost localhost.localdomain localhost4 localhost4.localdomain4
::1         localhost localhost.localdomain localhost6 localhost6.localdomain6
192.168.74.30  linux-node1 linux-node1.openstack.com
192.168.74.32  linux-node2 linux-node2.openstack.com
时间服务器设置为node1的地址
/etc/chrony.conf
server 192.168.74.30 iburst
timedatectl set-timezone Asia/Shanghai
启动服务
   47  systemctl enable libvirtd.service openstack-nova-compute.service
   49  systemctl start libvirtd.service openstack-nova-compute.service
在控制节点上查看是否注册上了
[root@linux-node1 ~]# openstack host list
+-------------+-------------+----------+
| Host Name   | Service     | Zone     |
+-------------+-------------+----------+
| linux-node1 | conductor   | internal |
| linux-node1 | consoleauth | internal |
| linux-node1 | scheduler   | internal |
| linux-node2 | compute     | nova     |
| linux-node1 | cert        | internal |
+-------------+-------------+----------+
测试和glance连接是否正常
[root@linux-node1 ~]# nova image-list
+--------------------------------------+--------+--------+--------+
| ID                                   | Name   | Status | Server |
+--------------------------------------+--------+--------+--------+
| f9f0e696-8c65-421f-a16c-43a0ec4d5d74 | cirros | ACTIVE |        |
+--------------------------------------+--------+--------+--------+
测试和keystone的连接是否正常
[root@linux-node1 ~]# nova endpoints
/usr/lib/python2.7/site-packages/novaclient/v2/shell.py:4205: UserWarning: nova endpoints is deprecated, use openstack catalog list instead
  "nova endpoints is deprecated, use openstack catalog list instead")
WARNING: cinder has no endpoint in ! Available endpoints for this service:
+-----------+---------------------------------------------------------------+
| cinder    | Value                                                         |
+-----------+---------------------------------------------------------------+
| id        | 3b5976d21e0546cca216e36c66ff6a82                              |
| interface | internal                                                      |
| region    | RegionOne                                                     |
| region_id | RegionOne                                                     |
| url       | http://192.168.74.30:8776/v1/fb771edbe62f40c4abe7f33b87b09e19 |
+-----------+---------------------------------------------------------------+
+-----------+---------------------------------------------------------------+
| cinder    | Value                                                         |
+-----------+---------------------------------------------------------------+
| id        | 3fca661b9c474d92a00f143dfe0be628                              |
| interface | public                                                        |
| region    | RegionOne                                                     |
| region_id | RegionOne                                                     |
| url       | http://192.168.74.30:8776/v1/fb771edbe62f40c4abe7f33b87b09e19 |
+-----------+---------------------------------------------------------------+
+-----------+---------------------------------------------------------------+
| cinder    | Value                                                         |
+-----------+---------------------------------------------------------------+
| id        | 7f39ae15f64b4353b96068dc9a35909d                              |
| interface | admin                                                         |
| region    | RegionOne                                                     |
| region_id | RegionOne                                                     |
| url       | http://192.168.74.30:8776/v1/fb771edbe62f40c4abe7f33b87b09e19 |
+-----------+---------------------------------------------------------------+
WARNING: glance has no endpoint in ! Available endpoints for this service:
这样nova就不部署ok了;
Neutron(网络)
需要同时部署在控制节点和计算节点上
配置内容: 数据库、keystone、rabbitmq、nova、ml2
注册:
  215  openstack service create --name neutron --description "OpenStack Networking" network
  216  openstack endpoint create --region RegionOne  network public http://192.168.74.30:9696
  217  openstack endpoint create --region RegionOne  network internal http://192.168.74.30:9696
  218  openstack endpoint create --region RegionOne  network admin  http://192.168.74.30:9696
配置:
[DEFAULT]
core_plugin = ml2
service_plugins = router
allow_overlapping_ips = True
rpc_backend = rabbit
auth_strategy = keystone
notify_nova_on_port_status_changes = True
notify_nova_on_port_data_changes = True
三个ini文件需要修改过
去nova的配置文件下,修改neutron的配置
[neutron]
url = http://192.168.74.30:9696
auth_url = http://192.168.74.30:35357
auth_type = password
project_domain_name = default
user_domain_name = default
region_name = RegionOne
project_name = service
username = neutron
password = openstack
service_metadata_proxy = True
metadata_proxy_shared_secret = openstack
创建软连接
[root@linux-node1 ~]# ll /etc/neutron/plugin.ini
lrwxrwxrwx 1 root root 37 4月  22 03:01 /etc/neutron/plugin.ini -> /etc/neutron/plugins/ml2/ml2_conf.ini
  213  openstack user create --domain default --password-prompt neutron
  214  openstack role add --project service --user neutron admin
因为修改的nova的配置文件,需要重启nova-api,然后重启neutron的服务
systemctl restart neutron-server.service neutron-linuxbridge-agent.service neutron-dhcp-agent.service neutron-metadata-agent.service
验证
[root@linux-node1 ~]# neutron agent-list
+--------------------------------------+--------------------+-------------+-------------------+-------+----------------+---------------------------+
| id                                   | agent_type         | host        | availability_zone | alive | admin_state_up | binary                    |
+--------------------------------------+--------------------+-------------+-------------------+-------+----------------+---------------------------+
| 07c2010a-9c9e-4f51-b8eb-e37f45aad83e | L3 agent           | linux-node1 | nova              | :-)   | True           | neutron-l3-agent          |
| 19c8160b-2ede-4c29-b5c9-e296ff7d05ea | DHCP agent         | linux-node1 | nova              | :-)   | True           | neutron-dhcp-agent        |
| a0ad69fe-7ed3-4917-bccc-f4126aa8aac3 | Metadata agent     | linux-node1 |                   | :-)   | True           | neutron-metadata-agent    |
| c705abfc-849b-463d-9e10-37403db6f357 | Linux bridge agent | linux-node2 |                   | xxx   | True           | neutron-linuxbridge-agent |
| fdc4a274-5a24-4122-a118-66b8c4829555 | Linux bridge agent | linux-node1 |                   | :-)   | True           | neutron-linuxbridge-agent |
+--------------------------------------+--------------------+-------------+-------------------+-------+----------------+---------------------------+
配置计算节点agent
配置计算节点nova中neutron的配置
[neutron]
url = http://192.168.74.30:9696
auth_url = http://192.168.74.30:35357
auth_type = password
project_domain_name = default
user_domain_name = default
region_name = RegionOne
project_name = service
username = neutron
password = openstack
重启:systemctl restart openstack-nova-compute
systemctl restart libvirtd.service openstack-nova-compute.service
验证,在控制节点
-------------+
[root@linux-node1 ~]# neutron agent-list
+--------------------------------------+--------------------+-------------+-------------------+-------+----------------+---------------------------+
| id                                   | agent_type         | host        | availability_zone | alive | admin_state_up | binary                    |
+--------------------------------------+--------------------+-------------+-------------------+-------+----------------+---------------------------+
| 07c2010a-9c9e-4f51-b8eb-e37f45aad83e | L3 agent           | linux-node1 | nova              | :-)   | True           | neutron-l3-agent          |
| 19c8160b-2ede-4c29-b5c9-e296ff7d05ea | DHCP agent         | linux-node1 | nova              | :-)   | True           | neutron-dhcp-agent        |
| a0ad69fe-7ed3-4917-bccc-f4126aa8aac3 | Metadata agent     | linux-node1 |                   | :-)   | True           | neutron-metadata-agent    |
| c705abfc-849b-463d-9e10-37403db6f357 | Linux bridge agent | linux-node2 |                   | xxx   | True           | neutron-linuxbridge-agent |
| fdc4a274-5a24-4122-a118-66b8c4829555 | Linux bridge agent | linux-node1 |                   | :-)   | True           | neutron-linuxbridge-agent |
+--------------------------------------+--------------------+-------------+-------------------+-------+----------------+---------------------------+
[root@linux-node1 ~]#
下面创建虚拟机
控制节点: DHCP agent、Linux Bridge Agent、DHCP masq、metadata agent
计算节点: linux bridge agent
创建一个网络
[root@linux-node1 ~]# neutron net-create flat --shared --provider:physical_network provider --provider:network_type flat
Created a new network:
+---------------------------+--------------------------------------+
| Field                     | Value                                |
+---------------------------+--------------------------------------+
| admin_state_up            | True                                 |
| availability_zone_hints   |                                      |
| availability_zones        |                                      |
| created_at                | 2017-04-22T18:09:34                  |
| description               |                                      |
| id                        | ed96078d-7d40-4ae2-bb09-e5b2d3db248c |
| ipv4_address_scope        |                                      |
| ipv6_address_scope        |                                      |
| mtu                       | 1500                                 |
| name                      | flat                                 |
| port_security_enabled     | True                                 |
| provider:network_type     | flat                                 |
| provider:physical_network | provider                             |
| provider:segmentation_id  |                                      |
| router:external           | False                                |
| shared                    | True                                 |
| status                    | ACTIVE                               |
| subnets                   |                                      |
| tags                      |                                      |
| tenant_id                 | fb771edbe62f40c4abe7f33b87b09e19     |
| updated_at                | 2017-04-22T18:09:34                  |
+---------------------------+--------------------------------------+
创建子网
[root@linux-node1 ~]# neutron subnet-create flat 192.168.74.0/24 --name flat-subnet --allocation-pool start=192.168.74.100,end=192.168.74.200 --dns-nameserver 192.168.74.2 --gateway 192.168.74.2
Created a new subnet:
+-------------------+------------------------------------------------------+
| Field             | Value                                                |
+-------------------+------------------------------------------------------+
| allocation_pools  | {"start": "192.168.74.100", "end": "192.168.74.200"} |
| cidr              | 192.168.74.0/24                                      |
| created_at        | 2017-04-22T18:13:24                                  |
| description       |                                                      |
| dns_nameservers   | 192.168.74.2                                         |
| enable_dhcp       | True                                                 |
| gateway_ip        | 192.168.74.2                                         |
| host_routes       |                                                      |
| id                | 16a8fd38-f201-482e-8117-f6660a0a65a4                 |
| ip_version        | 4                                                    |
| ipv6_address_mode |                                                      |
| ipv6_ra_mode      |                                                      |
| name              | flat-subnet                                          |
| network_id        | ed96078d-7d40-4ae2-bb09-e5b2d3db248c                 |
| subnetpool_id     |                                                      |
| tenant_id         | fb771edbe62f40c4abe7f33b87b09e19                     |
| updated_at        | 2017-04-22T18:13:24                                  |
+-------------------+------------------------------------------------------+
查看
[root@linux-node1 ~]# neutron net-list
+--------------------------------------+------+-------------------------------------------+
| id                                   | name | subnets                                   |
+--------------------------------------+------+-------------------------------------------+
| ed96078d-7d40-4ae2-bb09-e5b2d3db248c | flat | 16a8fd38-f201-482e-8117-f6660a0a65a4      |
|                                      |      | 192.168.74.0/24                           |
+--------------------------------------+------+-------------------------------------------+
[root@linux-node1 ~]# neutron subnet-list
+------------------------------+-------------+-----------------+-------------------------------+
| id                           | name        | cidr            | allocation_pools              |
+------------------------------+-------------+-----------------+-------------------------------+
| 16a8fd38-f201-482e-8117-f666 | flat-subnet | 192.168.74.0/24 | {"start": "192.168.74.100",   |
| 0a0a65a4                     |             |                 | "end": "192.168.74.200"}      |
+------------------------------+-------------+-----------------+-------------------------------+
使用demo用户创建
#创建密钥对
[root@linux-node1 ~]# ssh-keygen -q -N ""
Enter file in which to save the key (/root/.ssh/id_rsa):
[root@linux-node1 ~]# ls .ssh/
id_rsa  id_rsa.pub  known_hosts

#添加,创建的虚拟机使用
[root@linux-node1 ~]# nova keypair-add --pub-key .ssh/id_rsa.pub mykey
[root@linux-node1 ~]# nova keypair-list
+-------+------+-------------------------------------------------+
| Name  | Type | Fingerprint                                     |
+-------+------+-------------------------------------------------+
| mykey | ssh  | e7:b7:05:45:12:19:de:86:df:b3:3a:f9:d1:d0:15:3b |
+-------+------+-------------------------------------------------+

#设置安全组
[root@linux-node1 ~]# nova secgroup-add-rule default icmp -1 -1 0.0.0.0/0
+-------------+-----------+---------+-----------+--------------+
| IP Protocol | From Port | To Port | IP Range  | Source Group |
+-------------+-----------+---------+-----------+--------------+
| icmp        | -1        | -1      | 0.0.0.0/0 |              |
+-------------+-----------+---------+-----------+--------------+
[root@linux-node1 ~]# nova secgroup-add-rule default tcp 22 22 0.0.0.0/0
+-------------+-----------+---------+-----------+--------------+
| IP Protocol | From Port | To Port | IP Range  | Source Group |
+-------------+-----------+---------+-----------+--------------+
| tcp         | 22        | 22      | 0.0.0.0/0 |              |
+-------------+-----------+---------+-----------+--------------+
准备工作做完,可以创建虚拟机了
#有哪些虚拟机
[root@linux-node1 ~]# nova flavor-list
+----+-----------+-----------+------+-----------+------+-------+-------------+-----------+
| ID | Name      | Memory_MB | Disk | Ephemeral | Swap | VCPUs | RXTX_Factor | Is_Public |
+----+-----------+-----------+------+-----------+------+-------+-------------+-----------+
| 1  | m1.tiny   | 512       | 1    | 0         |      | 1     | 1.0         | True      |
| 2  | m1.small  | 2048      | 20   | 0         |      | 1     | 1.0         | True      |
| 3  | m1.medium | 4096      | 40   | 0         |      | 2     | 1.0         | True      |
| 4  | m1.large  | 8192      | 80   | 0         |      | 4     | 1.0         | True      |
| 5  | m1.xlarge | 16384     | 160  | 0         |      | 8     | 1.0         | True      |
+----+-----------+-----------+------+-----------+------+-------+-------------+-----------+

#镜像
[root@linux-node1 ~]# nova image-list
+--------------------------------------+--------+--------+--------+
| ID                                   | Name   | Status | Server |
+--------------------------------------+--------+--------+--------+
| f9f0e696-8c65-421f-a16c-43a0ec4d5d74 | cirros | ACTIVE |        |
+--------------------------------------+--------+--------+--------+

#网络
[root@linux-node1 ~]# nova net-list
+--------------------------------------+-------+------+
| ID                                   | Label | CIDR |
+--------------------------------------+-------+------+
| ed96078d-7d40-4ae2-bb09-e5b2d3db248c | flat  | None |
+--------------------------------------+-------+------+
开始创建
[root@linux-node1 ~]# nova boot --flavor m1.tiny --image cirros --nic net-id=ed96078d-7d40-4ae2-bb09-e5b2d3db248c --security-group default --key-name mykey hello-instance
+--------------------------------------+-----------------------------------------------+
| Property                             | Value                                         |
+--------------------------------------+-----------------------------------------------+
| OS-DCF:diskConfig                    | MANUAL                                        |
| OS-EXT-AZ:availability_zone          |                                               |
| OS-EXT-STS:power_state               | 0                                             |
| OS-EXT-STS:task_state                | scheduling                                    |
| OS-EXT-STS:vm_state                  | building                                      |
| OS-SRV-USG:launched_at               | -                                             |
| OS-SRV-USG:terminated_at             | -                                             |
| accessIPv4                           |                                               |
| accessIPv6                           |                                               |
| adminPass                            | gR37EGFYqcv4                                  |
| config_drive                         |                                               |
| created                              | 2017-04-22T18:30:41Z                          |
| description                          | -                                             |
| flavor                               | m1.tiny (1)                                   |
| hostId                               |                                               |
| id                                   | 01bcd258-5f0d-4747-8522-96d921b4f31f          |
| image                                | cirros (f9f0e696-8c65-421f-a16c-43a0ec4d5d74) |
| key_name                             | mykey                                         |
| locked                               | False                                         |
| metadata                             | {}                                            |
| name                                 | hello-instance                                |
| os-extended-volumes:volumes_attached | []                                            |
| progress                             | 0                                             |
| security_groups                      | default                                       |
| status                               | BUILD                                         |
| tenant_id                            | 27eaaefd663148fab9345ed68c0c2262              |
| updated                              | 2017-04-22T18:30:42Z                          |
| user_id                              | e68fc48bfb6d4759b2d1c3655366c203              |
+--------------------------------------+-----------------------------------------------+
配置注意:
dashboard配置文件:SESSION_ENGINE = 'django.contrib.sessions.backends.file', nova计算节点虚拟化技术试验qume就ok,kvm网卡不通;
cinder
存储的三大分类:块存储(磁盘阵列)、文件存储(NAS、NFS)和对象存储(metadata和block分开的,swift)
云硬盘的瓶颈在IO(网络)
cinder-api:接受API并将请求路由到cinder-volume;(安装在控制节点)
cinder-volume:类似于nova-compute;(安装在存储节点)
cinder-scheduler:类似于nova-scheduler,是一个守护进程;(安装在控制节点上);
cinder的后端使用isici,需要创建vg,采用issici发布出去;
添加一块硬盘,并创建pv
[root@linux-node2 ~]# pvcreate /dev/sdb
  Physical volume "/dev/sdb" successfully created.
创建vg
[root@linux-node2 ~]# vgcreate cinder-volumes /dev/sdb
  Volume group "cinder-volumes" successfully created
在lvm的配置文件中添加filter
/etc/lvm/lvm.conf
devices {
...
filter = [ "a/sdb/", "r/.*/"]
生产的yum源,使用cobbler就可以实现了,非常简单;
检测:时间不同步,有可能状态是down的;
[root@linux-node1 ~]# cinder service-list
+------------------+-----------------+------+---------+-------+----------------------------+-----------------+
|      Binary      |       Host      | Zone |  Status | State |         Updated_at         | Disabled Reason |
+------------------+-----------------+------+---------+-------+----------------------------+-----------------+
| cinder-scheduler |   linux-node1   | nova | enabled |   up  | 2017-04-28T12:49:47.000000 |        -        |
|  cinder-volume   | linux-node2@lvm | nova | enabled |   up  | 2017-04-28T12:49:53.000000 |        -        |
+------------------+-----------------+------+---------+-------+----------------------------
在dashboard上创建云硬盘,相当于创建了一盒lv;
[root@linux-node2 ~]# lvdisplay
  --- Logical volume ---
  LV Path                /dev/cinder-volumes/volume-4b7d4ffb-d342-4cfd-9c73-969c9287ddcb
  LV Name                volume-4b7d4ffb-d342-4cfd-9c73-969c9287ddcb
  VG Name                cinder-volumes
  LV UUID                MhllVl-EDgQ-uOkO-oY2P-Df6z-OdT1-gM60qx
  LV Write Access        read/write
  LV Creation host, time linux-node2, 2017-04-28 20:56:03 +0800
  LV Status              available
  # open                 0
  LV Size                1.00 GiB
  Current LE             256
  Segments               1
  Allocation             inherit
  Read ahead sectors     auto
  - currently set to     8192
  Block device           253:3

  WARNING: Device for PV kWvTDr-LyYF-U5kR-4jEf-rKtT-b0M8-4bLkWS not found or rejected by a filter.
  WARNING: Couldn't find all devices for LV cl/swap while checking used and assumed devices.
  WARNING: Couldn't find all devices for LV cl/home while checking used and assumed devices.
  WARNING: Couldn't find all devices for LV cl/root while checking used and assumed devices.
  --- Logical volume ---
  LV Path                /dev/cl/swap
  LV Name                swap
  VG Name                cl
  LV UUID                cGmQdK-keaJ-GnjN-zPav-sytG-fTd5-pCwE8r
  LV Write Access        read/write
  LV Creation host, time localhost.localdomain, 2017-04-21 17:32:43 +0800
  LV Status              available
  # open                 2
  LV Size                2.00 GiB
  Current LE             512
  Segments               1
  Allocation             inherit
  Read ahead sectors     auto
  - currently set to     8192
  Block device           253:1

  --- Logical volume ---
  LV Path                /dev/cl/home
  LV Name                home
  VG Name                cl
  LV UUID                sneMTM-lQsX-LZFC-SzDQ-93RM-NXe0-WMF929
  LV Write Access        read/write
  LV Creation host, time localhost.localdomain, 2017-04-21 17:32:43 +0800
  LV Status              available
  # open                 1
  LV Size                18.70 GiB
  Current LE             4786
  Segments               1
  Allocation             inherit
  Read ahead sectors     auto
  - currently set to     8192
  Block device           253:2

  --- Logical volume ---
  LV Path                /dev/cl/root
  LV Name                root
  VG Name                cl
  LV UUID                KIv4KK-AleO-pk9k-5Pht-w5FG-TLam-LIsYGY
  LV Write Access        read/write
  LV Creation host, time localhost.localdomain, 2017-04-21 17:32:43 +0800
  LV Status              available
  # open                 1
  LV Size                38.30 GiB
  Current LE             9804
  Segments               1
  Allocation             inherit
  Read ahead sectors     auto
  - currently set to     8192
  Block device           253:0
在编辑云硬盘--->管理连接 就可以选择云主机进行挂载了;
Ml2model: linux bridge、openvswitch、其他商业插件;
DhcpAgent:
L3-Agent:
LBAAS-Agent:负载均衡agent
其他agent:
虚拟机存放目录,在计算节点上:
[root@linux-node2 instances]# tree
.
├── 9fe8e6b6-49b8-487e-aad3-742ae9465960
│?? ├── console.log
│?? ├── disk
│?? ├── disk.info
│?? └── libvirt.xml
├── _base
│?? └── 502a247d32cfab80c4db305718d58df0323bd9e5
├── compute_nodes
├── e858e8e9-8c89-417e-99c0-6dea030bc841
│?? ├── console.log
│?? ├── disk
│?? ├── disk.info
│?? └── libvirt.xml
└── locks
    ├── nova-502a247d32cfab80c4db305718d58df0323bd9e5
    └── nova-storage-registry-lock

4 directories, 12 files
[root@linux-node2 instances]# pwd
/var/lib/nova/instances
可以看到既有日志文件,又有lock(避免脚本被重复运行)文件; 脚本既需要有日志,又要有lock文件(在脚本开始运行的时候,创建文件,脚本运行结束,删除文件,下一次运行如果发现文件存在,记录日志之后,退出);
磁盘:
[root@linux-node2 instances]# cd 9fe8e6b6-49b8-487e-aad3-742ae9465960/
[root@linux-node2 9fe8e6b6-49b8-487e-aad3-742ae9465960]# ls
console.log  disk  disk.info  libvirt.xml
[root@linux-node2 9fe8e6b6-49b8-487e-aad3-742ae9465960]# ls -lh
总用量 2.7M
-rw-rw---- 1 qemu qemu  57K 4月  26 22:13 console.log
-rw-r--r-- 1 qemu qemu 2.6M 4月  26 22:17 disk
-rw-r--r-- 1 nova nova   79 4月  26 17:25 disk.info
-rw-r--r-- 1 nova nova 2.5K 4月  26 17:25 libvirt.xml
[root@linux-node2 9fe8e6b6-49b8-487e-aad3-742ae9465960]# file disk
disk: QEMU QCOW Image (v3), has backing file (path /var/lib/nova/instances/_base/502a247d32cfab80c4db305718d58df03), 1073741824 bytes
[root@linux-node2 9fe8e6b6-49b8-487e-aad3-742ae9465960]# qemu-img info disk
image: disk
file format: qcow2
virtual size: 1.0G (1073741824 bytes)
disk size: 2.6M
cluster_size: 65536
backing file: /var/lib/nova/instances/_base/502a247d32cfab80c4db305718d58df0323bd9e5
Format specific information:
    compat: 1.1
    lazy refcounts: false
    refcount bits: 16
    corrupt: false
qcow2:将变动的文件放在disk中,大部分的文件存放在后端文件_base目录下面,这样就占用更小的空间;
[root@linux-node2 _base]# pwd
/var/lib/nova/instances/_base
[root@linux-node2 _base]# qemu-img info 502a247d32cfab80c4db305718d58df0323bd9e5
image: 502a247d32cfab80c4db305718d58df0323bd9e5
file format: raw
virtual size: 39M (41126400 bytes)
disk size: 18M
openstack中的虚拟机的xml文件不能改,每次都自动生成(改了没有啥用)
[root@linux-node2 9fe8e6b6-49b8-487e-aad3-742ae9465960]# pwd
/var/lib/nova/instances/9fe8e6b6-49b8-487e-aad3-742ae9465960
[root@linux-node2 9fe8e6b6-49b8-487e-aad3-742ae9465960]# ls
console.log  disk  disk.info  libvirt.xml
我们在宿主机上创建的key,是如何copy到虚拟机上的呢?
进入虚拟机查看
$ curl http://169.254.169.254/2009-04-04/meta-data   #meta-data源
ami-id
ami-launch-index
ami-manifest-path
block-device-mapping/
hostname
instance-action
instance-id
instance-type
local-hostname
local-ipv4
placement/
public-hostname
public-ipv4
public-keys/
reservation-id
security-groups$

$ curl http://169.254.169.254/2009-04-04/meta-data/hostname
instance.novalocal$
$ curl http://169.254.169.254/2009-04-04/meta-data/local-ipv4
192.168.74.103$
$ curl http://169.254.169.254/2009-04-04/meta-data/public-keys/0/openssh-key
ssh-rsa AAAAB3NzaC1yc2EAAAADAQABAAABAQDxRKLkdrsrFHI/q5KjH7N2XjjdfNob6kJfOX5XlKaE5YNT2poiV0p2+Vr3H/epPYrPz+yZEFRc4dQ9WJCPAA8KcaDXc0FuB/JJGQ6M2wXjsFqHS9Co/FrOC8N0dP7ODPE+6uiZR9d8OV+NNad7KOg3WPaPji6fueZ9
那么这个meta源是谁提供的呢?
$ ip ro li           #查看路由,有169.254.169.254的地址,数据从eth0出去,经过的地址是192.168.74.100
default via 192.168.74.2 dev eth0
169.254.169.254 via 192.168.74.100 dev eth0
192.168.74.0/24 dev eth0  src 192.168.74.103
$


在宿主机上查看
[root@linux-node1 ~]# ip netns li    #查看namespace
qdhcp-5453944d-52fd-4451-b711-8c3dd8ec7cc3 (id: 0)


[root@linux-node1 ~]# ip netns exec qdhcp-5453944d-52fd-4451-b711-8c3dd8ec7cc3 ifconfig
lo: flags=73<UP,LOOPBACK,RUNNING>  mtu 65536
        inet 127.0.0.1  netmask 255.0.0.0
        inet6 ::1  prefixlen 128  scopeid 0x10<host>
        loop  txqueuelen 1  (Local Loopback)
        RX packets 4  bytes 2304 (2.2 KiB)
        RX errors 0  dropped 0  overruns 0  frame 0
        TX packets 4  bytes 2304 (2.2 KiB)
        TX errors 0  dropped 0 overruns 0  carrier 0  collisions 0

ns-44f3231a-96: flags=4163<UP,BROADCAST,RUNNING,MULTICAST>  mtu 1500
        inet 192.168.74.100  netmask 255.255.255.0  broadcast 192.168.74.255
        inet6 fe80::f816:3eff:fe9a:e0de  prefixlen 64  scopeid 0x20<link>
        ether fa:16:3e:9a:e0:de  txqueuelen 1000  (Ethernet)
        RX packets 11879  bytes 1567747 (1.4 MiB)
        RX errors 0  dropped 0  overruns 0  frame 0
        TX packets 355  bytes 40240 (39.2 KiB)
        TX errors 0  dropped 0 overruns 0  carrier 0  collisions 0

[root@linux-node1 ~]# ip netns exec qdhcp-5453944d-52fd-4451-b711-8c3dd8ec7cc3 ip ad li     #namespace的地址为192.168..74.100
1: lo: <LOOPBACK,UP,LOWER_UP> mtu 65536 qdisc noqueue state UNKNOWN qlen 1
    link/loopback 00:00:00:00:00:00 brd 00:00:00:00:00:00
    inet 127.0.0.1/8 scope host lo
       valid_lft forever preferred_lft forever
    inet6 ::1/128 scope host
       valid_lft forever preferred_lft forever
2: ns-44f3231a-96@if5: <BROADCAST,MULTICAST,UP,LOWER_UP> mtu 1500 qdisc noqueue state UP qlen 1000
    link/ether fa:16:3e:9a:e0:de brd ff:ff:ff:ff:ff:ff link-netnsid 0
    inet 192.168.74.100/24 brd 192.168.74.255 scope global ns-44f3231a-96
       valid_lft forever preferred_lft forever
    inet 169.254.169.254/16 brd 169.254.255.255 scope global ns-44f3231a-96
       valid_lft forever preferred_lft forever
    inet6 fe80::f816:3eff:fe9a:e0de/64 scope link
       valid_lft forever preferred_lft forever


[root@linux-node1 ~]# ip netns exec qdhcp-5453944d-52fd-4451-b711-8c3dd8ec7cc3 netstat -atlp    #由这个namespace提供web服务器,开发80端口,提供meta-data
Active Internet connections (servers and established)
Proto Recv-Q Send-Q Local Address           Foreign Address         State       PID/Program name
tcp        0      0 0.0.0.0:http            0.0.0.0:*               LISTEN      3331/python2
tcp        0      0 linux-node1:domain      0.0.0.0:*               LISTEN      5933/dnsmasq
tcp        0      0 linux-node1:domain      0.0.0.0:*               LISTEN      5933/dnsmasq
tcp6       0      0 linux-node1:domain      [::]:*                  LISTEN      5933/dnsmasq
[root@linux-node1 ~]# ip netns exec qdhcp-5453944d-52fd-4451-b711-8c3dd8ec7cc3 netstat -nulp
Active Internet connections (only servers)
Proto Recv-Q Send-Q Local Address           Foreign Address         State       PID/Program name
udp        0      0 192.168.74.100:53       0.0.0.0:*                           5933/dnsmasq
udp        0      0 169.254.169.254:53      0.0.0.0:*                           5933/dnsmasq
udp        0      0 0.0.0.0:67              0.0.0.0:*                           5933/dnsmasq
udp6       0      0 fe80::f816:3eff:fe9a:53 :::*                                5933/dnsmasq
[root@linux-node1 ~]# ip netns exec qdhcp-5453944d-52fd-4451-b711-8c3dd8ec7cc3 ps -aux
dashboard是通过API通信的;
dashboard可以安装在任何地方,只有能够连上keystone就可以;重启httpd之后,会生成配置文件;
/etc/httpd/conf.d
[root@linux-node1 conf.d]# ls
autoindex.conf  openstack-dashboard.conf  README  userdir.conf  welcome.conf  wsgi-keystone.con
在dashboard上创建快照,存在位置如下:
[root@linux-node2 instances]# pwd
/var/lib/nova/instances
[root@linux-node2 instances]# ll
总用量 4
drwxr-xr-x 2 nova nova 73 4月  27 21:09 1a8b9792-a74b-4069-b585-bf15af66c172
drwxr-xr-x 2 nova nova 73 4月  26 17:25 9fe8e6b6-49b8-487e-aad3-742ae9465960
drwxr-xr-x 2 nova nova 54 4月  24 16:34 _base
-rw-r--r-- 1 nova nova 34 4月  27 21:16 compute_nodes
drwxr-xr-x 2 nova nova 73 4月  26 17:54 e858e8e9-8c89-417e-99c0-6dea030bc841
drwxr-xr-x 2 nova nova 93 4月  24 16:34 locks
drwxr-xr-x 2 nova nova  6 4月  27 21:19 snapshots
虚拟机创建流程:
1、第一阶段(和keystone交互、认证,获取auth token):用户使用dashboard/CLI,发送用户名或者密码给keystone,用户获取到auth token,拿着这个token,去访问nova-api,申请创建虚拟机,nova-api去找keystone查看该token是否是有效的,keystone回复nova-api;
2、第二阶段(nova组件之间交互[通过消息队列],调度,选择一个nova-compute)nova-api把用户要创建虚拟机的请求在nova数据库中记录下来,nova-api以rpc all的方式,发送一个请求给nova-schduler,nova-schduler获取请求,nova-scheduler在数据库中查找,调度,将数据发回到mq中,nova-compute获取数据,nova-compute和数据库交换,(这里不直接和数据库交互,是通过nova-conductor,由nova-conductor和数据库交互)获取实例的信息
3、第三个阶段(nova-compute和其他服务组件交互,获取创建虚拟机需要的各种资源,每一个服务都要到keystone上认证请求是否是有效的)nova-compute发送auth token的restful 请求给glance,glance拿着token去token确认,确认之后,把需要的返回给nova-compute;
..... neutron.....
......cinder.... 类似。
4、所有的资源信息获取成之后,nova-api,nova-compute通过libvirt调用kvm创建虚拟机;

小问题:为什么第一次创建虚拟机会慢,因为第一次计算节点上是没有镜像的,glance会把镜像放到/var/lib/nova/instances/_base/下;拷贝的过程会比较慢;
如果网卡的启动协议为dhcp,会创建不了网桥;