第一次做这个的时候,都是别人直接提供给我们了image 和OVMF.fd,可以直接进行以下的command就可以实现最终目的了:
CMD to boot up the img which had the os installed without network enabling.
#qemu-img create -b /share/xvs/images/OSV/rhel_8.0.img -f qcow2 /root/rhel8u0_efi.qcow
#/usr/libexec/qemu-kvm -accel kvm -cpu host -drive file=/root/temp/rhel8u0_efi.qcow -m 4096 -smp 4 -net none -serial stdio -bios OVMF.fd
但是现在需要重新自己理一下思路,我的思路是这样的:
在网上备好了下载好ISO 文件备好
iso -> qcow2 -> img ->qcow -> 起KVM
首先在linux GUI 下起virtual Machine Mnager
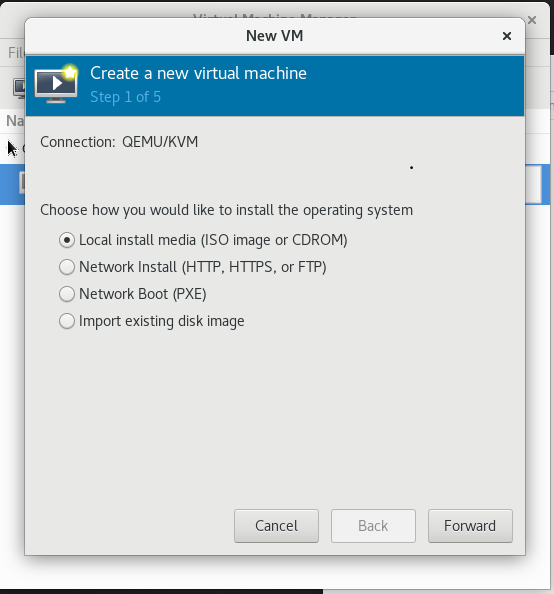
1. 右击file -> new Virtual Machine

2.我们已经在网上下载了iso 的文件,因此是选择local 那个

3. 接下来就是forward 就好,没有什么特别注意的地方,就安装好虚拟机
4.等安装结束后,发现在/var/lib/libvirt/image/ 路径下有一个qcow2 的文件,说明此时是生效了
5.考虑到我以后是打算在纯command中起KVM ,因为我想要有log 输出,因此我在virtual machine manager 中安装好的机器中,做以下的command
Let's just modify the file of /boot/efi/EFI/redhat/grub.cfg (3 places after linuxefi to modify, + console=tty0 console=ttyS0,115200n8 loglevel=7)
For /etc/default/grub , you can also add serial parameter into it
===========================
GRUB_CMDLINE_LINUX=”console=tty0 console=ttyS0,115200n8 loglevel=7”
===========================
Run command: grub2 –mkconfig –o /boot/grub2/grub.cfg to makre sure the grub config file takes effect and then reboot
然后重启就可以了。
6. 此时就可以做qcow2 转换为img 文件了
go to /var/lib/libvirt/image
qemu-img convert -O raw rhel8.qcow2 RHEL8-KVM.img
7.将RHEL8-KVM copy 到你需要的地方去,将img 文件转化为qcow 文件,
#qemu-img create -b /root/RHEL8.img -f qcow2 /root/rhel8.qcow
#cp /share/xvs/images/OVMF.fd .
--> 最后这一步就是实现了我们在纯Linux command 下可以另外起一个虚拟机,此时虚拟机起来之后可以通过uname -a 或者之前定义的账号密码来确认已经不是本机的Linux层面了
#/usr/libexec/qemu-kvm -accel kvm -cpu host -drive file=/root/temp/rhel.qcow -m 4096 -smp 4 -net none -serial stdio -bios OVMF.fd