前言
Cobra是一个强大的用来构建命令行程序的库,许多流行的Go项目都是用它来构建的,比如Kubernetes、Docker、etcd、Istio、Github CLI等等。
接下来,演示开发一个我们自己的命令行程序chenqionghe,模仿一下docker命令行,预期功能如下
# 查看帮助
chenqionghe -h
# 查看版本,类似docker version
chenqionghe version
# 查看hello命令帮助,类似docker ps -h
chenqionghe hello -h
# 使用hello命令,类似docker run --name app --volume /app/data
chenqionghe hello --name light-weight-baby --author gym
Cobra基于三个基本概念
- commands(行为)
- arguments(位置参数)
- flags(命令行选项)
使用基本模式是APPNAME VERB NOUN --ADJECTIVE或APPNAME COMMAND ARG --FLAG,例如
# server是一个command,--port=1313是一个命令行选项
hugo server --port=1313
# clone 是 commands,URL 是 arguments,brae是命令行选项
git clone URL --bare
一、安装
go get -u github.com/spf13/cobra/cobra
go install github.com/spf13/cobra/cobra
二、初始化应用
初始化项目
这里我的应用名叫chenqionghe
go mod init chenqionghe
创建入口文件cmd/root.go
创建文件夹cmd,并创建文件cmd/root.go,这是用来放所有的命令的基本文件
package cmd
import (
	"fmt"
	"github.com/spf13/cobra"
	"os"
)
var rootCmd = &cobra.Command{
	Use:   "chenqionghe",
	Short: "getting muscle is not easy",
	Long: `let's do it, yeah buddy light weight baby!`,
	Run: func(cmd *cobra.Command, args []string) {
		fmt.Println("hello chenqionghe")
	},
}
func Execute() {
	if err := rootCmd.Execute(); err != nil {
		fmt.Println(err)
		os.Exit(1)
	}
}
创建主程序main.go
package main

import "chenqionghe/cmd"

func main() {
	cmd.Execute()
}
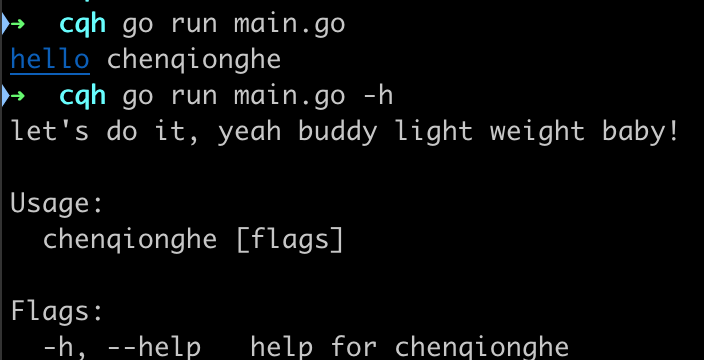
运行一下main.go可以看到生效了
三、如何自定义命令
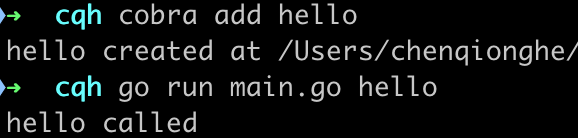
创建hello子命令
cobra add hello
会在cmd下生成一个hello.cmd的命令,生成的命令是长下面这样的,核心是调用了AddCommand方法

我们把没用的信息干掉,精简后如下
package cmd

import (
	"fmt"
	"github.com/spf13/cobra"
)
var helloCmd = &cobra.Command{
	Use:   "hello",
	Short: "hello命令简介",
	Long:  `hello命令详细介绍`,
	Run: func(cmd *cobra.Command, args []string) {
		fmt.Println("hello called")
	},
	TraverseChildren: true,
}

func init() {
	rootCmd.AddCommand(helloCmd)
}
直接运行看看
go run main.go hello
创建version子命令
同理,我们再创建一个version命令
cobra add version
修改一下Run方法
Run: func(cmd *cobra.Command, args []string) {
   fmt.Println("chenqionghe version v0.0.1")
},
运行如下

四、如何设置flag选项
flag选项按作用范围分为persistent和local两类
全局选项
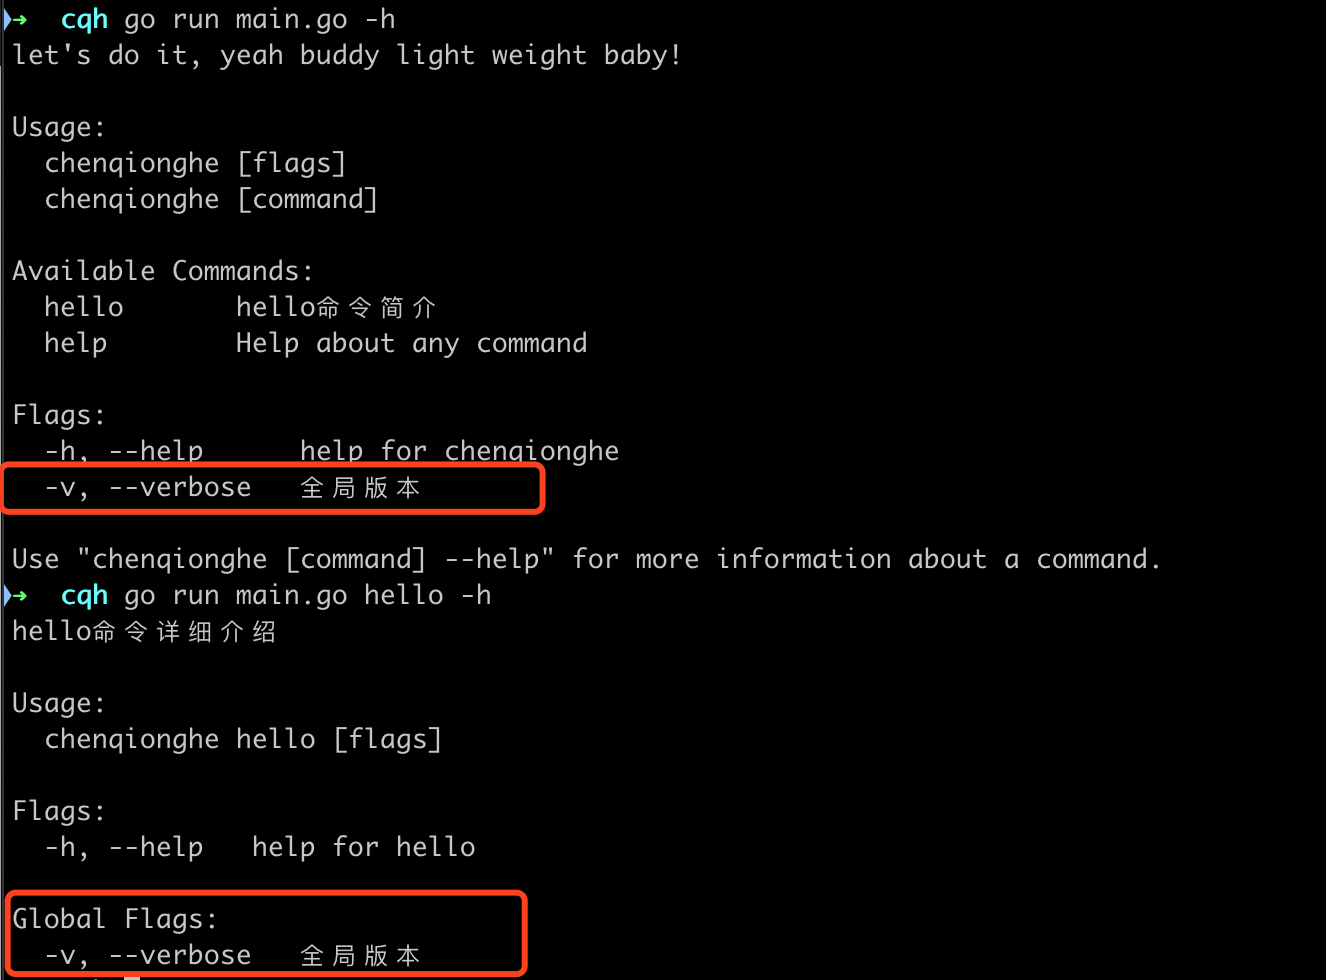
persistent是全局选项,对应的方法为PersistentFlags,可以分配给命令和命令下的所有子命令,上面的rootCmd和helloCmd都是可以调用flag
例如,添加一个-v选项
func init() {
	var Verbose bool
	rootCmd.PersistentFlags().BoolVarP(&Verbose, "verbose", "v", false, "全局版本")
}
运行,可以看到生效了
本地选项
local为本地选项,对应方法为Flags,只对指定的Command生效,我们往hello命令的init里边添加一个本地flag
func init() {
	rootCmd.AddCommand(helloCmd)
	//本地flag
	var Source string
	helloCmd.Flags().StringVarP(&Source, "source", "s", "", "读取文件路径")
}
运行如下

设置必填
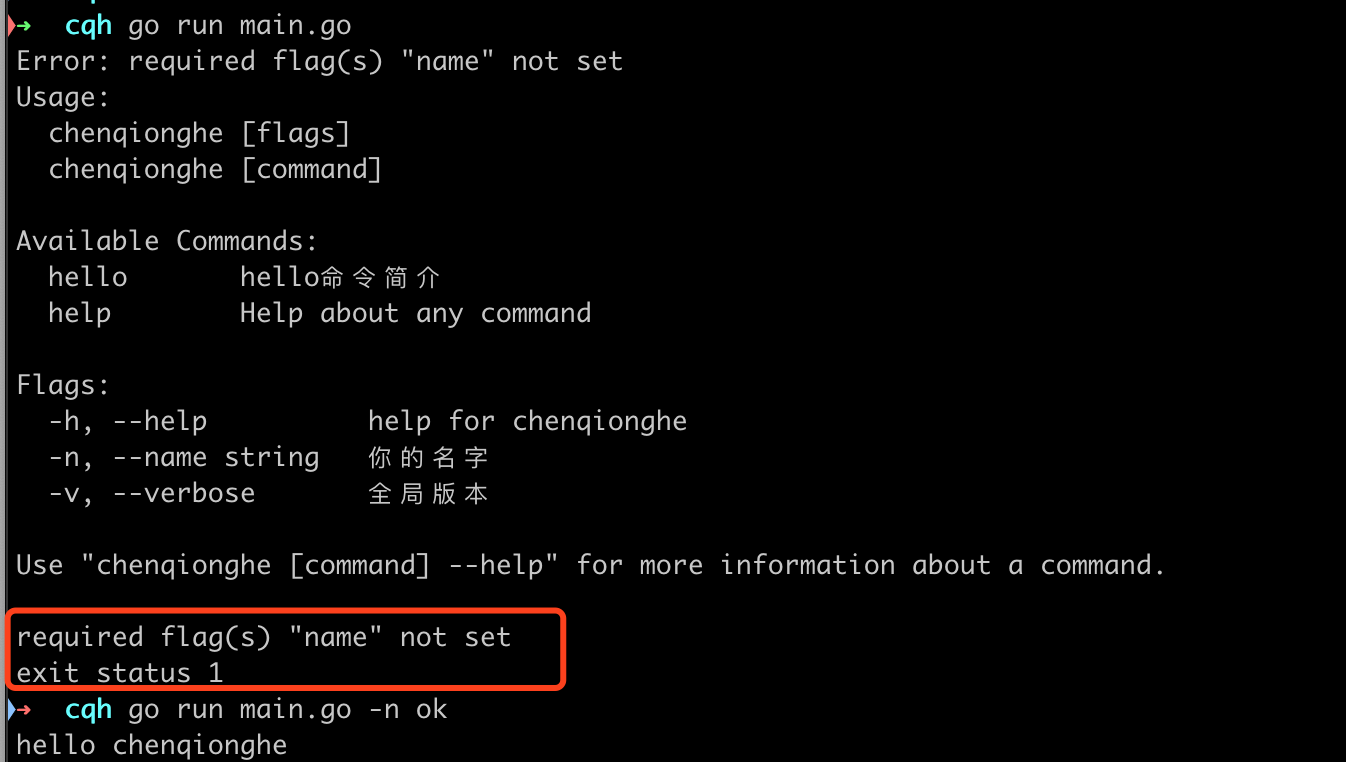
我们在init函数添加以下代码
rootCmd.Flags().StringVarP(&Name, "name", "n", "", "你的名字")
rootCmd.MarkFlagRequired("name")
运行如下,必须填写name参数才可以运行
绑定配置
添加一个initConfig方法
func initConfig() {
	viper.AddConfigPath("./")
	viper.AddConfigPath("./conf")
	viper.SetConfigName("config")
	viper.SetConfigType("yaml")
	viper.AutomaticEnv()
	if err := viper.ReadInConfig(); err != nil {
		fmt.Println("Error:", err)
		os.Exit(1)
	}
}
在init中调用
cobra.OnInitialize(initConfig) //这会在运行每个子命令之前运行
rootCmd.PersistentFlags().StringVar(&Author, "author", "defaultAuthor", "作者名")
viper.BindPFlag("author", rootCmd.PersistentFlags().Lookup("author"))
这将把viper配置和flag绑定,如果用户不设置-author选项,将从配置中查找
五、如何设置arguments
cobra默认提供了一些验证方法
- NoArgs: 如果包含任何位置参数,命令报错
- ArbitraryArgs: 命令接受任何参数
- OnlyValidArgs: 如果有位置参数不在ValidArgs中,命令报错
- MinimumArgs(init): 如果参数数目少于N个后,命令行报错
- MaximumArgs(init): 如果参数数目多于N个后,命令行报错
- ExactArgs(init): 如果参数数目不是N个话,命令行报错
- RangeArgs(min, max): 如果参数数目不在范围(min, max)中,命令行报错
使用示例
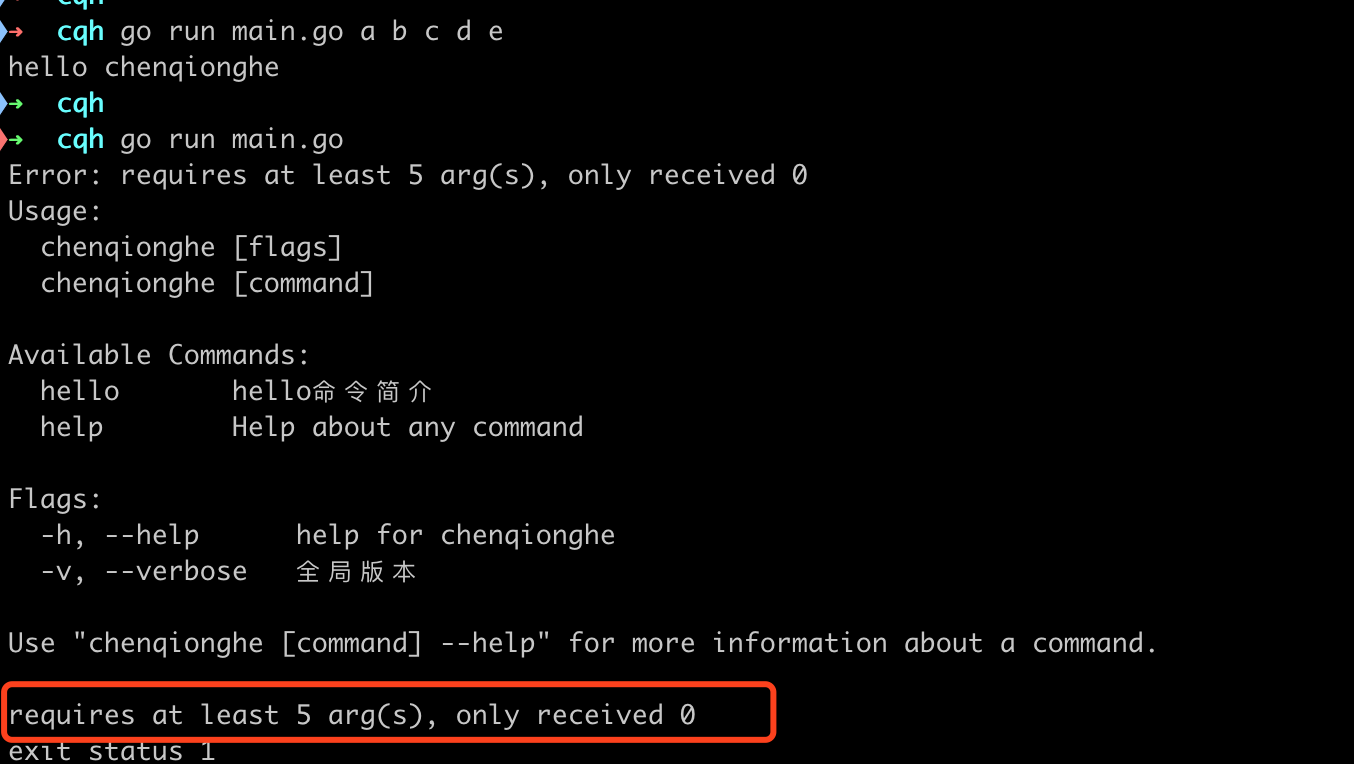
往Command中添加参数Args,我们规定参数不能少于5个,如下
var rootCmd = &cobra.Command{
   Use:   "chenqionghe",
   Short: "getting muscle is not easy",
   Long:  `let's do it, yeah buddy light weight baby!`,
   Run: func(cmd *cobra.Command, args []string) {
      fmt.Println("hello chenqionghe")
   },
   Args: cobra.MinimumNArgs(5),
}
运行输出
六、如何使用参数
我们可以看到核心的方法,其实就是cobra.Command中的Run参数,指定了func(cmd *cobra.Command, args []string)类型的回调
代表我们可以直接使用cmd和args来编写我们的程序
获取flag参数
我们可以直接使用cmd的flag方法获取传递的flag
var helloCmd = &cobra.Command{
	Use:   "hello",
	Short: "hello命令简介",
	Long:  `hello命令详细介绍`,
	Run: func(cmd *cobra.Command, args []string) {
		fmt.Println(cmd.Flag("author").Value)
		fmt.Println(cmd.Flag("name").Value)
	},
}
运行如下

获取args参数
var helloCmd = &cobra.Command{
	Use:   "hello",
	Short: "hello命令简介",
	Long:  `hello命令详细介绍`,
	Run: func(cmd *cobra.Command, args []string) {
		fmt.Println(args)
	},
	TraverseChildren: true,
}
调用如下,可以看到已经取出了所有的args参数

七、如何设置钩子
cobra提供了很多钩子方法,可按运行顺序排列如下
- PersistentPreRun
- PreRun
- Run
- PostRun
- PersistentPostRun
使用示例
var helloCmd = &cobra.Command{
	Use:   "hello",
	Short: "hello命令简介",
	Long:  `hello命令详细介绍`,
	//Args: cobra.MinimumNArgs(1),
	PersistentPreRun: func(cmd *cobra.Command, args []string) {
		fmt.Printf("Inside rootCmd PersistentPreRun with args: %v
", args)
	},
	PreRun: func(cmd *cobra.Command, args []string) {
		fmt.Printf("Inside rootCmd PreRun with args: %v
", args)
	},
	Run: func(cmd *cobra.Command, args []string) {
		fmt.Printf("Run with args: %v
", args)
	},
	PostRun: func(cmd *cobra.Command, args []string) {
		fmt.Printf("Inside rootCmd PostRun with args: %v
", args)
	},
	PersistentPostRun: func(cmd *cobra.Command, args []string) {
		fmt.Printf("Inside rootCmd PersistentPostRun with args: %v
", args)
	},
}
运行如下

总结
到这里,我们就已经学会了如果设置子命令、flag参数、arguments参数以及编写方法使用这些参数,
还有最后一步,就是编译出我们的二进制程序,验证一下我们之前的需求
- 编译
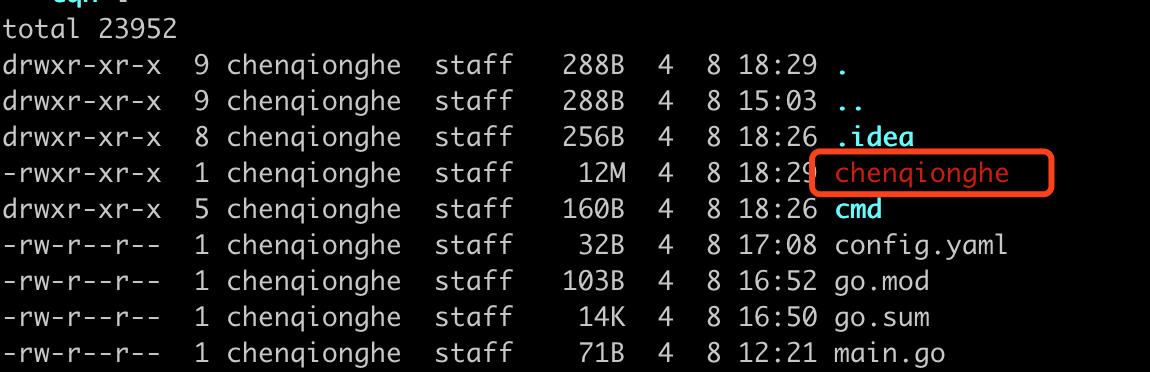
go build -o chenqionghe
如下,已经生成二进制文件chenqionghe
- 运行命令
./chenqionghe -h # 查看帮助
./chenqionghe version # 查看版本,类似docker version
./chenqionghe hello -h # 查看hello命令帮助,类似docker ps -h
./chenqionghe hello --name light-weight-baby --author gym # 使用hello命令,类似docker run --name app --volume /app/data
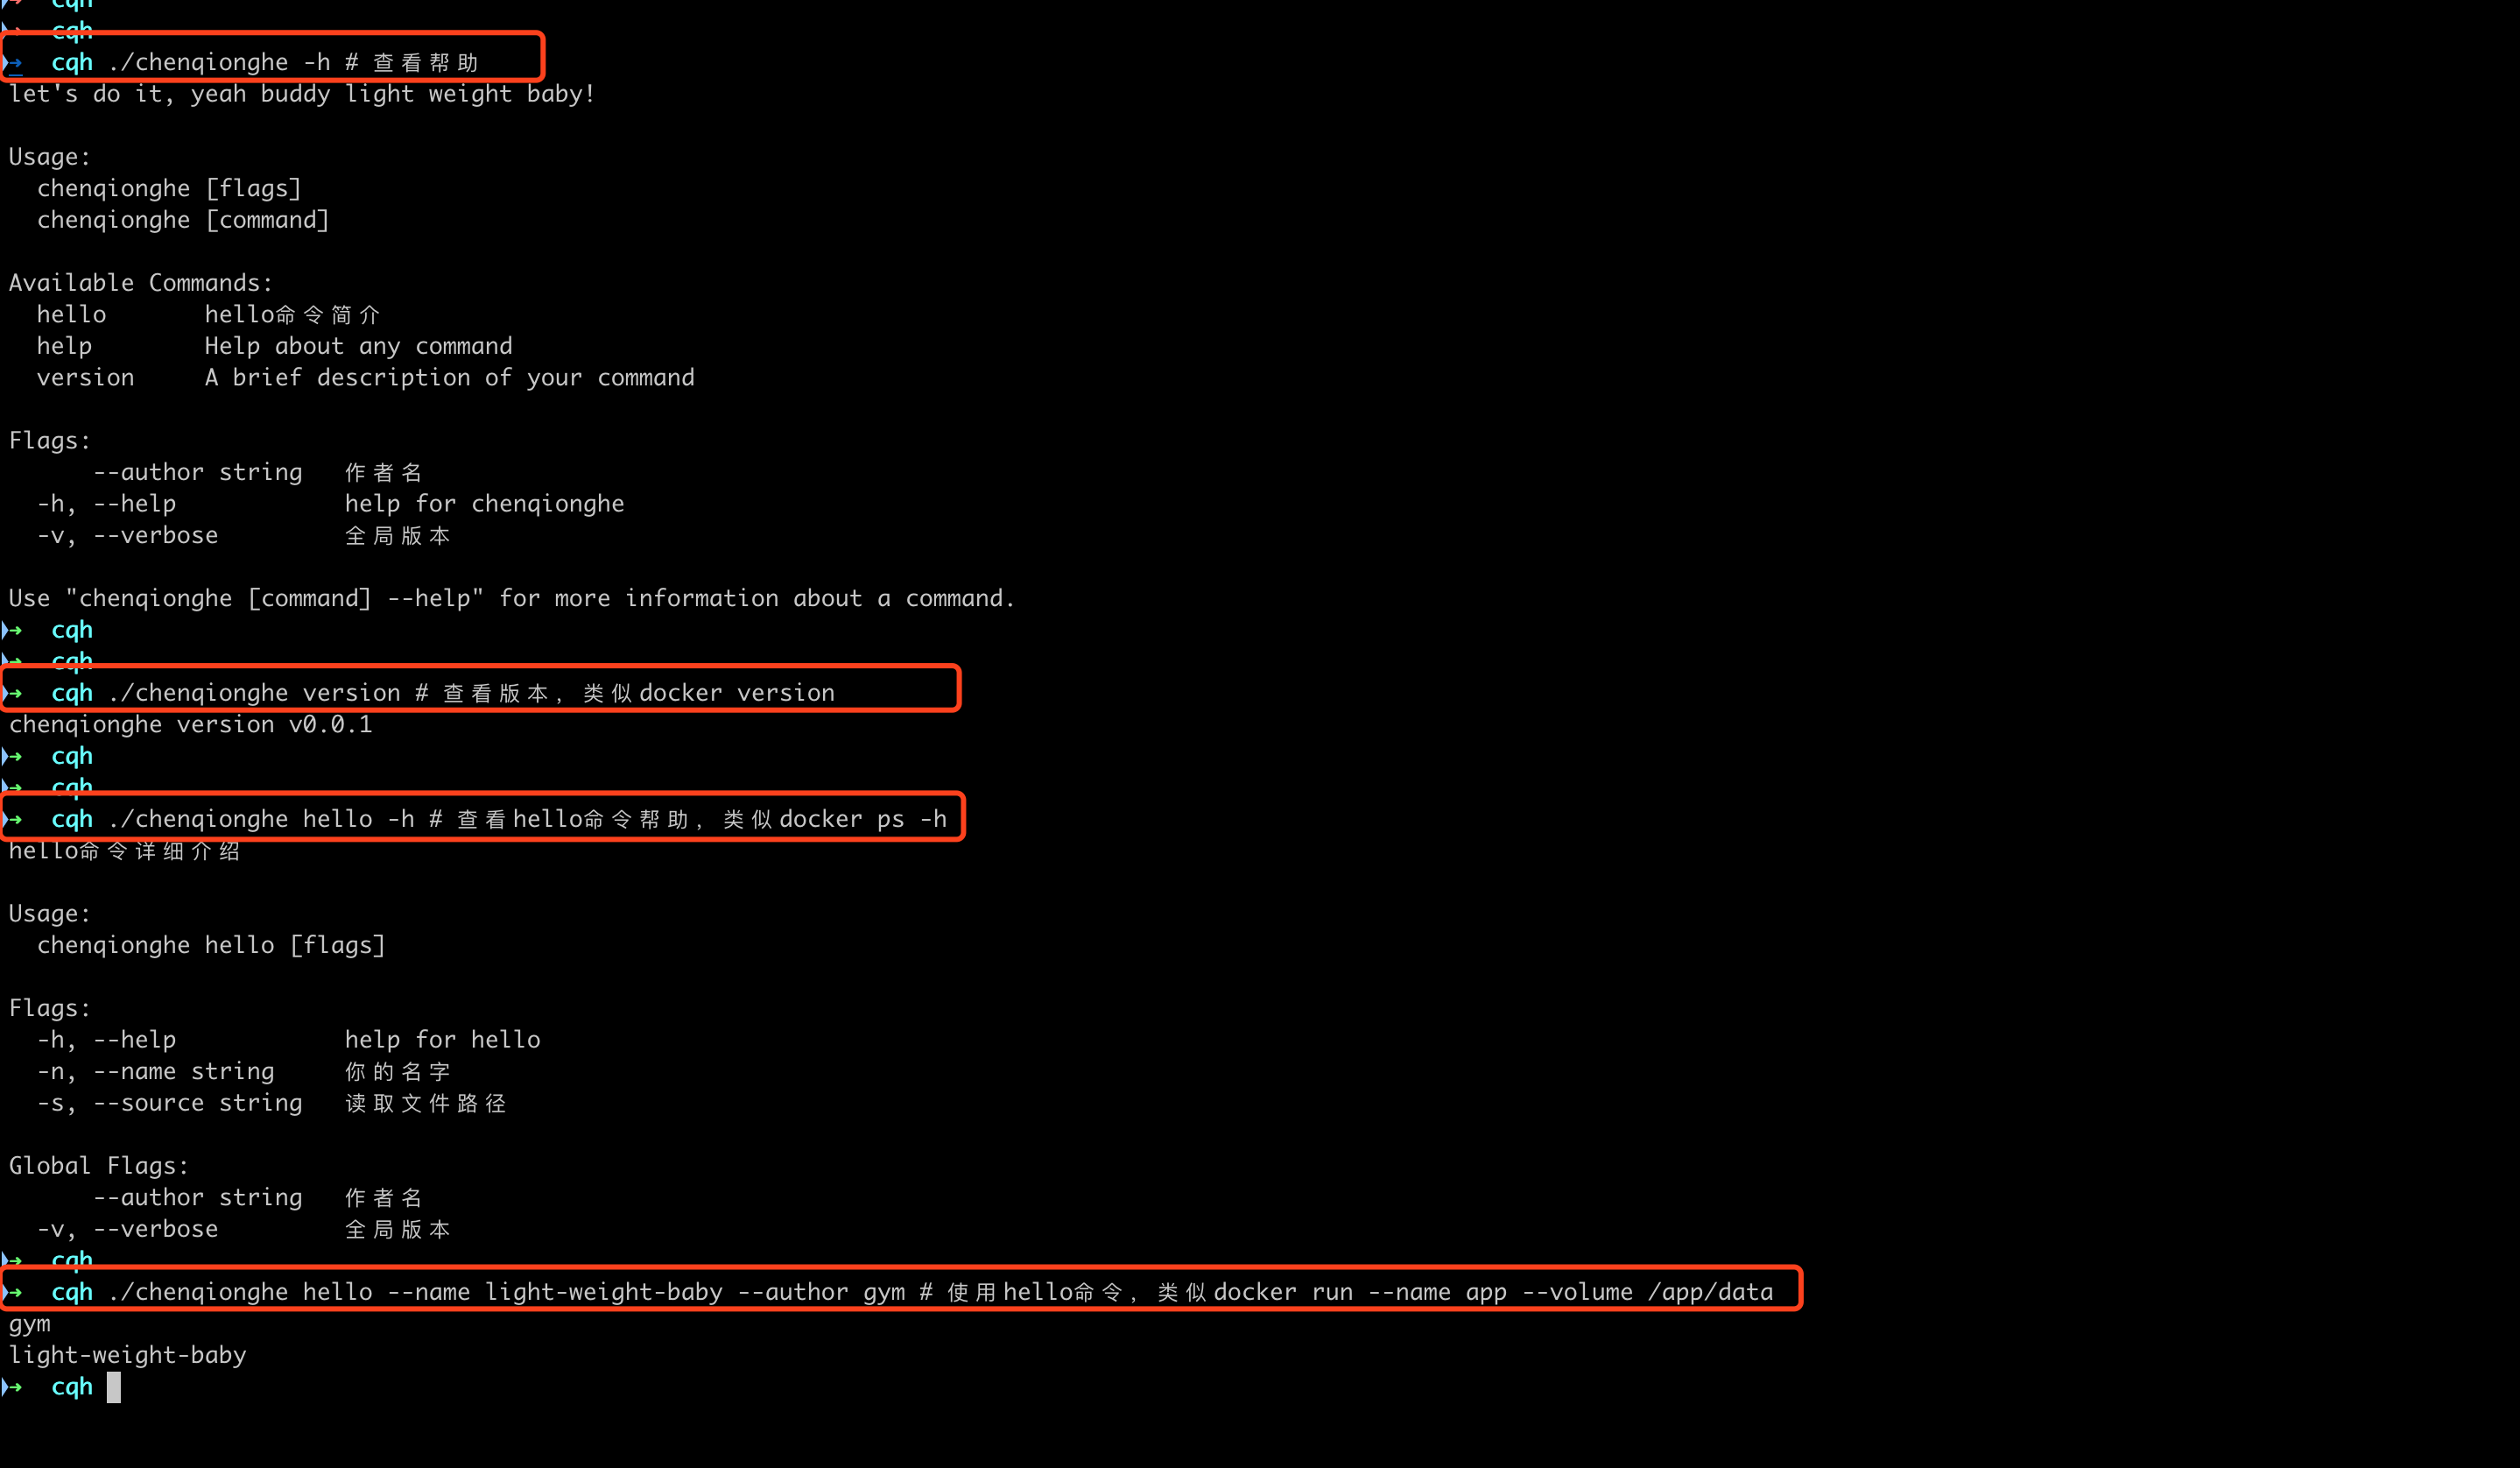
可以看到,完美的实现了预期需求,就是这么简单,light weight baby!