前序
集成了一键安装离线包redis,mysql,php,openresty,jdk,系统优化等脚本, 一个shell搞掂。
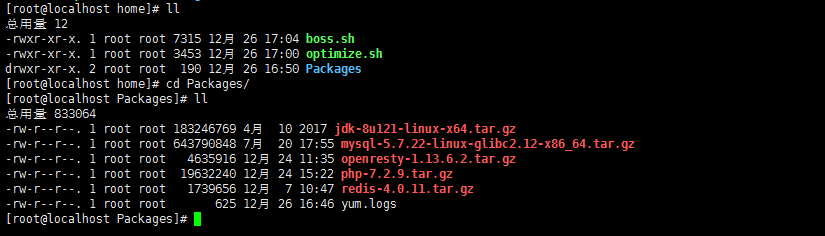
JDK:自动识别本地安装包,自动解压,部署,配置环境变量。
REDIS:自动识别本地安装包,自动解压,部署,判断编译错误退出,修改配置文件加入后台,日志,快捷启动。
MYSQL:自动识别本地安装包,自动解压,部署, 自动修改配置文件,初始化,编译,启动, 修改新密码。
PHP:自动识别本地安装包,自动解压,部署, 使用yum跑依赖,自动编译输出,make输出,自动配置文件, 快捷启动。
OPENRESTY:自动识别本地安装包,自动解压,部署。
系统优化: yum缓存优化,ntpdate/lrzsz工具调用优化,安全设置,hosts安全优化。
注:OPENRESTY可以说是另一种形式的nginx了, 很强大?!第一个脚本属于安装脚本, 第二个脚本是优化脚本。
shell
#/usr/bin/env bash
currentDIR=$(cd `dirname $0`; pwd)
installDIR=/usr/local

#很大一块系统调优
#system optimize
function OPTIMIZE(){
    sh ./optimize.sh
}
#JDK
function JDK(){
    j=`whereis java`
    java=$(echo ${j} | grep "jdk")
    if [[ "$java" != "" ]]
    then
        echo;
        echo "JDK已安装"
    else
        echo;
        echo "正在部署JDK"
        cd Packages
        tar -zxvf jdk-*.tar.gz -C ${installDIR} >/dev/null 2>&1
        echo;
        cd ${installDIR}/jdk* && jdkname=`pwd | awk -F '/' '{print $NF}'`
        echo;
        sed -i '$aexport JAVA_HOME='${installDIR}'/'${jdkname}'
export JRE_HOME=${JAVA_HOME}/jre
export CLASSPATH=.:${JAVA_HOME}/lib:${JRE_HOME}/lib
export PATH=${JAVA_HOME}/bin:$PATH' /etc/profile
        echo "source /etc/profile"
    fi
}
#REDIS
function REDIS(){
    echo "正在部署REDIS"
    mkdir -p ${installDIR}/redis/{logs,nodes,conf,bin}
    cd ${currentDIR}/Packages
    tar -zxvf redis*.tar.gz >/dev/null 2>&1
    cd redis*/src && make >/dev/null 2>&1
    if [[ $? -ne 0 ]]; then
        echo "编译出错"
    else
        cp redis-cli redis-server ${installDIR}/redis/bin
        cp redis-trib.rb ${installDIR}/redis
        cp ../redis.conf ${installDIR}/redis/conf
        cd ${installDIR}/redis/conf
        #后台
        sed -i 's/daemonize no/daemonize yes/' redis.conf
        #日志
        sed -i 's/logfile ""/logfile "/usr/local/redis/logs/redis.logs"/' redis.conf
        #启动
        cd ../
        echo "./bin/redis-server conf/redis.conf" > start.sh
        chmod +x start.sh
    fi
}
#MYSQL
function MYSQL(){
    echo "正在部署MYSQL"
    cd ${currentDIR}/Packages
    tar -zxvf mysql*.tar.gz -C ${installDIR} >/dev/null 2>&1
    cd ${installDIR} && mv mysql* mysql
    mkdir -p /data/mysql && mkdir ${installDIR}/mysql/logs
    touch ${installDIR}/mysql/logs/mysql.logs && touch ${installDIR}/mysql/logs/initialize.logs
    touch ${installDIR}/mysql/logs/start.logs
    useradd mysql -s /usr/sbin/nologin
    configfile="/etc/my.cnf"
    NdataDIR="/data/mysql"
    OdataDIR=`cat /etc/my.cnf | grep datadir | awk -F '=' '{print$2}'`
    Nsocket="/tmp/mysql.sock"
    Osocket=`cat /etc/my.cnf | grep socket | awk -F '=' '{print$2}'`
    Nlogerror="${installDIR}/mysql/logs/mysql.logs"
    Ologerror=`cat /etc/my.cnf | grep log-error | awk -F '=' '{print$2}'`
    Npidfile="${installDIR}/mysql/mysql.pid"
    Opidfile=`cat /etc/my.cnf | grep pid-file | awk -F '=' '{print$2}'`

    sed -i "s|${OdataDIR}|${NdataDIR}|g" ${configfile}
    sed -i "s|${Ologerror}|${Nlogerror}|g" ${configfile}
    sed -i "s|${Opidfile}|${Npidfile}|g" ${configfile}
    sed -i "s|${Osocket}|${Nsocket}|g" ${configfile}
    chown -R mysql:mysql /etc/my.cnf
    chown -R mysql:mysql ${installDIR}/mysql
    chown -R mysql:mysql /data/
    echo "初始化"
    ${installDIR}/mysql/bin/mysqld --initialize --user=mysql --basedir=${installDIR}/mysql --datadir=/data/mysql > ${installDIR}/mysql/logs/initialize.logs 2>&1
    echo "#!/bin/bash" > ${installDIR}/mysql/start.sh
    echo "./bin/mysqld_safe --user=mysql --basedir=${installDIR}/mysql --datadir=/data/mysql > logs/start.logs 2>&1 &" >> ${installDIR}/mysql/start.sh
    chmod +x ${installDIR}/mysql/start.sh
    echo "启动"
    cd ${installDIR}/mysql && ./start.sh
    echo "修改新的密码"
    ln -fs /usr/local/mysql/bin/mysql /usr/bin/mysql
    password1=`cat ${installDIR}/mysql/logs/initialize.logs | grep password | awk -F ' ' '{print$NF}'`
    #echo "旧的密码:${password1}"
    password2="123456"
    #炮灰牺牲品
    mysql --protocol=TCP -u root -p''${password1}'' --connect-expired-password -e "flush PRIVILEGES;" >/dev/null 2>&1
    /usr/bin/sleep 5
    #主力
    mysql --protocol=TCP -u root -p''${password1}'' --connect-expired-password -e "alter user 'root'@'localhost' identified by '${password2}';" >/dev/null 2>&1
    echo "新的密码:${password2}"
    echo "部署完成!"
}
function PHP(){
    echo "正在部署PHP"
    cd Packages
    wget https://mirrors.ustc.edu.cn/centos/7.5.1804/extras/x86_64/Packages/epel-release-7-11.noarch.rpm
    rpm -ivh epel-release*.rpm
    echo;
    echo "部署需要时间,请耐心稍等"
    mkdir -p ${installDIR}/php/logs && touch ${installDIR}/php/logs/{yum.logs,configure.logs,make.logs}
    tar -zxvf php*.tar.gz >/dev/null 2>&1
    cd php*
    #依赖
    yum install -y gcc gcc-c++ libmcrypt-devel mcrypt mhash gd-devel ncurses-devel libxml2-devel bzip2-devel libcurl-devel curl-devel libjpeg-devel libpng-devel freetype-devel net-snmp-devel openssl-deve python-devel zlib-devel freetype libxslt* bison autoconf re2c >${installDIR}/php/logs/yum.logs 2>&1
    #编译
    ./configure --prefix=/usr/local/php --exec-prefix=/usr/local/php --bindir=/usr/local/php/bin --sbindir=/usr/local/php/sbin --includedir=/usr/local/php/include --libdir=/usr/local/php/lib/php --mandir=/usr/local/php/php/man --with-config-file-path=/usr/local/php/etc --with-mysql-sock=/var/run/mysql/mysql.sock --with-mhash --with-openssl --with-mysqli=shared,mysqlnd --with-pdo-mysql=shared,mysqlnd --with-gd --with-iconv --with-zlib --enable-zip --enable-inline-optimization --disable-debug --disable-rpath --enable-shared --enable-xml --enable-bcmath --enable-shmop --enable-sysvsem --enable-mbregex --enable-mbstring --enable-ftp --enable-pcntl --enable-calendar --enable-exif --enable-sockets --with-xmlrpc --with-libxml-dir --enable-soap --without-pear --with-gettext --enable-session --with-curl --with-jpeg-dir --with-png-dir --with-freetype-dir --with-bz2 --enable-opcache --enable-fpm --with-fpm-user=nginx --with-fpm-group=nginx --without-gdbm --enable-fast-install --disable-fileinfo > ${installDIR}/php/logs/configure.logs 2>&1
    #安装
    make && make install > ${installDIR}/php/logs/make.logs 2>&1
    #配置
    cp php.ini-production ${installDIR}/php/etc/php.ini
    echo;
    M=`cat ${installDIR}/php/etc/php.ini | grep date.timezone | tail -n 1`
    datatime="date.timezone = Asia/shanghai"
    sed -i "s|${M}|${datatime}|g" ${installDIR}/php/etc/php.ini
    echo "zend_extension=opcache.so" >> ${installDIR}/php/etc/php.ini
    cp ${installDIR}/php/etc/php-fpm.conf.default ${installDIR}/php/etc/php-fpm.conf
    cp ${installDIR}/php/etc/php-fpm.d/www.conf.default ${installDIR}/php/etc/php-fpm.d/www.conf
    cp sapi/fpm/init.d.php-fpm /etc/init.d/php-fpm
    chmod +x /etc/rc.d/init.d/php-fpm
    #慎用(仅限centos&redhat)
    chkconfig --add php-fpm
    useradd nginx -s /usr/sbin/nologin
    echo "部署完成"
    echo;
    echo "启动PHP"
    service php-fpm start
}
function OPENRESTY(){
    echo "正在部署OPENRESTY"
    cd Packages
    yum install -y gcc gcc-c++ zlib-devel pcre-devel openssl-devel readline-devel > yum.logs 2>&1
    useradd www -s /usr/sbin/nologin
    mkdir /usr/local/openresty
    tar -zxvf openresty*.tar.gz >/dev/null 2>&1
    cd openresty*
    #编译
    ./configure --prefix=/usr/local/openresty --user=www --group=www --with-http_ssl_module --with-http_flv_module --with-http_stub_status_module --with-http_gzip_static_module --with-pcre --with-http_realip_module > configure.logs 2>&1
    gmake && gmake install >gmake.logs 2>&1
    echo "部署完成"
}

function main(){
    #OPTIMIZE
    #JDK
    #REDIS
    #MYSQL
    #PHP
    #OPENRESTY
}
main
shell2
#!/bin/bash
# Close SELINUX
setenforce 0
sed -i 's/^SELINUX=.*$/SELINUX=disabled/' /etc/selinux/config
# Custom profile
cat > /etc/profile.d/iot.sh << EOF
HISTSIZE=10000
PS1="[e[37;40m][[e[32;40m]u[e[37;40m]@h [e[35;40m]W[e[0m]]\\$ "
HISTTIMEFORMAT="%F %T $(whoami) "

alias l='ls -AFhlt'
alias lh='l | head'
alias vi=vim

GREP_OPTIONS="--color=auto"
alias grep='grep --color'
alias egrep='egrep --color'
alias fgrep='fgrep --color'
EOF
source /etc/profile.d/iot.sh

[ -z "$(grep ^'PROMPT_COMMAND=' /etc/bashrc)" ] && cat >> /etc/bashrc << EOF
PROMPT_COMMAND='{ msg=$(history 1 | { read x y; echo $y; });logger "[euid=$(whoami)]":$(who am i):[\`pwd\`]"$msg"; }'
EOF
# /etc/security/limits.conf
[ -e /etc/security/limits.d/*nproc.conf ] && rename nproc.conf nproc.conf_bk /etc/security/limits.d/*nproc.conf
sed -i '/^# End of file/,$d' /etc/security/limits.conf
cat >> /etc/security/limits.conf <<EOF
# End of file
* soft nproc 1000000
* hard nproc 1000000
* soft nofile 1000000
* hard nofile 1000000
EOF
# /etc/hosts
[ "$(hostname -i | awk '{print $1}')" != "127.0.0.1" ] && sed -i "s@127.0.0.1.*localhost@&
127.0.0.1 $(hostname)@g" /etc/hosts
# Set timezone
rm -rf /etc/localtime
ln -s /usr/share/zoneinfo/Asia/Shanghai /etc/localtime
# ip_conntrack table full dropping packets
[ ! -e "/etc/sysconfig/modules/iptables.modules" ] && { echo -e "modprobe nf_conntrack
modprobe nf_conntrack_ipv4" > /etc/sysconfig/modules/iptables.modules; chmod +x /etc/sysconfig/modules/iptables.modules; }
modprobe nf_conntrack
modprobe nf_conntrack_ipv4
echo options nf_conntrack hashsize=131072 > /etc/modprobe.d/nf_conntrack.conf
# /etc/sysctl.conf
[ ! -e "/etc/sysctl.conf_bk" ] && /bin/mv /etc/sysctl.conf{,_bk}
cat > /etc/sysctl.conf << EOF
fs.file-max=1000000
net.ipv4.tcp_max_tw_buckets = 6000
net.ipv4.tcp_sack = 1
net.ipv4.tcp_window_scaling = 1
net.ipv4.tcp_rmem = 4096 87380 4194304
net.ipv4.tcp_wmem = 4096 16384 4194304
net.ipv4.tcp_max_syn_backlog = 16384
net.core.netdev_max_backlog = 32768
net.core.somaxconn = 32768
net.core.wmem_default = 8388608
net.core.rmem_default = 8388608
net.core.rmem_max = 16777216
net.core.wmem_max = 16777216
net.ipv4.tcp_timestamps = 1
net.ipv4.tcp_fin_timeout = 20
net.ipv4.tcp_synack_retries = 2
net.ipv4.tcp_syn_retries = 2
net.ipv4.tcp_syncookies = 1
#net.ipv4.tcp_tw_len = 1
net.ipv4.tcp_tw_reuse = 1
net.ipv4.tcp_mem = 94500000 915000000 927000000
net.ipv4.tcp_max_orphans = 3276800
net.ipv4.ip_local_port_range = 1024 65000
net.nf_conntrack_max = 6553500
net.netfilter.nf_conntrack_max = 6553500
net.netfilter.nf_conntrack_tcp_timeout_close_wait = 60
net.netfilter.nf_conntrack_tcp_timeout_fin_wait = 120
net.netfilter.nf_conntrack_tcp_timeout_time_wait = 120
net.netfilter.nf_conntrack_tcp_timeout_established = 3600
EOF
sysctl -p
#安全设置 centos 6
#sed -i 's@^ACTIVE_CONSOLES.*@ACTIVE_CONSOLES=/dev/tty[1-2]@' /etc/sysconfig/init
#sed -i 's@^start@#start@' /etc/init/control-alt-delete.conf
#sed -i 's@LANG=.*$@LANG="en_US.UTF-8"@g' /etc/sysconfig/i18n
# Update time
yum -y install ntpdate  lrzsz
ntpdate pool.ntp.org
[ ! -e "/var/spool/cron/root" -o -z "$(grep 'ntpdate' /var/spool/cron/root)" ] && { echo "*/20 * * * * $(which ntpdate) pool.ntp.org > /dev/null 2>&1" >> /var/spool/cron/root;chmod 600 /var/spool/cron/root; }
service iptables stop
service rsyslog restart
service crond restart
##set yum
sed -i 's@^exclude@#exclude@' /etc/yum.conf
yum clean all
yum makecachell