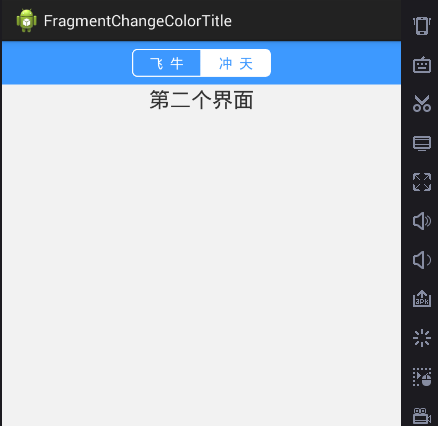
以前终觉得这种非常难,现在才发现其实简单的布局加fragment即可实现,先上效果图:
大致就三个布局搞定,一个布局用来设置背景色,一个布局嵌入在前一个布局的里边,用来存放文本标签,另一个布局就是用于显示内容。代码如下:
<LinearLayout xmlns:android="http://schemas.android.com/apk/res/android"
xmlns:tools="http://schemas.android.com/tools"
android:layout_width="match_parent"
android:layout_height="match_parent"
android:orientation="vertical"
android:background="@color/y_gray"
tools:context="com.exa.changecolortitle.MainActivity$PlaceholderFragment" >
<RelativeLayout
android:layout_width="match_parent"
android:layout_height="50dp"
android:background="@color/bg_title_blue"
android:padding="5dp" >
<LinearLayout
android:layout_width="wrap_content"
android:layout_height="wrap_content"
android:layout_centerInParent="true"
android:background="@drawable/l_bg3" >
<TextView
android:id="@+id/tv_signup"
android:layout_width="80dp"
android:layout_height="wrap_content"
android:gravity="center_horizontal"
android:padding="5dp"
android:text="飞 牛"
android:textSize="16sp" />
<TextView
android:id="@+id/tv_course"
android:layout_width="80dp"
android:layout_height="wrap_content"
android:gravity="center_horizontal"
android:padding="5dp"
android:text="冲 天"
android:textSize="16dp" />
</LinearLayout>
</RelativeLayout>
<LinearLayout
android:id="@+id/ll_fragment2"
android:layout_width="match_parent"
android:layout_height="0dp"
android:layout_weight="1"
android:orientation="vertical" >
</LinearLayout>
</LinearLayout>
窗体实现的java代码如下:
public class MainActivity extends FragmentActivity implements OnClickListener {
private TextView tv_feiniu;// 第一个标题文本
private TextView tv_chongtian;// 第二个标题文本
private Fragment fragment1;// 第一个操作界面
private Fragment fragment2;// 第二个操作界面
private android.app.FragmentManager fm;//管理器
@Override
protected void onCreate(Bundle savedInstanceState) {
super.onCreate(savedInstanceState);
setContentView(R.layout.fragment_main);
initView();
}
private void initView() {
// 实例化第一个标签
tv_feiniu = (TextView) findViewById(R.id.tv_feiniu);
// 实例化第二个标签
tv_chongtian = (TextView) findViewById(R.id.tv_chongtian);
//设置监听事件
tv_feiniu.setOnClickListener(this);
tv_chongtian.setOnClickListener(this);
selectFragment(0);// 设置默认选项
}
@Override
public void onClick(View v) {
switch (v.getId()) {
case R.id.tv_feiniu:
selectFragment(0);
break;
case R.id.tv_chongtian:
selectFragment(1);
break;
default:
break;
}
}
// 切换Fragment
private void selectFragment(int i) {
FragmentTransaction transaction = getSupportFragmentManager()
.beginTransaction();
hideFragment(transaction);
changeView(i);// 设置选项颜色
switch (i) {
case 0:
if (fragment1 == null) {
fragment1 = new Fragment1();
transaction.add(R.id.ll_fragment2, fragment1);
}
transaction.show(fragment1);
break;
case 1:
if (fragment2 == null) {
fragment2 = new Fragment2();
transaction.add(R.id.ll_fragment2, fragment2);
}
transaction.show(fragment2);
break;
}
transaction.commit();
}
// 隐藏fragment
private void hideFragment(FragmentTransaction transaction) {
if (fragment1 != null) {
transaction.hide(fragment1);
}
if (fragment2 != null) {
transaction.hide(fragment2);
}
}
//改变字体和背景色状态
@SuppressLint("NewApi")
private void changeView(int i) {
if (i == 0) {
//设置背景色及字体颜色
tv_chongtian.setBackgroundResource(R.drawable.l_bg8);
tv_chongtian.setTextColor(getResources().getColor(R.color.white));
tv_feiniu.setBackground(null);
tv_feiniu.setTextColor(getResources().getColor(R.color.blue));
} else if (i == 1) {
tv_feiniu.setBackgroundResource(R.drawable.l_bg7);
tv_feiniu.setTextColor(getResources().getColor(R.color.white));
tv_chongtian.setBackground(null);
tv_chongtian.setTextColor(getResources().getColor(R.color.blue));
}
}
}
drawable中的三个设置标题按钮边框及背景色分别入下:
l_bg3.xml:
<?xml version="1.0" encoding="utf-8"?>
<layer-list xmlns:android="http://schemas.android.com/apk/res/android" >
<item>
<shape>
<solid android:color="@color/white" />
<corners android:radius="5dp" />
<stroke
android:width="1dp"
android:color="@color/blue" />
</shape>
</item>
<item
android:bottom="1dp"
android:left="1dp"
android:right="1dp"
android:top="1dp">
<shape>
<solid android:color="@color/white" />
<corners android:radius="5dp" />
<stroke
android:width="1dp"
android:color="@color/white" />
<padding
android:bottom="1dp"
android:left="1dp"
android:right="1dp"
android:top="1dp" >
</padding>
</shape>
</item>
</layer-list>
l_bg7.xml:
<?xml version="1.0" encoding="utf-8"?>
<shape xmlns:android="http://schemas.android.com/apk/res/android" >
<corners
android:bottomLeftRadius="5dp"
android:topLeftRadius="5dp" />
<solid android:color="@color/blue" />
<stroke
android:width="1dp"
android:color="@color/white" />
</shape>
l_bg8.xml:
<?xml version="1.0" encoding="utf-8"?>
<shape xmlns:android="http://schemas.android.com/apk/res/android" >
<corners
android:bottomRightRadius="5dp"
android:topRightRadius="5dp" />
<solid android:color="@color/blue" />
<stroke
android:width="1dp"
android:color="@color/white" />
</shape>
接下来的Fragment自定义即可。