上一篇文章写了一个在配置文件中设置时间的定时器,现在来写一个注解方式的定时器:
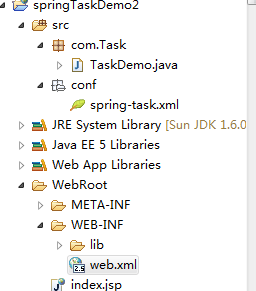
1.工程结构如下:
2.需要执行的代码块:
 1 package com.Task;
 2
 3 import org.springframework.scheduling.annotation.Scheduled;
 4 import org.springframework.stereotype.Component;
 5
 6 @Component
 7 public class TaskDemo {
 8     private static int sf = 0;
 9
10     @Scheduled(cron = "0/5 * * * * ?")
11     public void testTask(){
12         sf++;
13         System.out.println("5秒输出一次。。。。。sf:"+sf);
14     }
15 }
注意:不要忘记@Component,否则配置文件扫描不到需要执行的代码块;
3.
 1 <?xml version="1.0" encoding="UTF-8"?>
 2 <beans xmlns="http://www.springframework.org/schema/beans"
 3     xmlns:xsi="http://www.w3.org/2001/XMLSchema-instance" xmlns:context="http://www.springframework.org/schema/context"
 4     xmlns:tx="http://www.springframework.org/schema/tx" xmlns:task="http://www.springframework.org/schema/task"
 5     xmlns:aop="http://www.springframework.org/schema/aop"
 6     xsi:schemaLocation="http://www.springframework.org/schema/beans
 7     http://www.springframework.org/schema/beans/spring-beans-3.0.xsd
 8     http://www.springframework.org/schema/context
 9     http://www.springframework.org/schema/context/spring-context-3.0.xsd
10     http://www.springframework.org/schema/tx
11     http://www.springframework.org/schema/tx/spring-tx-3.0.xsd
12     http://www.springframework.org/schema/task
13     http://www.springframework.org/schema/task/spring-task-3.0.xsd
14     http://www.springframework.org/schema/aop
15     http://www.springframework.org/schema/aop/spring-aop-3.0.xsd">
16
17     <context:component-scan base-package="com"/>
18
19     <task:annotation-driven/>
20
21 </beans>
说明:相对于上一遍的配置文件的设置时间方式,这种方式就简单多了,
如果启动过程中报:The prefix "task" for element "task:annotation-driven" is not bound.错误,
则需要在beans中加:
xmlns:task="http://www.springframework.org/schema/task"
xmlns:aop="http://www.springframework.org/schema/aop"
4.web.xml配置文件:
 1 <?xml version="1.0" encoding="UTF-8"?>
 2 <web-app version="2.5"
 3     xmlns="http://java.sun.com/xml/ns/javaee"
 4     xmlns:xsi="http://www.w3.org/2001/XMLSchema-instance"
 5     xsi:schemaLocation="http://java.sun.com/xml/ns/javaee
 6     http://java.sun.com/xml/ns/javaee/web-app_2_5.xsd">
 7   <display-name></display-name>
 8   <welcome-file-list>
 9     <welcome-file>index.jsp</welcome-file>
10   </welcome-file-list>
11
12   <servlet>
13     <servlet-name>dispatcherServlet</servlet-name>
14     <servlet-class>org.springframework.web.servlet.DispatcherServlet</servlet-class>
15     <init-param>
16         <param-name>contextConfigLocation</param-name>
17         <param-value>
18                  classpath:conf/spring-task.xml
19             </param-value>
20     </init-param>
21     <load-on-startup>1</load-on-startup>
22 </servlet>
23 </web-app>
web.xml配置的信息目的就是让spring-task.xml文件生效;
5.相关jar包:http://pan.baidu.com/s/1qYwCrBQ
6.部署到tomcat上启动即可;
注解时间设置和上一篇文章一样;