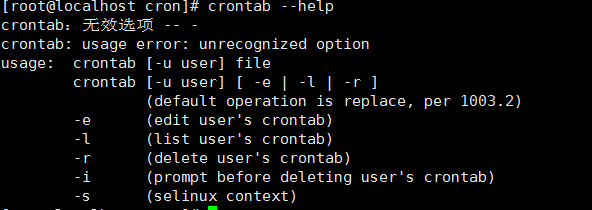
1: 网卡的配置文件
 [
[
root@localhost ~]# cat /etc/sysconfig/network-scripts/ifcfg-eth0
DEVICE=eth0  #网卡设备名称
HWADDR=00:0C:29:26:96:BD  #MAC地址
TYPE=Ethernet  #以太网
UUID=e982e20a-e7ef-4246-8e44-a7c0c474c708  #Linux系统内部的标识,唯一
ONBOOT=yes  #开机启动
NM_CONTROLLED=yes
#BOOTPROTO=dhclient
BOOTPROTO=static  #引导协议,一般为static(静态),dhclient(自动获取)
IPADDR=192.168.126.128  #IP地址

NETMASK=255.255.255.0  #子网掩码
GATEWAY=192.168.126.2  #网关
DNS=111.13.148.14
同样可以使用命令setup来执行网卡参数
2: DNS文件
[root@localhost ~]# cat /etc/resolv.conf
; generated by /sbin/dhclient-script
search localdomain
nameserver 192.168.126.2
注:网卡的配置文件里面如果配置了DNS,它的优先级是高于这个配置文件的。
3: hosts文件
/etc/hosts 用户IP与名称(域名)的对应解析的配置文件
在实际的生产环境中很有用(一般所有的内网机器hosts文件都保持一致),主要用于服务器迁移

[root@centos6 ~]# cat /etc/hosts
127.0.0.1 localhost localhost.localdomain localhost4 localhost4.localdomain4
::1 localhost localhost.localdomain localhost6 localhost6.localdomain6
192.168.197.100 centos6.6
[root@centos6 ~]# hostname
centos6.6
[root@centos6 ~]# ping centos6.6
PING centos6.6 (192.168.197.100) 56(84) bytes of data.
64 bytes from centos6.6 (192.168.197.100): icmp_seq=1 ttl=64 time=0.051 ms
64 bytes from centos6.6 (192.168.197.100): icmp_seq=2 ttl=64 time=0.047 ms
64 bytes from centos6.6 (192.168.197.100): icmp_seq=3 ttl=64 time=0.047 ms
^C
-- centos6.6 ping statistics --
3 packets transmitted, 3 received, 0% packet loss, time 2867ms
rtt min/avg/max/mdev = 0.047/0.048/0.051/0.006 ms
实际生产环境的作用:
1. 开发、产品、测试人员用于通过正式的域名来测试产品
2. 服务器之间调用可以用域名,方便以后的迁移(各程序之间调用域名,机房迁移之后只需修改相应的hosts文件即可)
4: 主机名文件
/etc/sysconfig/network 修改机器名及网卡启动、网关配置文件

修改上述的HOSTNAME永久生效(修改主机名)
5: fstab文件
/etc/fstab 记录开机要挂载的文件系统文件
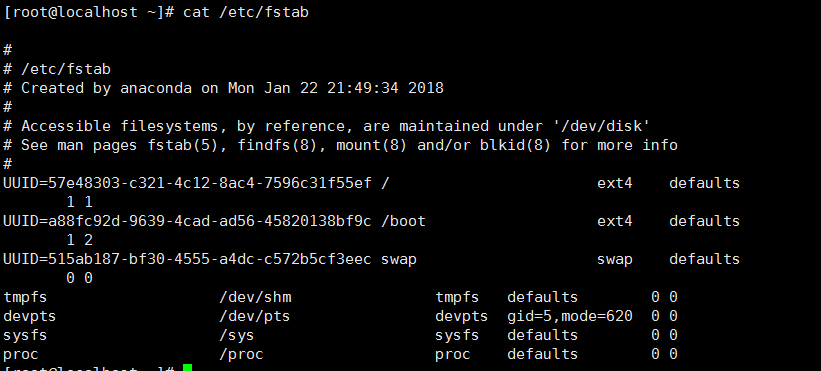
开机自动挂载磁盘,设置文件系统挂载信息的文件
文件信息一共包含六列(具体解析可 man fstab 查看)
第一列: 被挂载的设备名称
第二列: 挂载点位置
第三列: 文件系统类型
第四列: 挂载选项(只读、可写、其他等等)
第五列: 需不需要备份(0就是不备份)
第六列: 需不需要开机检查(0就是不需要,需要设置为1)
6: /etc/rc.local文件
存放开机自启动服务命令(同于windows里面的开始菜单中启动菜单)
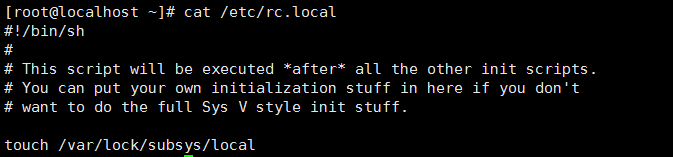
可以将命令直接写入到配置文件的末行
注: 实际生产环境中,一般服务开机自启动都会写入这个配置文件里面,这样只需要查看此配置文件就可以得知服务器运行哪些服务。
7: inittab文件
/etc/inittab 设定系统启动时init进程将把系统设置成什么样的运行级别及加相关的启动文件配置的文件
[root@localhost ~]# cat /etc/inittab
# inittab is only used by upstart for the default runlevel.  #只被用于突然发起的默认运行级别
#
# ADDING OTHER CONFIGURATION HERE WILL HAVE NO EFFECT ON YOUR SYSTEM.
#
# System initialization is started by /etc/init/rcS.conf
#
# Individual runlevels are started by /etc/init/rc.conf
#
# Ctrl-Alt-Delete is handled by /etc/init/control-alt-delete.conf
#
# Terminal gettys are handled by /etc/init/tty.conf and /etc/init/serial.conf,
# with configuration in /etc/sysconfig/init.
#
# For information on how to write upstart event handlers, or how
# upstart works, see init(5), init(8), and initctl(8).
#
# Default runlevel. The runlevels used are:
#   0 - halt (Do NOT set initdefault to this)
#   1 - Single user mode
#   2 - Multiuser, without NFS (The same as 3, if you do not have networking)
#   3 - Full multiuser mode
#   4 - unused
#   5 - X11
#   6 - reboot (Do NOT set initdefault to this)
#
id:3:initdefault:
注: linux开机启动流程如下:
开机自检----MBR引导程序-----GRUB菜单----加载内核----运行init进程----读取/etc/inittab配置文件----执行/etc/rc.d/rc.sysinit脚本----执行/etc/rc.local脚本(读取运行级别)----启动终端登录进程----登录系统
8: 软件启动服务文件
/etc/init.d 安装的软件启动服务(系统的启动服务)所在目录
使用yum、rpm安装的软件启动程序都在这个目录下

9: 全局环境变量文件
/etc/profile 系统全局变量的配置文件
[root@localhost init.d]# cat /etc/profile
# /etc/profile

# System wide environment and startup programs, for login setup  #系统全局变量和启动程序
# Functions and aliases go in /etc/bashrc

# It's NOT a good idea to change this file unless you know what you  #除非你知道你要做什么,否则不要更改
# are doing. It's much better to create a custom.sh shell script in  #更好的是去创建脚本在/etc/profile.d,去改变
# /etc/profile.d/ to make custom changes to your environment, as this
# will prevent the need for merging in future updates.

pathmunge () {
    case ":${PATH}:" in
        *:"$1":*)
            ;;
        *)
            if [ "$2" = "after" ] ; then
                PATH=$PATH:$1
            else
                PATH=$1:$PATH
            fi
    esac
}


if [ -x /usr/bin/id ]; then
    if [ -z "$EUID" ]; then
        # ksh workaround
        EUID=`id -u`
        UID=`id -ru`
    fi
    USER="`id -un`"
    LOGNAME=$USER
    MAIL="/var/spool/mail/$USER"
fi

# Path manipulation
if [ "$EUID" = "0" ]; then
    pathmunge /sbin
    pathmunge /usr/sbin
    pathmunge /usr/local/sbin
else
    pathmunge /usr/local/sbin after
    pathmunge /usr/sbin after
    pathmunge /sbin after
fi

HOSTNAME=`/bin/hostname 2>/dev/null`
HISTSIZE=1000
if [ "$HISTCONTROL" = "ignorespace" ] ; then
    export HISTCONTROL=ignoreboth
else
    export HISTCONTROL=ignoredups
fi

export PATH USER LOGNAME MAIL HOSTNAME HISTSIZE HISTCONTROL

# By default, we want umask to get set. This sets it for login shell
# Current threshold for system reserved uid/gids is 200
# You could check uidgid reservation validity in
# /usr/share/doc/setup-*/uidgid file
if [ $UID -gt 199 ] && [ "`id -gn`" = "`id -un`" ]; then
    umask 002
else
    umask 022
fi

for i in /etc/profile.d/*.sh ; do
    if [ -r "$i" ]; then
        if [ "${-#*i}" != "$-" ]; then
            . "$i"
        else
            . "$i" >/dev/null 2>&1
        fi
    fi
done

unset i
unset -f pathmunge
export TMOUT=300
HISTSIZE=50
HISTFILESIZE=50
与之关联的还有一个文件/etc/profile.d,可以存放登录后自动执行的脚本
[root@centos6 ~]# cd /etc/profile.d/
[root@centos6 profile.d]# vi welcome.sh
echo "welcome to mingongge's blog"
[root@centos6 profile.d]# chmod +x welcome.sh
[root@centos6 profile.d]# logout
Last login: Thu Dec 22 13:51:55 2016 from 192.168.197.1
welcome to mingongge's blog
10: motd文件
/etc/motd 用户登录提示信息


编辑过后,再登录就显示自己编辑的文本。
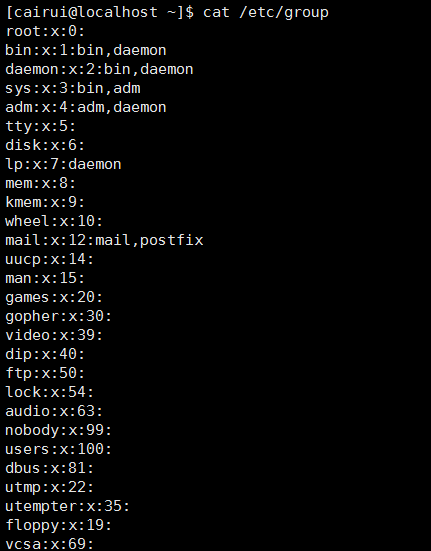
11: group文件
/etc/group 用户的组名与相关信息
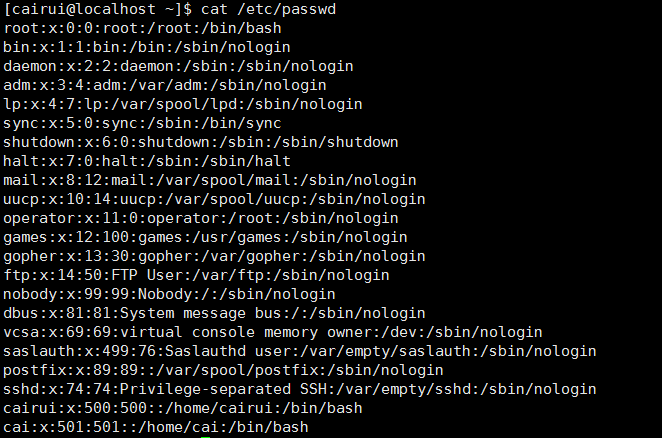
12: 用户账号相关信息
/etc/passwd 系统所有用户账号信息文件
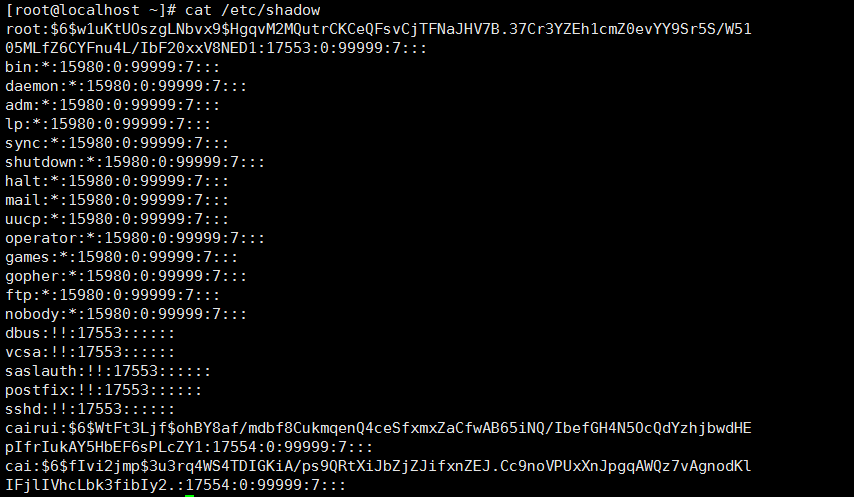
13: 用户密码相关文件
/etc/shadow 系统所有用户密码信息文件
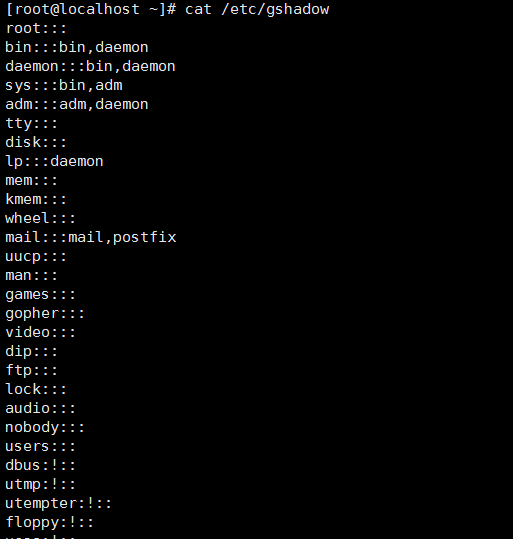
/etc/gshadow 系统所有组密码信息文件
14: 系统信息文件
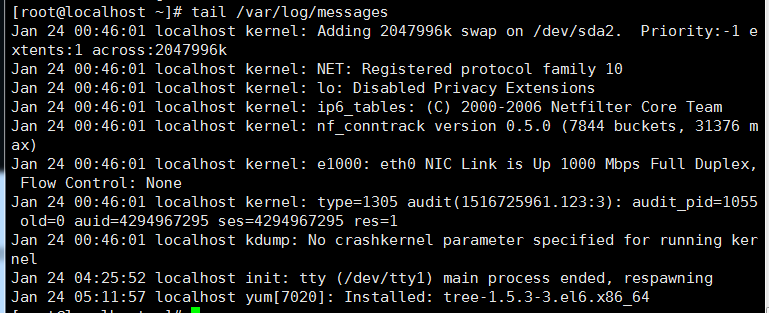
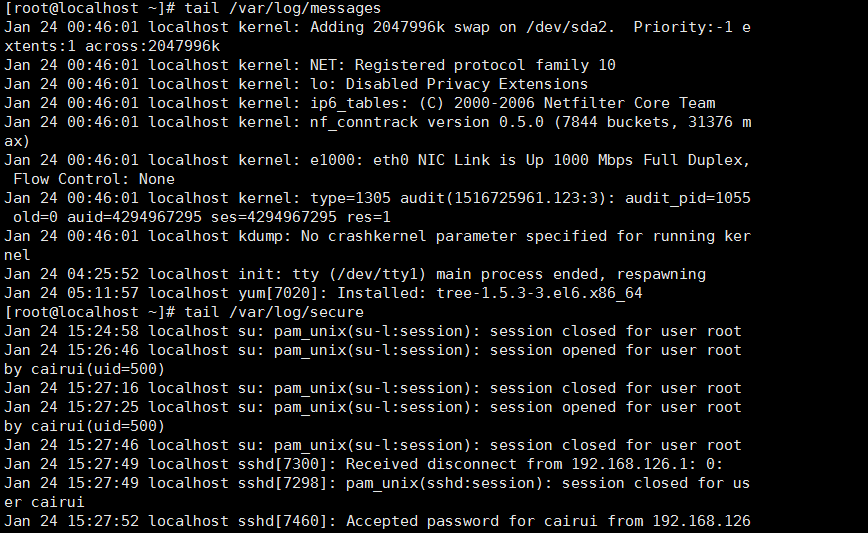
/var/log/messages 系统日志文件
/var/log/secure 登陆系统存取信息文件(系统安全日志文件)
15: 定时任务配置文件
/var/spool/cron/ 定时任务配置文件

DESCRIPTION
       Crontab  is  the program used to install, remove or list the tables  #crontab是程序用来安装,移除或者列出一个表去驱动cron进程。
       used to drive the cron(8) daemon.  Each user  can  have  their  own
       crontab,  and  though these are files in /var/spool/ , they are not  #这些定时文件到在/var/spool/cron下
       intended to be edited directly. For SELinux in mls mode can be even
       more crontabs - for each range. For more see selinux(8).

       The  cron  jobs could be allow or disallow for different users. For
       classical crontab there exists cron.allow and cron.deny files.   If
       cron.allow file exists, then you must be listed therein in order to
       be allowed to use this command.  If the cron.allow  file  does  not
       exist  but  the  cron.deny  file  does  exist, then you must not be
       listed in the cron.deny file in order to use this command.  If nei-
       ther  of these files exists, only the super user will be allowed to
       use this command.  The second option is using  PAM  authentication,
       where  you  set  up  users, which could or couldn’t use crontab and
       also system cron jobs from /etc/cron.d/.

       The temporary directory could be set in  enviroment  variables.  If
       it’s not set by user than /tmp is used.