一、HAProxy的核心功能
- 负载均衡:L4和L7两种模式,支持RR/静态RR/LC/IP Hash/URI Hash/URL_PARAM Hash/HTTP_HEADER Hash等丰富的负载均衡算法
- 健康检查:支持TCP和HTTP两种健康检查模式
- 会话保持:对于未实现会话共享的应用集群,可通过Insert Cookie/Rewrite Cookie/Prefix Cookie,以及上述的多种Hash方式实现会话保持
- SSL:HAProxy可以解析HTTPS协议,并能够将请求解密为HTTP后向后端传输
- HTTP请求重写与重定向
- 监控与统计:HAProxy提供了基于Web的统计信息页面,展现健康状态和流量数据。基于此功能,使用者可以开发监控程序来监控HAProxy的状态
二、HAProxy的关键特性
性能
- 采用单线程、事件驱动、非阻塞模型,减少上下文切换的消耗,能在1ms内处理数百个请求。并且每个会话只占用数KB的内存。
- 大量精细的性能优化,如O(1)复杂度的事件检查器、延迟更新技术、Single-buffereing、Zero-copy forwarding等等,这些技术使得HAProxy在中等负载下只占用极低的CPU资源。
- HAProxy大量利用操作系统本身的功能特性,使得其在处理请求时能发挥极高的性能,通常情况下,HAProxy自身只占用15%的处理时间,剩余的85%都是在系统内核层完成的。
- HAProxy作者在8年前(2009)年使用1.4版本进行了一次测试,单个HAProxy进程的处理能力突破了10万请求/秒,并轻松占满了10Gbps的网络带宽。
稳定性
作为建议以单进程模式运行的程序,HAProxy对稳定性的要求是十分严苛的。按照作者的说法,HAProxy在13年间从未出现过一个会导致其崩溃的BUG,HAProxy一旦成功启动,除非操作系统或硬件故障,否则就不会崩溃(我觉得可能多少还是有夸大的成分)。
在上文中提到过,HAProxy的大部分工作都是在操作系统内核完成的,所以HAProxy的稳定性主要依赖于操作系统,作者建议使用2.6或3.x的Linux内核,对sysctls参数进行精细的优化,并且确保主机有足够的内存。这样HAProxy就能够持续满负载稳定运行数年之久。
三、HAProxy、LVS、Nginx三者区别
四、HAProxy的安装和运行
4.1)下载解压(官网需要翻墙,例如下haproxy-1.5.19.tar.gz)
wget http://www.haproxy.org/download/1.7/src/haproxy-1.7.2.tar.gz
tar -xzf haproxy-1.7.2.tar.gz
4.2)编译并安装
make PREFIX=/usr/local/haproxy TARGET=linux2628
make install PREFIX=/usr/local/haproxy
PREFIX为指定的安装路径,TARGET则根据当前操作系统内核版本指定:
- linux22     for Linux 2.2
- linux24     for Linux 2.4 and above (default)
- linux24e    for Linux 2.4 with support for a working epoll (> 0.21)
- linux26     for Linux 2.6 and above
- linux2628   for Linux 2.6.28, 3.x, and above (enables splice and tproxy)
4.3)创建HAProxy配置文件,因为编译安装的配置文件是不生成的,需要去源码包里去复制。
mkdir -p /usr/local/haproxy/conf
cd /usr/local/haproxy/conf
cp /usr/local/src/haproxy-1.5.19/examples/haproxy.cfg .
vim haproxy.cfg
到此安装结束。
五、配置文件
此处对于配置文件不会过多阐述。。
# this config needs haproxy-1.1.28 or haproxy-1.2.1

global
	log 127.0.0.1	local0 info
	log 127.0.0.1	local1 warning
	#log loghost	local0 info
	maxconn 4096
	chroot /usr/local/haproxy
	pidfile /usr/local/haproxy/conf/haproxy.pid
	uid 99
	gid 99
	daemon
	#debug
	#quiet
	stats socket /var/run/haproxy.sock mode 600 level admin
        stats timeout 2m

defaults
	log	global
	mode	http
	option	http-keep-alive
	#option	httplog
	#option	dontlognull
	#retries	3
	#redispatch
	maxconn	2000
	#contimeout	5000
	#clitimeout	50000
	#srvtimeout	50000
	timeout connect 5000ms  #??server???5s
	timeout client 50000ms  #???????50s
	timeout server 50000ms  #server?????50s

listen stats
	mode http
	bind *:8888
	stats enable
	stats uri	/haproxy-status
	stats auth	haproxy:haproxy

frontend frontend_www_example_com
	bind *:80
	mode http
	#option httplog
	#log	global
	default_backend backend_www_example_com

backend backend_www_example_com
	option forwardfor header X-REAL-IP
	option httpchk HEAD / HTTP/1.0
	balance source
	server web-node1 192.168.222.147:8080 check source 192.168.222.140:1025-65000 inter 2000 rise 30 fall 15
可以参考如下链接,例如ACL策略,正则匹配策略,session保持,健康检查,四层与七层负载均衡:
2、官方文档
六、日志添加
6.1)修改haproxy.cfg,在global域和defaults域中添加:
global
    ...
    log 127.0.0.1 local0 info
    log 127.0.0.1 local1 warning
    ...

defaults
    ...
    log global
    ...
意思是将info级(及以上)的日志推送到rsyslog的local0接口,将warn级(及以上)的日志推送到rsyslog的local1接口,并且所有frontend都默认使用global中的日志配置。
注:info级的日志会打印HAProxy处理的每一条请求,会占用很大的磁盘空间,在生产环境中,建议将日志级别调整为notice
vim /etc/rsyslog.conf
# Provides UDP syslog reception   默认是UDP
$ModLoad imudp
$UDPServerRun 514
.
.
.
local0.*                                                /var/log/haproxy/info.log
local1.*                                                /var/log/haproxy/warning.log
6.3)修改rsyslog的启动参数
vim /etc/sysconfig/rsyslog
# Options for rsyslogd
# Syslogd options are deprecated since rsyslog v3.
# If you want to use them, switch to compatibility mode 2 by "-c 2"
# See rsyslogd(8) for more details
SYSLOGD_OPTIONS="-c 2 -r -m 0"
6.4)重启rsyslog和HAProxy
service rsyslog restart
service haproxy restart
其余没有什么好写的了,具体用的时候还是看文档和上面提供的链接吧。
七、几个注意点
7.1)有些内核参数的配置可能导致haproxy无法启动,例如:
Starting proxy linuxyw.com: cannot bind socket
net.ipv4.ip_nonlocal_bind=1
net.ipv4.ip_forward = 1
配置生效
sysctl –p
7.2)长连接,如果不支持长连接会产生大量的timewait,tcp端口会被占满,,要设置timewait时间
	缩短time_wait时间
	[root@master conf]# cat /proc/sys/net/ipv4/tcp_fin_timeout 可以设小为30,也不要太小
	60
	[root@master conf]# cat /proc/sys/net/ipv4/tcp_tw_recycle 设为1
	0
	[root@master conf]# cat /proc/sys/net/ipv4/tcp_tw_reuse 设为1
	0
	[root@master conf]# cat /proc/sys/net/ipv4/ip_local_port_range 改本地的端口范围
	32768	61000
7.3)端口只有0-65535,当超过这个端口后的解决方法,反向代理的请求方式,客户端向VIP请求,haproxy再去访问rs,当请求到了haproxy时可以将源ip绑定,一个ip对应0-65535个端口
1、添加一个IP
ifconfig eth0:1 192.168.222.140
2、在haproxy.cfg里面backend里添加source
server web-node1 192.168.222.147:8080 check source 192.168.222.140:1025-65000 inter 2000 rise 30 fall 15
3、然后此时在就看到是140发起的请求。
netstat -na | grep 192.168.222.140
八、通过unix socket command在线修改haproxy配置不重启haproxy
用法:
1、global
        stats socket /var/run/haproxy.sock mode 600 level admin
        stats timeout 2m

2、echo "help" | socat stdio /var/run/haproxy.sock

3、使用
echo "show info" | socat stdio /var/run/haproxy.sock
echo "show stat" | socat stdio /var/run/haproxy.sock	比较适合做监控
4、关闭某个backend下的某台server,,下线
echo "disable server backend_www_example_com/web-node2" | socat stdio /var/run/haproxy.sock
[root@master conf]# echo "help" | socat stdio /var/run/haproxy.sock
Unknown command. Please enter one of the following commands only :
  clear counters : clear max statistics counters (add 'all' for all counters)
  clear table    : remove an entry from a table
  help           : this message
  prompt         : toggle interactive mode with prompt
  quit           : disconnect
  show info      : report information about the running process
  show pools     : report information about the memory pools usage
  show stat      : report counters for each proxy and server
  show errors    : report last request and response errors for each proxy
  show sess [id] : report the list of current sessions or dump this session
  show table [id]: report table usage stats or dump this table's contents
  get weight     : report a server's current weight
  set weight     : change a server's weight
  set server     : change a server's state or weight
  set table [id] : update or create a table entry's data
  set timeout    : change a timeout setting
  set maxconn    : change a maxconn setting
  set rate-limit : change a rate limiting value
  disable        : put a server or frontend in maintenance mode
  enable         : re-enable a server or frontend which is in maintenance mode
  shutdown       : kill a session or a frontend (eg:to release listening ports)
  show acl [id]  : report available acls or dump an acl's contents
  get acl        : reports the patterns matching a sample for an ACL
  add acl        : add acl entry
  del acl        : delete acl entry
  clear acl <id> : clear the content of this acl
  show map [id]  : report available maps or dump a map's contents
  get map        : reports the keys and values matching a sample for a map
  set map        : modify map entry
  add map        : add map entry
  del map        : delete map entry
  clear map <id> : clear the content of this map
  set ssl <stmt> : set statement for ssl


[root@master conf]# echo "show info" | socat stdio /var/run/haproxy.sock
Name: HAProxy
Version: 1.5.19
Release_date: 2016/12/25
Nbproc: 1
Process_num: 1
Pid: 14091
Uptime: 0d 0h02m26s
Uptime_sec: 146
Memmax_MB: 0
Ulimit-n: 8225
Maxsock: 8225
Maxconn: 4096
Hard_maxconn: 4096
CurrConns: 0
CumConns: 2
CumReq: 2
Maxpipes: 0
PipesUsed: 0
PipesFree: 0
ConnRate: 0
ConnRateLimit: 0
MaxConnRate: 0
SessRate: 0
SessRateLimit: 0
MaxSessRate: 0
CompressBpsIn: 0
CompressBpsOut: 0
CompressBpsRateLim: 0
Tasks: 7
Run_queue: 1
Idle_pct: 100
node: master
description:
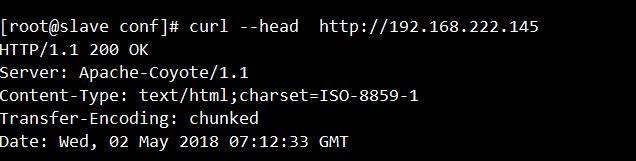
九、证明HAProxy是反向代理
2、上面的机器即客户端向haproxy建立TCP三次握手:

3、从RS上看是谁跟自己建立连接

补充:
我们知道HTTP协议采用“请求-应答”模式,当使用普通模式,即非KeepAlive模式时,每个请求/应答客户和服务器都要新建一个连接,完成 之后立即断开连接(HTTP协议为无连接的协议);当使用Keep-Alive模式(又称持久连接、连接重用)时,Keep-Alive功能使客户端到服 务器端的连接持续有效,当出现对服务器的后继请求时,Keep-Alive功能避免了建立或者重新建立连接。
http 1.0中默认是关闭的,需要在http头加入"Connection: Keep-Alive",才能启用Keep-Alive;http 1.1中默认启用Keep-Alive,如果加入"Connection: close ",才关闭。目前大部分浏览器都是用http1.1协议,也就是说默认都会发起Keep-Alive的连接请求了,所以是否能完成一个完整的Keep- Alive连接就看服务器设置情况。