最近在做的项目,有好大一部分都用到这个权限,修改系统时间啊,调用隐藏方法啊,系统关机重启啊,静默安装升级卸载应用等等,刚开始的时候,直接添加权限,运行就报错,无论模拟器还是真机,在logcat中总会得到"Unable to open alarm driver: Permission denied ".这个函数需要root权限或者运行于系统进程中才可以用。网上搜索了好久,发现有两种方法可以解决:
一种是需要在Android系统源码的环境下用make来编译:
1. 在应用程序的AndroidManifest.xml中的manifest节点中加入android:sharedUserId="android.uid.system"这个属性。 2. 修改Android.mk文件,加入LOCAL_CERTIFICATE := platform这一行
3. 使用mm命令来编译,生成的apk就有修改系统时间的权限了。
LZ不会.mk编译这种方法 ,所以就只好参考第二种了:
1. 加入android:sharedUserId="android.uid.system"这个属性。 2. 使用eclipse编译出未加签名的apk文件,但是这个apk文件是不能用的。
3. 使用目标系统的platform密钥来重新给apk文件签名。这步比较麻烦,首先找到密钥文件,在我的Android源码目录中的位置是"build/target/product/security",下面的platform.pk8和platform.x509.pem两个文件。然后用Android提供的Signapk工具来签名,signapk的源代码是在"build/tools/signapk"下,用法为"signapk platform.x509.pem platform.pk8 input.apk output.apk",文件名最好使用绝对路径防止找不到,也可以修改源代码直接使用。(上边的文件在上一个帖子中都发布过)
这样最后得到的apk和第一个方法是一样的。
最后解释一下原理,首先加入android:sharedUserId="android.uid.system"这个属性。通过Shared User id,拥有同一个User id的多个APK可以配置成运行在同一个进程中。那么把程序的UID配成android.uid.system,也就是要让程序运行在系统进程中,这样就有权限来修改系统时间了。
只是加入UID还不够,如果这时候安装APK的话发现无法安装,提示签名不符,原因是程序想要运行在系统进程中还要有目标系统的platform key,就是上面第二个方法提到的platform.pk8和platform.x509.pem两个文件。用这两个key签名后apk才真正可以放入系统进程中。第一个方法中加入LOCAL_CERTIFICATE := platform其实就是用这两个key来签名。
这也有一个问题,就是这样生成的程序只有在原始的Android系统或者是自己编译的系统中才可以用,因为这样的系统才可以拿到platform.pk8和platform.x509.pem两个文件。要是别家公司做的Android上连安装都安装不了。试试原始的Android中的key来签名,程序在模拟器上运行OK,不过放到G3上安装直接提示"Package ... has no signatures that match those in shared user android.uid.system",这样也是保护了系统的安全。
最后还说下,这个android:sharedUserId属性不只可以把apk放到系统进程中,也可以配置多个APK运行在一个进程中,这样可以共享数据,应该会很有用的。
android会为每个apk进程分配一个单独的空间(比如只能访问/data/data/自己包名下面的文件),一般情况下apk之间是禁止相互访问数据的。通过Shared User id,拥有同一个User id的多个APK可以配置成运行在同一个进程中.所以默认就是可以互相访问任意数据. 也可以配置成运行成不同的进程, 同时可以访问其他APK的数据目录下的数据库和文件.就像访问本程序的数据一样(使用IPC机制,不同进程之间,比如AIDL)。
一、使用同一个shareuserid,多个apk运行到同一个进程,实现多个apk之间的数据访问 实现效果:把A.apk assets目录下的session.log拷贝到/data/data/A包名/目录下面
A.apk 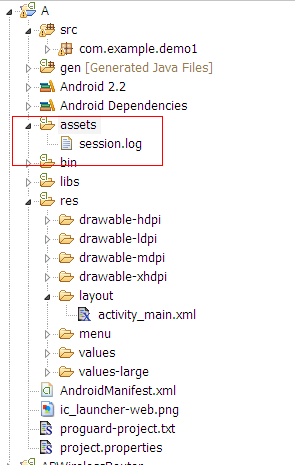 AndroidManifest.xml
|
1
2
3
4
5
6
7
8
9
10
11
12
13
14
15
16
17
18
19
20
21
22
23
24
|
<manifest xmlns:android="http://schemas.android.com/apk/res/android" package="com.example.demo1" android:sharedUserId="com.example" android:versionCode="1" android:versionName="1.0" > <uses-sdk android:minSdkVersion="8" android:targetSdkVersion="15" /> <application android:icon="@drawable/ic_launcher" android:label="@string/app_name" android:theme="@style/AppTheme" > <activity android:name=".MainActivity" android:label="@string/title_activity_main" > <intent-filter> <action android:name="android.intent.action.MAIN" /> <category android:name="android.intent.category.LAUNCHER" /> </intent-filter> </activity> </application></manifest> |
B.apk(实现访问资源并且拷贝) MainActivity.java(如何访问assets资源文件请看上一篇http://my.oschina.net/zhoulc/blog/118693)
|
1
2
3
4
5
6
7
8
9
10
11
12
13
14
15
16
17
18
19
20
21
22
23
24
25
26
27
28
29
30
31
32
33
34
35
36
37
38
39
40
41
42
43
44
45
46
47
48
49
50
51
52
53
54
55
56
57
58
59
60
61
62
63
64
65
66
|
package com.example.demo2;import java.io.File;import java.io.FileOutputStream;import java.io.IOException;import java.io.InputStream;import java.io.OutputStream;import android.os.Bundle;import android.app.Activity;import android.content.Context;import android.content.pm.PackageManager.NameNotFoundException;import android.view.Menu;import android.view.MenuItem;import android.support.v4.app.NavUtils;public class MainActivity extends Activity { @Override public void onCreate(Bundle savedInstanceState) { super.onCreate(savedInstanceState); setContentView(R.layout.activity_main); Context context = null; InputStream input = null; OutputStream output = null; try { context = this.createPackageContext("com.example.demo1", Context.CONTEXT_IGNORE_SECURITY); File file = new File("/data/data/com.example.demo1/session.log"); if (!file.exists()) { file.createNewFile(); } input = context.getAssets().open("session.log"); output = new FileOutputStream(file); byte[] buffer = new byte[1024]; int readLength = 0; while((readLength = input.read(buffer)) != -1){ output.write(buffer, 0, readLength); } } catch (Exception e) { // TODO Auto-generated catch block e.printStackTrace(); } finally{ try { if(input!=null || output!= null){ input.close(); output.close(); input = null; output = null; } } catch (Exception e2) { // TODO: handle exception } } } @Override public boolean onCreateOptionsMenu(Menu menu) { getMenuInflater().inflate(R.menu.activity_main, menu); return true; }} |
AndroidManifest.xml
|
1
2
3
4
5
6
7
8
9
10
11
12
13
14
15
16
17
18
19
20
21
22
23
24
|
<manifest xmlns:android="http://schemas.android.com/apk/res/android" package="com.example.demo2" android:versionCode="1" android:versionName="1.0" android:sharedUserId="com.example"> <uses-sdk android:minSdkVersion="8" android:targetSdkVersion="15" /> <application android:icon="@drawable/ic_launcher" android:label="@string/app_name" android:theme="@style/AppTheme" > <activity android:name=".MainActivity" android:label="@string/title_activity_main" > <intent-filter> <action android:name="android.intent.action.MAIN" /> <category android:name="android.intent.category.LAUNCHER" /> </intent-filter> </activity> </application></manifest> |
A.apk,B.apk使用同一个shareduserid:com.example 实现效果:

二、通过shareduserid来获取系统权限 (1)在AndroidManifest.xml中添加android:sharedUserId="android.uid.system" (2)在Android.mk文件里面添加LOCAL_CERTIFICATE := platform(使用系统签名) (3)在源码下面进行mm编译 这样生成的apk能够获取system权限,可以在任意system权限目录下面进行目录或者文件的创建,以及访问其他apk资源等(注意创建的文件(夹)只有创建者(比如system,root除外)拥有可读可写权限-rw-------)。
三、扩展
系统中所有使用android.uid.system作为共享UID的APK,都会首先在manifest节点中增加android:sharedUserId="android.uid.system",然后在Android.mk中增加LOCAL_CERTIFICATE := platform。可以参见Settings等
系统中所有使用android.uid.shared作为共享UID的APK,都会在manifest节点中增加android:sharedUserId="android.uid.shared",然后在Android.mk中增加LOCAL_CERTIFICATE := shared。可以参见Launcher等
系统中所有使用android.media作为共享UID的APK,都会在manifest节点中增加android:sharedUserId="android.media",然后在Android.mk中增加LOCAL_CERTIFICATE := media。可以参见Gallery等。