今天准备写个博客带大家一步一步封装一个聊天键盘,先上git地址(https://github.com/GitBaoChao/BCKeyboard.git,记得下载了,给我点个star啊)
第二篇地址(http://www.cnblogs.com/bcblogs/p/4707512.html),希望大家认真去看哦,不懂的可以在评论里问
众所周知,一个聊天键盘,肯定要有表情,发送图片啊,语音啊,视频什么的,我封装的就只有表情(是emoji),其他几个扩展的,放在一个view里,等以后在去添加功能
好吧,我们开始,首先要思考封装一个这样的聊天键盘,我们需要什么,肯定需要一个表情按钮,UItextView,还有一个扩展的view,而UITextView可能需要有占位文字,所以我们首先自己定制有占位文字的UITextView
继承UITextView创建一个自定义的UITextView,我的叫BCTextView
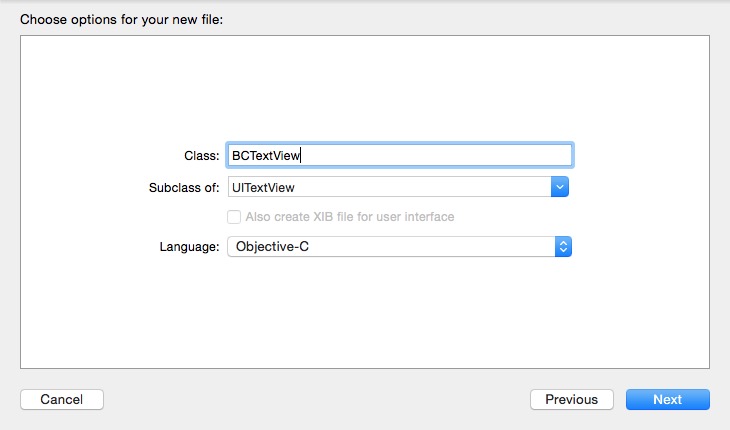
BCTextView.h文件
#import <UIKit/UIKit.h>

@interface BCTextView : UITextView
@property (nonatomic, retain) NSString *placeholder;
@property (nonatomic, retain) UIColor *placeholderColor;
@end
BCTextView.m文件
#import "BCTextView.h"

@interface BCTextView ()

@end

@implementation BCTextView

- (instancetype)initWithFrame:(CGRect)frame
{

    self = [super initWithFrame:frame];
    if (self) {
        [[NSNotificationCenter defaultCenter] addObserver:self selector:@selector(textChanged:)
                                                     name:UITextViewTextDidChangeNotification
                                                   object:nil];
        self.autoresizesSubviews = NO;
        //默认字和颜色
        self.placeholder = @"";
        self.placeholderColor = [UIColor lightGrayColor];

    }
    return self;
}
- (void)drawRect:(CGRect)rect
{
    //内容为空时才绘制placeholder
    if ([self.text isEqualToString:@""]) {
        CGRect placeholderRect;
        placeholderRect.origin.y = 8;
        placeholderRect.size.height = CGRectGetHeight(self.frame)-8;

        placeholderRect.origin.x = 5;
        placeholderRect.size.width = CGRectGetWidth(self.frame)-5;

        [self.placeholderColor set];
        [self.placeholder drawInRect:placeholderRect
                            withFont:self.font
                       lineBreakMode:NSLineBreakByWordWrapping
                           alignment:NSTextAlignmentLeft];
    }
}
- (void)textChanged:(NSNotification *)not
{
    [self setNeedsDisplay];
}

- (void)setText:(NSString *)text
{
    [super setText:text];
    [self setNeedsDisplay];
}
准备工作完成,现在我们来自定义键盘,继承UIView新建一个类
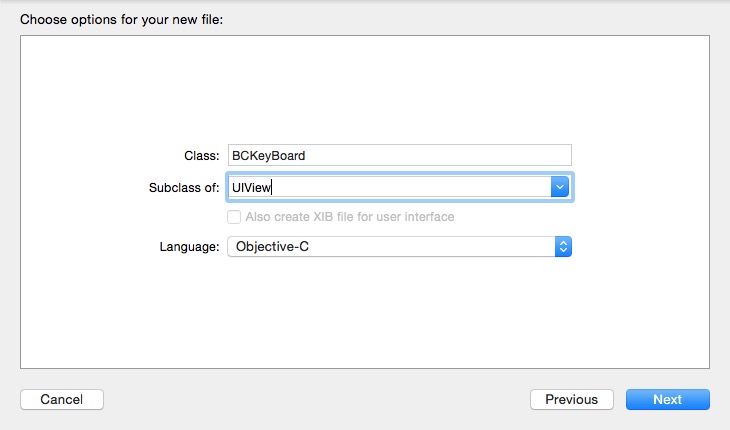
我们一步一步的来,我们的布局是左边表情按钮,中间textView,右边扩展按钮
先给大家看看宏定义吧
#define SCREEN_WIDTH ([[UIScreen mainScreen] bounds].size.width)
#define SCREEN_HEIGHT ([[UIScreen mainScreen] bounds].size.height)


#define kBCTextViewHeight 36 /**< 底部textView的高度 */
#define kHorizontalPadding 8 /**< 横向间隔 */
#define kVerticalPadding 5 /**< 纵向间隔 */
Key.m文件
#import "BCKeyBoard.h"
#define SCREEN_WIDTH ([[UIScreen mainScreen] bounds].size.width)
#define SCREEN_HEIGHT ([[UIScreen mainScreen] bounds].size.height)


#define kBCTextViewHeight 36 /**< 底部textView的高度 */
#define kHorizontalPadding 8 /**< 横向间隔 */
#define kVerticalPadding 5 /**< 纵向间隔 */
@interface BCKeyBoard() <UITextViewDelegate>
@property (nonatomic,strong)UIButton *faceBtn;
@property (nonatomic,strong)UIButton *moreBtn;
@property (nonatomic,strong)BCTextView  *textView;
@property (nonatomic,strong)UIImageView *backgroundImageView;
@end

@implementation BCKeyBoard

- (instancetype)initWithFrame:(CGRect)frame
{
    if (frame.size.height < (kVerticalPadding * 2 + kBCTextViewHeight)) {
        frame.size.height = kVerticalPadding * 2 + kBCTextViewHeight;
    }
    self = [super initWithFrame:frame];
    if (self) {
        [self createUI];
    }
    return self;
}

- (void)setFrame:(CGRect)frame
{
    if (frame.size.height < (kVerticalPadding * 2 + kBCTextViewHeight)) {
        frame.size.height = kVerticalPadding * 2 + kBCTextViewHeight;
    }
    [super setFrame:frame];
}

- (void)createUI{

    self.backgroundImageView = [[UIImageView alloc] initWithFrame:self.bounds];
    self.backgroundImageView.userInteractionEnabled = YES;
    self.backgroundImageView.image = [[UIImage imageNamed:@"messageToolbarBg"] stretchableImageWithLeftCapWidth:0.5 topCapHeight:10];


    //表情按钮
    self.faceBtn = [UIButton buttonWithType:UIButtonTypeCustom];
    self.faceBtn.frame = CGRectMake(kHorizontalPadding,kHorizontalPadding, 30, 30);
    [self.faceBtn addTarget:self action:@selector(willShowFaceView:) forControlEvents:UIControlEventTouchUpInside];
    [self.faceBtn setBackgroundImage:[UIImage imageNamed:@"chatBar_face"] forState:UIControlStateNormal];
    [self.faceBtn setBackgroundImage:[UIImage imageNamed:@"chatBar_keyboard"] forState:UIControlStateSelected];
    [self addSubview:self.faceBtn];

    //文本
    self.textView = [[BCTextView alloc] initWithFrame:CGRectMake(CGRectGetMaxX(self.faceBtn.frame)+kHorizontalPadding, kHorizontalPadding, self.bounds.size.width - 4*kHorizontalPadding - 30*2, 30)];
    self.textView.placeholderColor = [UIColor lightGrayColor];
    self.textView.returnKeyType = UIReturnKeySend;
    self.textView.scrollEnabled = NO;
    self.textView.backgroundColor = [UIColor clearColor];
    self.textView.layer.borderColor = [UIColor colorWithWhite:0.8f alpha:1.0f].CGColor;
    self.textView.layer.borderWidth = 0.65f;
    self.textView.layer.cornerRadius = 6.0f;
    self.textView.delegate = self;

    //更多按钮
    self.moreBtn = [UIButton buttonWithType:UIButtonTypeCustom];
    self.moreBtn.frame = CGRectMake(CGRectGetMaxX(self.textView.frame)+kHorizontalPadding,kHorizontalPadding,30,30);
    [self.moreBtn addTarget:self action:@selector(willShowMoreView:) forControlEvents:UIControlEventTouchUpInside];
    [self.moreBtn setBackgroundImage:[UIImage imageNamed:@"chatBar_more"] forState:UIControlStateNormal];
    [self.moreBtn setBackgroundImage:[UIImage imageNamed:@"chatBar_keyboard"] forState:UIControlStateSelected];

    [self addSubview:self.backgroundImageView];
    [self.backgroundImageView addSubview:self.textView];
    [self.backgroundImageView addSubview:self.faceBtn];
    [self.backgroundImageView addSubview:self.moreBtn];
}
- (void)willShowFaceView:(UIButton *)btn{

}
- (void)willShowMoreView:(UIButton *)btn{

}
在ViewController.m中
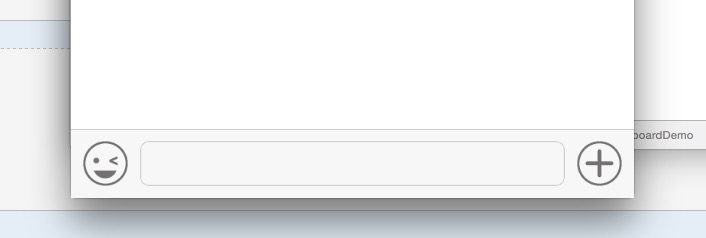
#import "ViewController.h"
#import "BCKeyBoard.h"
@interface ViewController ()

@end

@implementation ViewController

- (void)viewDidLoad {
    [super viewDidLoad];
    BCKeyBoard *bc = [[BCKeyBoard alloc] initWithFrame:CGRectMake(0, [UIScreen mainScreen].bounds.size.height - 46, [UIScreen mainScreen].bounds.size.width,46)];
    bc.backgroundColor = [UIColor clearColor];
    [self.view addSubview:bc];

}
运行效果
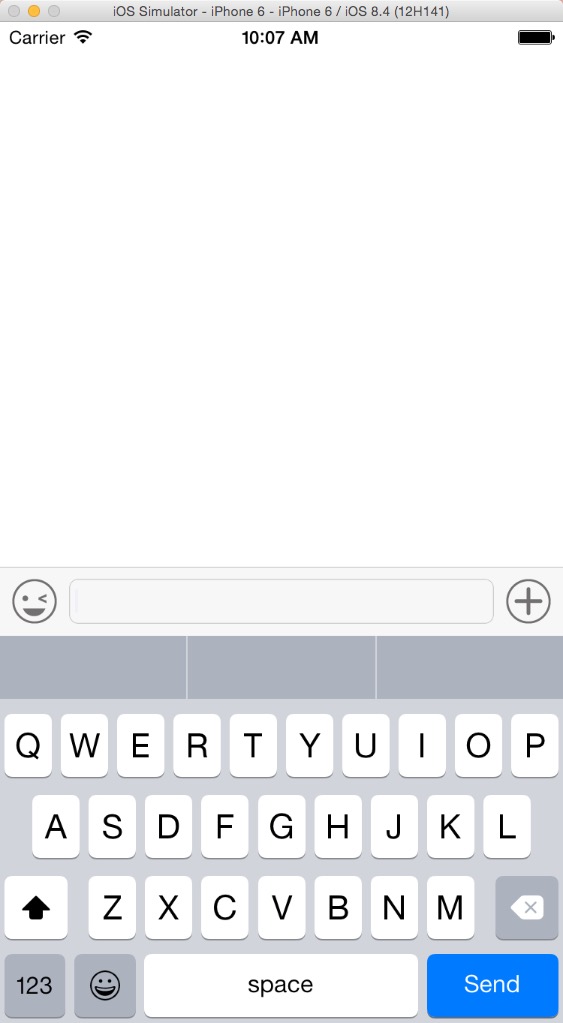
我们还要根据键盘弹起的高度,将自定义的view随之弹起,用的是通知,根据键盘弹起的高度,去改变自定义view的高度,使之始终在键盘的上面
#import "BCKeyBoard.h"
#define SCREEN_WIDTH ([[UIScreen mainScreen] bounds].size.width)
#define SCREEN_HEIGHT ([[UIScreen mainScreen] bounds].size.height)


#define kBCTextViewHeight 36 /**< 底部textView的高度 */
#define kHorizontalPadding 8 /**< 横向间隔 */
#define kVerticalPadding 5 /**< 纵向间隔 */
@interface BCKeyBoard() <UITextViewDelegate>
@property (nonatomic,strong)UIButton *faceBtn;
@property (nonatomic,strong)UIButton *moreBtn;
@property (nonatomic,strong)BCTextView  *textView;
@property (nonatomic,strong)UIImageView *backgroundImageView;
@end

@implementation BCKeyBoard

- (instancetype)initWithFrame:(CGRect)frame
{
    if (frame.size.height < (kVerticalPadding * 2 + kBCTextViewHeight)) {
        frame.size.height = kVerticalPadding * 2 + kBCTextViewHeight;
    }
    self = [super initWithFrame:frame];
    if (self) {
        [self createUI];
    }
    return self;
}

- (void)setFrame:(CGRect)frame
{
    if (frame.size.height < (kVerticalPadding * 2 + kBCTextViewHeight)) {
        frame.size.height = kVerticalPadding * 2 + kBCTextViewHeight;
    }
    [super setFrame:frame];
}

- (void)createUI{

    //键盘高度改变是调用
    [[NSNotificationCenter defaultCenter] addObserver:self selector:@selector(keyboardWillChangeFrame:) name:UIKeyboardWillChangeFrameNotification object:nil];

    self.backgroundImageView = [[UIImageView alloc] initWithFrame:self.bounds];
    self.backgroundImageView.userInteractionEnabled = YES;
    self.backgroundImageView.image = [[UIImage imageNamed:@"messageToolbarBg"] stretchableImageWithLeftCapWidth:0.5 topCapHeight:10];


    //表情按钮
    self.faceBtn = [UIButton buttonWithType:UIButtonTypeCustom];
    self.faceBtn.frame = CGRectMake(kHorizontalPadding,kHorizontalPadding, 30, 30);
    [self.faceBtn addTarget:self action:@selector(willShowFaceView:) forControlEvents:UIControlEventTouchUpInside];
    [self.faceBtn setBackgroundImage:[UIImage imageNamed:@"chatBar_face"] forState:UIControlStateNormal];
    [self.faceBtn setBackgroundImage:[UIImage imageNamed:@"chatBar_keyboard"] forState:UIControlStateSelected];
    [self addSubview:self.faceBtn];

    //文本
    self.textView = [[BCTextView alloc] initWithFrame:CGRectMake(CGRectGetMaxX(self.faceBtn.frame)+kHorizontalPadding, kHorizontalPadding, self.bounds.size.width - 4*kHorizontalPadding - 30*2, 30)];
    self.textView.placeholderColor = [UIColor lightGrayColor];
    self.textView.returnKeyType = UIReturnKeySend;
    self.textView.scrollEnabled = NO;
    self.textView.backgroundColor = [UIColor clearColor];
    self.textView.layer.borderColor = [UIColor colorWithWhite:0.8f alpha:1.0f].CGColor;
    self.textView.layer.borderWidth = 0.65f;
    self.textView.layer.cornerRadius = 6.0f;
    self.textView.delegate = self;

    //更多按钮
    self.moreBtn = [UIButton buttonWithType:UIButtonTypeCustom];
    self.moreBtn.frame = CGRectMake(CGRectGetMaxX(self.textView.frame)+kHorizontalPadding,kHorizontalPadding,30,30);
    [self.moreBtn addTarget:self action:@selector(willShowMoreView:) forControlEvents:UIControlEventTouchUpInside];
    [self.moreBtn setBackgroundImage:[UIImage imageNamed:@"chatBar_more"] forState:UIControlStateNormal];
    [self.moreBtn setBackgroundImage:[UIImage imageNamed:@"chatBar_keyboard"] forState:UIControlStateSelected];

    [self addSubview:self.backgroundImageView];
    [self.backgroundImageView addSubview:self.textView];
    [self.backgroundImageView addSubview:self.faceBtn];
    [self.backgroundImageView addSubview:self.moreBtn];
}
- (void)keyboardWillChangeFrame:(NSNotification *)notification{
    NSDictionary *userInfo = notification.userInfo;
    CGRect endFrame = [userInfo[UIKeyboardFrameEndUserInfoKey] CGRectValue];
    CGFloat duration = [userInfo[UIKeyboardAnimationDurationUserInfoKey] doubleValue];
    UIViewAnimationCurve curve = [userInfo[UIKeyboardAnimationCurveUserInfoKey] integerValue];
    //动画
    void(^animations)() = ^{
        CGRect frame = self.frame;
        frame.origin.y = endFrame.origin.y - self.bounds.size.height;
        self.frame = frame;
    };
    void(^completion)(BOOL) = ^(BOOL finished){
    };
    [UIView animateWithDuration:duration delay:0.0f options:(curve << 16 | UIViewAnimationOptionBeginFromCurrentState) animations:animations completion:completion];
}
- (void)willShowFaceView:(UIButton *)btn{

}
- (void)willShowMoreView:(UIButton *)btn{

}
@end
运行效果
是不是很棒.....,接下来,我们写表情按钮点击事件,表情按钮点击的时候弹出的肯定是表情键盘,自定义View的高度肯定也要变化,点击更多按钮时也是一样,所以,我们先写个高度变化的方法
其实底部的view,我们可以用一个activeView表示底部到底是什么View,方法的话是传入一个View,就直接能改变自定义View的高度来适应底部的activeView,多加的两个方法,记得要加个属性,就是activeView,类型是UIView;
- (void)willShowBottomView:(UIView *)bottomView
{
    if (![self.activeView isEqual:bottomView]) {
        CGFloat bottomHeight = bottomView ? bottomView.frame.size.height : 0;
        [self willShowBottomHeight:bottomHeight];

        if (bottomView) {
            CGRect rect = bottomView.frame;
            rect.origin.y = CGRectGetMaxY(self.backgroundImageView.frame);
            bottomView.frame = rect;
            [self addSubview:bottomView];
        }
        if (self.activeView) {
            [self.activeView removeFromSuperview];
        }
        self.activeView = bottomView;
    }
}
- (void)willShowBottomHeight:(CGFloat)bottomHeight
{
    CGRect fromFrame = self.frame;
    CGFloat toHeight = self.backgroundImageView.frame.size.height + bottomHeight;
    CGRect toFrame = CGRectMake(fromFrame.origin.x, fromFrame.origin.y + (fromFrame.size.height - toHeight), fromFrame.size.width, toHeight);
    self.frame = toFrame;
}
接下来,我们创建表情键盘,这个是我网上找的(我不会写表情键盘...),自己看git里面的FaceView的文件夹,顺便试试上面的改变frame的方法
#import "BCKeyBoard.h"
#import "DXFaceView.h"

#define SCREEN_WIDTH ([[UIScreen mainScreen] bounds].size.width)
#define SCREEN_HEIGHT ([[UIScreen mainScreen] bounds].size.height)


#define kBCTextViewHeight 36 /**< 底部textView的高度 */
#define kHorizontalPadding 8 /**< 横向间隔 */
#define kVerticalPadding 5 /**< 纵向间隔 */
@interface BCKeyBoard() <UITextViewDelegate,DXFaceDelegate>
@property (nonatomic,strong)UIButton *faceBtn;
@property (nonatomic,strong)UIButton *moreBtn;
@property (nonatomic,strong)BCTextView  *textView;
@property (nonatomic,strong)UIImageView *backgroundImageView;
@property (nonatomic,strong)UIView *faceView;
@property (nonatomic,strong)UIView *activeView;
@end

@implementation BCKeyBoard

- (instancetype)initWithFrame:(CGRect)frame
{
    if (frame.size.height < (kVerticalPadding * 2 + kBCTextViewHeight)) {
        frame.size.height = kVerticalPadding * 2 + kBCTextViewHeight;
    }
    self = [super initWithFrame:frame];
    if (self) {
        [self createUI];
    }
    return self;
}

- (void)setFrame:(CGRect)frame
{
    if (frame.size.height < (kVerticalPadding * 2 + kBCTextViewHeight)) {
        frame.size.height = kVerticalPadding * 2 + kBCTextViewHeight;
    }
    [super setFrame:frame];
}

- (void)createUI{

    //键盘高度改变是调用
    [[NSNotificationCenter defaultCenter] addObserver:self selector:@selector(keyboardWillChangeFrame:) name:UIKeyboardWillChangeFrameNotification object:nil];

    self.backgroundImageView = [[UIImageView alloc] initWithFrame:self.bounds];
    self.backgroundImageView.userInteractionEnabled = YES;
    self.backgroundImageView.image = [[UIImage imageNamed:@"messageToolbarBg"] stretchableImageWithLeftCapWidth:0.5 topCapHeight:10];


    //表情按钮
    self.faceBtn = [UIButton buttonWithType:UIButtonTypeCustom];
    self.faceBtn.frame = CGRectMake(kHorizontalPadding,kHorizontalPadding, 30, 30);
    [self.faceBtn addTarget:self action:@selector(willShowFaceView:) forControlEvents:UIControlEventTouchUpInside];
    [self.faceBtn setBackgroundImage:[UIImage imageNamed:@"chatBar_face"] forState:UIControlStateNormal];
    [self.faceBtn setBackgroundImage:[UIImage imageNamed:@"chatBar_keyboard"] forState:UIControlStateSelected];
    [self addSubview:self.faceBtn];

    //文本
    self.textView = [[BCTextView alloc] initWithFrame:CGRectMake(CGRectGetMaxX(self.faceBtn.frame)+kHorizontalPadding, kHorizontalPadding, self.bounds.size.width - 4*kHorizontalPadding - 30*2, 30)];
    self.textView.placeholderColor = [UIColor lightGrayColor];
    self.textView.returnKeyType = UIReturnKeySend;
    self.textView.scrollEnabled = NO;
    self.textView.backgroundColor = [UIColor clearColor];
    self.textView.layer.borderColor = [UIColor colorWithWhite:0.8f alpha:1.0f].CGColor;
    self.textView.layer.borderWidth = 0.65f;
    self.textView.layer.cornerRadius = 6.0f;
    self.textView.delegate = self;

    //更多按钮
    self.moreBtn = [UIButton buttonWithType:UIButtonTypeCustom];
    self.moreBtn.frame = CGRectMake(CGRectGetMaxX(self.textView.frame)+kHorizontalPadding,kHorizontalPadding,30,30);
    [self.moreBtn addTarget:self action:@selector(willShowMoreView:) forControlEvents:UIControlEventTouchUpInside];
    [self.moreBtn setBackgroundImage:[UIImage imageNamed:@"chatBar_more"] forState:UIControlStateNormal];
    [self.moreBtn setBackgroundImage:[UIImage imageNamed:@"chatBar_keyboard"] forState:UIControlStateSelected];

    [self addSubview:self.backgroundImageView];
    [self.backgroundImageView addSubview:self.textView];
    [self.backgroundImageView addSubview:self.faceBtn];
    [self.backgroundImageView addSubview:self.moreBtn];

    if (!self.faceView) {
        self.faceView = [[DXFaceView alloc] initWithFrame:CGRectMake(0, (kHorizontalPadding * 2 + 30), self.frame.size.width, 200)];
        [(DXFaceView *)self.faceView setDelegate:self];
        self.faceView.backgroundColor = [UIColor whiteColor];
        self.faceView.autoresizingMask = UIViewAutoresizingFlexibleTopMargin;
    }
}
- (void)keyboardWillChangeFrame:(NSNotification *)notification{
    NSDictionary *userInfo = notification.userInfo;
    CGRect endFrame = [userInfo[UIKeyboardFrameEndUserInfoKey] CGRectValue];
    CGFloat duration = [userInfo[UIKeyboardAnimationDurationUserInfoKey] doubleValue];
    UIViewAnimationCurve curve = [userInfo[UIKeyboardAnimationCurveUserInfoKey] integerValue];
    //动画
    void(^animations)() = ^{
        CGRect frame = self.frame;
        frame.origin.y = endFrame.origin.y - self.bounds.size.height;
        self.frame = frame;
    };
    void(^completion)(BOOL) = ^(BOOL finished){
    };
    [UIView animateWithDuration:duration delay:0.0f options:(curve << 16 | UIViewAnimationOptionBeginFromCurrentState) animations:animations completion:completion];
}
- (void)willShowBottomView:(UIView *)bottomView
{
    if (![self.activeView isEqual:bottomView]) {
        CGFloat bottomHeight = bottomView ? bottomView.frame.size.height : 0;
        [self willShowBottomHeight:bottomHeight];

        if (bottomView) {
            CGRect rect = bottomView.frame;
            rect.origin.y = CGRectGetMaxY(self.backgroundImageView.frame);
            bottomView.frame = rect;
            [self addSubview:bottomView];
        }
        if (self.activeView) {
            [self.activeView removeFromSuperview];
        }
        self.activeView = bottomView;
    }
}
- (void)willShowBottomHeight:(CGFloat)bottomHeight
{
    CGRect fromFrame = self.frame;
    CGFloat toHeight = self.backgroundImageView.frame.size.height + bottomHeight;
    CGRect toFrame = CGRectMake(fromFrame.origin.x, fromFrame.origin.y + (fromFrame.size.height - toHeight), fromFrame.size.width, toHeight);
    self.frame = toFrame;
}
#pragma mark 表情键盘的代理方法
- (void)sendFace
{

}
- (void)selectedFacialView:(NSString *)str isDelete:(BOOL)isDelete{

}
//显示表情键盘
- (void)willShowFaceView:(UIButton *)btn{
    btn.selected = !btn.selected;
    if(btn.selected == YES){
        [self willShowBottomView:self.faceView];
        [self.textView resignFirstResponder];
    }else{
        [self willShowBottomView:nil];
        [self.textView becomeFirstResponder];
    }
}
//显示扩展键盘
- (void)willShowMoreView:(UIButton *)btn{

}
@end
运行效果
今天就到这里啦,有什么问题,可以在评论里面发给我哦,等有时间继续写啦