一、argparse模块
1、模块说明
# argparse是python的标准库中用来解析命令行参数的模块,用来替代已经过时的optparse模块,argparse能够根据程序中的定义的sys.argv中解析出这些参数,
# 并自动生成帮助和使用信息
2、模块常用的参数
    # 参数说明:
    # name/flag:参数的名字
    # action:遇到参数的动作,默认值是store
    # nargs:参数的个数,可以是具体的数字,或者是+或者是*,*表示0个或者多个参数,+号表示1个或者多个参数
    # default:不指定参数时的默认值
    # type:# 参数的类型
    # choice:参数允许的值
    # required:可选参数是否可以省略
    # help:参数的帮助信息
    # dest:解析后参数的名称
3、使用方法
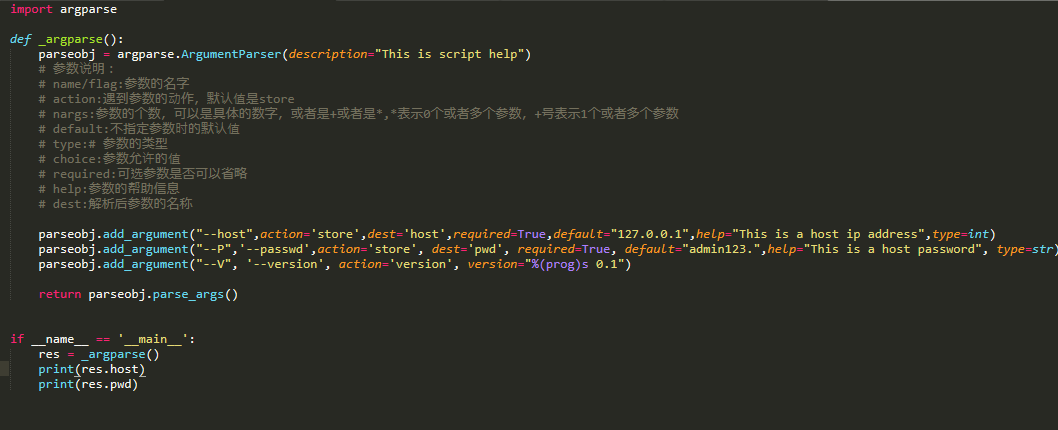
import argparse

def _argparse():
    parseobj = argparse.ArgumentParser(description="This is script help")
    # 参数说明:
    # name/flag:参数的名字
    # action:遇到参数的动作,默认值是store
    # nargs:参数的个数,可以是具体的数字,或者是+或者是*,*表示0个或者多个参数,+号表示1个或者多个参数
    # default:不指定参数时的默认值
    # type:# 参数的类型
    # choice:参数允许的值
    # required:可选参数是否可以省略
    # help:参数的帮助信息
    # dest:解析后参数的名称

    parseobj.add_argument("--host",action='store',dest='host',required=True,default="127",help="This is a host ip address",type=int)
    parseobj.add_argument("--P",'--passwd',action='store', dest='pwd', required=True, default="admin123.",help="This is a host password", type=str)
    parseobj.add_argument("--V", '--version', action='version', version="%(prog)s 0.1")

    return parseobj.parse_args()


if __name__ == '__main__':
    res = _argparse()
    print(res.pwd)
    print(res.host)
这里还可以加一个choices的选项,限制参数为指定的参数
parseobj.add_argument("--type", action='store', dest='t', required=True,
                      help="type", type=str,choices=["update","create"])
这里我们在试一下nargs参数,切记这里的type也是str,不能是list,这里的type的意思是每个参数的类型
    parseobj.add_argument("--index", action='store', dest='index', required=True,
                          help="index names", type=str,nargs="+")
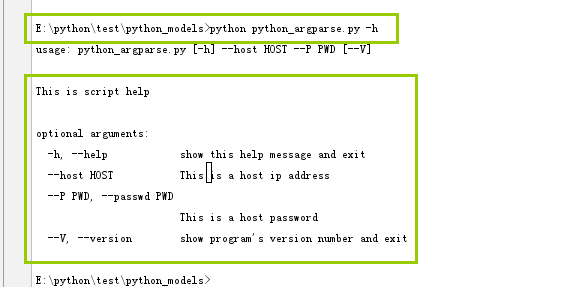
4、最后我们测试一下这个模块
a、测试 -h选项,这里-h和--help的效果是一样的
b、测试--V选项和--version选项

c、测试一下输入的正确的参数

二、click模块
1、模块介绍
click模块的作者就是Flask的作者,(Armin Ronacher)开发的一个第三方的模块,用于快速创建命令行。他的作用用python标准库中的argparse相同,但是
使用更加简单,click相对于标准库的argparse,就好比requests库相当于标准库的urllib库,click是一个第三的库,因此在使用之前需要安装
2、模块安装
E:python3Scripts>pip3.6.exe install click
3、使用步骤
a、使用@click.command()装饰一个函数,使之成为命令行的接口
b、使用@click.option()等装饰函数,为其添加命令行选项等
c、先看一个官方的例子
import click

# click模块的作者就是Flask的作者,(Armin Ronacher)开发的一个第三方的模块,用于快速创建命令行。他的作用用python标准库中的argparse相同,但是
# 使用更加简单,click相对于标准库的argparse,就好比requests库相当于标准库的urllib库,click是一个第三的库,因此在使用之前需要安装

@click.command()
@click.option('--count',default=1,help='Number of greetings')
@click.option('--name',prompt='your name',help='The person to greet')
def hello(count,name):
    for x in range(count):
        click.echo("hello {name}".format(name = name))

if __name__ == '__main__':
    hello()

其他的应该大家都可以看懂,这个prompt的作用是什么呢,实际就是如果我们没有为name传参数,他就会给出一个提示

下面这个例子是完整的传参

4、常用参数
常用参数
default:设置命令行参数的默认值
help:参数说明
type:参数的类型,可以是string,int,float
prompt:当在命令行中没有输入相应的参数,会根据prompt提示用户输入
nargs:指定命令行参数接受的值的个数
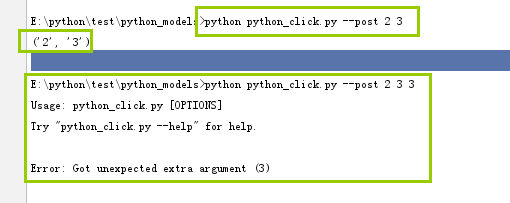
a、测试一下nargs参数
@click.command()
@click.option('--post',nargs=2,help='Number of post')
def hello(post):
    print(post)


if __name__ == '__main__':
    hello()
测试结果
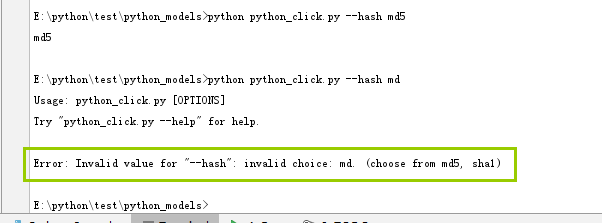
b、测试click.choice选项
@click.command()
@click.option('--hash',type=click.Choice(["md5","sha1"]),help='type of hash')
def hello(hash):
    print(hash)


if __name__ == '__main__':
    hello()
测试结果
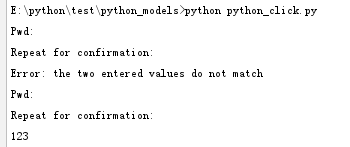
c、如果使用命令行输入密码,则默认的情况是有很大的安全隐患的,因为输入密码的命令在history中,其他用户就可以通过命令的历史列表,拿到我们的密码,click可以为我们解决这个问题
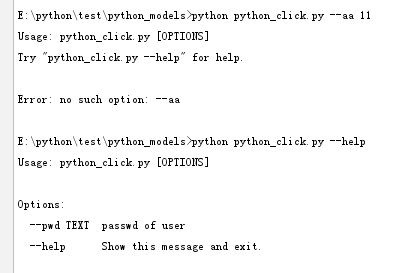
@click.command()
@click.option('--pwd',prompt=True,hide_input=True,help='passwd of user',confirmation_prompt=True)
def hello(pwd):
    print(pwd)


if __name__ == '__main__':
    hello()
prompt:要设置为True
hide_input:要设置为True
confirmation_prompt:会自动为我们进行密码的二次验证
测试结果如下
错误的输入
正确的输入
