今天在github上找东西,找到个工具是python写的,但是需要安装nosetests,因此了解了下nosetests
python除了unittest,还有nosetests,使用更快捷
nosetests的口号:
nose extends unittest to make testing easier
特点:
自动发现测试用例(包含[Tt]est文件以及文件包中包含test的函数)
如:以test开头的文件;以test开头的函数或方法;以Test开头的类
nose自动收集单元测试,会自动识别源代码文件、目录或包中的测试用例,任何符合正则表达式:(?:^|[b_.-])[Tt]est的类、函数、文件或目录,以及TestCase的子类都会被识别并执行,匹配成功的包、任何python的源文件都会被当做测试用例。
1.安装
pip install nose
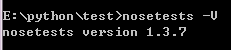
测试安装是否成功
nosetests -V
2.使用
常用命令
nosetests –h    查看所有nose相关命令
nosetests –s     执行并捕获输出
nosetests –with-xunit  输出xml结果报告
nosetests -w    查看指定目录下的
nosetests -v     查看nose的运行信息和调试信息
nose支持setup和teardown函数,在测试用例的前后执行。作用域:
1、package
可以在__init__.py中定义
setup方法名可以是setup, setup_package, setUp, or setUpPackage
teardown方法名可以是teardown, teardown_package, tearDown or tearDownPackage。比如定义数据库的连接和释放
2、module
在模块内定义setup,setup_module, setUp or setUpModule,和/或teardown,teardown_module, or tearDownModule
3、class
4、function
任何符合正则的函数都会被包装成FunctionTestCase
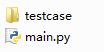
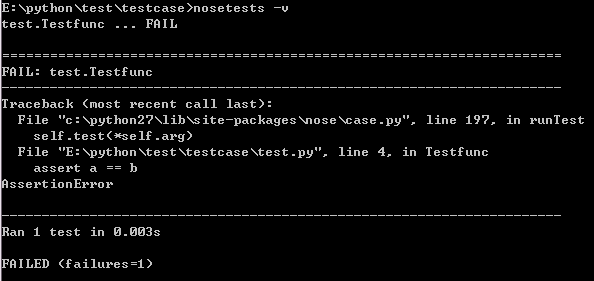
testcase下面test.py
def Testfunc():
    a = 1
    b = 2
    assert a == b
运行测试
(1)自动发现和执行
进入testcase目录执行
nosetests -v
(2)编码实现测试用例的执行
在main.py所在的目录
main.py
import nose
result = nose.run()
print(result)
执行
python main.py

3.测试用例
(1)函数形式
def test_1():
    print("test_1")
    pass


def test_2():
    print("test_2")


def test_3():
    print("test_3")
def setUp():
    print "test setUp"


def tearDown():
    print "test teardown"

test_1.teardown=test_2.teardown= tearDown
运行某个文件
nosetests test1.py

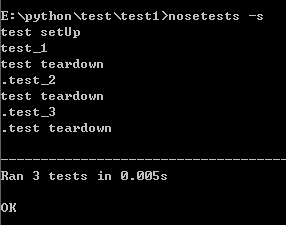
nosetests -s
nosetests -s test1.test_3
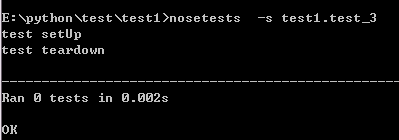
test_1.teardown=test_2.teardown= tearDown,说明在运行完成后就执行tearDown操作
(2)类形式
test/test2下新建test2.py
class Testclass:

    def __init__(self):
        pass

    def testfunc1(self):
        print 'this is case1'

    def testfunc2(self):
        print 'this is case2'

    def testfunc3(self):
        print 'this is case3'
执行
nosetests -s

执行
nosetests -v

在test目录执行
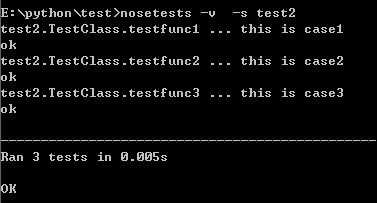
nosetests -v -s test2
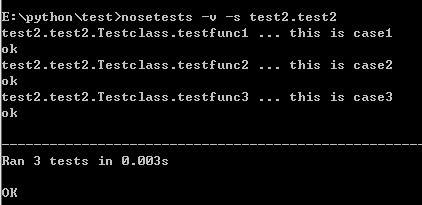
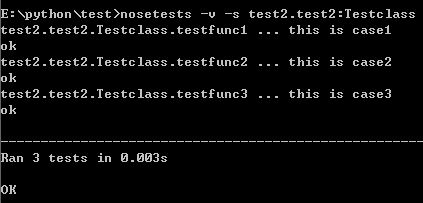
nosetests -v -s test2.test2
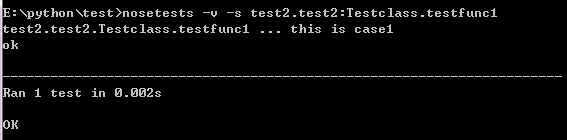
nosetests -v -s test2.test2:Testclass.testfunc1
nosetests -v -s test2.test2:Testclass.testfunc1
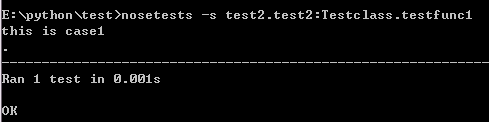
nosetests -s test2.test2:Testclass.testfunc1
补充:
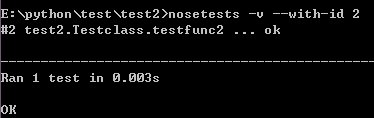
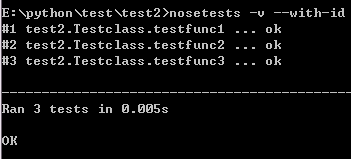
在输出文件中填加testid的显示 nosetests -v --with-id
通过id,自定义要运行的测试用例 nosetests -v --with-id id号