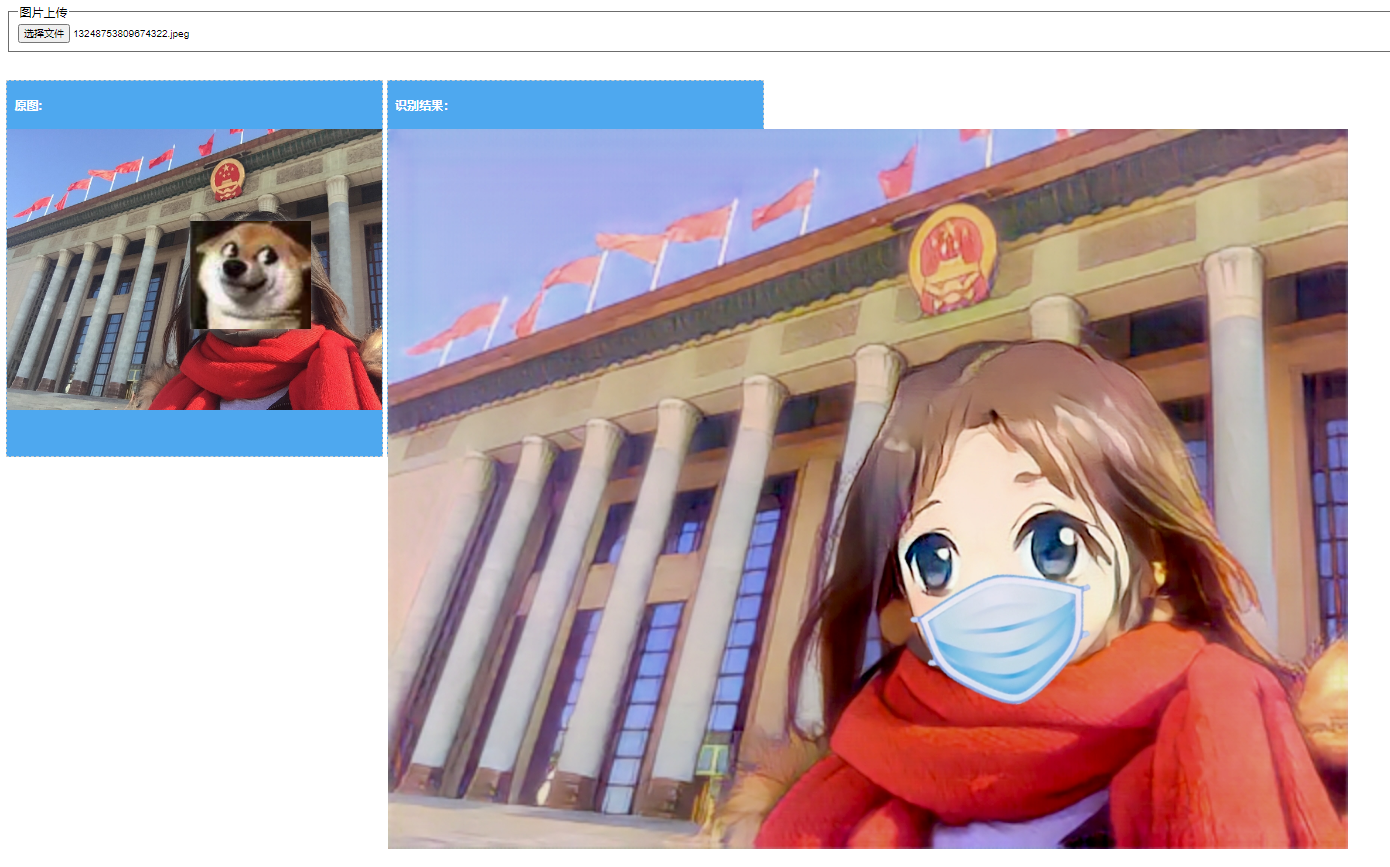
效果图:
准备工作
1、注册百度账号
2、登录百度智能云控制台
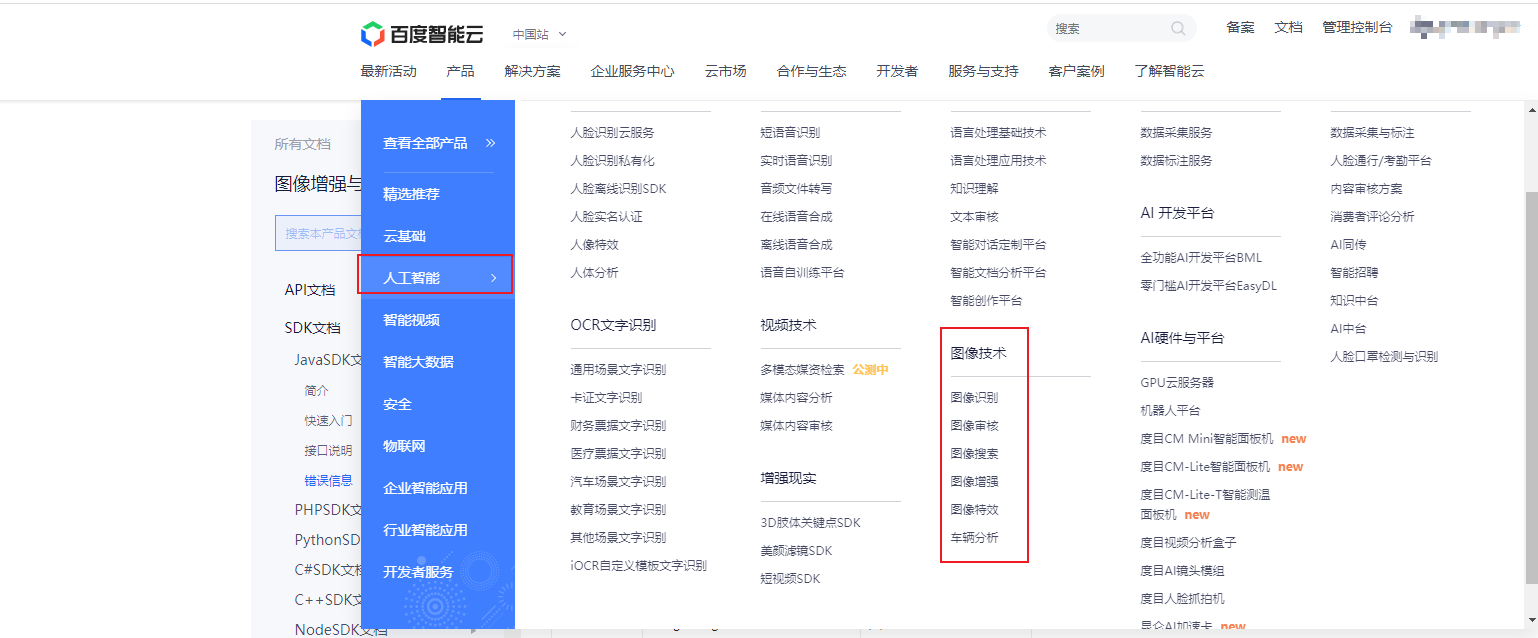
3、在产品列表中找到 人工智能->图像技术
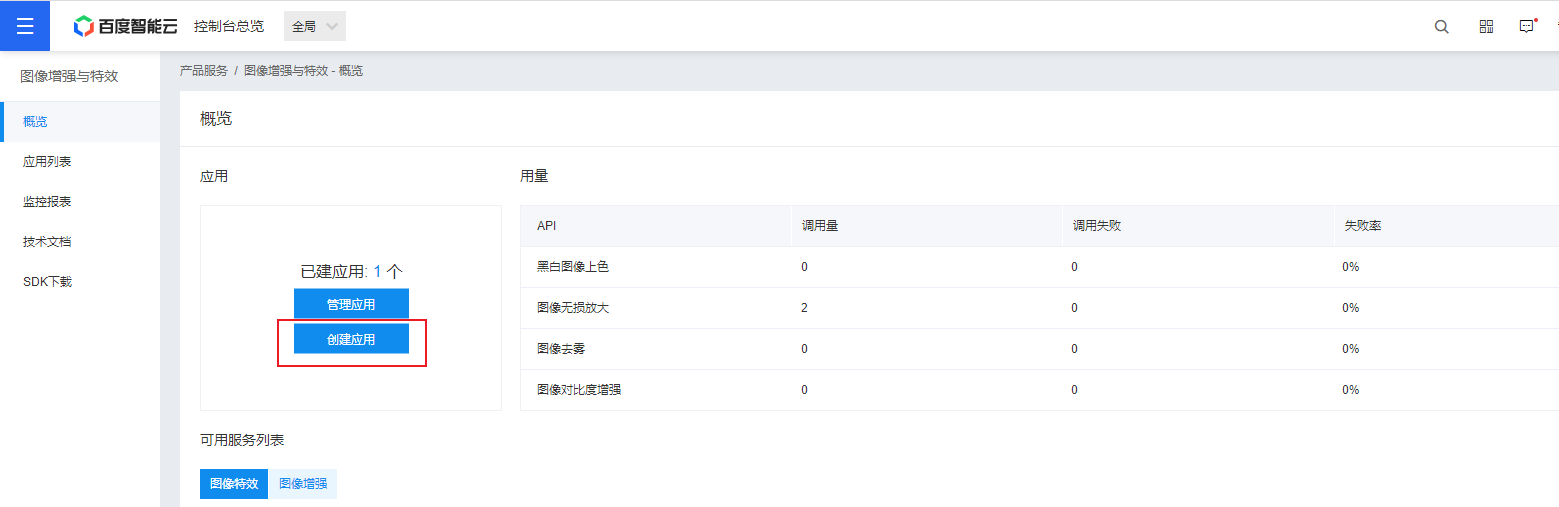
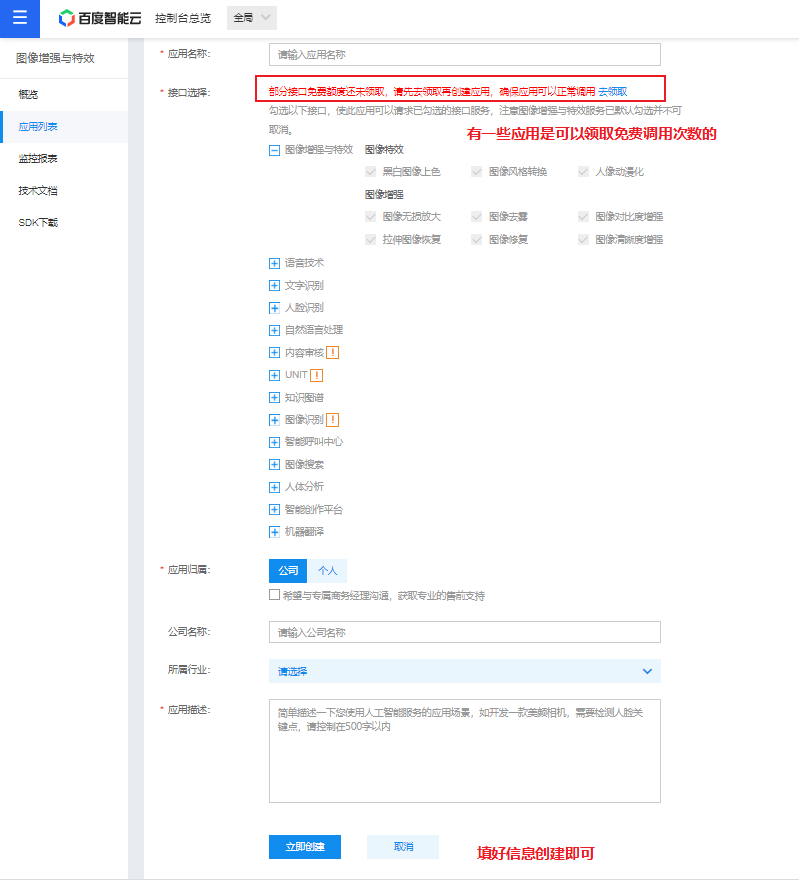
4、点击创建应用,如下图:
代码
1.创建公共方法 common.php 声明请求的方法和获取access_token值的方法
<?php
// 请求方法
function request_post($url = '', $param = '')
{
    if (empty($url) || empty($param)) {
        return false;
    }
    $postUrl = $url;
    $curlPost = $param;
    // 初始化curl
    $curl = curl_init();
    curl_setopt($curl, CURLOPT_URL, $postUrl); //抓取指定网页
    curl_setopt($curl, CURLOPT_HEADER, 0); //设置header
    curl_setopt($curl, CURLOPT_RETURNTRANSFER, 1); // 要求结果为字符串且输出到屏幕上
    curl_setopt($curl, CURLOPT_POST, 1);// post提交方式
    curl_setopt($curl, CURLOPT_SSL_VERIFYPEER, false);
    curl_setopt($curl, CURLOPT_POSTFIELDS, $curlPost);
    $data = curl_exec($curl); // 运行curl
    curl_close($curl);
    return $data;
}
// 获取access_token
function access_token(){
  $file = __DIR__ .'access_token';
  if(file_exists($file)){
     $str=file_get_contents($file);
     try{
        $arr=json_decode($str,true);
        if(is_array($arr)){
              $totime=$arr['totime'];
              if($totime>time()){
                  return $arr['access_token'];
                  exit;
              }
        }
      }catch(Ecception $e){

      }
  }

  $url = 'https://aip.baidubce.com/oauth/2.0/token'; //固定地址
  $post_data['grant_type']       = 'client_credentials'; //固定参数
  $post_data['client_id']      = '你的 Api Key'; //创建应用的API Key
  $post_data['client_secret'] = '你的 Secret Key';  //创建应用的Secret Key
  $o = "";
  foreach ( $post_data as $k => $v )
  {
    $o.= "$k=" . urlencode( $v ). "&" ;
  }
  $post_data = substr($o,0,-1);
  $res = request_post($url, $post_data);
  $arr =json_decode($res,true);
  if(isset($arr['access_token']) && isset($arr['expires_in'])){
     $data['access_token']=$arr['access_token'];
     $data['totime']=time() + $arr['expires_in'] -3600;

     file_put_contents($file, json_encode($data));
     return $arr['access_token'];
  }else{
     return false;
  }
}
2.图片上传及识别
2.1、在项目的根目录下创建一个upload文件夹,用于存放上传的图片
2.2、创建一个index.html文件,用于上传图片及数据渲染
- html代码:
<!DOCTYPE html>
<html>

<head>
  <meta charset="utf-8">
  <title>使用百度 API </title>
  <style type="text/css">
    .spanstyle {
      display: inline-block;
       500px;
      height: 500px;
      position: relative;
    }
  </style>
  <script src="https://cdn.bootcss.com/jquery/1.10.2/jquery.min.js"></script>

  <script>
    function imageUpload(imgFile) {
      console.log(imgFile.files);
      var uploadfile = imgFile.files[0] //获取图片文件流

      var formData = new FormData(); //创建一个FormData对象

      formData.append('file', uploadfile);
      //将图片放入FormData对象对象中(由于图片属于文件格式,不能直接将文件流直接通过ajax传递到后台,需要放入FormData对象中。在传递)

      $("#loading").css("opacity", 1);


      $.ajax({
        type: "POST", //POST请求
        url: "upload.php", //接收图片的地址(同目录下的php文件)
        data: formData, //传递的数据
        dataType: "json", //声明成功使用json数据类型回调

        //如果传递的是FormData数据类型,那么下来的三个参数是必须的,否则会报错
        cache: false, //默认是true,但是一般不做缓存
        processData: false, //用于对data参数进行序列化处理,这里必须false;如果是true,就会将FormData转换为String类型
        contentType: false, //一些文件上传http协议的关系,自行百度,如果上传的有文件,那么只能设置为false
        success: function (msg) { //请求成功后的回调函数
          console.log(msg)
          //预览上传的图片
          var filereader = new FileReader();
          filereader.onload = function (event) {
            var srcpath = event.target.result;
            $("#loading").css("opacity", 0);
            $("#PreviewImg").attr("src", srcpath);
          };
          filereader.readAsDataURL(uploadfile);
          if (msg.img_base64) {
            $('#img_res').attr('src', msg.img_base64);
          }

        }
      });

    }
  </script>
</head>

<body>

  <fieldset>
    <input type="file" onchange="imageUpload(this)">
    <legend>图片上传</legend>
  </fieldset>

  <div style="margin-top:2%">
    <span class="spanstyle" style="vertical-align: top;border: 1px dashed #ccc;background-color: #4ea8ef;color: white;">
      <h4 style="padding-left:2%">原图:</h4>
      <img id="PreviewImg" src="default.jpg" style="100%;max-height:100%">
      <img id="loading" style="100px;height:100px;top: 36%;left: 39%;position: absolute;opacity: 0;"
        src="loading.gif">
    </span>
    <span class="spanstyle" style="vertical-align: top;border: 1px dashed #ccc;background-color: #4ea8ef;color: white;">
      <h4 style="padding-left:2%">识别结果:</h4>
      <img id="img_res" src="" alt="">
    </span>
  </div>

</body>

</html>
2.3、创建一个upload.php文件,用于接收图片及调用图像识别API
<?php
    require './common.php';
    $token =  access_token();
    $temp = explode(".", $_FILES["file"]["name"]);
    $extension = end($temp);     // 获取图片文件后缀名
    $_FILES["file"]["name"]=time().'.'.$extension;//图片重命名(以时间戳来命名)
    //将图片文件存在项目根目录下的upload文件夹下
    move_uploaded_file($_FILES["file"]["tmp_name"], "upload/" . $_FILES["file"]["name"]);
	// 人像动漫化
    $url = 'https://aip.baidubce.com/rest/2.0/image-process/v1/selfie_anime?access_token=' . $token;
    $img = file_get_contents("upload/" . $_FILES["file"]["name"]);
    $img = base64_encode($img);
    $bodys = array(
        'image' => $img,
        // 'type'=>'anime_mask',
        // 'mask_id'=>2
    );
    $res = request_post($url, $bodys);
    $res = json_decode($res,true);
    $image_file = "upload/" .$_FILES["file"]["name"];
    $image_info  = getimagesize($image_file);
    if($res['image']){
      $res['img_base64'] = "data:{$image_info['mime']};base64," .$res['image'];  // 返回处理后的图片base64
    }
    echo json_encode($res);die();
注:这个案例是直接参照api文档做的,未使用过下载的sdk