重点:
- 密码加密存储
- 使用jQuery插件做校验和错误提示等
密码不能明文存储,在数据库中是加密存储的
- 可逆加密:通过密文使用解密算法得到明文 DES AES
- 不可逆加密:通过密文,得不到明文 MD5 SHA-1 SHA-2
MD5优点:压缩性,长度固定;容易计算;抗修改性;强抗碰撞;MD5加盐值加密码
一、公司的工具类中加入MD5
project-commons下
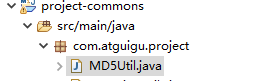
创建MD5Util.java
package com.atguigu.project;

import java.security.MessageDigest;

public class MD5Util {
    public static String digest16(String inStr) {
        return digest(inStr, 16);
    }
    public static String digest(String inStr) {
        return digest(inStr, 32);
    }
    private static String digest(String inStr, int rang) {
        MessageDigest md5 = null;
        if ( MyStringUtils.isEmpty(inStr) ) {
            return "";
        }

        try {
            md5 = MessageDigest.getInstance("MD5");
        } catch (Exception e) {
            e.printStackTrace();
            return "";
        }

        char[] charArray = inStr.toCharArray();
        byte[] byteArray = new byte[charArray.length];

        for (int i = 0; i < charArray.length; i++) {
            byteArray[i] = (byte) charArray[i];
        }

        byte[] md5Bytes = md5.digest(byteArray);

        StringBuilder hexValue = new StringBuilder();

        for (int i = 0; i < md5Bytes.length; i++) {
            int val = ((int) md5Bytes[i]) & 0xff;
            if (val < 16)
                hexValue.append("0");
            hexValue.append(Integer.toHexString(val));
        }
        if ( rang == 32 ) {
            return hexValue.toString();
        } else {
            return hexValue.toString().substring(8, 24);
        }
    }

    public static void main(String args[]) {
        String s = new String("admin");
        System.out.println(digest(s));
    }
}
MyStringUtils
package com.atguigu.project;

public class MyStringUtils {

    public static boolean isEmpty(String str) {
        if (str == null) {
            return true;
        }
        if (str.trim().equals("")) {
            return true;
        }
        return false;
    }
}
业务中使用MD5加密:
1.将用户输入的用户密码拿到
2.去数据库查询用户,使用用户带来的用户名和加密后的密码进行查询
二、使用jQuery插件做校验和错误提示
jQuery Validate 插件为表单提供了强大的验证功能,让客户端表单验证变得更简单,同时提供了大量的定制选项,满足应用程序各种需求。该插件捆绑了一套有用的验证方法,包括 URL 和电子邮件验证,同时提供了一个用来编写用户自定义方法的 API。所有的捆绑方法默认使用英语作为错误信息,且已翻译成其他 37 种语言。
该插件是由 Jörn Zaefferer 编写和维护的,他是 jQuery 团队的一名成员,是 jQuery UI 团队的主要开发人员,是 QUnit 的维护人员。该插件在 2006 年 jQuery 早期的时候就已经开始出现,并一直更新至今。目前版本是 1.14.0。
访问 jQuery Validate 官网,下载最新版的 jQuery Validate 插件
使用:引入jQuery和jQuery Validate
<script type="application/javascript" src="yourpath/jquery-3.2.1.min.js"></script>
<script type="application/javascript" src="yourpath/jquery.validate.js"></script>
rules指定校验规则
messages指定报错信息

举例:
<!DOCTYPE html>
<html>
    <head>
        <meta charset="utf-8" />
        <title></title>
        <script type="application/javascript" src="js/jquery-3.2.1.min.js"></script>
        <script type="application/javascript" src="plugin/jquery-validation-1.13.1/dist/jquery.validate.js"></script>
    </head>
    <body>
        <form class="cmxform" id="commentForm" method="get" action="">
            <fieldset>
                <legend>Please provide your name, email address (won't be published) and a comment</legend>
                <p>
                    <label for="cname">Name (required, at least 2 characters)</label>
                    <input id="cname" name="name" minlength="2" type="text" required>
                </p>
                <p>
                    <label for="cemail">E-Mail (required)</label>
                    <input id="cemail" type="email" name="email" required>
                </p>
                <p>
                    <label for="curl">URL (optional)</label>
                    <input id="curl" type="url" name="url">
                </p>
                <p>
                    <label for="ccomment">Your comment (required)</label>
                    <textarea id="ccomment" name="comment" required></textarea>
                </p>
                <p>
                    <input class="submit" type="submit" value="Submit">
                </p>
            </fieldset>
        </form>
    </body>
        <script>
    $.validator.setDefaults({
        submitHandler: function() {
            alert("submitted!");
        }
    });

    $().ready(function() {

        $("#commentForm").validate({
            rules: {
                name: "required",

                email: {
                    required: true,
                    email: true
                }
            },
            messages: {
                    name:{
                        required:"名字是必须的",
                        },
                    email: {
                        required: "邮箱是必须的",
                        email: "邮箱格式必须是合法的"
                    }

            }
        });

    });
    </script>
</html>
rules指定规则,name: "required"意为name是必须的,当有多条规则的时候使用大括号,email字段是必须的,且要检查email格式
rules: {
        name: "required",

        email: {
                required: true,
                email: true
               }
       }
messages是错误信息,与上面的rules相对应
messages: {
     name:{
           required:"名字是必须的",
          },
     email: {
              required: "邮箱是必须的",
              email: "邮箱格式必须是合法的"
            }
         }
三、用户登陆和注册界面
将css和js的引入统一放到WEB-INF的includes文件夹下,所有页面共用的css和js聚集在一起,各页面独有的则存放在各个页面
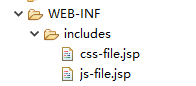
js-file.jsp
<%@ page language="java" contentType="text/html; charset=UTF-8"
    pageEncoding="UTF-8"%>
<script src="${ctp}/jquery/jquery-2.1.1.min.js"></script>
<script src="${ctp}/plugin/bootstrap-3.3.7/js/bootstrap.min.js"></script>
<script src="${ctp}/script/docs.min.js"></script>
<script src="${ctp}/script/back-to-top.js"></script>
<!-- --------随着项目不断增加 -->
<script src="${ctp}/plugin/jquery-validation-1.13.1/dist/jquery.validate.min.js"></script>
css-file.jsp
<%@ page language="java" contentType="text/html; charset=UTF-8"
    pageEncoding="UTF-8"%>
<link rel="stylesheet" href="${ctp}/plugin/bootstrap-3.3.7/css/bootstrap.min.css">
<link rel="stylesheet" href="${ctp}/css/font-awesome.min.css">
<link rel="stylesheet" href="${ctp}/css/login.css">
<link rel="stylesheet" href="${ctp}/css/main.css">
在各页面需要引入js和css的地方分别使用:
<%@include file="/WEB-INF/includes/js-file.jsp" %>
<%@include file="/WEB-INF/includes/css-file.jsp" %>
JSP指令(directive)是为JSP引擎而设计的,它们并不直接产生任何可见输出,而只是告诉引擎如何处理JSP页面中的其余部分。
JSP指令的基本语法格式:
<%@ 指令 属性名="值" %>include指令
include指令用于通知JSP引擎在翻译当前JSP页面时将其他文件中的内容合并进当前JSP页面转换成的Servlet源文件中,这种在源文件级别进行引入的方式称之为静态引入,当前JSP页面与静态引入的页面紧密结合为一个Servlet。
语法:
<%@ include file="relativeURL"%>
其中的file属性用于指定被引入文件的相对路径。
在index.jsp中配置登陆和注册页面的url
<ul class="nav navbar-nav navbar-right">
    <li><a href="${ctp}/login.jsp">登录</a></li>
    <li><a href="${ctp}/reg.jsp">注册</a></li>
</ul>
同时也配置login.jsp和reg.jsp中的相关链接
四、管理员用户注册
注册的流程:
来到注册页面--->输入表单内容--->js插件校验--->来到控制器处理注册请求--->调用UserService的注册方法--->UserMapper给数据库中保存东西--->注册完跳转到管理员控制台
注册页面找到注册表单
表单有action指向
method是post
 <form id="regForm" class="form-signin" role="form" action="${ctp }/permission/user/reg" method="post">
       ...
        </div>
        <a id="submitBtn" class="btn btn-lg btn-success btn-block" > 注册</a>
      </form>
    </div>
  <%@include file="/WEB-INF/includes/js-file.jsp" %>
  <script type="text/javascript">
  $("#submitBtn").click(function () {
    $("#regForm").submit();
    return false;
});

  </script>
action 属性规定当提交表单时,向何处发送表单数据
action="${ctp }/permission/user/reg",因此点击提交后会将表单数据发送给/manager-web/permission/user/reg
在web控制器里
分层,后台有很多功能
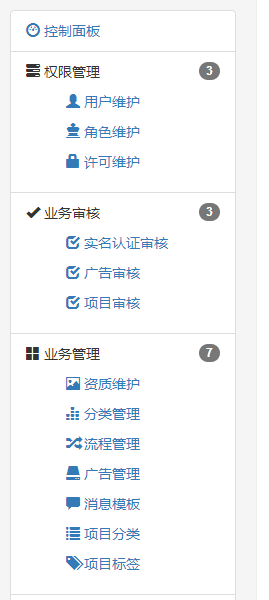
controller中根据功能分包
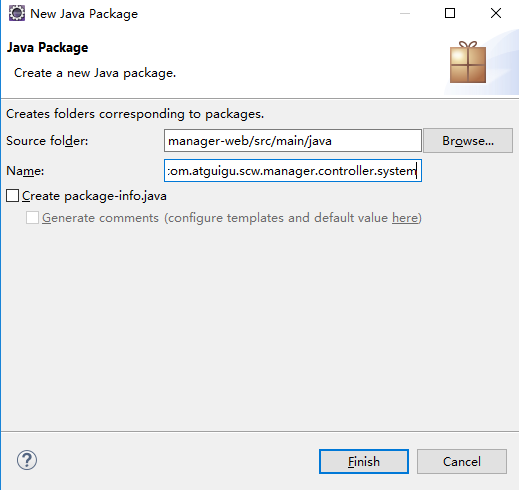
权限
业务审核

业务管理
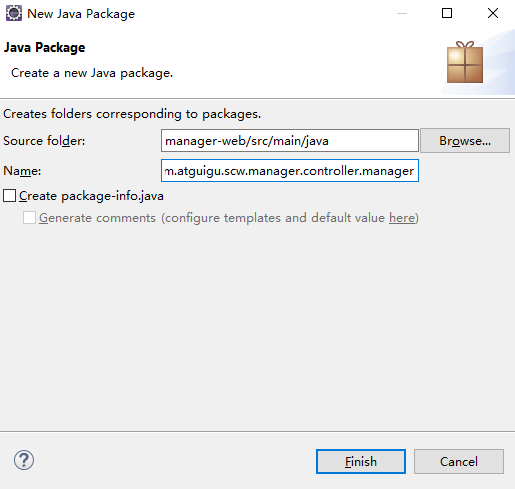
参数管理
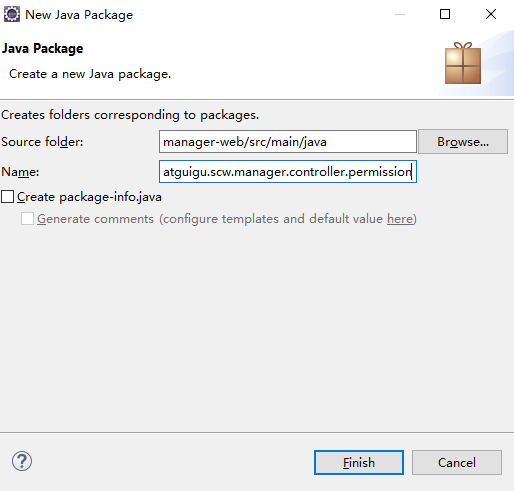
我们将处理上面注册请求的功能放在permission下,接收并响应上面的请求
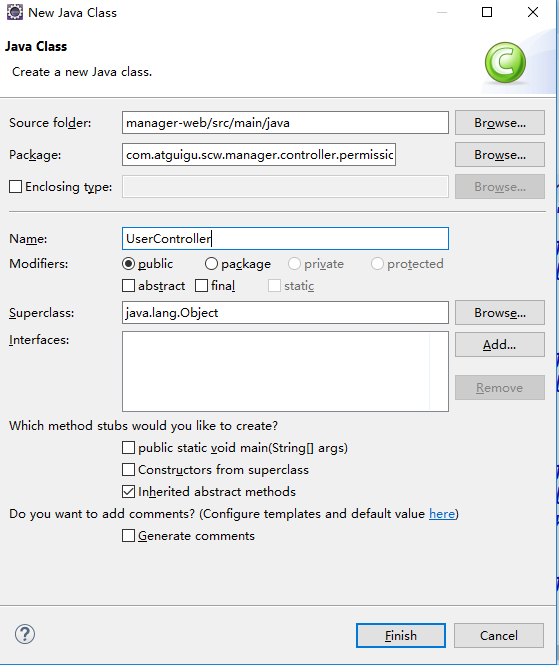
处理注册请求
超详细 Spring @RequestMapping 注解使用技巧
项目部属对应的path
从上面可知webapp在根路径下

@RequestMapping("/permission/user") 正是上面发送数据的地址
package com.atguigu.scw.manager.controller.permission;

import org.springframework.stereotype.Controller;
import org.springframework.web.bind.annotation.RequestMapping;

import com.atguigu.scw.manager.bean.TUser;

//处理所有/permission/user下的请求
@RequestMapping("/permission/user")
@Controller
public class UserController {

    private String manager = "manager/";

    /**
     *
     */
    // /permission/user/reg
    @RequestMapping("/reg")
    public String reg(TUser user) {
        System.out.println("用户注册...");
        // 1.注册成功后来到控制面板页面
        return "manager/main";
    }
}
return "manager/main"
实际访问的是/manager-web/WEB-INF/jsps/manager/main.jsp
为什么能访问到呢?因为我们在SpringMVC中配置了解析器
<!--2、视图解析器 -->
<bean class="org.springframework.web.servlet.view.InternalResourceViewResolver">
     <property name="prefix" value="/WEB-INF/jsps/"></property>
     <property name="suffix" value=".jsp"></property>
</bean>
controller方法返回字符串可以指定逻辑视图名,通过视图解析器解析为物理视图地址。因此,根据上面的前后缀配置,manager/main解析为/manager-web/WEB-INF/jsps/manager/main.jsp
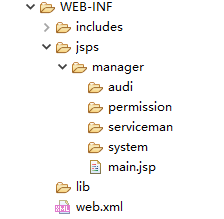
控制台页面不是直接能够访问的,不放在webapp,放在WEB-INF的jsps下的manager中
manger存放管理员的页面
下面又包含permission、audi、serviceman、system文件夹,分别对应权限管理、业务审核、业务管理、参数管理
将main.jsp放在manager下
五、表单校验
设置下注册页面的表单
校验插件拷贝到plugin文件夹下
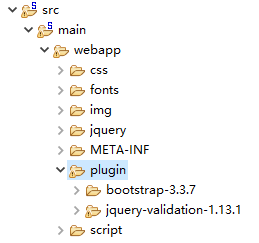
修改reg.jsp
...
<div class="container">

      <form id="regForm" class="form-signin" role="form" action="${ctp }/permission/user/reg" method="post">
        <h2 class="form-signin-heading"><i class="glyphicon glyphicon-log-in"></i> 用户注册</h2>
          <div class="form-group has-success has-feedback">
            <input type="text" name="loginacct" class="form-control"
            id="loginacct_input"
            placeholder="请输入登录账号" autofocus>
            <span class="glyphicon glyphicon-user form-control-feedback"></span>
          </div>
          <div class="form-group has-success has-feedback">
            <input type="password" name="userpswd" class="form-control"
            id="userpswd_input"
            placeholder="请输入登录密码" style="margin-top:10px;">
            <span class="glyphicon glyphicon-lock form-control-feedback"></span>
          </div>
          <div class="form-group has-success has-feedback">
            <input type="text" name="email" class="form-control"
            id="email_input" placeholder="请输入邮箱地址" style="margin-top:10px;">
            <span class="glyphicon glyphicon glyphicon-envelope form-control-feedback"></span>
          </div>
          <div class="form-group has-success has-feedback">
            <select class="form-control" >
                <option>会员</option>
                <option>管理</option>
            </select>
          </div>
        <div class="checkbox">
          <label>
            忘记密码
          </label>
          <label style="float:right">
            <a href="${ctp}/login.jsp">我有账号</a>
          </label>
        </div>
        <a id="submitBtn" class="btn btn-lg btn-success btn-block" > 注册</a>
      </form>
    </div>
  <%@include file="/WEB-INF/includes/js-file.jsp" %>
  <script type="text/javascript">
  $("#submitBtn").click(function () {
    $("#regForm").submit();
    return false;
});

  $("#regForm").validate({
      rules:{
          loginacct:{
              required: true,
              minlength: 6
          },
          userpswd: {
              required: true,
              minlength: 6
          },
          email: {
              required: true,
              email: true
          }
      },
      messages:{
          loginacct:{
              required: "请填写用户账号",
              minlength: "登陆账号必须是6位以上"
          },
          userpswd: {
              required: "请填写密码",
              minlength: "密码必须是6位以上"
          },
          email: {
              required: "请填写邮箱",
              email: "请输入正确的邮箱"
          }
      }
  });

  </script>
...
运行
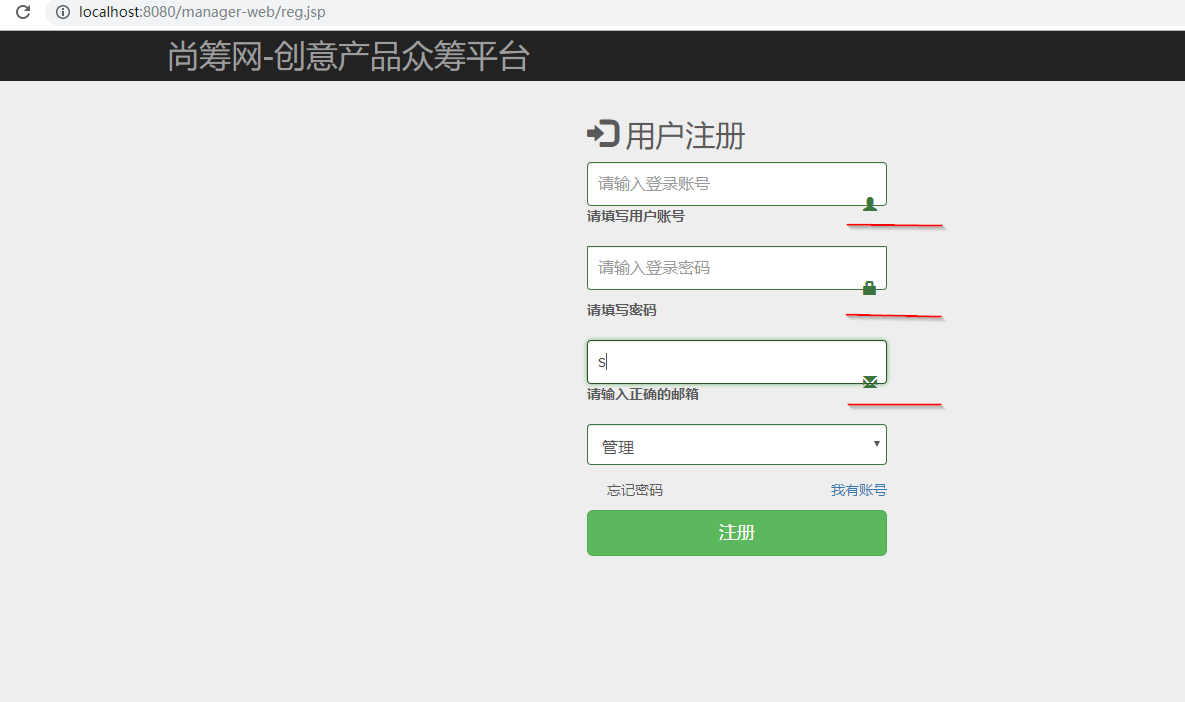
可以发现图标因为显示提示信息位置有点错乱

可以想办法把提示信息放在图标的下边
自定义错误显示
 <script type="text/javascript">

//给校验器设置一些策略
    $.validator.setDefaults({
        showErrors:function(map, list) {
            //console.log(map);
            //console.log(list);
            //将每个元素自己的错误信息显示在自己的图标下
            //先清除所有错误;清状态
            $(".errorinfo").empty();
            $(".form-group").removeClass("has-success has-error has-warning")

            $.each(list,function(){
                //当前发生错误的详细信息;
                //element当前错误元素
                //错误信息
                $(this.element).nextAll(".errorinfo").text(this.message);
                //改变input的状态;
                $(this.element).parent("div.form-group").addClass("has-error")


            })
        }
    });
...
showErrors:function(map, list)
map和list
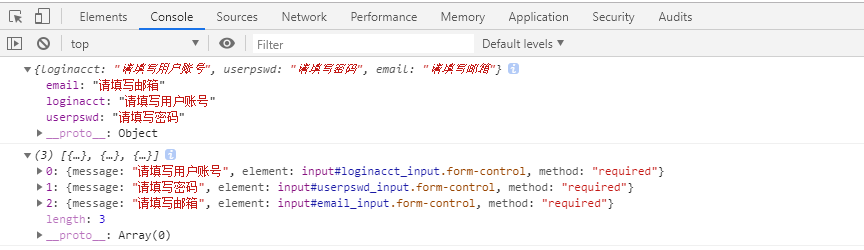
map封装了每个字段的错误信息
element是错误信息的元素
在图标下面加一个span用来显示错误信息
<span class="errorinfo" style="color: red"></span>
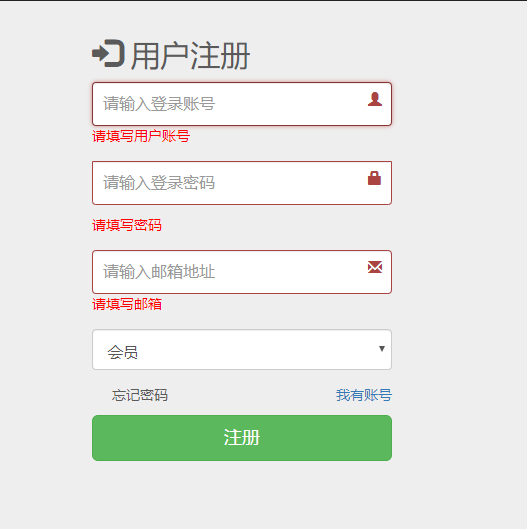
bootstrap 中的 表单
      <form>

          <div class="form-group has-success has-feedback">
            <input type="text" class="form-control" name="loginaccount" id="login_account" placeholder="请输入登录账号" autofocus>
            <span class="glyphicon glyphicon-user form-control-feedback"></span>
              <span class="errorinfo" style="color: red"></span>
          </div>
          <div class="form-group has-success has-feedback">
            <input type="text" class="form-control" name="loginpassword" id="login_password" placeholder="请输入登录密码" style="margin-top:10px;">
            <span class="glyphicon glyphicon-lock form-control-feedback"></span>
              <span class="errorinfo" style="color: red"></span>
          </div>
          <div class="form-group has-success has-feedback">
            <input type="text" class="form-control" name="loginemail" id="login_email" placeholder="请输入邮箱地址" style="margin-top:10px;">
            <span class="glyphicon glyphicon glyphicon-envelope form-control-feedback"></span>
              <span class="errorinfo" style="color: red"></span>
          </div>
      </form>
1.Textual form controls—like
<input>s,<select>s, and<textarea>s—are styled with the.form-controlclass.2.表单状态验证
Bootstrap 对表单控件的校验状态,如 error、warning 和 success 状态,都定义了样式。
使用时,添加.has-warning、.has-error或.has-success类到这些控件的父元素即可。
任何包含在此元素之内的.control-label、.form-control和.help-block元素都将接受这些校验状态的样式。3.has-error 优先级高于has-warning高于has-success
4.has-feedback
Feedback icons only work with textual
<input class="form-control">elements类名"has-feedback"要与"has-error"、"has-warning"、"has-success"配合使用。
使用 span 设置图标<span class="glyphicon glyphicon-user form-control-feedback"></span>
注册分会员注册和管理员注册
修改下reg.jsp中提交时的js
 $("#submitBtn").click(function () {
    var loginType = $("select.form-control").val();
    if(loginType == "管理"){
        $("#regForm").submit();
    }else{
        alert("此功能尚未开通")
    }
    return false;
});
在表单提交的UserController中编写注册的逻辑
//处理所有/permission/user下的请求
@RequestMapping("/permission/user")
@Controller
public class UserController {

    private String manager = "manager/";
    @Autowired
    UserService userService;

    /**
     *
     */
    // /permission/user/reg
    @RequestMapping("/reg")
    public String reg(TUser user, Model model, HttpSession session) {
        System.out.println("用户注册..." + user);
        // 1.注册成功后来到控制面板页面
        // 1.注册用户
        boolean flag = userService.register(user);
        if (flag == true) {
            // 1.注册成功,来到控制面板
            // 用户保存的数据在user对象中,id是数据库生成的自增主键
            // 需要修改mybatis的mapper文件,让其使用自动生成的id
            session.setAttribute(Constants.LOGIN_USER, user);

            return "manager/main";
        } else {
            // 2.注册失败
            model.addAttribute("regError", "用户名已经被使用");
            // 3.来到页面要回显user之前输入的内容
            // 4.user先从隐含模型中拿的;只要pojo,确定完值以后会自动放在隐含模型中
            // 用的key是类名首字母小写${tUser.loginacct }
            // 由于bean包中的类名前两个字母大写,比较特殊,这里实际使用的是TUser

            return "forward:/reg.jsp";
        }

    }
}
注册失败好要回显,在reg.jsp的表格中设置用户名和邮箱的value,value="${TUser.loginacct }
<form id="regForm" class="form-signin" role="form" action="${ctp }/permission/user/reg" method="post">
        <h2 class="form-signin-heading"><i class="glyphicon glyphicon-log-in"></i> 用户注册</h2>
          <div class="form-group has-success has-feedback">
            <input type="text" name="loginacct" class="form-control"
            id="loginacct_input"
            placeholder="请输入登录账号" value="${TUser.loginacct }" autofocus>
            <span class="glyphicon glyphicon-user form-control-feedback"></span>
            <span class="errorinfo" style="color: red"></span>
          </div>
          <div class="form-group has-success has-feedback">
            <input type="password" name="userpswd" class="form-control"
            id="userpswd_input"
            placeholder="请输入登录密码" style="margin-top:10px;">
            <span class="glyphicon glyphicon-lock form-control-feedback"></span>
            <span class="errorinfo" style="color: red"></span>
          </div>
          <div class="form-group has-success has-feedback">
            <input type="text" name="email" class="form-control"
            id="email_input" placeholder="请输入邮箱地址" value="${TUser.email }" style="margin-top:10px;">
            <span class="glyphicon glyphicon glyphicon-envelope form-control-feedback"></span>
            <span class="errorinfo" style="color: red"></span>
          </div>
低级错误
    @RequestMapping("reg")
    public String reg(TUser user, Model model, HttpSession session){

        System.out.println("用户注册");
        UserService userService = new UserServiceImpl();
        Boolean flag = userService.register(user);
        if (flag == true){
            session.setAttribute(Constants.LOGIN_USER, user);
            return "manager/main";
        }else {
            model.addAttribute("regError", "注册失败");
            return "forward:/reg.jsp";
        }
    }
自己新建对象,然后调用方法,而register中使用了 @Autowired 注解,这回导致方法调用失败,报空指针异常,方法中的bean为null
自己新建对象,Spring不会管理,无法调用Spring容器中的实例,所以为null
还有一种bean为null的情况
静态方法调用了bean,但是由于spring的加载机制,是加载静态代码-》构造函数-》注入bean-》postconstuct的顺序执行,因此静态方法里调用的bean,并没有注入相应的bean,因此为空,所以会出现bean为null的情况
由于bean起名的时候前两个字母都是大写,因此页面中要和类名相同,即TUser,而不是常用的tUser

上面用到了UserService的register方法和Constants.LOGIN_USER常量
编写UserService接口和实现类
package com.atguigu.scw.manager.service;

import com.atguigu.scw.manager.bean.TUser;

public interface UserService {

    public boolean register(TUser user);
}
package com.atguigu.scw.manager.service.impl;

import java.util.Date;

import org.springframework.beans.factory.annotation.Autowired;
import org.springframework.stereotype.Service;

import com.atguigu.project.MD5Util;
import com.atguigu.project.MyStringUtils;
import com.atguigu.scw.manager.bean.TUser;
import com.atguigu.scw.manager.dao.TUserMapper;
import com.atguigu.scw.manager.service.UserService;

@Service
public class UserServiceImpl implements UserService {

    @Autowired
    TUserMapper userMapper;

    public boolean register(TUser user) {
        // 1.拿到用户信息,先加密密码
        // 加密的密码 盐,这里使用了用户名
        // 盐不能超过8位,因此本打算用用户名,但容易出错,这里取部分用户名
        // String loginacct = user.getLoginacct();
        // String salt = loginacct.substring(0, 6) + "HA";
        // String crypt = Md5Crypt.md5Crypt(user.getUserpswd().getBytes());
        String diget = MD5Util.digest(user.getUserpswd());
        user.setUserpswd(diget);
        // 2.在将用户的其他信息设置默认值
        // 设置昵称 创建时间
        user.setUsername(user.getLoginacct());
        user.setCreatetime(MyStringUtils.formatSimpleDate(new Date()));
        // 3.去数据库保存用户,登陆账号不能重复
        int i;
        try {
            i = userMapper.insertSelective(user);
        } catch (Exception e) {
            // 保存失败的原因就是用户重复,数据库设置了Loginacct不可重复
            return false;
        }
        // i影响多少行
        return i == 1 ? true : false;
    }

}
用到了MyStringUtils.formatSimpleDate(new Date())
MyStringUtils中添加方法
 public static String formatSimpleDate(Date date) {
        SimpleDateFormat format = new SimpleDateFormat("yyyy-MM-dd");
        return format.format(date);
    }
Constants.LOGIN_USER常量
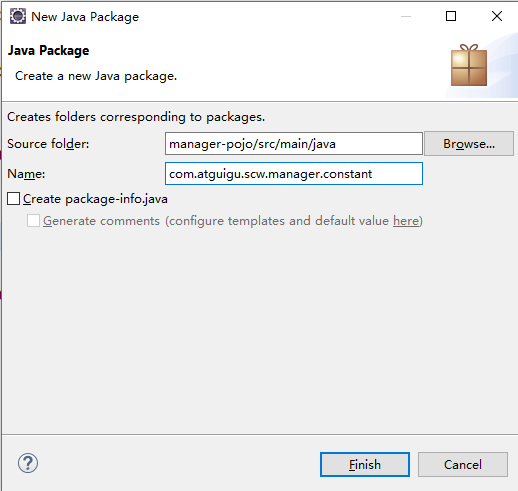

package com.atguigu.scw.manager.constant;


public class Constants {

    public static final String LOGIN_USER = "loginUser";
}
修改下/manager-dao/src/main/resources/mybatis/mapper/TUserMapper.xml
<insert id="insertSelective" parameterType="com.atguigu.scw.manager.bean.TUser" useGeneratedKeys="true" keyProperty="id">
数据库里密码长度改为64
登陆后的控制面板,右上角显示用户名
从session中取,用loginUser
main.jsp中
<div class="btn-group">
                  <button type="button" class="btn btn-default btn-success dropdown-toggle" data-toggle="dropdown">
                    <i class="glyphicon glyphicon-user"></i>
                   ${loginUser.username }
                  <span class="caret"></span>
                  </button>
                      <ul class="dropdown-menu" role="menu">
                        <li><a href="#"><i class="glyphicon glyphicon-cog"></i> 个人设置</a></li>
                        <li><a href="#"><i class="glyphicon glyphicon-comment"></i> 消息</a></li>
                        <li class="divider"></li>
                        <li><a href="index.html"><i class="glyphicon glyphicon-off"></i> 退出系统</a></li>
                      </ul>
                </div>