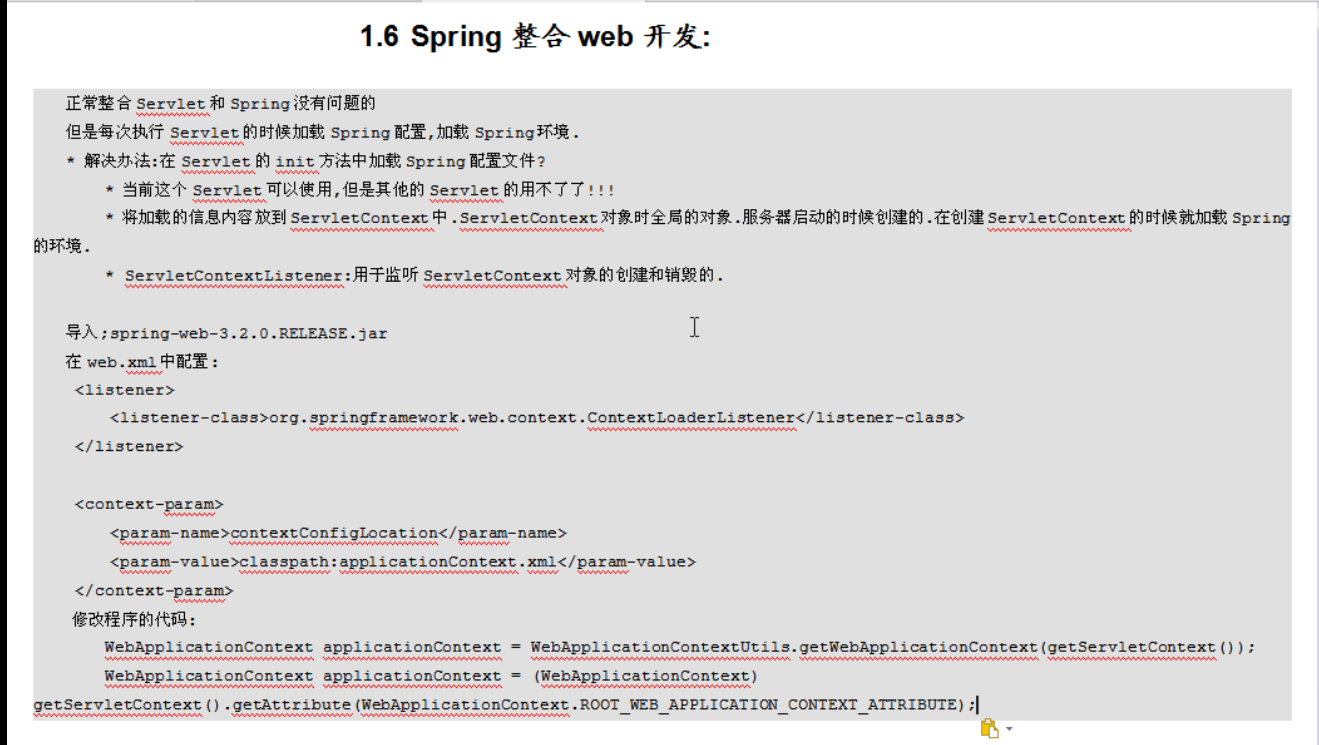


整合Spring开发环境只需要引入spring-web-3.2.0.RELEASE.jar这个jar包就可以了,因为它已经帮我们做好了.


Spring整合web开发,不用每次都加载Spring环境了。
package cn.itcast.service;

public class UserService {
     public void sayHello(){
         System.out.println("Hello Spring web.....");
     }
}
package cn.itcast.servlet;

import java.io.IOException;
import java.io.PrintWriter;

import javax.servlet.ServletException;
import javax.servlet.http.HttpServlet;
import javax.servlet.http.HttpServletRequest;
import javax.servlet.http.HttpServletResponse;

/*import org.springframework.context.ApplicationContext;
import org.springframework.context.support.ClassPathXmlApplicationContext;*/
import org.springframework.web.context.WebApplicationContext;
import org.springframework.web.context.support.WebApplicationContextUtils;
import cn.itcast.service.UserService;

@SuppressWarnings("serial")
public class UserServlet extends HttpServlet {
//每次启动Servlet都会加载Spring的环境.每次运行都需要加载Spring的环境.Spring配置环境中的东西如果多了,每次加载Servlet就加载Spring环境肯定不行.
    public void doGet(HttpServletRequest request, HttpServletResponse response)
            throws ServletException, IOException {
        /*    ApplicationContext applicationContext  = new ClassPathXmlApplicationContext(
                       "applicationContext.xml");
               UserService userService =  (UserService) applicationContext.getBean("userService");
               userService.sayHello();*/
        //得把代码改了,否则每次都是来获取Spring的环境.
        WebApplicationContext applicationContext = WebApplicationContextUtils.getWebApplicationContext(getServletContext());//工具类WebApplicationContextUtils
          UserService userService =  (UserService) applicationContext.getBean("userService");
          userService.sayHello();
    }
    public void doPost(HttpServletRequest request, HttpServletResponse response)
            throws ServletException, IOException {

                doGet(request,response);
    }

}
<?xml version="1.0" encoding="UTF-8"?>
<!-- 别去schema,schema是文件,本地的文件,你得引那个头 -->

<beans xmlns="http://www.springframework.org/schema/beans"
       xmlns:p="http://www.springframework.org/schema/p"
       xmlns:xsi="http://www.w3.org/2001/XMLSchema-instance"
       xsi:schemaLocation="
http://www.springframework.org/schema/beans http://www.springframework.org/schema/beans/spring-beans.xsd">


    <bean id="userService" class="cn.itcast.service.UserService"></bean>
</beans>
<?xml version="1.0" encoding="UTF-8"?>
<web-app xmlns:xsi="http://www.w3.org/2001/XMLSchema-instance" xmlns="http://java.sun.com/xml/ns/javaee" xmlns:web="http://java.sun.com/xml/ns/javaee/web-app_2_5.xsd" xsi:schemaLocation="http://java.sun.com/xml/ns/javaee http://java.sun.com/xml/ns/javaee/web-app_2_5.xsd" version="2.5">
  <display-name></display-name>
  <!-- 配置监听器ContextLoaderListener -->
  <listener>
      <listener-class>org.springframework.web.context.ContextLoaderListener</listener-class>


  </listener>
  <!-- 配置全局初始化参数 -->
  <context-param>
  <param-name>contextConfigLocation</param-name>
  <param-value>classpath:applicationContext.xml</param-value>
  </context-param>
  <servlet>
    <description>This is the description of my J2EE component</description>
    <display-name>This is the display name of my J2EE component</display-name>
    <servlet-name>UserServlet</servlet-name>
    <servlet-class>cn.itcast.servlet.UserServlet</servlet-class>
  </servlet>
  <servlet-mapping>
    <servlet-name>UserServlet</servlet-name>
    <url-pattern>/userServlet</url-pattern>
  </servlet-mapping>
  <welcome-file-list>
    <welcome-file>index.jsp</welcome-file>
  </welcome-file-list>
</web-app>