微信小程序是一种全新的连接用户与服务的方式,它可以在微信内被便捷地获取和传播,同时具有出色的使用体验
一、小程序注册
在微信公众平台官网首页(mp.weixin.qq.com)点击右上角的“立即注册”按钮。过程较为简单,不再赘述,可参考相应文档。
注册成功后可获取AppID:wx2da89f012f006665
二、HelloWorld
开发工具下载:https://developers.weixin.qq.com/miniprogram/dev/devtools/download.html
开发工具安装直接下一步直至完成
1:创建项目
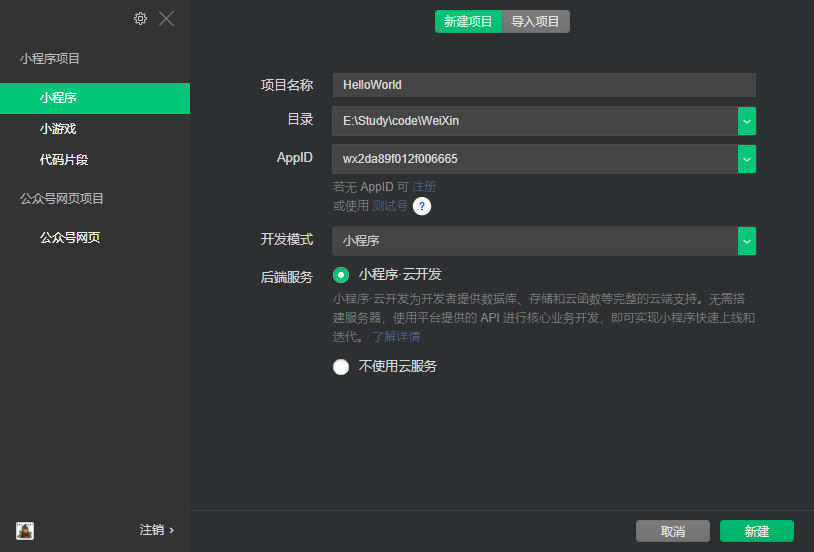
ps:如果还没有购买云服务器,可以选择【不使用云服务】
2:编译预览
点击工具上的编译按钮,可以在工具的左侧模拟器界面看到这个小程序的表现,也可以点击预览按钮,通过微信的扫一扫在手机上体验你的第一个小程序。
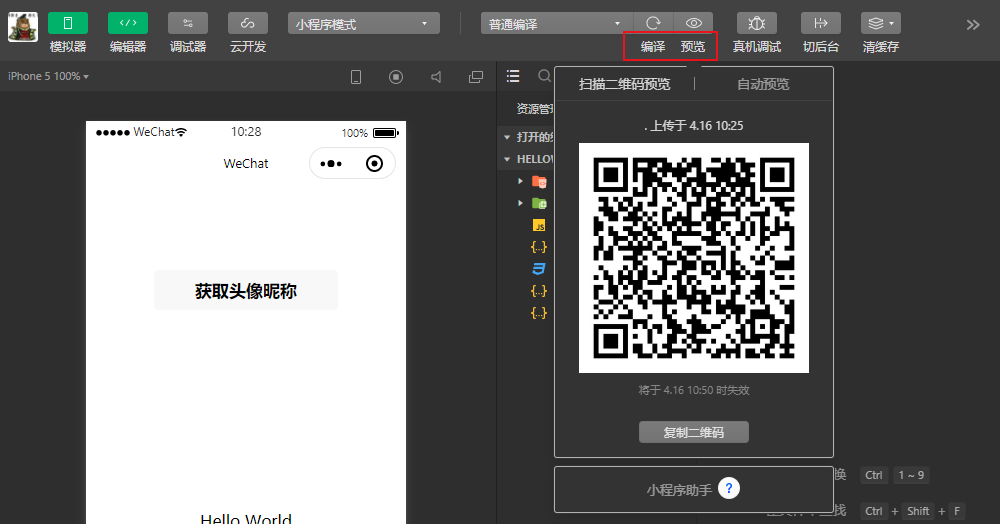
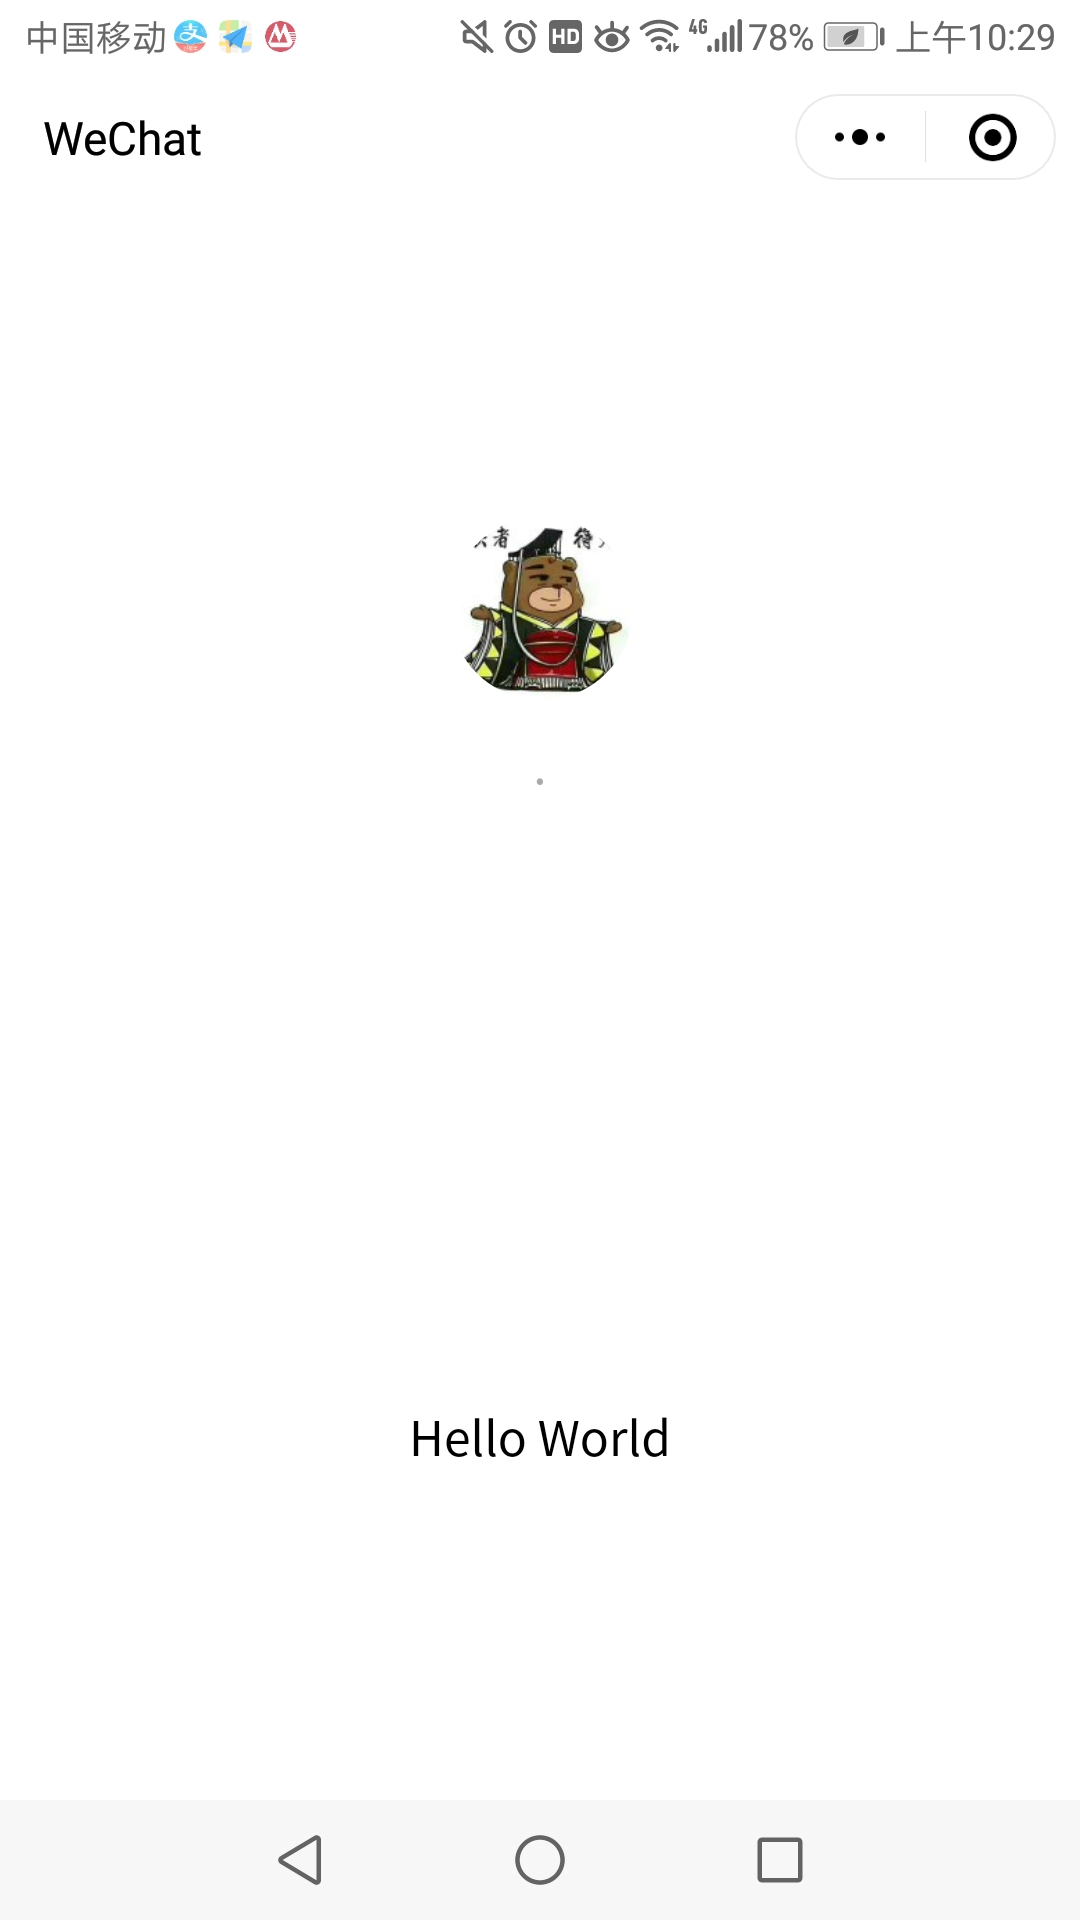
3:手机测试
三、代码构成
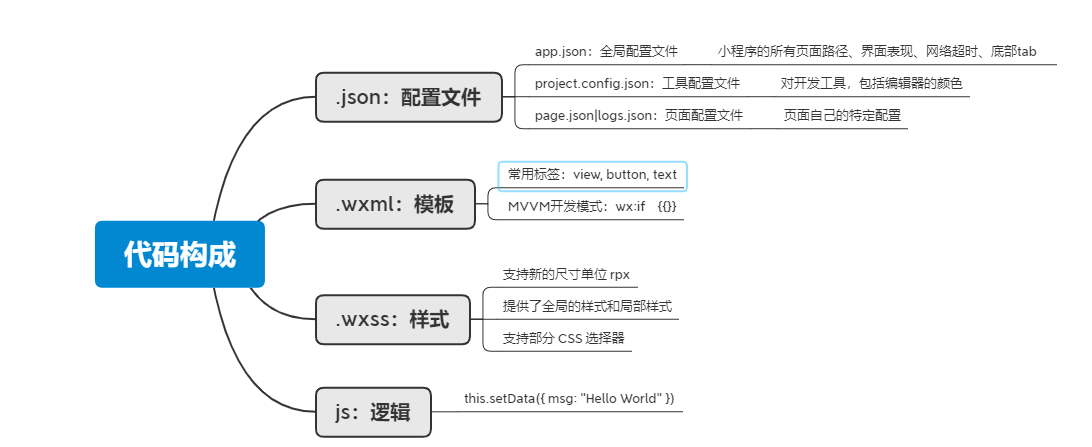
.json后缀的JSON配置文件- 全局配置:app.json
-
 app.json
{
  "pages":[
    "pages/index/index",
    "pages/logs/logs"
  ],
  "window":{
    "backgroundTextStyle":"light",
    "navigationBarBackgroundColor": "#fff",
    "navigationBarTitleText": "WeChat",
    "navigationBarTextStyle":"black"
  },
  "style": "v2",
  "sitemapLocation": "sitemap.json"
}
简单说一下这个配置各个项的含义:
pages字段 —— 用于描述当前小程序所有页面路径,这是为了让微信客户端知道当前你的小程序页面定义在哪个目录。window字段 —— 定义小程序所有页面的顶部背景颜色,文字颜色定义等。
-
- 工具配置:project.config.json
-
 project.config.json
{
    "description": "项目配置文件",
    "packOptions": {
        "ignore": []
    },
    "setting": {
        "urlCheck": true,
        "es6": true,
        "postcss": true,
        "preloadBackgroundData": false,
        "minified": true,
        "newFeature": true,
        "autoAudits": false,
        "coverView": true,
        "showShadowRootInWxmlPanel": true,
        "scopeDataCheck": false
    },
    "compileType": "miniprogram",
    "libVersion": "2.11.0",
    "appid": "wx2da89f012f006665",
    "projectname": "HelloWorld",
    "debugOptions": {
        "hidedInDevtools": []
    },
    "isGameTourist": false,
    "simulatorType": "wechat",
    "simulatorPluginLibVersion": {},
    "condition": {
        "search": {
            "current": -1,
            "list": []
        },
        "conversation": {
            "current": -1,
            "list": []
        },
        "game": {
            "currentL": -1,
            "list": []
        },
        "miniprogram": {
            "current": -1,
            "list": []
        }
    }
}
开发者工具就自动会帮你恢复到当时你开发项目时的个性化配置,其中会包括编辑器的颜色、代码上传时自动压缩等等一系列选项。当然也包括项目的一些信息,如AppID和项目名称
-
- 页面配置:page.json 或 log.json
-
 index.json
{
  "usingComponents": {}
}
开发者可以独立定义每个页面的一些属性
-
- 全局配置:app.json
.wxml后缀的WXML模板文件-
 index.wxml
<!--index.wxml-->
<view class="container">
  <view class="userinfo">
    <button wx:if="{{!hasUserInfo && canIUse}}" open-type="getUserInfo" bindgetuserinfo="getUserInfo"> 获取头像昵称 </button>
    <block wx:else>
      <image bindtap="bindViewTap" class="userinfo-avatar" src="{{userInfo.avatarUrl}}" mode="cover"></image>
      <text class="userinfo-nickname">{{userInfo.nickName}}</text>
    </block>
  </view>
  <view class="usermotto">
    <text class="user-motto">{{motto}}</text>
  </view>
</view>
标签名字有点不一样(
多了一些view,button,text)wx:if这样的属性以及 {{ }} 这样的表达式
-
.wxss后缀的WXSS样式文件-
 index.wxss
/**index.wxss**/
.userinfo {
  display: flex;
  flex-direction: column;
  align-items: center;
}

.userinfo-avatar {
   128rpx;
  height: 128rpx;
  margin: 20rpx;
  border-radius: 50%;
}

.userinfo-nickname {
  color: #aaa;
}

.usermotto {
  margin-top: 200px;
}
新增了尺寸单位rpx,此外
提供了全局的样式和局部样式WXSS仅支持部分CSS选择器
-
.js后缀的JS脚本逻辑文件-
 View Code
<view>{{ msg }}</view>
<button bindtap="clickMe">点击我</button>


Page({
  clickMe: function() {
    this.setData({ msg: "Hello World" })
  }
})
-
四、页面加载流程
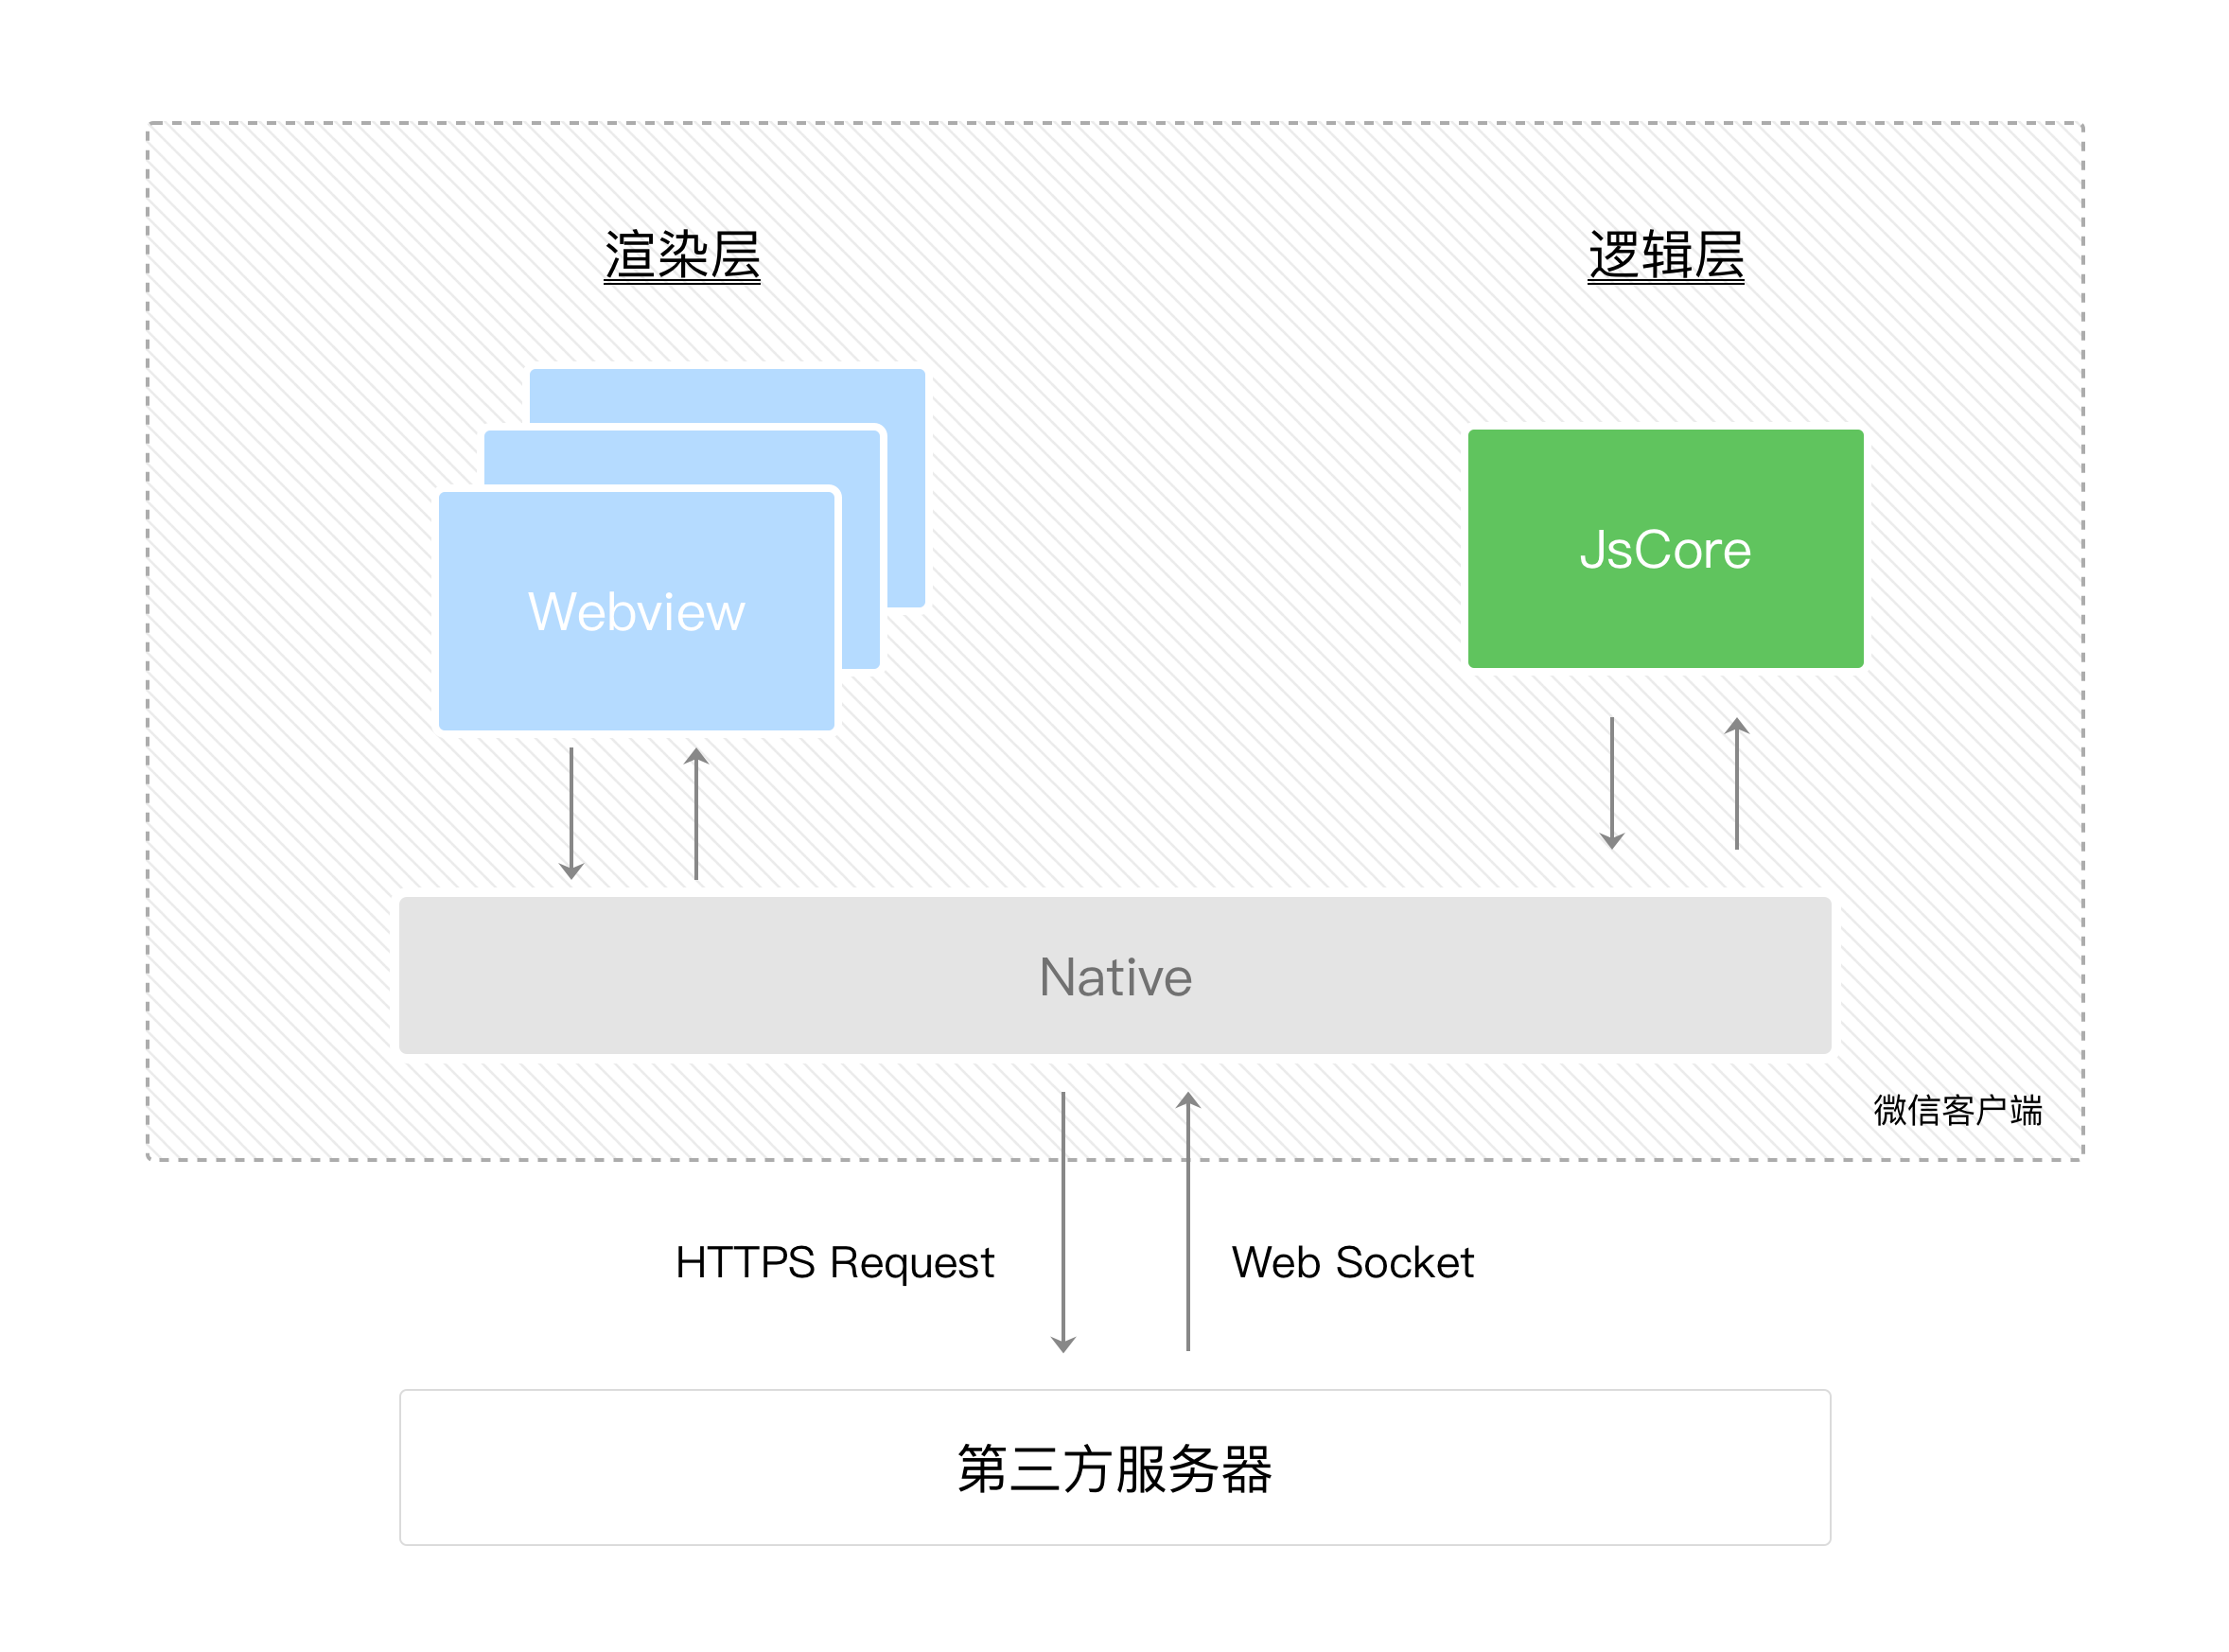
1:微信客户端在打开小程序之前,会把整个小程序的代码包下载到本地。
紧接着通过 app.json 的 pages 字段就可以知道你当前小程序的所有页面路径,写在 pages 字段的第一个页面就是这个小程序的首页。小程序启动之后,在 app.js 定义的 App 实例的 onLaunch 回调会被执行。
2:微信客户端会先根据 logs.json 配置生成一个界面,顶部的颜色和文字你都可以在这个 json文件里边定义好。紧接着客户端就会装载这个页面的 WXML 结构和 WXSS 样式。最后客户端会装载 logs.js。
Page 是一个页面构造器,这个构造器就生成了一个页面。在生成页面的时候,小程序框架会把 data 数据和 index.wxml 一起渲染出最终的结构,于是就得到了你看到的小程序的样子。
在渲染完界面之后,页面实例就会收到一个 onLoad 的回调,你可以在这个回调处理你的逻辑。
总结
- 小程序与网页开发的区别

- 小程序代码结构
- 小程序展示过程

