1 前备知识
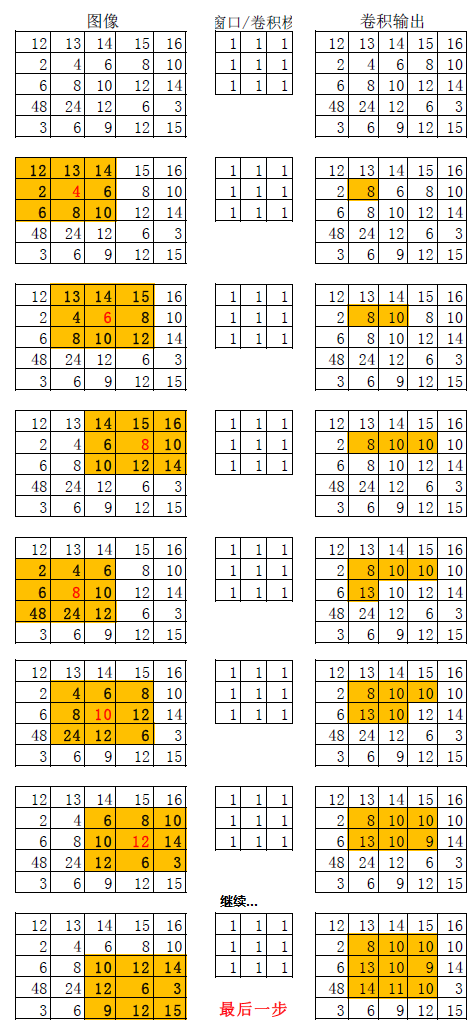
图像卷积:图像卷积可以看成是一个窗口区域在另外一个大的图像上移动,对每个窗口覆盖的区域都进行点乘相加并取平均得到的值作为中心像素点的输出值。窗口的移动是从左到右,从上到下。窗口可以理解成一个指定大小的二维矩阵,里面有预先指定的值。
2 所用到的主要OpenCv API
/** @brief 使用归一化窗口滤波器进行滤波
@param src input image; it can have any number of channels, which are processed independently, but
the depth should be CV_8U, CV_16U, CV_16S, CV_32F or CV_64F.
@param dst output image of the same size and type as src.
@param ksize blurring kernel size.
@param anchor anchor point; default value Point(-1,-1) means that the anchor is at the kernel
center.
@param borderType border mode used to extrapolate pixels outside of the image, see #BorderTypes
*/
CV_EXPORTS_W void blur( InputArray src, OutputArray dst,
                        Size ksize, Point anchor = Point(-1,-1),
                        int borderType = BORDER_DEFAULT );
3 程序代码
#include <opencv2/opencv.hpp>
#include <iostream>

using namespace cv;
using namespace std;

int main(int artc, char** argv) {
    Mat src = imread("../images/lena.png");
    if (src.empty()) {
        printf("could not load image...
");
        return -1;
    }
    namedWindow("input", CV_WINDOW_AUTOSIZE);
    imshow("input", src);

    int h = src.rows;
    int w = src.cols;

    // 3x3 均值模糊,自定义版本实现
    Mat dst = src.clone();
    for (int row = 1; row < h - 1; row++) {
        for (int col = 1; col < w - 1; col++) {
            Vec3b p1 = src.at<Vec3b>(row - 1, col - 1);
            Vec3b p2 = src.at<Vec3b>(row - 1, col);
            Vec3b p3 = src.at<Vec3b>(row - 1, col + 1);
            Vec3b p4 = src.at<Vec3b>(row, col - 1);
            Vec3b p5 = src.at<Vec3b>(row, col);
            Vec3b p6 = src.at<Vec3b>(row, col + 1);
            Vec3b p7 = src.at<Vec3b>(row + 1, col - 1);
            Vec3b p8 = src.at<Vec3b>(row + 1, col);
            Vec3b p9 = src.at<Vec3b>(row + 1, col + 1);

            int b = p1[0] + p2[0] + p3[0] + p4[0] + p5[0] + p6[0] + p7[0] + p8[0] + p9[0];
            int g = p1[1] + p2[1] + p3[1] + p4[1] + p5[1] + p6[1] + p7[1] + p8[1] + p9[1];
            int r = p1[2] + p2[2] + p3[2] + p4[2] + p5[2] + p6[2] + p7[2] + p8[2] + p9[2];

            dst.at<Vec3b>(row, col)[0] = saturate_cast<uchar>(b / 9);
            dst.at<Vec3b>(row, col)[1] = saturate_cast<uchar>(g / 9);
            dst.at<Vec3b>(row, col)[2] = saturate_cast<uchar>(r / 9);
        }
    }
    imshow("blur", dst);
    imwrite("D:/result.png", dst);

    // OpenCV 均值模糊
    Mat result;
    blur(src, result, Size(15, 15), Point(-1, -1), 4);
    imshow("result", result);

    waitKey(0);
    return 0;
}
4 运行
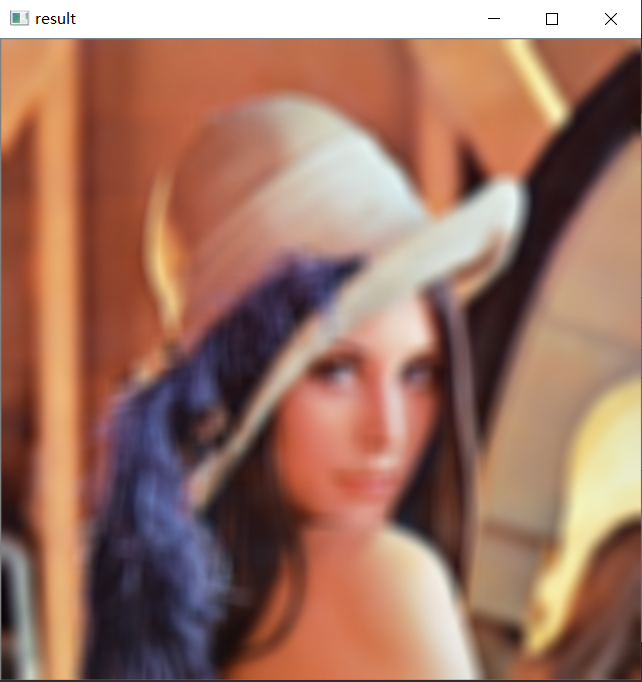
原图:


5 扩展及注意事项
null
6*目前只做大概了解,知道有这一算法,后续具体使用再做具体分析