并发编程-Condition源码分析&基于Condition实现阻塞队列
上一篇说猜测了condition的实现原理,本篇对condition源码进行剖析,并且来使用condition实现一个阻塞队列,同时聊聊有哪些东西的底层使用了condition。So Run。。。
上篇回顾
主要是这两个方法
【await】:可以阻塞同一把锁上的N个线程、释放锁
【signal】:唤醒一个等待在用一把锁上的线程
如何让线程等待:有一个等待队列来存储等待中的线程
唤醒等待的线程:condition的等待队列,和aqs中的同步队列是并行的,会牵扯到AQS中同步队列和Condition中的等待队列的转移,那是如何做的呢。
源码分析
await:
- 释放锁
- 释放锁的线程应该被阻塞
- 被阻塞后需要存储在队列中
- 需要重新竞争锁
- 要能够处理interrupt的中断响应
public final void await() throws InterruptedException {
    if (Thread.interrupted())
        throw new InterruptedException();
    // 添加到等待队列
    Node node = addConditionWaiter();
    //完整的释放锁(考虑到重入锁的问题)
    int savedState = fullyRelease(node);
    int interruptMode = 0;
  //如果当前节点不在aqs同步队列上,因为只有确定当前的线程不在aqs队列中咱们才去阻塞
    while (!isOnSyncQueue(node)) {
        //阻塞当前线程,**注意当其他线程调用signal()时候,当前线程会从这里进行执行,因为上下文切换会保存当前程序的寄存器和程序计数器
        LockSupport.park(this);
        //判断当前被阻塞的线程是否是因为interrupt而唤醒的
        //->因为interrupt中断的操作,会唤醒处于等待的线程,所以这里有可能不是被signal唤醒的而是被interrupt唤醒的
        if ((interruptMode = checkInterruptWhileWaiting(node)) != 0)
            break;
    }
    // 重新竞争锁 savedState这个表示的被释放锁的重入次数
    if (acquireQueued(node, savedState) && interruptMode != THROW_IE)
        interruptMode = REINTERRUPT;
    if (node.nextWaiter != null) // clean up if cancelled
        unlinkCancelledWaiters();
    if (interruptMode != 0)
        reportInterruptAfterWait(interruptMode);
}
这里构建condition队列,并把当前的线程添加进队列中,想象一下,
- 现在有线程A、B来抢占线程,这个时候线程A抢占到了锁,他要执行await的方法,那这个时候AQS队列中的当前线程是A,并且线程A也会被放在condition队列中,
- 那这个时候他就要释放锁,这样好把aqs中的位置空出来,这个时候线程B就可以对锁进行抢占了,那线程B抢占到锁就有机会去调用signal方法去唤醒
- 线程B为什么知道他可以对锁进行抢占了呢,那是因为在上面j释放锁的时候调用了ava.util.concurrent.locks.AbstractQueuedSynchronizer#release,这个方法调用了unparkSuccessor(),他是对aqs队列中的线程进行唤醒的方法,我们上一篇讲过
//这里不用考虑线程安全性,因为在lock中执行的
private Node addConditionWaiter() {
    Node t = lastWaiter;
    // If lastWaiter is cancelled, clean out.
    if (t != null && t.waitStatus != Node.CONDITION) {
        unlinkCancelledWaiters();
        t = lastWaiter;
    }
    // 这里把当前线程加入到队列中
    Node node = new Node(Thread.currentThread(), Node.CONDITION);
    if (t == null)
        firstWaiter = node;
    else
        t.nextWaiter = node;
    lastWaiter = node;
    return node;
}
signal:
- 要把被阻塞的线程先唤醒
- 把等待队列中的线程转移到AQS队列中
- 再次回到await方法中直接抢占锁
public final void signal() {
    if (!isHeldExclusively())
        throw new IllegalMonitorStateException();
    //得到当前的等待队列
    Node first = firstWaiter;
    if (first != null)
        doSignal(first);
}
//唤醒等待队列中的一个线程
private void doSignal(Node first) {
    do {
        if ( (firstWaiter = first.nextWaiter) == null)
            lastWaiter = null;
        first.nextWaiter = null;
    } while (!transferForSignal(first) &&
             (first = firstWaiter) != null);
}
final boolean transferForSignal(Node node) { //如果没有办法修改这个节点的状态,那证明当前节点已经被取消,那就去操作下一个节点,返回到do代码块中,把当前线程抛弃 if (!compareAndSetWaitStatus(node, Node.CONDITION, 0)) return false; //上篇说这个是尾插法把节点插入队列,这里就是把等待队列插入aqs队列的尾部 Node p = enq(node); int ws = p.waitStatus; if (ws > 0 || !compareAndSetWaitStatus(p, ws, Node.SIGNAL)) //进行唤醒,唤醒后因为cpu记住了上次阻塞的地方,所以从【await()->LockSupport.park(this)】这里进行唤醒 LockSupport.unpark(node.thread); return true; }再次回到await方法中直接抢占锁(现在就执行这里的代码,acquireQueued()这个是aqs中的逻辑,实现锁的抢占,按照aqs的那套执行,上篇已经分析过)
public final void await() throws InterruptedException {
    if (acquireQueued(node, savedState) && interruptMode != THROW_IE)
        interruptMode = REINTERRUPT;
    if (node.nextWaiter != null) // clean up if cancelled
        unlinkCancelledWaiters();
    if (interruptMode != 0)
        reportInterruptAfterWait(interruptMode);
}
Condition被使用在哪里呢?
实际上我们直接使用Condition的地方很少,主要用在阻塞队列中(阻塞队列一般被使用在线程池中),生产者/消费者、流量缓冲等等,我们这里主要讲讲什么是阻塞队列。
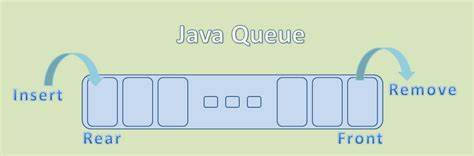
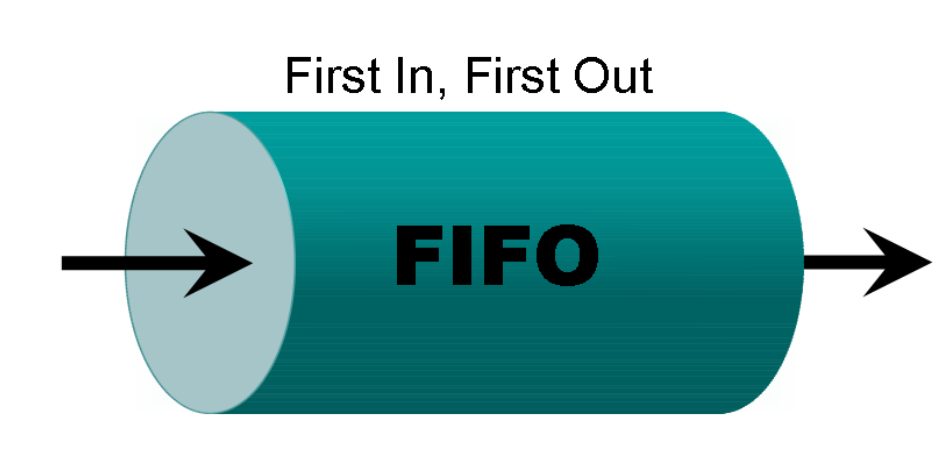
【阻塞队列】:阻塞队列是一种线性表,允许一端插入另外一端删除(FIFO先进先出),可以使用【数组】和】进【链表】进行实现。当你要插入数据的时候支持阻塞插入,当取数据出来的时候支持阻塞移除,换言之,当你插入的时候你的队列满了,那插入数据的线程就要等待(阻塞),如果队列空了,则阻塞移除元素的线程。实际上就是一个生产者消费者模型。一般来说,有两种队列,一种【有界队列】、和【无界队列】(实际上也是有大小的,只不过他可以支持很大,直到你的内存爆炸)
基于condition实现一个阻塞队列(这里的实现有点想juc中的java.util.concurrent.ArrayBlockingQueue,只不过人家使用数组来实现的阻塞队列)
public class ConditionQueue {
    // 容器
    private List<String> items;
    // 表示已经添加的元素个数
    private volatile int size;
    //容器的容量
    private volatile int count;

    private Lock lock = new ReentrantLock();
    //take
    private Condition notEmpty = lock.newCondition();
    //add
    private Condition notFull = lock.newCondition();

    private ConditionQueue(int count) {
        this.count = count;
        items = new ArrayList<>();
    }

    private void put(String item) throws InterruptedException {
        lock.lock();
        try {
            if (size >= count) {
                // 队列满了,需要等待
                System.out.println("full of pipeline");
                //这里就是阻塞当前线程,然后把当前线程阻塞在队列中,当阻塞的时候就通知了aqs中的头结点的下一个线程对锁进行抢占,这个时候执行take的线程就抢占到了锁
                notFull.await();
            }
            ++size;
            items.add(item);
            notEmpty.signal();
        } finally {
            lock.unlock();
        }
    }

    private String take() throws InterruptedException {
        lock.lock();
        try {
            if (size == 0) {
                System.out.println("empty of pipeline");
                notEmpty.await();
            }
            --size;
            String item = items.remove(0);
            // 同理,他消费了其中的一个数据,然后他就去把上面的阻塞队列中的执行put方法的线程唤醒(把阻塞队列中的线程放到aqs队列中)然后aqs就会进行他的逻辑进行锁的抢占
            notFull.signal();
            return item;
        } finally {
            lock.unlock();
        }
    }

    public static void main(String[] args) throws InterruptedException {
        ConditionQueue conditionQueue = new ConditionQueue(10);
        Thread thread = new Thread(() -> {
            Random random = new Random();
            for (int i = 0; i < 1000; i++) {
                String item = "item" + i;
                try {
                    conditionQueue.put(item);
                } catch (InterruptedException e) {
                    e.printStackTrace();
                }
                try {
                    Thread.sleep(random.nextInt(1000));
                } catch (InterruptedException e) {
                    e.printStackTrace();
                }
            }
        });
        thread.start();
        //这里是让生产数据的线程先去生产一下数据,
        Thread.sleep(100);
        Thread thread1 = new Thread(() -> {
            Random random = new Random();
            //进行自旋
            for (; ; ) {
                try {
                    System.out.println(conditionQueue.take() + "被消费了");
                } catch (InterruptedException e) {
                    e.printStackTrace();
                }
                try {
                    Thread.sleep(random.nextInt(1000));
                } catch (InterruptedException e) {
                    e.printStackTrace();
                }
            }
        });
        thread1.start();
    }
}
阻塞队列中常用的方法
添加元素
- add():如果队列满了就抛出异常
- offer():如果队列满了就返回false
- put():如果队列满了就一直阻塞
- offer(timeout):如果队列满了就先阻塞你传入的timeout的时间,否则就返回false
移除元素的时候
- element:元素为空抛异常
- peak:true / false
- take:队列一直阻塞
- poll(timeout):如果超时还没有产生数据,那就返回null
JUC中的阻塞队列
JUC中针对不同的场景,有不同的阻塞队列为我们提供
ArrayBlockingQueue:基于数组
LinkedBlockingQueue:基于链表(单向链表)
PriorityBlockingQueue:基于优先级队列,可以看到他是基于Comparator进行实现的,所以在使用它的时候需要去实现这个接口。
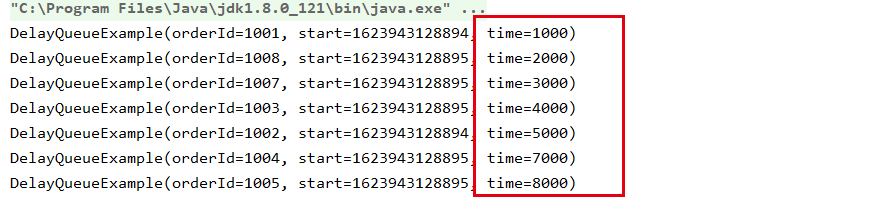
DelayQueue:你可以设置你的元素多久执行,这里有点像rabbitmq中的延迟队列,比如说你的订单15分钟没有支付就取消,那就可以使用这个来做
@ToString
public class DelayQueueExample implements Delayed {
    String orderId;
    long start=System.currentTimeMillis();
    long time;

    public DelayQueueExample(String orderId, long time) {
        this.orderId = orderId;
        this.time = time;
    }

    public static void main(String[] args) {

    }

    //这里表示下次执行的时间
    @Override
    public long getDelay(TimeUnit unit) {
        return unit.convert((start+time)-System.currentTimeMillis(),TimeUnit.MILLISECONDS);
    }

    // 这里对任务进行排序(根据时间的先后做比较)
    @Override
    public int compareTo(Delayed o) {
        return (int) ((int)this.getDelay(TimeUnit.MICROSECONDS)-o.getDelay(TimeUnit.MICROSECONDS));
    }
}
测试
public class DelayQueueTest {
    static DelayQueue delayQueue = new DelayQueue();
    public static void main(String[] args) throws InterruptedException {
        delayQueue.offer(new DelayQueueExample("1001", 1000));
        delayQueue.offer(new DelayQueueExample("1002", 5000));
        delayQueue.offer(new DelayQueueExample("1003", 4000));
        delayQueue.offer(new DelayQueueExample("1004", 7000));
        delayQueue.offer(new DelayQueueExample("1005", 8000));
        delayQueue.offer(new DelayQueueExample("1007", 3000));
        delayQueue.offer(new DelayQueueExample("1008", 2000));
        while (true){
            Delayed take = delayQueue.take();
            System.out.println(take);
        }
    }

}
这里就是按照你的指定的时间顺序依次执行的
SynchronousQueue:没有任何存储结构(因为没有存储容器,当生产者去生产数据的时候,没有消费者消费,那就会阻塞,反之亦然,当消费者去消费,而没有生产者的时候消费者也会阻塞。那多个消费者和生产者阻塞的话必然会产生一个阻塞队列,然后互相去唤醒,有点像AQS,实际上利用了阻塞队列来控制了生产者和消费者),线程池中就只用巧妙了使用了这个java.util.concurrent.Executors#newCachedThreadPool()