1、简单使用示例
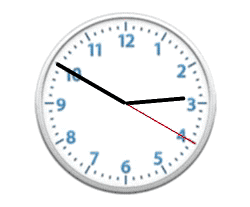
1.1 时钟
-
QClockView.h
@interface QClockView : UIView /// 创建时钟界面 + (instancetype)q_clockViewWithFrame:(CGRect)frame; @end -
QClockView.m
#define CLOCK_WIDTH self.bounds.size.width @interface QClockView () // 表盘 @property (nonatomic, strong) UIImageView *clockView; // 指针 @property (nonatomic, strong) CALayer *secondLayer; @property (nonatomic, strong) CALayer *minuteLayer; @property (nonatomic, strong) CALayer *hourLayer; @end @implementation QClockView /// 创建时钟界面 + (instancetype)q_clockViewWithFrame:(CGRect)frame { QClockView *clockView = [[self alloc] initWithFrame:frame]; return clockView; } /// 初始化 - (instancetype)initWithFrame:(CGRect)frame { if (self = [super initWithFrame:frame]) { // 添加表盘 self.clockView = [[UIImageView alloc] init]; self.clockView.image = [UIImage imageNamed:@"clock"]; [self addSubview:self.clockView]; // 添加定时器 [NSTimer scheduledTimerWithTimeInterval:1 target:self selector:@selector(timeChange) userInfo:nil repeats:YES]; [self timeChange]; } return self; } /// 布局子控件 - (void)layoutSubviews { [super layoutSubviews]; self.clockView.frame = self.bounds; } // 定时器响应事件处理 - (void)timeChange { // 获取当前的系统的时间 // 获取当前日历对象 NSCalendar *calendar = [NSCalendar currentCalendar]; // 获取日期的组件:年月日小时分秒 NSDateComponents *cmp = [calendar components:NSCalendarUnitSecond | NSCalendarUnitMinute | NSCalendarUnitHour fromDate:[NSDate date]]; // 获取秒 NSInteger second = cmp.second + 1; // 获取分 NSInteger minute = cmp.minute; // 获取小时 NSInteger hour = cmp.hour; // 计算秒针转多少度,一秒钟秒针转 6° CGFloat secondA = second * 6; // 计算分针转多少度,一分钟分针转 6° CGFloat minuteA = minute * 6; // 计算时针转多少度,一小时时针转 30°,每分钟时针转 0.5° CGFloat hourA = hour * 30 + minute * 0.5; // 旋转秒针,使用 layer 的隐式动画属性产生动画效果 self.secondLayer.transform = CATransform3DMakeRotation(secondA / 180 * M_PI, 0, 0, 1); // 旋转分针 self.minuteLayer.transform = CATransform3DMakeRotation(minuteA / 180 * M_PI, 0, 0, 1); // 旋转小时 self.hourLayer.transform = CATransform3DMakeRotation(hourA / 180 * M_PI, 0, 0, 1); } // 添加秒针 - (CALayer *)secondLayer { if (_secondLayer == nil) { _secondLayer = [CALayer layer]; _secondLayer.backgroundColor = [UIColor redColor].CGColor; _secondLayer.anchorPoint = CGPointMake(0.5, 1); _secondLayer.position = CGPointMake(CLOCK_WIDTH * 0.5, CLOCK_WIDTH * 0.5); _secondLayer.bounds = CGRectMake(0, 0, 1, CLOCK_WIDTH * 0.5 - 20); [self.clockView.layer addSublayer:_secondLayer]; } return _secondLayer; } // 添加分针 - (CALayer *)minuteLayer { if (_minuteLayer == nil) { _minuteLayer = [CALayer layer]; _minuteLayer.backgroundColor = [UIColor blackColor].CGColor; _minuteLayer.anchorPoint = CGPointMake(0.5, 1); _minuteLayer.position = CGPointMake(CLOCK_WIDTH * 0.5, CLOCK_WIDTH * 0.5); _minuteLayer.bounds = CGRectMake(0, 0, 4, CLOCK_WIDTH * 0.5 - 20); _minuteLayer.cornerRadius = 2; [self.clockView.layer addSublayer:_minuteLayer]; } return _minuteLayer; } // 添加时针 - (CALayer *)hourLayer { if (_hourLayer == nil) { _hourLayer = [CALayer layer]; _hourLayer.backgroundColor = [UIColor blackColor].CGColor; _hourLayer.anchorPoint = CGPointMake(0.5, 1); _hourLayer.position = CGPointMake(CLOCK_WIDTH * 0.5, CLOCK_WIDTH * 0.5); _hourLayer.bounds = CGRectMake(0, 0, 4, CLOCK_WIDTH * 0.5 - 40); _hourLayer.cornerRadius = 2; [self.clockView.layer addSublayer:_hourLayer]; } return _hourLayer; } @end -
ViewController.m
// 创建时钟界面 QClockView *clockView = [QClockView q_clockViewWithFrame:CGRectMake(100, 100, 200, 200)]; [self.view addSubview:clockView]; -
效果
1.2 转盘
-
QWheelButton.h
@interface QWheelButton : UIButton @end -
QWheelButton.m
@implementation QWheelButton /// 设置按钮中 imageView 的尺寸 - (CGRect)imageRectForContentRect:(CGRect)contentRect { // 计算 imageView 控件尺寸,contentRect 为按钮的尺寸 CGFloat W = 40; CGFloat H = 46; CGFloat X = (contentRect.size.width - W) * 0.5; CGFloat Y = 20; return CGRectMake(X, Y, W, H); } /// 设置按钮接收点击事件的区域 - (UIView *)hitTest:(CGPoint)point withEvent:(UIEvent *)event { CGFloat btnW = self.bounds.size.width; CGFloat btnH = self.bounds.size.height; // 计算不接收点击事件的区域 CGFloat X = 0; CGFloat Y = btnH / 2; CGFloat W = btnW; CGFloat H = Y; CGRect rect = CGRectMake(X, Y, W, H); if (CGRectContainsPoint(rect, point)) { return nil; } else { return [super hitTest:point withEvent:event]; } } @end -
QWheelView.h
@interface QWheelView : UIView /// 创建转盘界面 + (instancetype)q_wheelViewWithFrame:(CGRect)frame; /// 开始转动 - (void)q_startAnimating; /// 停止转动 - (void)q_stopAnimating; @end -
QWheelView.m
#import "QWheelButton.h" #define WHEEL_WIDTH self.bounds.size.width @interface QWheelView () <CAAnimationDelegate> /// 转盘控件 @property (nonatomic, strong) UIImageView *backImageView; @property (nonatomic, strong) UIImageView *centerImagerView; @property (nonatomic, strong) UIButton *startButton; /// 当前选中的按钮 @property (nonatomic, weak) UIButton *selectedButton; /// 显示定时器 @property (nonatomic, strong) CADisplayLink *link; @end @implementation QWheelView /// 创建转盘界面 + (instancetype)q_wheelViewWithFrame:(CGRect)frame { QWheelView *wheelView = [[self alloc] initWithFrame:frame]; return wheelView; } /// 开始转动 - (void)q_startAnimating { self.link.paused = NO; } /// 停止转动 - (void)q_stopAnimating { self.link.paused = YES; } /// 初始化转盘控件 - (instancetype)initWithFrame:(CGRect)frame { if (self = [super initWithFrame:frame]) { // 添加转盘界面 self.backImageView = [[UIImageView alloc] init]; self.backImageView.image = [UIImage imageNamed:@"LuckyBaseBackground"]; [self addSubview:self.backImageView]; self.centerImagerView = [[UIImageView alloc] init]; self.centerImagerView.image = [UIImage imageNamed:@"LuckyRotateWheel"]; self.centerImagerView.userInteractionEnabled = YES; [self addSubview:self.centerImagerView]; // 添加开始选号按钮 self.startButton = [[UIButton alloc] init]; [self.startButton setBackgroundImage:[UIImage imageNamed:@"LuckyCenterButton"] forState:UIControlStateNormal]; [self.startButton setBackgroundImage:[UIImage imageNamed:@"LuckyCenterButtonPressed"] forState:UIControlStateHighlighted]; [self.startButton addTarget:self action:@selector(startPicker:) forControlEvents:UIControlEventTouchUpInside]; [self addSubview:self.startButton]; // 添加号码按钮 // 加载大图片 UIImage *bigImage = [UIImage imageNamed:@"LuckyAstrology"]; UIImage *selBigImage = [UIImage imageNamed:@"LuckyAstrologyPressed"]; // 获取当前使用的图片像素和点的比例 CGFloat scale = [UIScreen mainScreen].scale; CGFloat imageW = bigImage.size.width / 12 * scale; CGFloat imageH = bigImage.size.height * scale; for (int i = 0; i < 12; i++) { QWheelButton *button = [QWheelButton buttonWithType:UIButtonTypeCustom]; [self.centerImagerView addSubview:button]; // 设置按钮图片 CGRect clipR = CGRectMake(i * imageW, 0, imageW, imageH); [button setImage:[self getImageWithClipRect:clipR fromImage:bigImage] forState:UIControlStateNormal]; [button setImage:[self getImageWithClipRect:clipR fromImage:selBigImage] forState:UIControlStateSelected]; [button setBackgroundImage:[UIImage imageNamed:@"LuckyRototeSelected"] forState:UIControlStateSelected]; // 监听按钮的点击 [button addTarget:self action:@selector(buttonClick:) forControlEvents:UIControlEventTouchUpInside]; // 默认选中第一个 if (i == 0) { [self buttonClick:button]; // button.backgroundColor = [UIColor blueColor]; } } } return self; } /// 布局子控件 - (void)layoutSubviews { [super layoutSubviews]; // 转盘界面 self.backImageView.frame = CGRectMake(0, 0, WHEEL_WIDTH, WHEEL_WIDTH); self.centerImagerView.layer.position = CGPointMake(WHEEL_WIDTH * 0.5, WHEEL_WIDTH * 0.5); self.centerImagerView.bounds = CGRectMake(0, 0, WHEEL_WIDTH, WHEEL_WIDTH); // 开始选号按钮 self.startButton.frame = CGRectMake((WHEEL_WIDTH - WHEEL_WIDTH / 3.5) / 2, (WHEEL_WIDTH - WHEEL_WIDTH / 3.5) / 2, WHEEL_WIDTH / 3.5, WHEEL_WIDTH / 3.5); // 号码按钮 CGFloat btnW = 68; CGFloat btnH = 143; for (int i = 0; i < 12; i++) { QWheelButton *button = self.centerImagerView.subviews[i]; // 按钮尺寸位置 button.bounds = CGRectMake(0, 0, btnW, btnH); button.layer.position = CGPointMake(WHEEL_WIDTH * 0.5, WHEEL_WIDTH * 0.5); button.layer.anchorPoint = CGPointMake(0.5, 1); // 按钮的旋转角度 CGFloat radion = (30 * i) / 180.0 * M_PI; button.transform = CGAffineTransformMakeRotation(radion); } } /// 定时器触发事件处理 - (void)angleChange { // 每一次调用旋转多少 90 / 60.0 CGFloat angle = (90 / 60.0) * M_PI / 180.0; // 持续旋转,需要设置 centerImagerView 的 layer.position 值 self.centerImagerView.transform = CGAffineTransformRotate(self.centerImagerView.transform, angle); } /// 按钮选中点击事件处理 - (void)buttonClick:(UIButton *)button { // 取消之前的按钮选择状态 self.selectedButton.selected = NO; // 设置当前点击的按钮选择状态 button.selected = YES; self.selectedButton = button; } /// 点击开始选号的时候 - (void)startPicker:(UIButton *)button { // 不需要定时器旋转 self.link.paused = YES; // 中间的转盘快速的旋转,并且不需要与用户交互 CABasicAnimation *anim = [CABasicAnimation animation]; anim.keyPath = @"transform.rotation"; anim.toValue = @(M_PI * 2 * 3); anim.duration = 0.5; anim.delegate = self; [self.centerImagerView.layer addAnimation:anim forKey:nil]; // 根据选中的按钮获取旋转的度数,通过 transform 获取角度 CGFloat angle = atan2(self.selectedButton.transform.b, self.selectedButton.transform.a); // 点击哪个星座,就把当前星座指向中心点上面 self.centerImagerView.transform = CGAffineTransformMakeRotation(-angle); } /// 动画协议方法 - (void)animationDidStop:(CAAnimation *)anim finished:(BOOL)flag { dispatch_after(dispatch_time(DISPATCH_TIME_NOW, (int64_t)(1 * NSEC_PER_SEC)), dispatch_get_main_queue(), ^{ self.link.paused = NO; }); } /// 懒加载定时器 - (CADisplayLink *)link { if (_link == nil) { _link = [CADisplayLink displayLinkWithTarget:self selector:@selector(angleChange)]; [_link addToRunLoop:[NSRunLoop mainRunLoop] forMode:NSDefaultRunLoopMode]; } return _link; } /// 裁剪图片 - (UIImage *)getImageWithClipRect:(CGRect)clipR fromImage:(UIImage *)image { // 裁剪图片,裁剪区域是以像素为基准 CGImageRef cgImage = CGImageCreateWithImageInRect(image.CGImage, clipR); return [UIImage imageWithCGImage:cgImage]; } @end -
ViewController.m
// 创建转盘界面 QWheelView *wheelView = [QWheelView q_wheelViewWithFrame:CGRectMake(40, 150, 300, 300)]; [self.view addSubview:wheelView]; self.wheelView = wheelView; // 开始转动 [self.wheelView q_startAnimating]; // 停止转动 [self.wheelView q_stopAnimating]; -
效果

1.3 折叠图片
-
一张图片必须要通过两个控件展示,旋转的时候,只旋转一部分控件,通过 layer 控制图片的显示内容,可以让一张完整的图片通过两个控件显示。
@interface ViewController () // 上下两部分图片绘制控件 @property (nonatomic, strong) UIImageView *topImageView; @property (nonatomic, strong) UIImageView *bottomImageView; // 触控控件 @property (nonatomic, strong) UIView *dragView; // 渐变图层 @property (nonatomic, strong) CAGradientLayer *gradientL; @end @implementation ViewController - (void)viewDidLoad { [super viewDidLoad]; self.view.backgroundColor = [UIColor cyanColor]; // 添加上下两部分图片绘制控件,两个控件叠加在一起,且在位于 drawView 中间 self.bottomImageView = [[UIImageView alloc] initWithFrame:CGRectMake(100, 250, 200, 100)]; self.bottomImageView.image = [UIImage imageNamed:@"demo"]; [self.view addSubview:self.bottomImageView]; self.topImageView = [[UIImageView alloc] initWithFrame:CGRectMake(100, 250, 200, 100)]; self.topImageView.image = [UIImage imageNamed:@"demo"]; [self.view addSubview:self.topImageView]; // 设置图片显示的尺寸 self.topImageView.layer.contentsRect = CGRectMake(0, 0, 1, 0.5); // 范围 0 ~ 1 self.topImageView.layer.anchorPoint = CGPointMake(0.5, 1); self.bottomImageView.layer.contentsRect = CGRectMake(0, 0.5, 1, 0.5); self.bottomImageView.layer.anchorPoint = CGPointMake(0.5, 0); // 添加渐变图层 self.gradientL = [CAGradientLayer layer]; self.gradientL.frame = self.bottomImageView.bounds; self.gradientL.opacity = 0; // 设置透明度 self.gradientL.colors = @[(id)[UIColor clearColor].CGColor, (id)[UIColor blackColor].CGColor]; // 设置渐变颜色 // self.gradientL.colors = @[(id)[UIColor redColor].CGColor, // (id)[UIColor greenColor].CGColor, // (id)[UIColor yellowColor].CGColor]; // self.gradientL.locations = @[@0.1, @0.4, @0.5]; // 设置渐变定位点 // gradientL.startPoint = CGPointMake(0, 1); // 设置渐变开始点,取值 0~1 [self.bottomImageView.layer addSublayer:self.gradientL]; // 添加触控控件 self.dragView = [[UIView alloc] initWithFrame:CGRectMake(100, 200, 200, 200)]; UIPanGestureRecognizer *pan = [[UIPanGestureRecognizer alloc] initWithTarget:self action:@selector(pan:)]; [self.dragView addGestureRecognizer:pan]; // 添加手势 [self.view addSubview:self.dragView]; } // 拖动的时候旋转上部分内容 - (void)pan:(UIPanGestureRecognizer *)pan { // 获取偏移量 CGPoint transP = [pan translationInView:self.dragView]; // 旋转角度,往下逆时针旋转 CGFloat angle = -transP.y / 200.0 * M_PI; CATransform3D transfrom = CATransform3DIdentity; transfrom.m34 = -1 / 500.0; // 增加旋转的立体感,近大远小,d:距离图层的距离 transfrom = CATransform3DRotate(transfrom, angle, 1, 0, 0); self.topImageView.layer.transform = transfrom; // 设置阴影效果 self.gradientL.opacity = transP.y * 1 / 200.0; if (pan.state == UIGestureRecognizerStateEnded) { // 反弹 // 弹簧效果的动画,SpringWithDamping:弹性系数,越小弹簧效果越明显 [UIView animateWithDuration:0.6 delay:0 usingSpringWithDamping:0.2 initialSpringVelocity:10 options:UIViewAnimationOptionCurveEaseInOut animations:^{ self.topImageView.layer.transform = CATransform3DIdentity; } completion:nil]; } } @end -
效果
1.4 图片倒影
-
QRepView.h
@interface QRepView : UIView @end -
QRepView.m
@implementation QRepView // 设置控件主层的类型 + (Class)layerClass { return [CAReplicatorLayer class]; } @end -
ViewController.m
#import "QRepView.h" @interface ViewController () @property (nonatomic, strong) QRepView *repView; @end @implementation ViewController - (void)viewDidLoad { [super viewDidLoad]; self.view.backgroundColor = [UIColor cyanColor]; self.repView = [[QRepView alloc] initWithFrame:CGRectMake(100, 100, 150, 150)]; [self.view addSubview:self.repView]; UIImageView *imageView = [[UIImageView alloc] initWithFrame:self.repView.bounds]; imageView.image = [UIImage imageNamed:@"demo.jpg"]; [self.repView addSubview:imageView]; // 创建复制图层 CAReplicatorLayer *repLayer = (CAReplicatorLayer *)self.repView.layer; // 设置子层数量 repLayer.instanceCount = 2; // 往下面平移旋转控件 CATransform3D translation = CATransform3DMakeTranslation(0, self.repView.bounds.size.height, 0); CATransform3D rotateTranslation = CATransform3DRotate(translation, M_PI, 1, 0, 0); repLayer.instanceTransform = rotateTranslation; // 设置阴影 repLayer.instanceAlphaOffset = -0.1; repLayer.instanceRedOffset = -0.1; repLayer.instanceGreenOffset = -0.1; repLayer.instanceBlueOffset = -0.1; } @end -
效果
1.5 音量振动条
-
创建音量振动条
@property (nonatomic, strong) UIView *vibrationBarView; self.vibrationBarView = [[UIView alloc] initWithFrame:CGRectMake(100, 100, 200, 200)]; self.vibrationBarView.backgroundColor = [UIColor lightGrayColor]; [self.view addSubview:self.vibrationBarView]; // 创建复制图层 CAReplicatorLayer *repLayer = [CAReplicatorLayer layer]; // 可以把图层里面所有子层复制 repLayer.frame = self.vibrationBarView.bounds; [self.vibrationBarView.layer addSublayer:repLayer]; // 创建震动条图层 CALayer *layer = [CALayer layer]; layer.anchorPoint = CGPointMake(0.5, 1); layer.position = CGPointMake(30, self.vibrationBarView.bounds.size.height); layer.bounds = CGRectMake(0, 0, 30, 150); layer.backgroundColor = [UIColor whiteColor].CGColor; [repLayer addSublayer:layer]; // 设置缩放动画 CABasicAnimation *anim = [CABasicAnimation animation]; anim.keyPath = @"transform.scale.y"; anim.toValue = @0.1; anim.duration = 0.5; anim.repeatCount = MAXFLOAT; anim.autoreverses = YES; // 设置动画反转 [layer addAnimation:anim forKey:nil]; // 设置复制层中子层 repLayer.instanceCount = 4; // 设置复制层里面有多少个子层,包括原始层 repLayer.instanceTransform = CATransform3DMakeTranslation(45, 0, 0); // 设置复制子层偏移量,不包括原始层,相对于原始层 x 偏移 repLayer.instanceDelay = 0.1; // 设置复制层动画延迟时间 repLayer.instanceColor = [UIColor greenColor].CGColor; // 设置复制子层背景色 repLayer.instanceGreenOffset = -0.3; -
效果
1.6 活动指示器
-
创建活动指示器
@property (nonatomic, strong) UIView *activityIndicatorView; self.activityIndicatorView = [[UIView alloc] initWithFrame:CGRectMake(100, 100, 200, 200)]; self.activityIndicatorView.backgroundColor = [UIColor redColor]; [self.view addSubview:self.activityIndicatorView]; // 创建复制图层 CAReplicatorLayer *repLayer = [CAReplicatorLayer layer]; // 可以把图层里面所有子层复制 repLayer.frame = self.activityIndicatorView.bounds; [self.activityIndicatorView.layer addSublayer:repLayer]; // 创建指示器图层 CALayer *layer = [CALayer layer]; layer.transform = CATransform3DMakeScale(0, 0, 0); layer.position = CGPointMake(self.activityIndicatorView.bounds.size.width / 2, 20); layer.bounds = CGRectMake(0, 0, 10, 10); layer.backgroundColor = [UIColor greenColor].CGColor; [repLayer addSublayer:layer]; // 设置缩放动画 CGFloat duration = 1.0; CABasicAnimation *anim = [CABasicAnimation animation]; anim.keyPath = @"transform.scale"; anim.fromValue = @1; anim.toValue = @0; anim.duration = duration; anim.repeatCount = MAXFLOAT; [layer addAnimation:anim forKey:nil]; // 设置复制层中子层 CGFloat count = 20; CGFloat angle = M_PI * 2 / count; repLayer.instanceCount = count; // 设置复制层里面有多少个子层,包括原始层 repLayer.instanceTransform = CATransform3DMakeRotation(angle, 0, 0, 1); // 设置复制子层偏移量,不包括原始层,相对于原始层 x 偏移 repLayer.instanceDelay = duration / count; // 设置复制层动画延迟时间 -
效果
1.7 粒子运动效果
-
QParticleMotionView.h
@interface QParticleMotionView : UIView /// 创建粒子运动效果界面 + (instancetype)q_particleMotionViewWithFrame:(CGRect)frame; /// 开始运动 - (void)q_startAnimating; /// 清除运动 - (void)q_clearAnimating; @end -
QParticleMotionView.m
@interface QParticleMotionView () /// 贝塞尔路径 @property (nonatomic, strong) UIBezierPath *path; /// 复制图层 @property (nonatomic, strong) CAReplicatorLayer *repLayer; /// 圆点图层 @property (nonatomic, strong) CALayer *dotLayer; /// 圆点个数 @property (nonatomic, assign) NSInteger dotCount; @end @implementation QParticleMotionView /// 创建粒子运动效果界面 + (instancetype)q_particleMotionViewWithFrame:(CGRect)frame { QParticleMotionView *particleMotionView = [[self alloc] initWithFrame:frame]; particleMotionView.backgroundColor = [UIColor whiteColor]; return particleMotionView; } /// 开始运动 - (void)q_startAnimating { // 创建关键帧动画 CAKeyframeAnimation *anim = [CAKeyframeAnimation animation]; anim.keyPath = @"position"; anim.path = self.path.CGPath; anim.duration = 3; anim.repeatCount = MAXFLOAT; [self.dotLayer addAnimation:anim forKey:@"dotAnimation"]; // 复制子层 self.repLayer.instanceCount = self.dotCount; self.repLayer.instanceDelay = 0.2; } /// 清除运动 - (void)q_clearAnimating { // 移除动画 [self.dotLayer removeAnimationForKey:@"dotAnimation"]; // 清空路径 self.path = nil; // 清空子层总数 self.dotCount = 0; [self setNeedsDisplay]; } /// 初始化 - (instancetype)initWithFrame:(CGRect)frame { if (self = [super initWithFrame:frame]) { self.dotCount = 0; // 创建复制图层 self.repLayer = [CAReplicatorLayer layer]; self.repLayer.frame = self.bounds; [self.layer addSublayer:self.repLayer]; // 创建圆点图层 CGFloat wh = 10; self.dotLayer = [CALayer layer]; self.dotLayer.frame = CGRectMake(0, -1000, wh, wh); self.dotLayer.cornerRadius = wh / 2; self.dotLayer.backgroundColor = [UIColor blueColor].CGColor; [self.repLayer addSublayer:self.dotLayer]; } return self; } /// 触摸开始 - (void)touchesBegan:(NSSet<UITouch *> *)touches withEvent:(nullable UIEvent *)event { // 获取触摸起始点位置 CGPoint startPoint = [touches.anyObject locationInView:self]; // 设置起点 [self.path moveToPoint:startPoint]; } /// 触摸移动 - (void)touchesMoved:(NSSet<UITouch *> *)touches withEvent:(nullable UIEvent *)event { // 获取触摸点位置 CGPoint touchPoint = [touches.anyObject locationInView:self]; // 添加线到某个点 [self.path addLineToPoint:touchPoint]; // 重绘 [self setNeedsDisplay]; self.dotCount ++; } /// 绘制贝塞尔路径 - (void)drawRect:(CGRect)rect { [self.path stroke]; } /// 懒加载路径 - (UIBezierPath *)path { if (_path == nil) { _path = [UIBezierPath bezierPath]; } return _path; } @end -
ViewController.m
@property (nonatomic, strong) QParticleMotionView *particleMotionView; // 创建粒子运动效果界面 CGRect frame = CGRectMake(0, 100, self.view.bounds.size.width, self.view.bounds.size.height - 100); self.particleMotionView = [QParticleMotionView q_particleMotionViewWithFrame:frame]; [self.view addSubview:self.particleMotionView]; // 开始运动 [self.particleMotionView q_startAnimating]; // 清除运动 [self.particleMotionView q_clearAnimating]; -
效果
1.8 划定路径移动
-
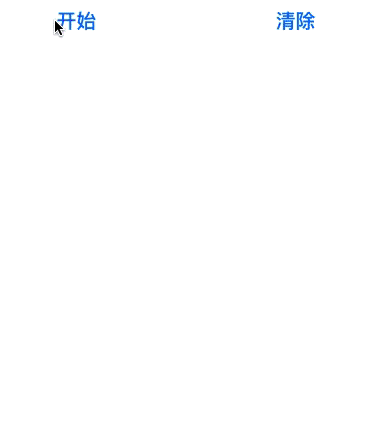
DrawView.m
@interface DrawView () @property (nonatomic, strong) UIBezierPath *path; @end @implementation DrawView /// 触摸开始 - (void)touchesBegan:(NSSet<UITouch *> *)touches withEvent:(nullable UIEvent *)event { // 移除上一个动画 [self.subviews.firstObject.layer removeAnimationForKey:@"drawAnimation"]; // 获取触摸起始点位置 CGPoint startPoint = [touches.anyObject locationInView:self]; // 创建路径 self.path = [UIBezierPath bezierPath]; // 设置起点 [self.path moveToPoint:startPoint]; } /// 触摸移动 - (void)touchesMoved:(NSSet<UITouch *> *)touches withEvent:(nullable UIEvent *)event { // 获取触摸点位置 CGPoint touchPoint = [touches.anyObject locationInView:self]; [self.path addLineToPoint:touchPoint]; [self setNeedsDisplay]; } /// 触摸结束 - (void)touchesEnded:(NSSet<UITouch *> *)touches withEvent:(nullable UIEvent *)event { // 添加关键帧动画 CAKeyframeAnimation *anim = [CAKeyframeAnimation animation]; anim.keyPath = @"position"; // 添加动画路径 anim.path = self.path.CGPath; anim.duration = 3; anim.repeatCount = MAXFLOAT; anim.timingFunction = [CAMediaTimingFunction functionWithName:kCAMediaTimingFunctionLinear]; // 给子视图添加核心动画 [self.subviews.firstObject.layer addAnimation:anim forKey:@"drawAnimation"]; } /// 触摸取消 - (void)touchesCancelled:(NSSet *)touches withEvent:(nullable UIEvent *)event { [self touchesEnded:touches withEvent:event]; } /// 绘图 - (void)drawRect:(CGRect)rect { [self.path stroke]; } @end -
ViewController.m
DrawView *myDrawView = [[DrawView alloc] initWithFrame:self.view.bounds]; myDrawView.backgroundColor = [UIColor whiteColor]; [self.view addSubview:myDrawView]; UIImageView *imv = [[UIImageView alloc] initWithFrame:CGRectMake(100, 100, 50, 50)]; imv.image = [UIImage imageNamed:@"heart2"]; [myDrawView addSubview:imv]; -
效果
1.9 粘性效果按钮
-
QGooButton.h
@interface QGooButton : UIButton @end -
QGooButton.m
	/// 最大圆心距离
	#define MAX_DISTANCE    80

	#define WIDTH           self.bounds.size.width

	@interface QGooButton ()

	/// 小圆视图
	@property (nonatomic, strong) UIView *smallCircleView;

	/// 不规则矩形
	@property (nonatomic, strong) CAShapeLayer *shapeLayer;

	/// 小圆原始半径
	@property (nonatomic, assign) CGFloat oriSmallRadius;

	/// 小圆原始中心
	@property (nonatomic, assign) CGPoint oriSmallCenter;

	@end

	@implementation QGooButton

	/// 懒加载

	- (CAShapeLayer *)shapeLayer {

	    if (_shapeLayer == nil) {

	        // 展示不规则矩形,通过不规则矩形路径生成一个图层
	        _shapeLayer = [CAShapeLayer layer];
	        _shapeLayer.fillColor = self.backgroundColor.CGColor;

	        [self.superview.layer insertSublayer:_shapeLayer below:self.layer];
	    }
	    return _shapeLayer;
	}

	- (UIView *)smallCircleView {

	    if (_smallCircleView == nil) {

	        _smallCircleView = [[UIView alloc] init];
	        _smallCircleView.backgroundColor = self.backgroundColor;

	        // 小圆添加按钮的父控件上
	        [self.superview insertSubview:_smallCircleView belowSubview:self];
	    }
	    return _smallCircleView;
	}

	/// 初始化
	- (instancetype)initWithFrame:(CGRect)frame {

	    if (self = [super initWithFrame:frame]) {

	        // 记录小圆最初始半径和中心
	        self.oriSmallRadius = WIDTH / 2;

	        // 设置按钮圆角
	        self.layer.cornerRadius = WIDTH / 2;

	        // 设置按钮文字颜色和字体大小
	        [self setTitleColor:[UIColor whiteColor] forState:UIControlStateNormal];
	        self.titleLabel.font = [UIFont systemFontOfSize:18];

	        // 添加手势
	        UIPanGestureRecognizer *pan = [[UIPanGestureRecognizer alloc] initWithTarget:self action:@selector(pan:)];
	        [self addGestureRecognizer:pan];
	    }
	    return self;
	}

	- (void)layoutSubviews {

	    [super layoutSubviews];

	    static int flag = 1;

	    if (flag) {

	        flag = 0;

	        // 设置小圆位置和尺寸
	        self.smallCircleView.center = self.center;
	        self.smallCircleView.bounds = self.bounds;
	        self.smallCircleView.layer.cornerRadius = WIDTH / 2;
	    }
	}

	/// 拖动手势事件处理
	- (void)pan:(UIPanGestureRecognizer *)pan {

	    // 获取手指偏移量
	    CGPoint transP = [pan translationInView:self];

	    // 移动控件位置
	    CGPoint center = self.center;
	    center.x += transP.x;
	    center.y += transP.y;
	    self.center = center;

	    // 复位
	    [pan setTranslation:CGPointZero inView:self];

	    // 显示后面圆,后面圆的半径,随着两个圆心的距离不断增加而减小

	    // 计算圆心距离
	    CGFloat d = [self circleCenterDistanceWithBigCircleCenter:self.center smallCircleCenter:self.smallCircleView.center];

	    // 计算小圆的半径
	    CGFloat smallRadius = self.oriSmallRadius - d / 10;

	    // 设置小圆的尺寸
	    self.smallCircleView.bounds = CGRectMake(0, 0, smallRadius * 2, smallRadius * 2);
	    self.smallCircleView.layer.cornerRadius = smallRadius;

	    // 当圆心距离大于最大圆心距离
	    if (d > MAX_DISTANCE) {                                         // 可以拖出来

	        // 隐藏小圆
	        self.smallCircleView.hidden = YES;

	        // 移除不规则的矩形
	        [self.shapeLayer removeFromSuperlayer];
	        self.shapeLayer = nil;

	    } else if (d > 0 && self.smallCircleView.hidden == NO) {        // 有圆心距离,并且圆心距离不大,才需要展示

	        // 展示不规则矩形,通过不规则矩形路径生成一个图层

	        self.shapeLayer.path = [self pathWithBigCirCleView:self smallCirCleView:self.smallCircleView].CGPath;
	    }

	    // 手指抬起的时候
	    if (pan.state == UIGestureRecognizerStateEnded) {

	        // 当圆心距离大于最大圆心距离
	        if (d > MAX_DISTANCE) {

	            // 展示 gif 动画

	            UIImageView *imageView = [[UIImageView alloc] initWithFrame:self.bounds];
	            NSMutableArray *arrM = [NSMutableArray array];
	            for (int i = 1; i < 9; i++) {
	                UIImage *image = [UIImage imageNamed:[NSString stringWithFormat:@"%d",i]];
	                [arrM addObject:image];
	            }
	            imageView.animationImages = arrM;
	            imageView.animationRepeatCount = 1;
	            imageView.animationDuration = 0.5;
	            [imageView startAnimating];
	            [self addSubview:imageView];
	            self.backgroundColor = [UIColor clearColor];

	            dispatch_after(dispatch_time(DISPATCH_TIME_NOW, (int64_t)(0.4 * NSEC_PER_SEC)), dispatch_get_main_queue(), ^{
	                [self removeFromSuperview];
	            });

	        } else {

	            // 移除不规则矩形,还原

	            [self.shapeLayer removeFromSuperlayer];
	            self.shapeLayer = nil;

	            // 还原位置
	            [UIView animateWithDuration:0.5 delay:0 usingSpringWithDamping:0.2
	                                                     initialSpringVelocity:0
	                                                                   options:UIViewAnimationOptionCurveLinear
	                                                                animations:^{

	                // 设置大圆中心点位置
	                self.center = self.smallCircleView.center;

	            } completion:^(BOOL finished) {

	                // 显示小圆
	                self.smallCircleView.hidden = NO;
	            }];
	        }
	    }
	}

	/// 计算两个圆心之间的距离
	- (CGFloat)circleCenterDistanceWithBigCircleCenter:(CGPoint)bigCircleCenter smallCircleCenter:(CGPoint)smallCircleCenter {

	    CGFloat offsetX = bigCircleCenter.x - smallCircleCenter.x;
	    CGFloat offsetY = bigCircleCenter.y - smallCircleCenter.y;

	    return sqrt(offsetX * offsetX + offsetY * offsetY);
	}

	/// 描述两圆之间一条矩形路径
	- (UIBezierPath *)pathWithBigCirCleView:(UIView *)bigCirCleView  smallCirCleView:(UIView *)smallCirCleView {

	    CGPoint bigCenter = bigCirCleView.center;
	    CGFloat x2 = bigCenter.x;
	    CGFloat y2 = bigCenter.y;
	    CGFloat r2 = bigCirCleView.bounds.size.width / 2;

	    CGPoint smallCenter = smallCirCleView.center;
	    CGFloat x1 = smallCenter.x;
	    CGFloat y1 = smallCenter.y;
	    CGFloat r1 = smallCirCleView.bounds.size.width / 2;

	    // 获取圆心距离
	    CGFloat d = [self circleCenterDistanceWithBigCircleCenter:bigCenter smallCircleCenter:smallCenter];

	    CGFloat sinθ = (x2 - x1) / d;

	    CGFloat cosθ = (y2 - y1) / d;

	    // 坐标系基于父控件
	    CGPoint pointA = CGPointMake(x1 - r1 * cosθ , y1 + r1 * sinθ);
	    CGPoint pointB = CGPointMake(x1 + r1 * cosθ , y1 - r1 * sinθ);
	    CGPoint pointC = CGPointMake(x2 + r2 * cosθ , y2 - r2 * sinθ);
	    CGPoint pointD = CGPointMake(x2 - r2 * cosθ , y2 + r2 * sinθ);
	    CGPoint pointO = CGPointMake(pointA.x + d / 2 * sinθ , pointA.y + d / 2 * cosθ);
	    CGPoint pointP = CGPointMake(pointB.x + d / 2 * sinθ , pointB.y + d / 2 * cosθ);

	    UIBezierPath *path = [UIBezierPath bezierPath];

	    // A
	    [path moveToPoint:pointA];

	    // AB
	    [path addLineToPoint:pointB];

	    // 绘制 BC 曲线
	    [path addQuadCurveToPoint:pointC controlPoint:pointP];

	    // CD
	    [path addLineToPoint:pointD];

	    // 绘制 DA 曲线
	    [path addQuadCurveToPoint:pointA controlPoint:pointO];

	    return path;
	}

	@end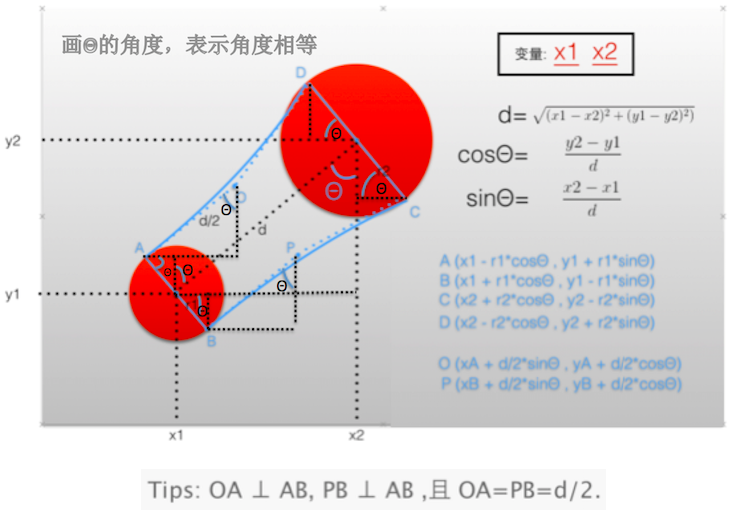
-
ViewController.m
// 创建粘性按钮 QGooButton *gooButton = [[QGooButton alloc] initWithFrame:CGRectMake(200, 200, 50, 50)]; [gooButton setBackgroundColor:[UIColor redColor]]; [gooButton setTitle:@"10" forState:UIControlStateNormal]; [self.view addSubview:gooButton]; -
效果
1.10 启动动画
-
QWelcomeView.h
@interface QWelcomeView : UIView /// 创建欢迎视图 + (instancetype)q_weicomeView; @end -
QWelcomeView.m
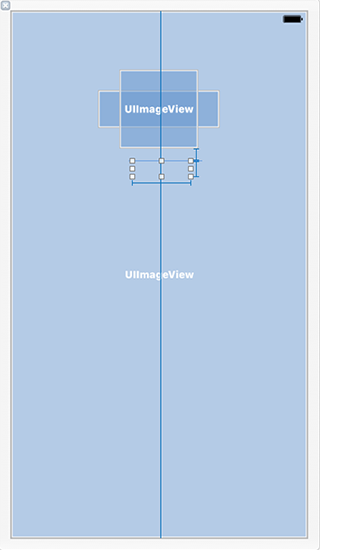
@interface QWelcomeView () @property (weak, nonatomic) IBOutlet UIImageView *backView; @property (weak, nonatomic) IBOutlet UIImageView *sloganView; @property (weak, nonatomic) IBOutlet UIImageView *iconView; @property (weak, nonatomic) IBOutlet UILabel *textView; @end @implementation QWelcomeView /// 创建欢迎视图 + (instancetype)q_weicomeView{ return [[NSBundle mainBundle] loadNibNamed:NSStringFromClass(self) owner:nil options:nil].firstObject; } /// 初始化 - (void)awakeFromNib { [super awakeFromNib]; self.backView.image = [UIImage imageNamed:@"ad_background"]; self.sloganView.image = [UIImage imageNamed:@"compose_slogan"]; self.iconView.image = [UIImage imageNamed:@"QianChia0123"]; self.textView.text = @"欢迎回来"; } /// 已经添加到父视图上 - (void)didMoveToSuperview { [super didMoveToSuperview]; // 设置头像圆角 self.iconView.layer.cornerRadius = 50; self.iconView.layer.masksToBounds = YES; // 头像下移 self.iconView.transform = CGAffineTransformMakeTranslation(0, 50); dispatch_after(dispatch_time(DISPATCH_TIME_NOW, (int64_t)(1.0 * NSEC_PER_SEC)), dispatch_get_main_queue(), ^{ [UIView animateWithDuration:1.0 animations:^{ // 文字图片慢慢消失 self.sloganView.alpha = 0; } completion:^(BOOL finished) { // 显示头像 self.iconView.hidden = NO; [UIView animateWithDuration:1.0 delay:0 usingSpringWithDamping:0.3 initialSpringVelocity:0 options:UIViewAnimationOptionCurveLinear animations:^{ // 头像往上移动的动画,弹簧效果 self.iconView.transform = CGAffineTransformIdentity; } completion:^(BOOL finished) { self.textView.alpha = 0; self.textView.hidden = NO; // 文字慢慢显示 [UIView animateWithDuration:0.5 animations:^{ // 欢迎回来 的文字慢慢显示 self.textView.alpha = 1; } completion:^(BOOL finished) { dispatch_after(dispatch_time(DISPATCH_TIME_NOW, (int64_t)(0.5 * NSEC_PER_SEC)), dispatch_get_main_queue(), ^{ // 移除 [self removeFromSuperview]; }); }]; }]; }]; }); } @end -
AppDelegate.m
#import "QWelcomeView.h" - (BOOL)application:(UIApplication *)application didFinishLaunchingWithOptions:(NSDictionary *)launchOptions { // 创建窗口 self.window = [[UIWindow alloc] initWithFrame:[UIScreen mainScreen].bounds]; UIStoryboard *stroyboard = [UIStoryboard storyboardWithName:@"Main" bundle:nil]; UIViewController *vc = [stroyboard instantiateInitialViewController]; self.window.rootViewController = vc; [self.window makeKeyAndVisible]; // 显示欢迎界面 QWelcomeView *welcomeV = [QWelcomeView q_weicomeView]; welcomeV.frame = self.window.bounds; // 注意:一定要给界面设置 Frame [self.window addSubview:welcomeV]; return YES; } -
效果
1.11 菜单按钮动画
-
QMenuItemModel.h
@interface QMenuItemModel : NSObject @property (nonatomic, strong) NSString *title; @property (nonatomic, strong) UIImage *image; + (instancetype)q_menuItemWithTitle:(NSString *)title image:(UIImage *)image; @end -
QMenuItemModel.m
@implementation QMenuItemModel + (instancetype)q_menuItemWithTitle:(NSString *)title image:(UIImage *)image { QMenuItemModel *itme = [[self alloc] init]; itme.title = title; itme.image = image; return itme; } @end -
QMenuItemButton.h
@interface QMenuItemButton : UIButton @end -
QMenuItemButton.m
#define kImageRatio 0.8 @implementation QMenuItemButton - (void)awakeFromNib { [super awakeFromNib]; [self setUp]; } - (instancetype)initWithFrame:(CGRect)frame { if (self = [super initWithFrame:frame]) { [self setUp]; } return self; } - (void)setUp { self.imageView.contentMode = UIViewContentModeCenter; self.titleLabel.textAlignment = NSTextAlignmentCenter; [self setTitleColor:[UIColor blackColor] forState:UIControlStateNormal]; } /// 布局子控件 - (void)layoutSubviews { [super layoutSubviews]; // UIImageView CGFloat imageX = 0; CGFloat imageY = 0; CGFloat imageW = self.bounds.size.width; CGFloat imageH = self.bounds.size.height * kImageRatio; self.imageView.frame = CGRectMake(imageX, imageY, imageW, imageH); // UILabel CGFloat labelY = imageH; CGFloat labelH = self.bounds.size.height - labelY; self.titleLabel.frame = CGRectMake(imageX, labelY, imageW, labelH); } @end -
QComposeItemViewController.h
@interface QComposeItemViewController : UIViewController @end -
QComposeItemViewController.m
#import "QMenuItemModel.h" #import "QMenuItemButton.h" @interface QComposeItemViewController () @property (nonatomic, strong) NSArray *items; @property (nonatomic, strong) NSTimer *timer; @property (nonatomic, assign) int btnIndex; @property (nonatomic, strong) NSMutableArray *itemButtons; @end @implementation QComposeItemViewController /// - (void)viewDidLoad { [super viewDidLoad]; // 添加所有 item 按钮 [self setUpAllBtns]; // 按钮按顺序的从下往上偏移 self.timer = [NSTimer scheduledTimerWithTimeInterval:0.1 target:self selector:@selector(timeChange) userInfo:nil repeats:YES]; } /// 添加所有 item 按钮 - (void)setUpAllBtns { int cols = 3; int col = 0; int row = 0; CGFloat x = 0; CGFloat y = 0; CGFloat wh = 100; CGFloat margin = ([UIScreen mainScreen].bounds.size.width - cols * wh) / (cols + 1); CGFloat oriY = 300; for (int i = 0; i < self.items.count; i++) { UIButton *btn = [QMenuItemButton buttonWithType:UIButtonTypeCustom]; col = i % cols; row = i / cols; x = margin + col * (margin + wh); y = row * (margin + wh) + oriY; btn.frame = CGRectMake(x, y, wh, wh); // 设置按钮的图片和文字 QMenuItemModel *item = self.items[i]; [btn setImage:item.image forState:UIControlStateNormal]; [btn setTitle:item.title forState:UIControlStateNormal]; // 偏移到底部 btn.transform = CGAffineTransformMakeTranslation(0, self.view.bounds.size.height); [btn addTarget:self action:@selector(btnClick:) forControlEvents:UIControlEventTouchDown]; [btn addTarget:self action:@selector(btnClick1:) forControlEvents:UIControlEventTouchUpInside]; [self.itemButtons addObject:btn]; [self.view addSubview:btn]; } } /// 给所有的按钮做动画 - (void)setUpAllBtnAnim { for (UIButton *btn in self.itemButtons) { [self setUpOneBtnAnim:btn]; } } /// 给一个按钮做动画 - (void)setUpOneBtnAnim:(UIButton *)btn { [UIView animateWithDuration:0.8 delay:0 usingSpringWithDamping:0.7 initialSpringVelocity:0 options:UIViewAnimationOptionCurveEaseIn animations:^{ btn.transform = CGAffineTransformIdentity; } completion:nil]; } /// 定时器响应事件处理 - (void)timeChange { // 让一个按钮做动画 if (self.btnIndex == self.itemButtons.count) { // 定时器停止 [self.timer invalidate]; return; } // 获取按钮 UIButton *btn = self.itemButtons[self.btnIndex]; [self setUpOneBtnAnim:btn]; self.btnIndex++; } /// 按钮按下响应事件处理 - (void)btnClick:(UIButton *)btn { [UIView animateWithDuration:0.5 animations:^{ btn.transform = CGAffineTransformMakeScale(1.2, 1.2); }]; } /// 按钮点击响应事件处理 - (void)btnClick1:(UIButton *)btn { [UIView animateWithDuration:0.5 animations:^{ btn.transform = CGAffineTransformMakeScale(2.0, 2.0); btn.alpha = 0; }]; NSLog(@"%s", __func__); } /// 懒加载 - (NSArray *)items { if (_items == nil) { // 创建模型对象 QMenuItemModel *item1 = [QMenuItemModel q_menuItemWithTitle:@"点评" image:[UIImage imageNamed:@"tabbar_compose_review"]]; QMenuItemModel *item2 = [QMenuItemModel q_menuItemWithTitle:@"更多" image:[UIImage imageNamed:@"tabbar_compose_more"]]; QMenuItemModel *item3 = [QMenuItemModel q_menuItemWithTitle:@"拍摄" image:[UIImage imageNamed:@"tabbar_compose_camera"]]; QMenuItemModel *item4 = [QMenuItemModel q_menuItemWithTitle:@"相册" image:[UIImage imageNamed:@"tabbar_compose_photo"]]; QMenuItemModel *item5 = [QMenuItemModel q_menuItemWithTitle:@"文字" image:[UIImage imageNamed:@"tabbar_compose_idea"]]; QMenuItemModel *item6 = [QMenuItemModel q_menuItemWithTitle:@"签到" image:[UIImage imageNamed:@"tabbar_compose_review"]]; _items = @[item1, item2, item3, item4, item5, item6]; } return _items; } - (NSMutableArray *)itemButtons { if (_itemButtons == nil) { _itemButtons = [NSMutableArray array]; } return _itemButtons; } @end -
ViewController.m
// 点击加号按钮 - (IBAction)btnClick:(id)sender { QComposeItemViewController *vc = [[QComposeItemViewController alloc] init]; [self presentViewController:vc animated:YES completion:nil]; } -
效果
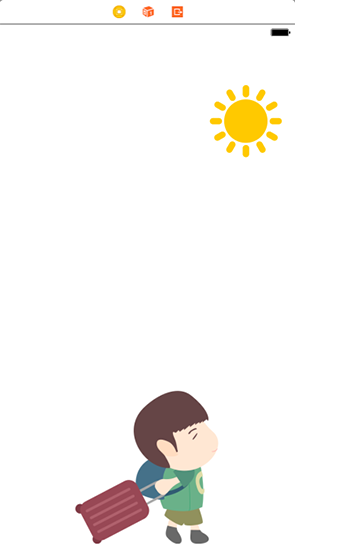
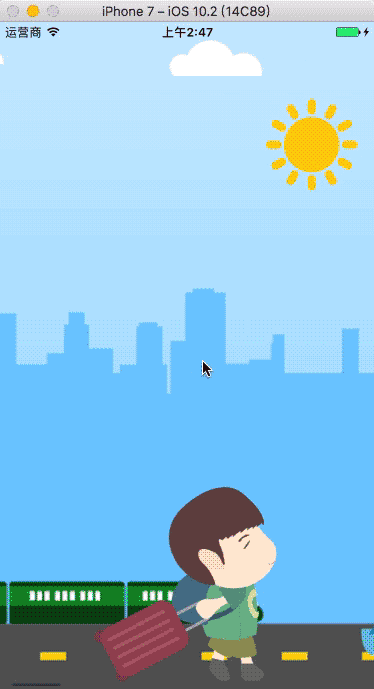
1.12 引导页动画
-
ViewController.m
@interface ViewController () <UIScrollViewDelegate> @property (weak, nonatomic) IBOutlet UIImageView *sunView; @property (weak, nonatomic) IBOutlet UIImageView *personView; @end @implementation ViewController - (void)viewDidLoad { [super viewDidLoad]; UIImage *bgImage = [UIImage imageNamed:@"520_userguid_bg"]; // ScrollView UIScrollView *scorollView = [[UIScrollView alloc] initWithFrame:self.view.bounds]; scorollView.contentSize = bgImage.size; scorollView.delegate = self; scorollView.decelerationRate = 0.5; [self.view insertSubview:scorollView atIndex:0]; // bg UIImageView *bgImageView = [[UIImageView alloc] initWithImage:bgImage]; CGRect rect = bgImageView.frame; rect.size.height = self.view.bounds.size.height; bgImageView.frame = rect; [scorollView addSubview:bgImageView]; // cg UIImage *cgImage = [UIImage imageNamed:@"520_userguid_cg"]; UIImageView *cgImageView = [[UIImageView alloc] initWithImage:cgImage]; rect = cgImageView.frame; rect.size.height = self.view.bounds.size.height; cgImageView.frame = rect; [bgImageView addSubview:cgImageView]; // fg UIImage *fgImage = [UIImage imageNamed:@"520_userguid_fg"]; UIImageView *fgImageView = [[UIImageView alloc] initWithImage:fgImage]; rect = cgImageView.frame; rect.size.height = self.view.bounds.size.height; fgImageView.frame = rect; [bgImageView addSubview:fgImageView]; // cloud UIImage *cloudImage = [UIImage imageNamed:@"520_userguid_cloud"]; UIImageView *cloudImageView = [[UIImageView alloc] initWithImage:cloudImage]; [bgImageView addSubview:cloudImageView]; } // 只要一滚动就会调用 - (void)scrollViewDidScroll:(UIScrollView *)scrollView { // 获取 scrollView 偏移量 CGFloat offsetX = scrollView.contentOffset.x; int intOffsetX = (int)offsetX; // 切换人物的图片 NSString *imageName = [NSString stringWithFormat:@"520_userguid_person_taitou_%d", (intOffsetX % 2 + 1)]; self.personView.image = [UIImage imageNamed:imageName]; // 旋转小太阳 self.sunView.transform = CGAffineTransformRotate(self.sunView.transform, 5 / 180.0 * M_PI); } @end -
效果