There are two methods for Sonarqube integration with Angular.
One way is to use ng test to generate the lcov.info file and then read the file directly through the SonarScanner CLI.
One way is to integrate the components of sonarqube by installing them in the angular project.
Two methods will be described below.
Method 1:Use SonarScanner CLI
Start SonarQube Service
Download SonarQube
Unzip .zip file.
In the bin directory, there are files to start the SonarQube service for different systems, including Windows, Mac and Linux.
For Windows system, the StartSonar.bat file needs to be executed.
Note
SonarQube requires the JDK environment, and here is its support information.
I downloaded JDK 11.
Then visit http://localhost:9000/.
Login through account admin, password admin, you can enter the system.
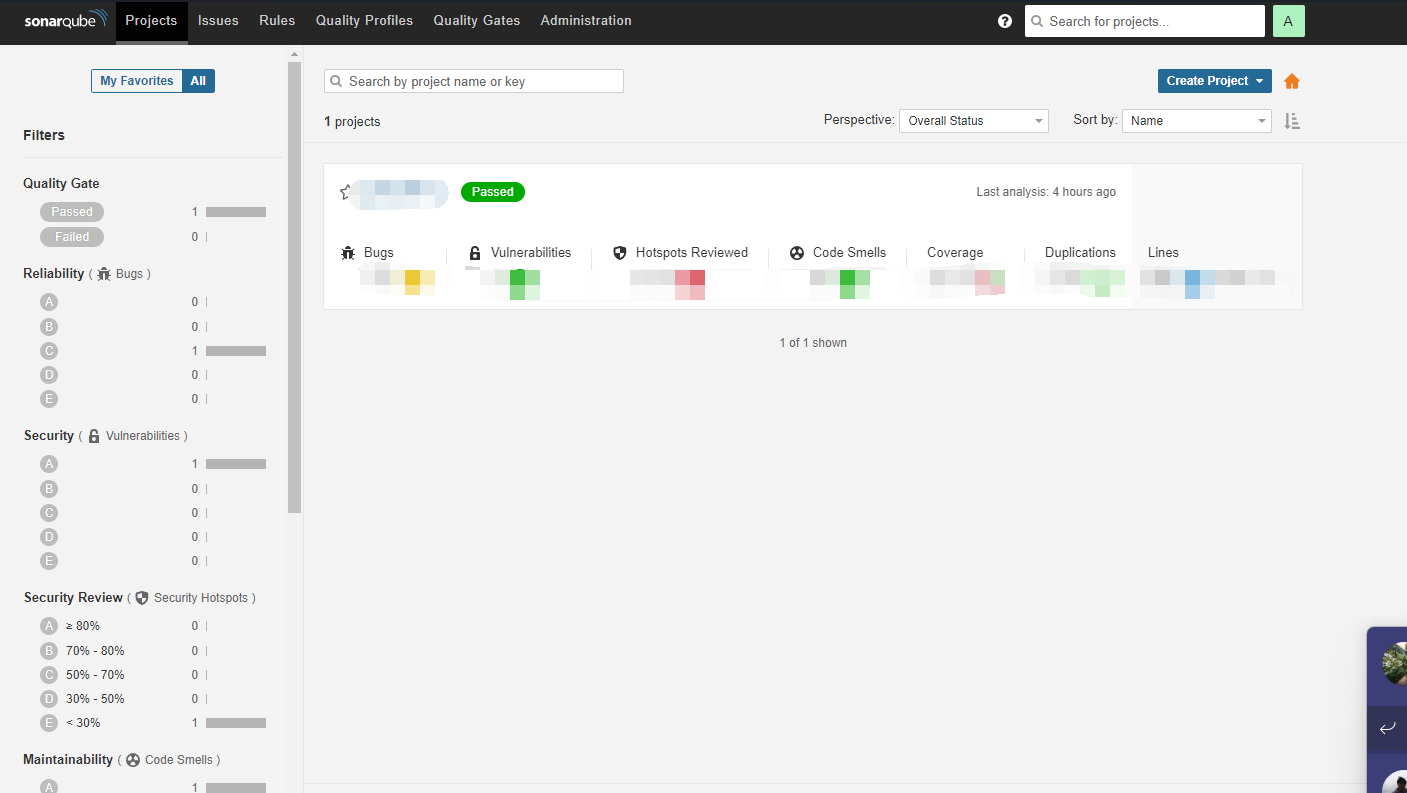
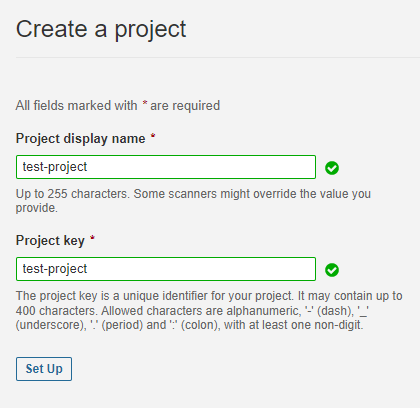
Then create a project manually.
(Optional)Create Tokens
In the user drop-down box in the upper right corner, select My Account.
Then select the Security Tab page.
Tokens can be managed here.

Reference-Generating and Using Tokens
The SonarQube service can be accessed through an account and password, or through tokens, so you can create tokens or not, which is depending on your needs.
Angular Project
Execute command ng test.
Note
Need to set coverage=true.
It can be added to the command line:
ng test --codeCoverage=true
It can also be added to the angular.json file:
"test": {
    "codeCoverage": true,
    ......
},
After the command is executed successfully, a new folder coverage will be created. In the folder there is a file lcov.info, this is what we need.
Parsing lcov.info file via SonarScanner CLI
Download SonarScanner
Unzip .zip file.
Modify the configuration file sonar-scanner.properties in the conf folder.
(1)sonar.projectBaseDir
The default project folder for scanner is the /src directory of the current folder, which needs to be modified here, so we have to set sonar.projectBaseDir.
sonar.projectBaseDirsupports relative and absolute paths.
Relative paths are calculated from the bin directory.
Note that you cannot use the path \ under windows, but must use /.(Related information)
(2)Need to set the file path of lcov.info:sonar.typescript.lcov.reportPaths.
sonar.typescript.lcov.reportPaths=coverage/lcov.info
(3)Set the host, which is the address of the sonarqube service:http://localhost:9000.
sonar.host.url=http://localhost:9000
(4)Set the account and password, but of course you can also use tokens directly from the command line.
sonar.login=admin
sonar.password=YourPassword
(5)Set target project(Project previously created in the SonarQube service).
sonar.projectKey=YourProjectKey
sonar.projectName=YourProjectName
(6)Other related settings can be found at:Analysis Parameters.
You will end up with a configuration file like this:
sonar.host.url=http://localhost:9000
sonar.login=admin
sonar.password=YourPassword
sonar.projectKey=YourProjectKey
sonar.projectName=YourProjectName
sonar.projectVersion=1.0
sonar.sourceEncoding=UTF-8
sonar.sources=src
sonar.exclusions=**/node_modules/**
sonar.tests=src
sonar.test.inclusions=**/*.spec.ts
sonar.typescript.lcov.reportPaths=coverage/lcov.info
sonar.projectBaseDir=../../src
Then go to the bin directory and execute the command:
sonar-scanner
Or
sonar-scanner -Dsonar.login=YourAuthenticationToken
It depends on whether you use the token or set the account and password in the sonar-scanner.properties file.
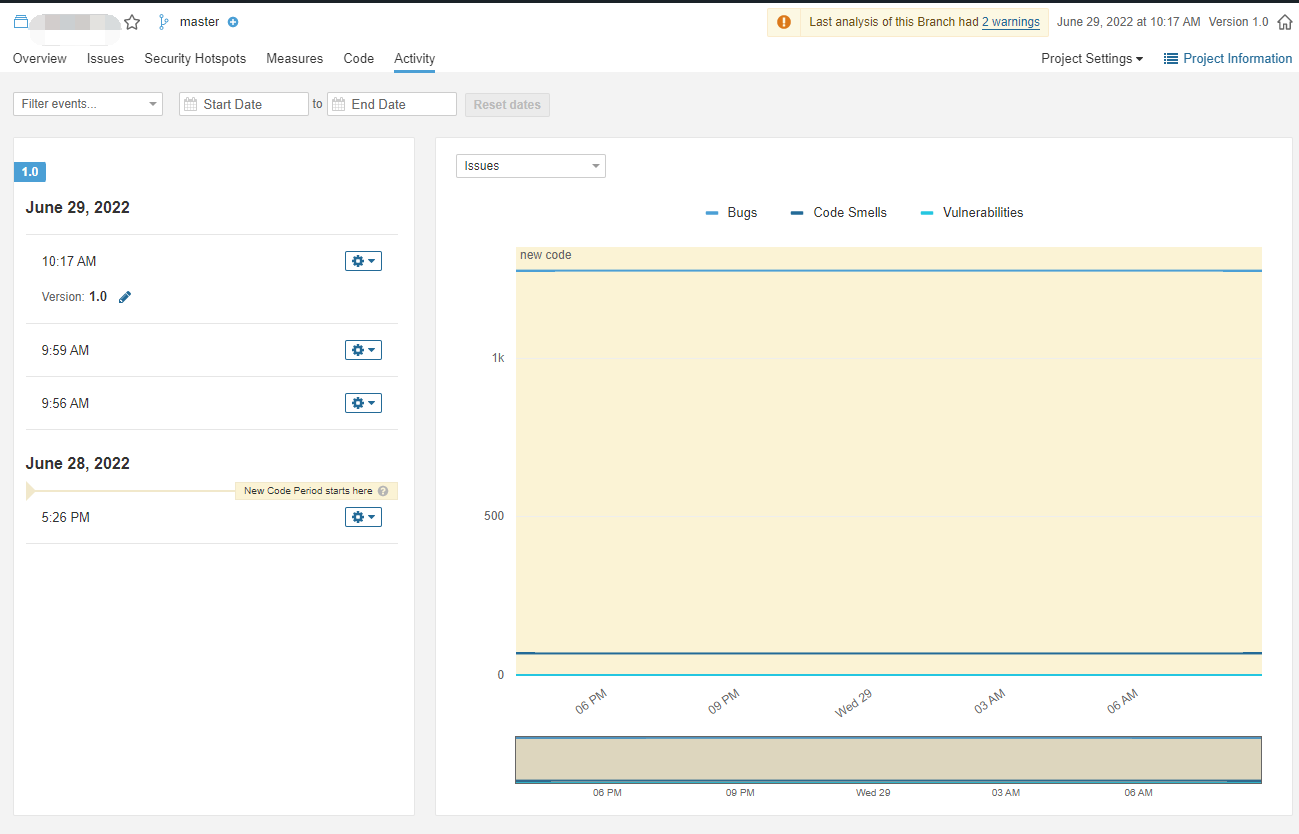
After some time, the sonar-scanner has finished its work and an activity has been generated in http://localhost:9000.
References
SonarScanner CLI
SonarScanner
sonar-scanner-cli sonarscanner.md
sonar-scanning-examples
Method 2:Installing sonarqube's components in the angular project
Install karma-sonarqube-reporter.
npm install -D karma-sonarqube-reporter
Install sonarqube-scanner.
npm install -D sonarqube-scanner
Create the sonar-project.properties file in the root directory of the Angular project. It is similar to the function of the sonar-scanner.properties file.
sonar.host.url=http://localhost:9000
sonar.login=admin
sonar.password=admin
sonar.projectKey=test-app
sonar.projectName=test-app
sonar.projectVersion=1.0
sonar.sourceEncoding=UTF-8
sonar.sources=src
sonar.exclusions=**/node_modules/**
sonar.tests=src
sonar.test.inclusions=**/*.spec.ts
sonar.typescript.lcov.reportPaths=coverage/lcov.info
Edit karma.conf file.
(1)Add plugins
require('karma-sonarqube-reporter'),、
(2)Add reporters
reporters:[‘progress’, ‘kjhtml’, ‘sonarqube’]
execute the command:
npm run sonar-scanner
References
Setting up SonarQube with Angular
Angular code coverage with Sonarqube