• 在Ubuntu下安装TensorFlow-gpu版本


         以前写过在Window7下面安装Tensorflow遇到过的一些问题,今天就来记录一下在Ubuntu安装TensorFlow方法,简直不能太简单~~~

         安装方法和Window上基本一样,CPU版本的不说了,太简单,主要来介绍下GPU版本的。

         第一步:从 清华大学镜像源 下载对应版本的Anaconda 安装包,下载下来是一个 Anaconda3-5.1.0-MacOSX-x86_64.sh 这样一个文件,在端口输入 

    bash  Anaconda3-5.1.0-MacOSX-x86_64.sh

         一直到安装完成就可以。

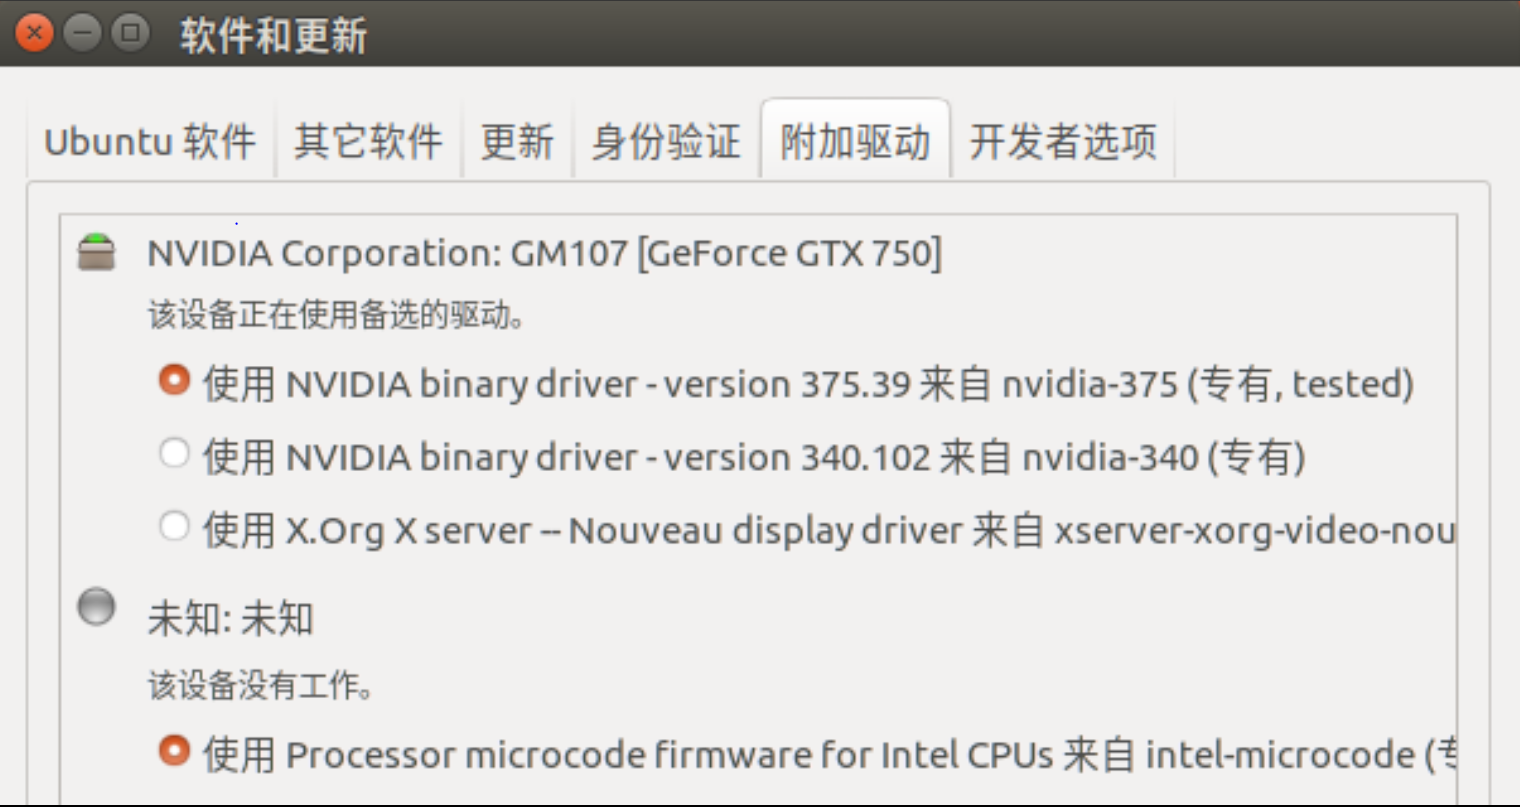
        第二部:安装显卡所对应的驱动程序,如果安装了NVIDIA的显卡,可以直接更新为它的专有驱动:

        第三步:更换镜像源,在Anaconda文件中打开端口,将conda的镜像源更换为清华大学的镜像源:

    conda config --add channels https://mirrors.tuna.tsinghua.edu.cn/anaconda/pkgs/free/
    conda config --add channels https://mirrors.tuna.tsinghua.edu.cn/anaconda/pkgs/main/
    conda config --set show_channel_urls yes

        第四步:创建一个TensorFlow的虚拟环境,然后直接安装就可以:

    conda create -n tensorflow python=3.5
    source activate tensorflow


    conda install tensorflow-gpu

       第五步:安装spyder编译环境:

    conda install spyder

       第六步:验证

    python
    import tensorflow

    如果这一步不出错的话就大功告成!


  • 相关阅读:
    POJ2182Lost Cows
    BZOJ4003: [JLOI2015]城池攻占
    POJ1635Subway tree systems
    BZOJ1005: [HNOI2008]明明的烦恼
    POJ1182 NOI2001 食物链
    栈的链式实现
    栈的数组实现
    链表ADT的实现
    #ifndef的用法
    using namespace std
  • 原文地址:https://www.cnblogs.com/Liu-xiang/p/9354763.html
Copyright © 2020-2023  润新知