Flex数据交互之Remoting
一 前言
Flex数据交互常用的有三种方式:WebService、HttpService以及Remoting。
WebService方式已在这篇文章中给出,这篇文章主要讲解以Remoting进行数据交互,Remoting是基于AMF的数据交互,速度以及性能较WebService好,是公认最有效率的方法。
二 FluorineFX
FluorineFx是一个开源库,提供了一种在.NET Framework下对Flex/Flash的远程调用过程。FluorineFx官网地址在这,FluorineFx可以在这下载。
下载安装后,会在vs2008在自动增加两处模板:FluorineFx ServicesLibrary与FluorineFx ASP.NET Web Site。


接下来演示如何利用FluorineFx进行Flex与ASP.NET数据交互。
三 ASP.NET服务器开发
(1)新建FluorineFx ServicesLibrary类库,如下图:

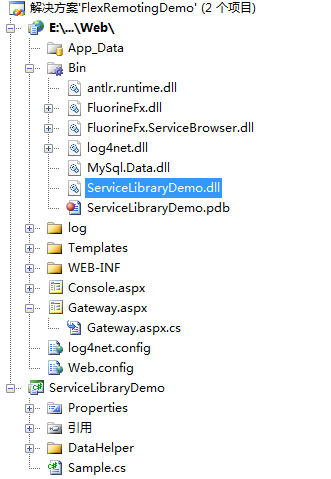
(2)在刚才建立的解决方案FlexRemotingDemo中,添加FluorineFx ASP.NET Web Site网站,如下图:

该网站会自动引入FlexRemotingDemo.dll:
在类库FlexRemotingDemo的Sample.cs文件中可以添加自己的函数:

 /// <summary>
 /// 获得监测站信息(14个监测站)
 /// </summary>
 /// <returns></returns>
  public string getStationInfo()
  {
            string json = "";
            DataTable dt = new DataTable();
            dt = helper.GetStationInfo();
            if (dt != null)
            {
                json = ConverTableToJSON(dt);
            }

            return json;
     }
将网站发布到IIS下:运行即可看到结果:

(3)修改WEB-INFflex下的services-config.xml配置文件:
|
1
2
3
4
5
6
7
8
9
10
11
12
13
14
15
16
|
<channels> <channel-definition id="my-amf" class="mx.messaging.channels.AMFChannel"> <endpoint uri="<strong><span style="color: #ff0000;">http://localhost/FlexRemotingDemo/Gateway.aspx</span></strong>" class="flex.messaging.endpoints.AMFEndpoint"/> <properties> <!-- <legacy-collection>true</legacy-collection> --> </properties> </channel-definition> <!-- <channel-definition id="my-rtmp" class="mx.messaging.channels.RTMPChannel"> <properties> <idle-timeout-minutes>20</idle-timeout-minutes> </properties> </channel-definition> --> </channels> |
四 Flex客户端开发
(1)新建Flex项目:

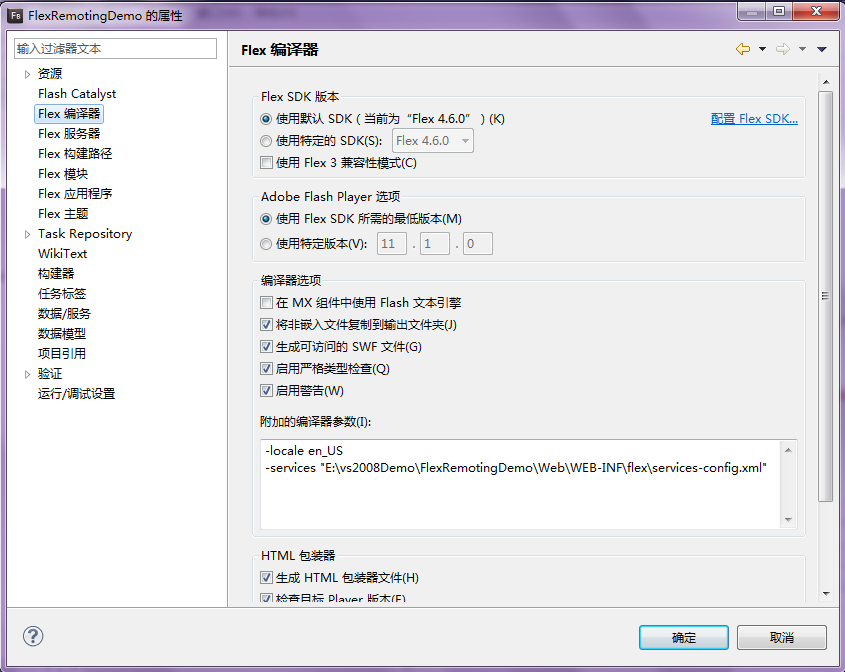
(2)配置Flex项目FlexRemotingDemo:
(3)编写程序代码:
<?xml version="1.0" encoding="utf-8"?> <s:Application xmlns:fx="http://ns.adobe.com/mxml/2009" xmlns:s="library://ns.adobe.com/flex/spark" xmlns:mx="library://ns.adobe.com/flex/mx" minWidth="955" minHeight="600">
<fx:Declarations> <mx:RemoteObject id="RO" destination="fluorine" source="ServiceLibraryDemo.Sample"> <mx:method name="getStationInfo" result="onResult(event)"/> </mx:RemoteObject> </fx:Declarations> <fx:Script> <![CDATA[ import mx.events.FlexEvent; import mx.rpc.AbstractOperation; import mx.rpc.events.ResultEvent;
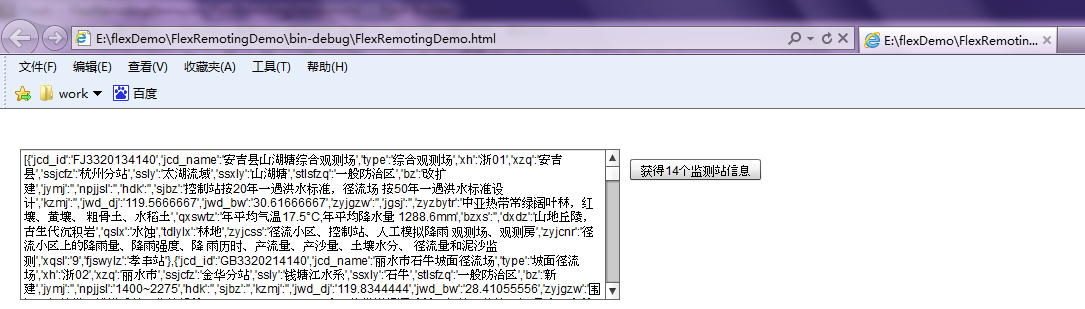
protected function btn1_clickHandler(event:MouseEvent):void { RO.getStationInfo(); } public function onResult(evt:ResultEvent):void{ txt1.text=evt.result.toString(); } ]]> </fx:Script> <s:Button id="btn1" label="获得14个监测站信息" x="630" y="50" click="btn1_clickHandler(event)"/> <s:TextArea id="txt1" x="20" y="40" width="600" />
</s:Application>
运行结果如下:
五 源码下载
源码在这下载。