安装DOCKER
1. https://docs.docker.com/engine/installation/linux/docker-ce/ubuntu/
nstall from a package
If you cannot use Docker’s repository to install Docker CE, you can download the .deb file for your release and install it manually. You will need to download a new file each time you want to upgrade Docker CE.
-
Go to https://download.docker.com/linux/ubuntu/dists/, choose your Ubuntu version, browse to
pool/stable/and chooseamd64,armhf, ors390x. Download the.debfile for the Docker version you want to install.Note: To install an edge package, change the word
stablein the URL toedge. Learn about stable and edge channels. -
Install Docker CE, changing the path below to the path where you downloaded the Docker package.
$ sudo dpkg -i /path/to/package.debThe Docker daemon starts automatically.
-
Verify that Docker CE is installed correctly by running the
hello-worldimage.$ sudo docker run hello-worldThis command downloads a test image and runs it in a container. When the container runs, it prints an informational message and exits.
Docker CE is installed and running. You need to use sudo to run Docker commands. Continue to Post-installation steps for Linux to allow non-privileged users to run Docker commands and for other optional configuration steps.
2. https://github.com/widuu/chinese_docker/blob/master/installation/ubuntu.md#Ubuntu%E5%AE%89%E8%A3%85Docker
##Ubuntu Docker可选配置
这部分主要介绍了 Docker 的可选配置项,使用这些配置能够让 Docker 在 Ubuntu 上更好的工作。
- 创建 Docker 用户组
- 调整内存和交换空间(swap accounting)
- 启用防火墙的端口转发(UFW)
- 为 Docker 配置DNS服务
###创建 Docker 用户组
docker 进程通过监听一个 Unix Socket 来替代 TCP 端口。在默认情况下,docker 的 Unix Socket属于root用户,当然其他用户可以使用sudo方式来访问。因为这个原因, docker 进程就一直是root用户运行的。
为了在使用 docker 命令的时候前边不再加sudo,我们需要创建一个叫 docker 的用户组,并且为用户组添加用户。然后在 docker 进程启动的时候,我们的 docker 群组有了 Unix Socket 的所有权,可以对 Socket 文件进行读写。
注意:
docker群组就相当于root用户。有关系统安全影响的细节,请查看 Docker 进程表面攻击细节
创建 docker 用户组并添加用户
-
使用具有
sudo权限的用户来登录你的Ubuntu。在这过程中,我们假设你已经登录了Ubuntu。
-
创建
docker用户组并添加用户。$ sudo usermod -aG docker ubuntu -
注销登录并重新登录
这里要确保你运行用户的权限。
-
验证
docker用户不使用sudo命令开执行Docker$ docker run hello-world
创建用户组docker,可以避免使用sudo
将docker和wxl(王小雷用户名,在创建主机时默认用户名称是ubuntu)添加到一个组内
#默认是ubuntu用户
#wxl@wxl-pc:~$ sudo usermod -aG docker ubuntu
# 将wxl的用户添加到docker用户组中,如果多个用户需要用空格隔开 如 wxl wxl1 wxl2用户
wxl@wxl-pc:~$ sudo usermod -aG docker wxl
注意需要重新启动计算机或者注销用户再登入,才能生效。这样就不需要使用sudo命令了。
那么,如何将wxl从docker用户组移除?
sudo gpasswd -d wxl docker
如何删除刚才创建的docker用户组?
sudo groupdel docker
如何创建和删除新用户,如用户newuser
sudo adduser newuser
sudo userdel newuser
###调整内存和交换空间(swap accounting)
当我们使用 Docker 运行一个镜像的时候,我们可能会看到如下的信息提示:
WARNING: Your kernel does not support cgroup swap limit. WARNING: Your
kernel does not support swap limit capabilities. Limitation discarded.、
为了防止以上错误信息提示的出现,我们需要在系统中启用内存和交换空间。我们需要修改系统的 GUN GRUB (GNU GRand Unified Bootloader) 来启用内存和交换空间。开启方法如下:
-
使用具有
sudo权限的用户来登录你的Ubuntu。 -
编辑
/etc/default/grub文件 -
设置
GRUB_CMDLINE_LINUX的值如下:GRUB_CMDLINE_LINUX="cgroup_enable=memory swapaccount=1" -
保存和关闭文件
-
更新 GRUB
$ sudo update-grub -
重启你的系统。
1.5.如何更新Docker
wxl@wxl-pc:~$ sudo apt-get upgrade docker-engine1.6.如何卸载Docker
wxl@wxl-pc:~$ sudo apt-get purge docker-engine2.运行一个web应用–Python Flask
2.1.docker简单命令汇总如下:
- docker run ubuntu /bin/echo “hello world” -运行ubuntu镜像并且在命令窗口输出”hello world”
- docker run -t -i ubuntu /bin/bash -进入ubuntu这个镜像的bash命令窗口,可以操作本镜像ubuntu的命令如ls
- docker ps - 列出当前运行的容器
- docker logs - 展示容器的标准的输出(比如hello world)
- docker stop - 停止正在运行的容器
- docker version -可以查看守护的进程,docker版本以及go版本(docker本身是用go语言写的)
总结,可以看出docker的命令一般为
[sudo] docker [subcommand] [flags] [arguments]
如docker run -i -t ubuntu /bin/bash
3.GPU需+额外:https://medium.com/@gooshan/for-those-who-had-trouble-in-past-months-of-getting-google-s-tensorflow-to-work-inside-a-docker-9ec7a4df945b
https://github.com/NVIDIA/nvidia-docker
4. 安装nvidia-docker
http://blog.csdn.net/u011987514/article/details/70943378
- # Install nvidia-docker and nvidia-docker-plugin
- wget -P /tmp https://github.com/NVIDIA/nvidia-docker/releases/download/v1.0.1/nvidia-docker_1.0.1-1_amd64.deb
- sudo dpkg -i /tmp/nvidia-docker*.deb && rm /tmp/nvidia-docker*.deb
- zcw@ubuntu:~# mkdir docker
- zcw@ubuntu:~# vim /etc/default/docker
DOCKER_OPTS="--graph=/home/docker"
service docker restart
- zcw@ubuntu:~# mkdir -p /etc/systemd/system/docker.service.d
- zcw@ubuntu:~# cat /etc/systemd/system/docker.service.d/Using_Environment_File.conf
[plain] view plain copy
- EnvironmentFile=-/etc/default/docker
- ExecStart=
- ExecStart=/usr/bin/docker daemon -H fd:// $DOCKER_OPTS
- zcw@ubuntu:~# systemctl daemon-reload
- zcw@ubuntu:~# service docker restart
- zcw@ubuntu:~# ps -ef|grep docker
You need at least a 384.xx series driver for CUDA 9. NVIDIA recommends 384.81 or later. If you're installing from deb packages, note that the package name is different for nvidia-384 versus nvidia-375 in order that the major driver version upgrade is intentional rather than automatic.
Alternatively, you can also use a CUDA 8.0 image and not upgrade your driver:
nvidia-docker run --rm nvidia/cuda:8.0-devel nvidia-smi3. Install Docker and nvidia-docker
# Install docker
curl -sSL https://get.docker.com/ | sh
The docker container needs access to the GPU devices. For this purpose use `nvidia-docker` which is a wrapper around the standard `docker` command.
# Install nvidia-docker and nvidia-docker-plugin
wget -P /tmp https://github.com/NVIDIA/nvidia-docker/releases/download/v1.0.0-rc.3/nvidia-docker_1.0.0.rc.3-1_amd64.deb
sudo dpkg -i /tmp/nvidia-docker*.deb && rm /tmp/nvidia-docker*.deb
# Test nvidia-smi.
nvidia-docker run --rm nvidia/cuda nvidia-smi
You might need to use `nvidia-docker` with sudo!
安装Tensorflow
http://blog.csdn.net/cq361106306/article/details/54094517
http://blog.csdn.net/freewebsys/article/details/70237003
http://blog.csdn.net/dream_an/article/details/55520205
下载tensorflow-gpu版本的源
docker pull daocloud.io/daocloud/tensorflow:0.11.0-gpu
先查下你有几个GPU设备
[root@XXX ~]# ls -la /dev | grep nvidia
crw-rw-rw-.  1 root root    195,   0 Sep 16 13:49 nvidia0
crw-rw-rw-.  1 root root    195, 255 Sep 16 13:49 nvidiactl
crw-rw-rw-.  1 root root    247,   0 Sep 16 13:54 nvidia-uvm
然后再查你的docker镜像
y@y:~$ sudo docker images
[sudo] password for y:
REPOSITORY                        TAG                 IMAGE ID            CREATED             SIZE
daocloud.io/daocloud/tensorflow   0.11.0-gpu          dd645f420f1d        8 weeks ago         2.713 GB
daocloud.io/daocloud/tensorflow   0.10.0-devel-gpu    fa886c09638d        3 months ago        5.014 GB
hello-world
然后就可以启动咯
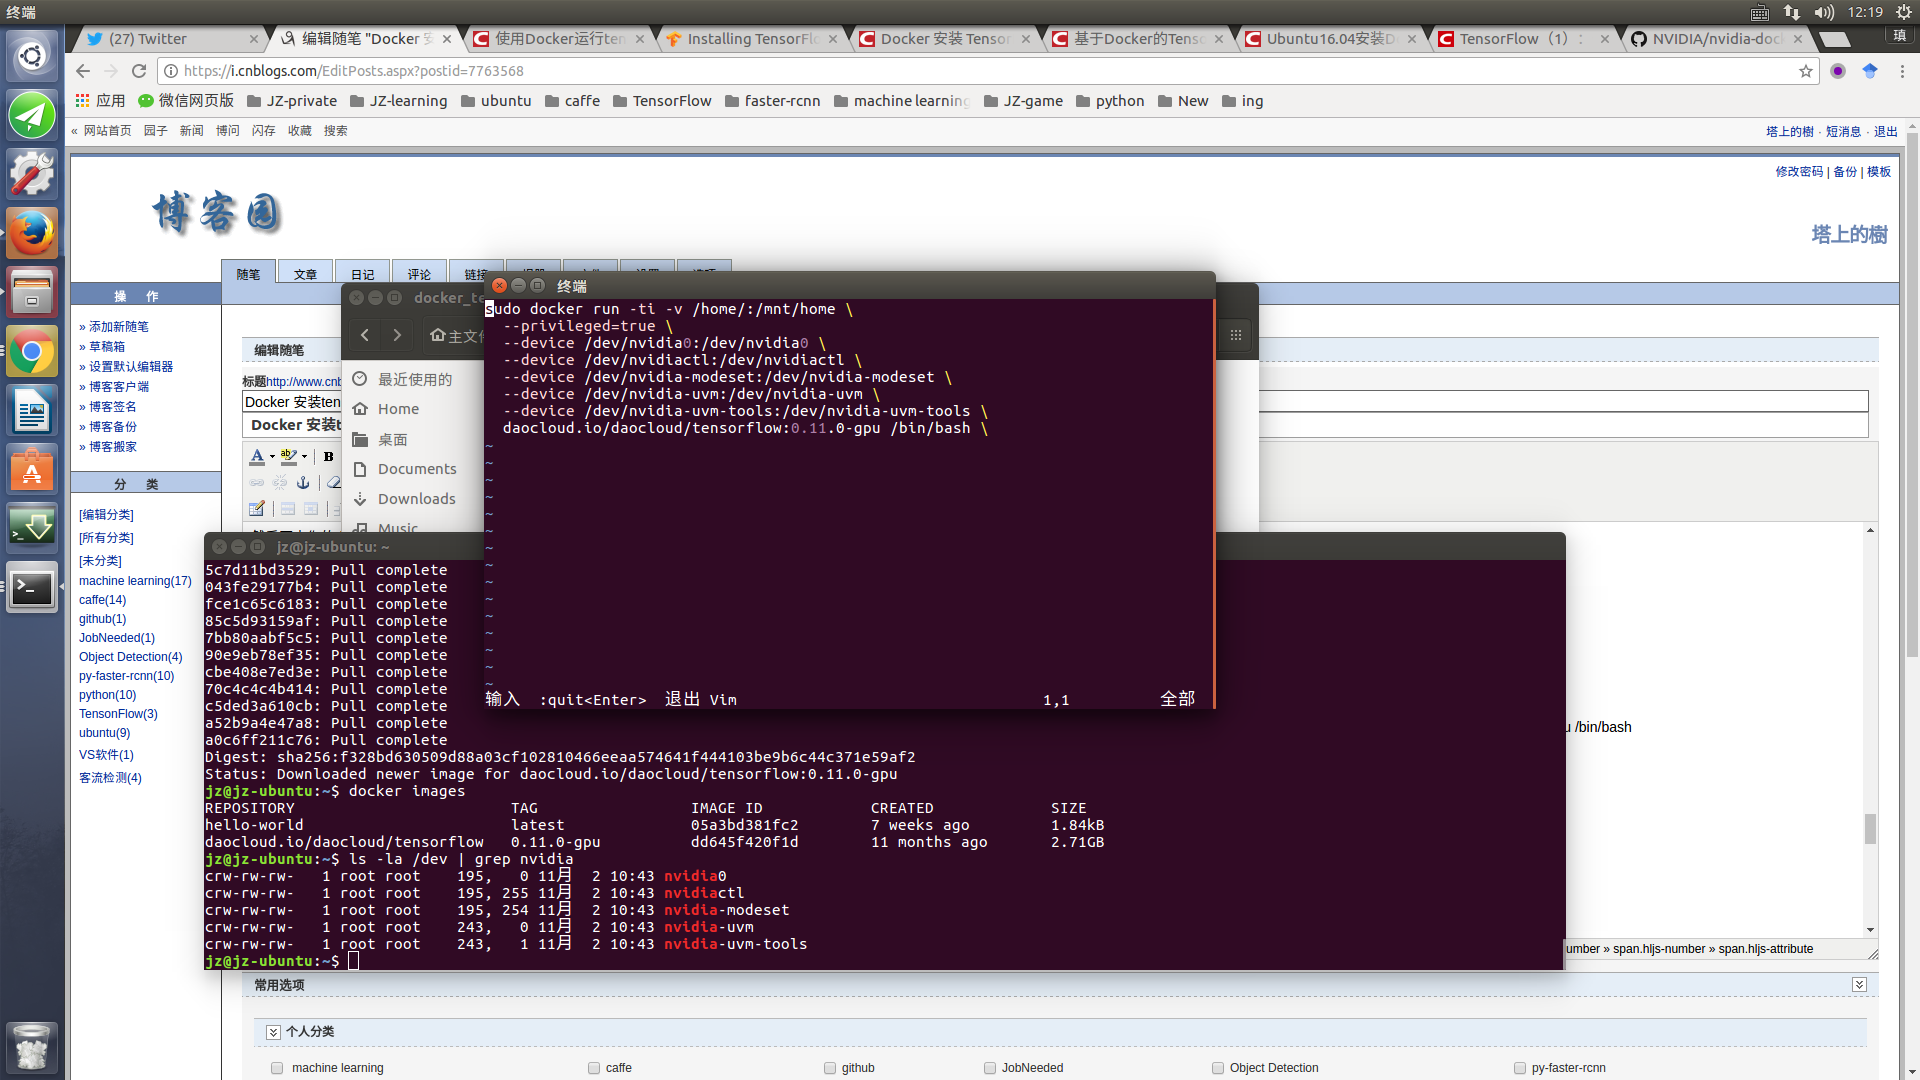
sudo docker run -ti -v /home/:/mnt/home --privileged=true --device /dev/nvidia0:/dev/nvidia0 --device /dev/nvidiactl:/dev/nvidiactl --device /dev/nvidia-uvm:/dev/nvidia-uvm daocloud.io/daocloud/tensorflow:0.11.0-gpu /bin/bash

上面这句有点长把它写到docker.sh文件,然后
sh docker.sh完成。 上面的意思是把本地的/home映射到docker的/mnt目录
以及各种显卡设备也映射进去
主机保存镜像为新版本
sudo docker ps -l
y@y:~$ sudo docker ps -l
CONTAINER ID        IMAGE                                        COMMAND             CREATED             STATUS              PORTS                NAMES
a1f2ac36a2c9        daocloud.io/daocloud/tensorflow:0.11.0-gpu   "/bin/bash"         10 minutes ago      Up 10 minutes       6006/tcp, 8888/tcp
把a1f2ac36a2c9这个名字记住
然后
docker commit a1f2ac36a2c9 新名字OK了
1. https://medium.com/@gooshan/for-those-who-had-trouble-in-past-months-of-getting-google-s-tensorflow-to-work-inside-a-docker-9ec7a4df945b
4. Run a Tensorflow GPU-enable Docker container
The container itself is started as pointed out in the official documentation as follows:
# Run container
nvidia-docker run -d --name <some name> -p 8888:8888 -p 6006:6006 gcr.io/tensorflow/tensorflow:latest-gpu
# Log in
nvidia-docker exec -it <some name> bash
e.g.:
nvidia-docker run -d --name tf1 -p 8888:8888 -p 6006:6006 gcr.io/tensorflow/tensorflow:latest-gpu
nvidia-docker exec -it tf1 bash
Note: Port 8888 is for ipython notebooks and port 6006 is for TensorBoard.
You can test if everything is alright by running this Python script.
https://www.tensorflow.org/install/install_linux#InstallingDocker
GPU support
Prior to installing TensorFlow with GPU support, ensure that your system meets all NVIDIA software requirements. To launch a Docker container with NVidia GPU support, enter a command of the following format:
$ nvidia-docker run -it -p hostPort:containerPort TensorFlowGPUImage
where:
- -p hostPort:containerPort is optional. If you plan to run TensorFlow programs from the shell, omit this option. If you plan to run TensorFlow programs as Jupyter notebooks, set both hostPort and
containerPortto8888. - TensorFlowGPUImage specifies the Docker container. You must specify one of the following values:
- gcr.io/tensorflow/tensorflow:latest-gpu, which is the latest TensorFlow GPU binary image.
- gcr.io/tensorflow/tensorflow:latest-devel-gpu, which is the latest TensorFlow GPU Binary image plus source code.
- gcr.io/tensorflow/tensorflow:version-gpu, which is the specified version (for example, 0.12.1) of the TensorFlow GPU binary image.
- gcr.io/tensorflow/tensorflow:version-devel-gpu, which is the specified version (for example, 0.12.1) of the TensorFlow GPU binary image plus source code.
We recommend installing one of the latest versions. For example, the following command launches the latest TensorFlow GPU binary image in a Docker container from which you can run TensorFlow programs in a shell:
$ nvidia-docker run -it gcr.io/tensorflow/tensorflow:latest-gpu bash
The following command also launches the latest TensorFlow GPU binary image in a Docker container. In this Docker container, you can run TensorFlow programs in a Jupyter notebook:
$ nvidia-docker run -it -p 8888:8888 gcr.io/tensorflow/tensorflow:latest-gpu
The following command installs an older TensorFlow version (0.12.1):
$ nvidia-docker run -it -p 8888:8888 gcr.io/tensorflow/tensorflow:0.12.1-gpu
Docker will download the TensorFlow binary image the first time you launch it. For more details see the TensorFlow docker readme.
Next Steps
You should now validate your installation.
使用:Docker
http://songhuiming.github.io/pages/2017/02/25/an-zhuang-dockerhe-tensorflow/
4. 镜像管理
4.0. 下载镜像
docker pull image-name
4.1. 查看本地镜像
docker images
4.2. 查看运行的容器
查看active镜像:  docker ps
查看所有镜像:    docker ps -a
查看最近的镜像:   docker ps -l
4.3. 删除镜像 删除容器
docker rmi image-name

docker rm <container id>
4.4. 在repo里搜索镜像
docker search [image-name]
4.5. 停止镜像
docker stop container-id
4.6. 停止并删除所有容器
docker stop $(docker ps -a -q)
docker rm $(docker ps -a -q)
5.4. 退出
exit
To restart the exited container:
docker start -a -i `docker ps -q -l`
docker start start a container (requires name or ID)
-a attach to container
-i interactive mode
docker ps List containers
-q list only container IDs
-l list only last created container
5.5. How do I install new libraries in Docker?
Therre are two ways to do this:
First methodd: Modify the Dockerfile directly to install new or update your existing libraries. You will need to do a docker build after you do this. If you just want to update to a newer version of the DL framework(s), you can pass them as CLI parameter using the --build-arg tag (see for details). The framework versions are defined at the top of the Dockerfile. For example, docker build -t shmhub/dl-docker:cpu -f Dockerfile.cpu --build-arg TENSORFLOW_VERSION=1.2.0 .
Second mthodd: you can install or upgrade in the container. After it is done, exit the cocntainer and do a commit as introducte below.
5.5. 向docker image提交container change
docker commit -m "install vim wget on ubuntu" -a "author: shm" 7de2c97f7a85 shm/ubuntu_custom
这里7de2c97f7a85是image id.也就是在bash下面看到的root@后面的id: root@7de2c97f7a85. 这时候比较前后的镜像,就会发现commit以后多了一个镜像
shm@ubuntu:~$ docker images
REPOSITORY              TAG                 IMAGE ID            CREATED             SIZE
tensorflow/tensorflow   latest              ea40dcc45724        2 weeks ago         1.03 GB
ubuntu                  latest              f49eec89601e        5 weeks ago         129 MB

shm@ubuntu:~$ docker commit -m "install vim wget on ubuntu" -a "author: shm" 7de2c97f7a85 shm/ubuntu_custom
sha256:5ed742f690e11c65db83936847c7c5659c5834f6b2c93b52d110455936e6a224

shm@ubuntu:~$ docker images
REPOSITORY              TAG                 IMAGE ID            CREATED             SIZE
shm/ubuntu_custom       latest              5ed742f690e1        12 seconds ago      647 MB
tensorflow/tensorflow   latest              ea40dcc45724        2 weeks ago         1.03 GB
ubuntu                  latest              f49eec89601e        5 weeks ago         129 MB
5.6. 向仓库提交镜像
首先登陆
docker login -u docker-username
然后push
5.6.1. list the image and get the tag id
shm@shm-xps9550:~/projects/dl_lessons/courses-master/deeplearning1/nbs$ `docker images`
REPOSITORY          TAG                 IMAGE ID            CREATED             SIZE
shmhub/dl-docker    cpu                 0f1e40d1bed8        12 days ago         9.13 GB
ubuntu              16.04               6a2f32de169d        13 days ago         117 MB
5.6.2. tag the giage with the registoryhost
docker tag 0f1e40d1bed8 pinseng/dl-docker
5.6.3. push the image to the repo
docker push docker-username/docker-image-name
docker push pinseng/dl-docker
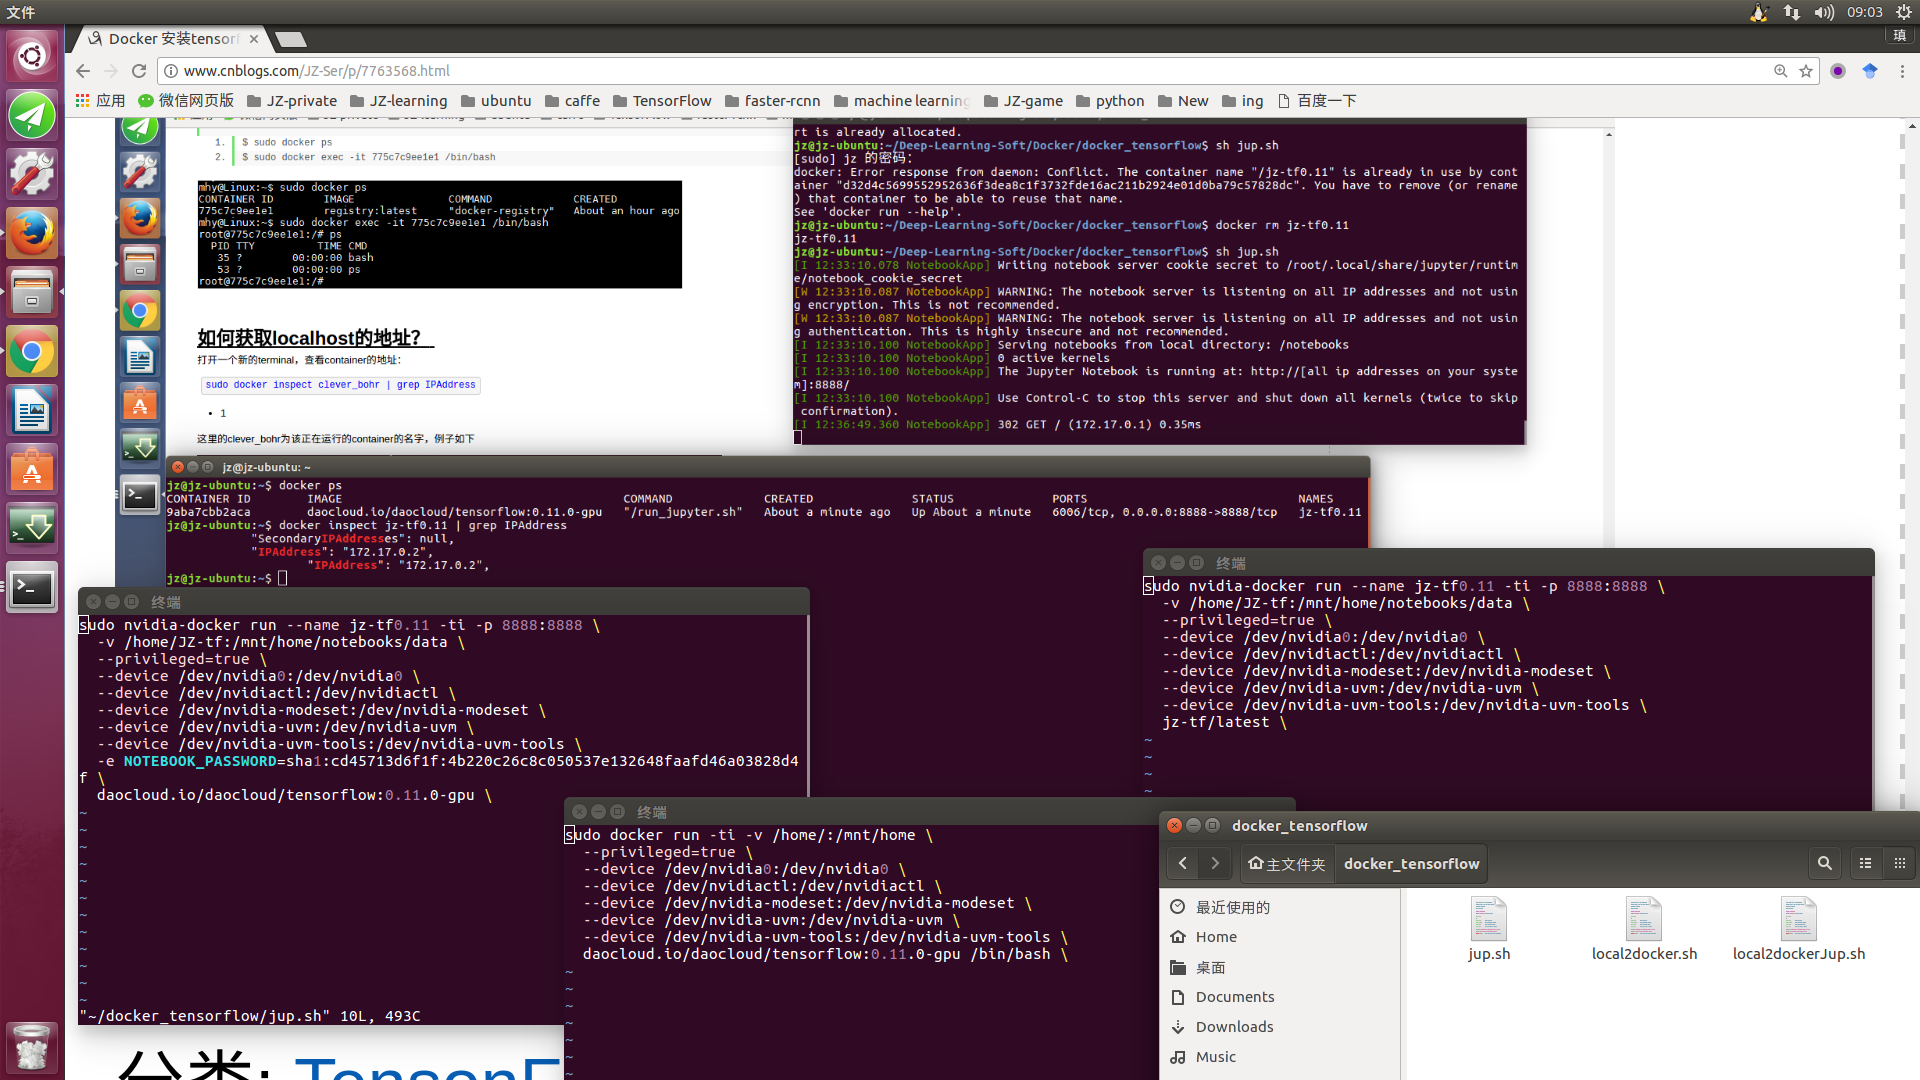
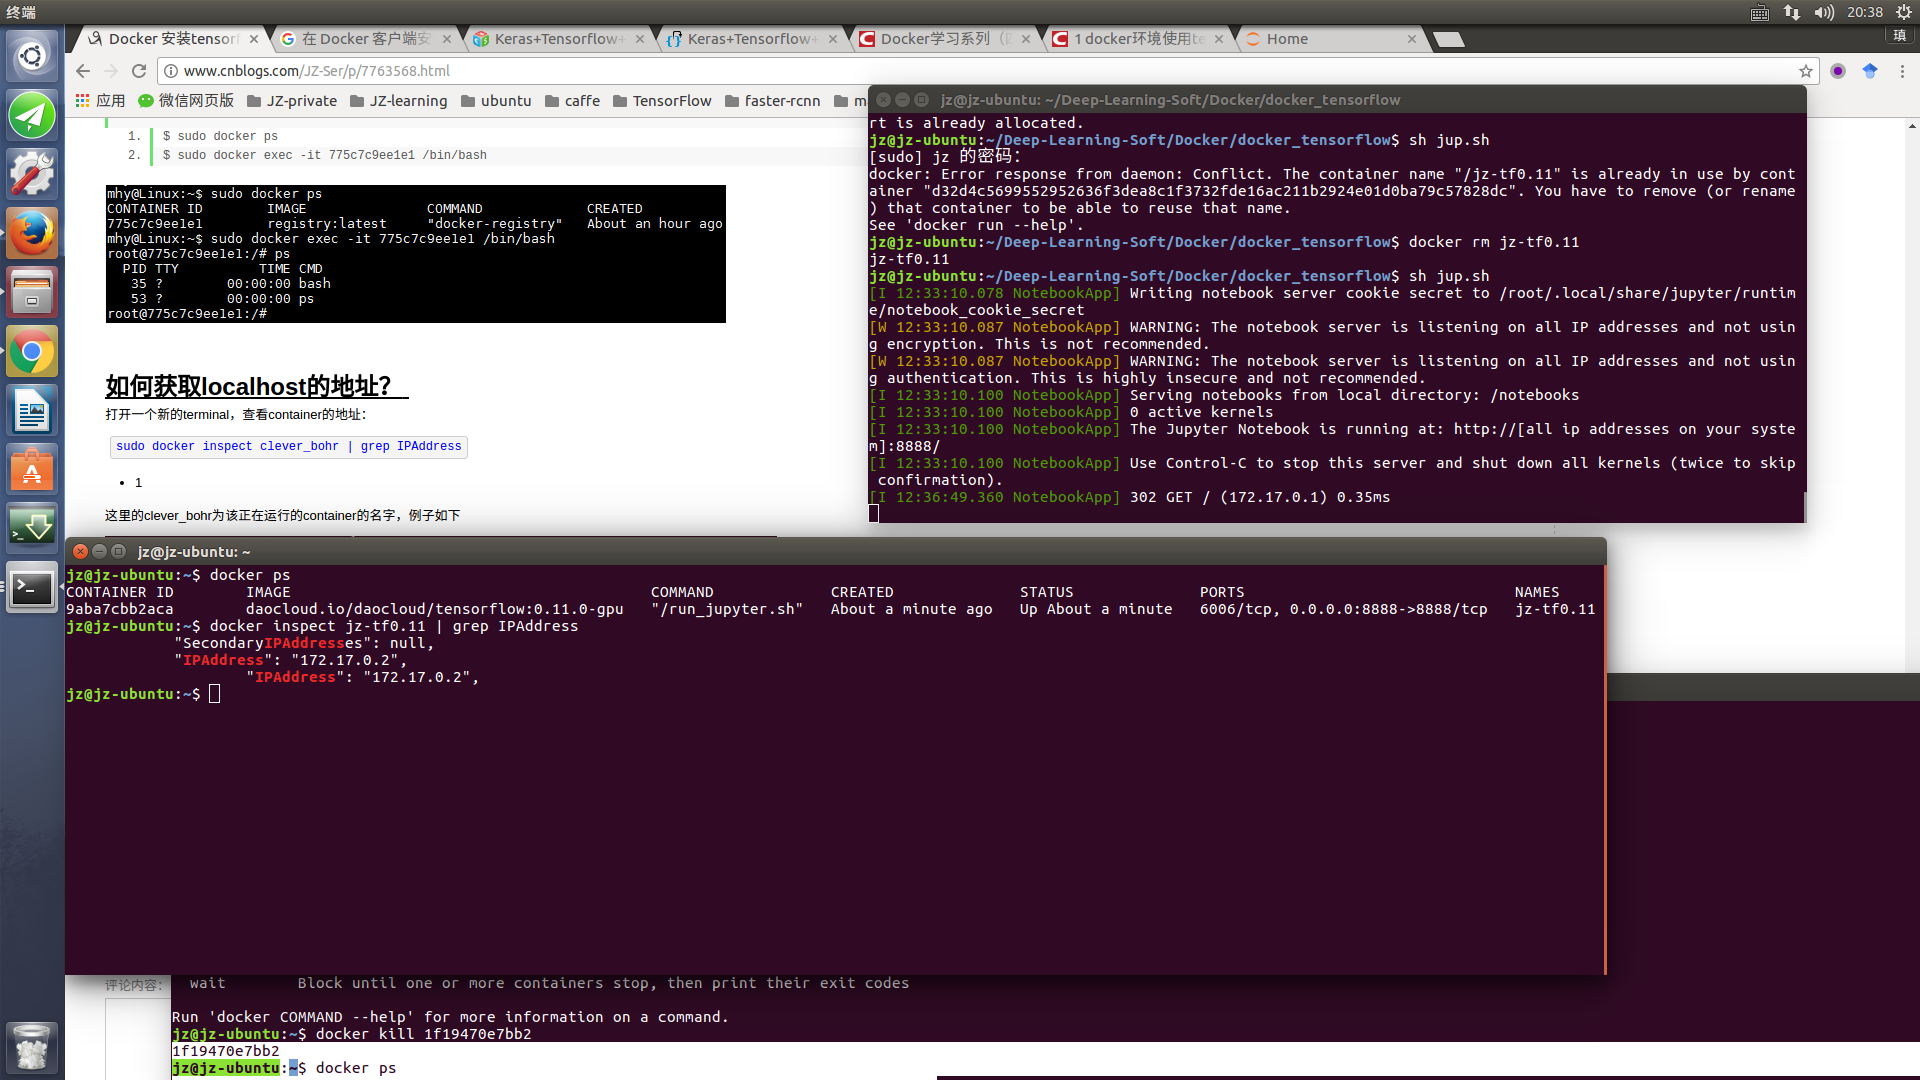
四、使用docker exec进入Docker容器
除了上面几种做法之外,docker在1.3.X版本之后还提供了一个新的命令exec用于进入容器,这种方式相对更简单一些,下面我们来看一下该命令的使用:
- $ sudo docker exec --help

接下来我们使用该命令进入一个已经在运行的容器
- $ sudo docker ps
- $ sudo docker exec -it 775c7c9ee1e1 /bin/bash

如何获取localhost的地址?
打开一个新的terminal,查看container的地址:
sudo docker inspect clever_bohr | grep IPAddress- 1
这里的clever_bohr为该正在运行的container的名字,例子如下

在浏览器中输入:172.17.0.6:8888
http://blog.csdn.net/tina_ttl/article/details/51417358
http://[all ip addresses on your system]:8888/==========================>http://172.17.0.2:8888/
=========================================================================================================================================================================================================2017/11/8更=====
docker pull tensorflow/tensorflow:nightly-gpu-py3

======================================docker run bash版本========================================
===========================================================本地ipython3 notebook=================================================
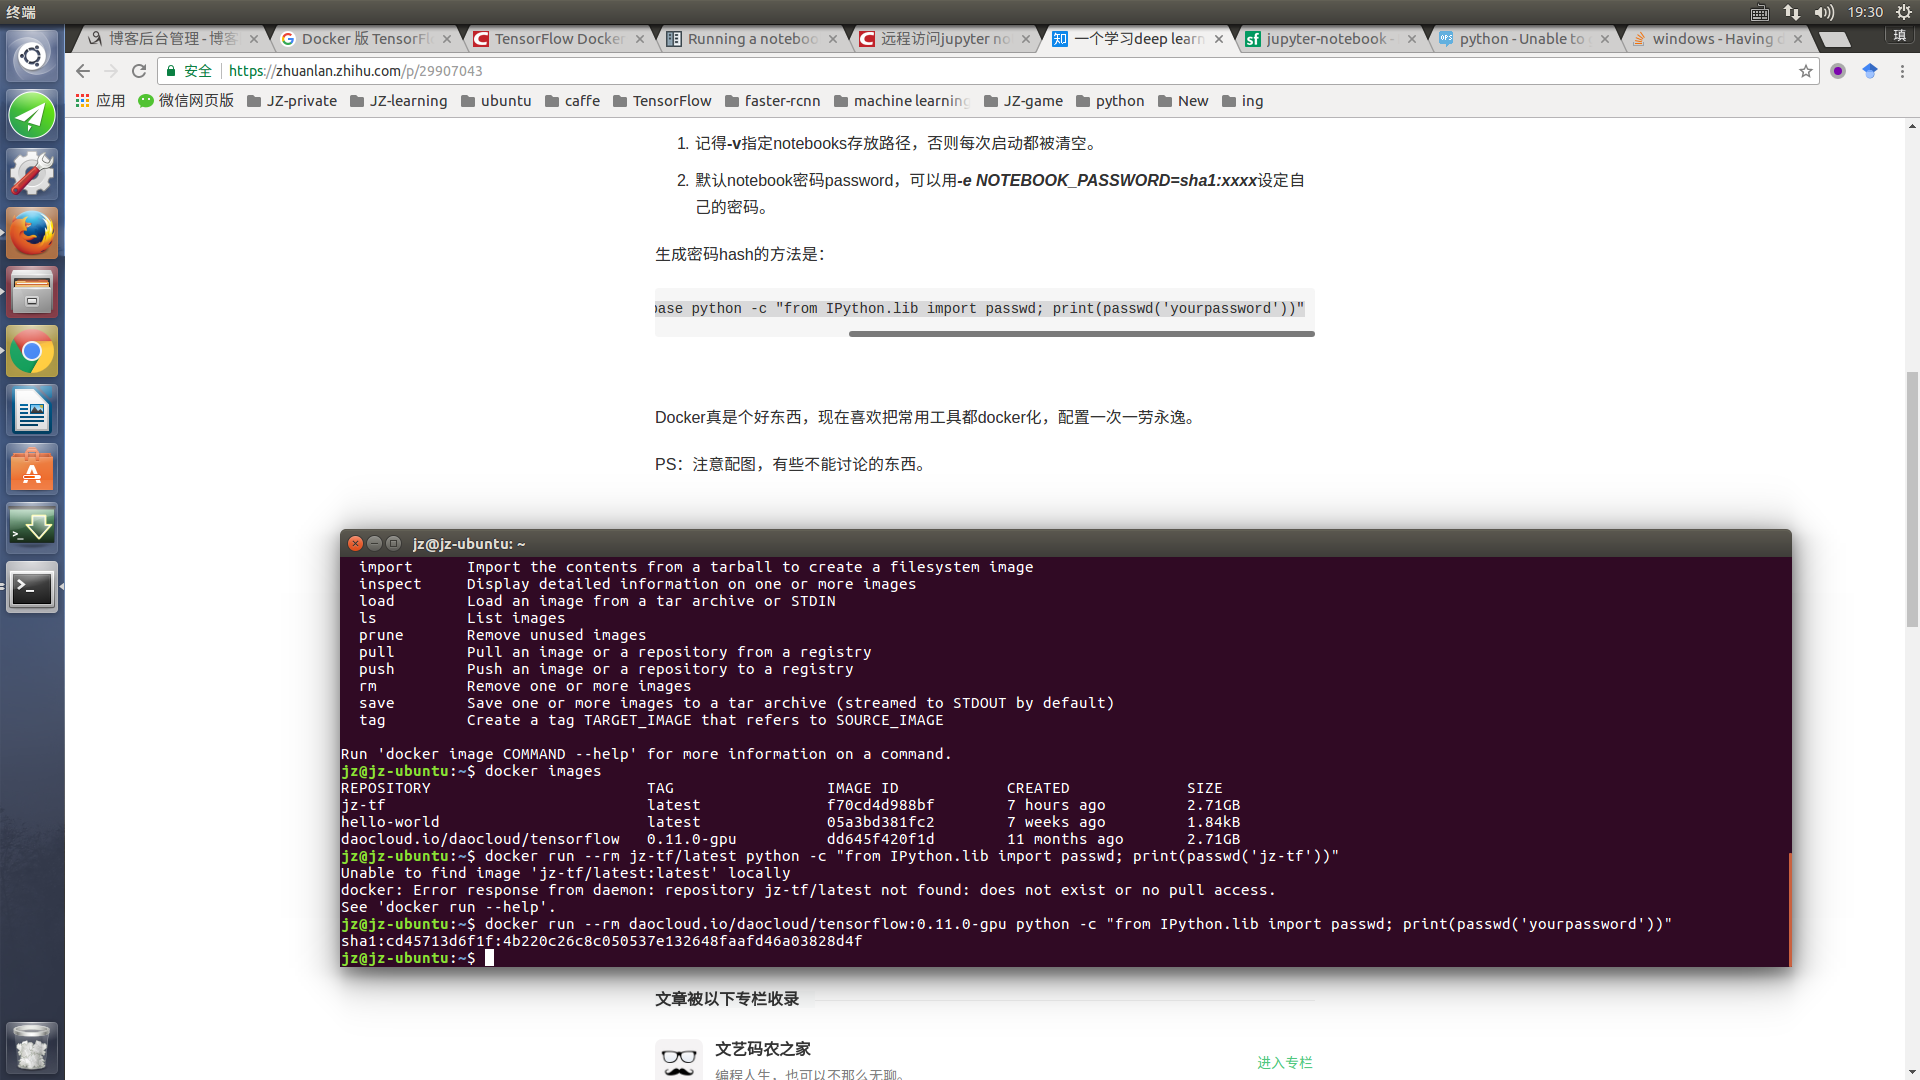
=======================================================make password==================================================
========================================================use docker-tf jupyter .sh code========================================================