【服务端】
第一步:建立一个Web项目
第二步:填充CXF jar包
第三步:创建接口及服务类
【工程截图(对比之前的WebService_CXF_Server00)】
【applicationContext.xml】
<?xml version="1.0" encoding="UTF-8"?>
<beans xmlns="http://www.springframework.org/schema/beans"
    xmlns:xsi="http://www.w3.org/2001/XMLSchema-instance" xmlns:jaxws="http://cxf.apache.org/jaxws"
    xmlns:jaxrs="http://cxf.apache.org/jaxrs" xmlns:cxf="http://cxf.apache.org/core"
    xsi:schemaLocation="http://www.springframework.org/schema/beans
                            http://www.springframework.org/schema/beans/spring-beans.xsd
                            http://cxf.apache.org/jaxrs http://cxf.apache.org/schemas/jaxrs.xsd
                            http://cxf.apache.org/jaxws http://cxf.apache.org/schemas/jaxws.xsd
                            http://cxf.apache.org/core http://cxf.apache.org/schemas/core.xsd">

<!-- service -->
<bean id="weatherInterface" class="com.Higgin.ws.service.WeatherInterfaceImpl"></bean>

<!--
    发布服务
    使用jaxws:server和jaxws:endpoint可以发布服务
    WebService地址=Tomcat地址值+CXF Servlet的路径+ /weather
-->
<jaxws:server address="/weather" serviceClass="com.Higgin.ws.service.WeatherInterface">
    <jaxws:serviceBean>
        <ref bean="weatherInterface"/>
    </jaxws:serviceBean>
</jaxws:server>

</beans>
【web.xml】
<?xml version="1.0" encoding="UTF-8"?>
<web-app xmlns:xsi="http://www.w3.org/2001/XMLSchema-instance" xmlns="http://java.sun.com/xml/ns/javaee" xsi:schemaLocation="http://java.sun.com/xml/ns/javaee http://java.sun.com/xml/ns/javaee/web-app_3_0.xsd" id="WebApp_ID" version="3.0">
  <display-name>WebService_CXF_Spring_Server00</display-name>
  <welcome-file-list>
    <welcome-file>index.jsp</welcome-file>
  </welcome-file-list>

  <!-- 加载Spring容器 -->
  <context-param>
    <param-name>contextConfigLocation</param-name>
    <param-value>/WEB-INF/classes/applicationContext.xml</param-value>
  </context-param>
  <listener>
    <listener-class>org.springframework.web.context.ContextLoaderListener</listener-class>
  </listener>


  <!-- CXF的Servlet -->
  <servlet>
    <servlet-name>cxf</servlet-name>
    <servlet-class>org.apache.cxf.transport.servlet.CXFServlet</servlet-class>
    <load-on-startup>1</load-on-startup>
  </servlet>
  <!-- 本系统的WebService路径必须以/ws/开头 -->
  <servlet-mapping>
    <servlet-name>cxf</servlet-name>
    <url-pattern>/ws/*</url-pattern>
  </servlet-mapping>


</web-app>
【启动Web容器】
访问 http://localhost:8080/WebService_CXF_Spring_Server00/ws

接着访问 http://localhost:8080/WebService_CXF_Spring_Server00/ws/weather?wsdl

可见WebService服务端启动正常。
【测试注意】
因为Spring和CXF整合将WebService通过TomCat发布,WebService和应用程序共用一个端口是8080。
测试WebService和应用程序(JSP)是否可以共存(都可以访问)
正式上线使用80端口。
【客户端】
【生成客户端代码】
首先,使用利用WebService的wsdl2java工具生成客户端代码:

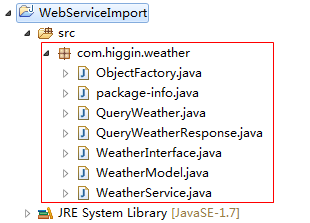
【客户端工程截图】

【applicationContext.java】
<?xml version="1.0" encoding="UTF-8"?>
<beans xmlns="http://www.springframework.org/schema/beans"
    xmlns:xsi="http://www.w3.org/2001/XMLSchema-instance" xmlns:jaxws="http://cxf.apache.org/jaxws"
    xmlns:jaxrs="http://cxf.apache.org/jaxrs" xmlns:cxf="http://cxf.apache.org/core"
    xsi:schemaLocation="http://www.springframework.org/schema/beans
                            http://www.springframework.org/schema/beans/spring-beans.xsd
                            http://cxf.apache.org/jaxrs http://cxf.apache.org/schemas/jaxrs.xsd
                            http://cxf.apache.org/jaxws http://cxf.apache.org/schemas/jaxws.xsd
                            http://cxf.apache.org/core http://cxf.apache.org/schemas/core.xsd">
    <!--
        使用<jaxws:clietn>调用服务端
        jaxws:client内部使用JaxWsProxyFactoryBean方式
        serviceClass:指定portType地址(需要使用wsdl2java工具生成)
    -->
    <jaxws:client id="weatherClient" address="http://localhost:8080/WebService_CXF_Spring_Server00/ws/weather?wsdl"
        serviceClass="com.higgin.weather.WeatherInterface">
    </jaxws:client>
</beans>
【ClientTest.java】
package com.higgin.ws.cxf;

import java.text.SimpleDateFormat;
import java.util.Date;
import java.util.List;
import org.junit.Before;
import org.junit.Test;
import org.springframework.context.ApplicationContext;
import org.springframework.context.support.ClassPathXmlApplicationContext;
import com.higgin.weather.WeatherInterface;
import com.higgin.weather.WeatherModel;

public class ClientTest {
    private ApplicationContext applicationContext;

    @Before
    public void before(){
        applicationContext=new ClassPathXmlApplicationContext("applicationContext.xml");
    }

    @Test
    public void testCxfSpringClient(){
        //从Spring容器中取出portType
        WeatherInterface weatherInterface=(WeatherInterface) applicationContext.getBean("weatherClient");

        //调用portType方法
        List<WeatherModel> list=weatherInterface.queryWeather("杭州");

        for(WeatherModel weatherModel:list){
            System.out.println(weatherModel.getDetail());
            Date date=weatherModel.getDate().toGregorianCalendar().getTime();
            System.out.println(new SimpleDateFormat("yyyy-MM-dd").format(date));
            System.out.println(weatherModel.getTemperatureMax());
            System.out.println(weatherModel.getTemperatureMin());
        }

    }
}
【运行结果】

【总结:使用jaxws实现SOAP1.1、SOAP1.2】
方式一:
CXF编程实现:
1.使用jaxwsServerFactoryBean发布WebService服务端。
需要设置:
jaxwsServerFactoryBean.setAddress("WebService地址");
jaxwsServerFactoryBean.setServiceClass("porType类路径"); //由程序员编写的
jaxwsServerFactoryBean.setServiceBean("portType类对象");
jaxwsServerFactoryBean.create(); //发布一个服务
2.使用jaxwsProxyFactory实现客户端调用WebService服务
jaxwsServerFactoryBean.setAddress("WebService的wsdl地址");
jaxwsServerFactoryBean.setServiceClass("portType路径"); //portType是wsdl2java工具生成
jaxwsServerFactoryBean.setCreate(); //创建portType对象
方法二:
CXF和Spring整合开发服务端和客户端。
1.使用<jaxws:Server>发布WebService服务端
在<jaxws:Server>设置Address、serviceClass、serviceBean
2.使用<jaxws:Client>调用WebService服务
在<jaxws:Server>设置Address、serviceClass