1,AOP简介
Aspect Oriented Programming 面向切面编程。AOP还是以OOP为基础,只不过将共同逻辑封装为组件,然后通过配置的方式将组件动态切入到原有组件中。这样做的有点有:可以在不修改原有组件功能代码的基础上,对组件进行扩充,对公共需要和传统业务进行解耦。
2,语法
1.切面组件(加什么功能?) Aspect
在组件中寻找共通位置和时机,将追加功能切入到原有组件中。追加的功能组件一般被称为切面组件。
2. 切入点(给谁加?) Pointcut
切入点用于指定切入目标组件或方法。 Spring 提供了多种表达式,下面介绍方法方法限定表达式、类型限定表达式(使用的最多)、Bean名称限定表达式
方法限定表达式
execution( 修饰符? 返回类型 方法名 ( 参数列表 )  抛出异常? )
// 所有以 find 开头的方法要被切入追加功能
execution(* find*(..))
//DeptService 类中所有方法要切入追加功能
execution(* cn.xdl.service.DeptService.*(..))
//cn.xdl.service 包下所有类所有方法
execution(* cn.xdl.service.*.*(..))
//cn.xdl.service 包及子包下所有类所有方法
execution(* cn.xdl.service..*.*(..))
类型限定表达式
within( 类型 )
//DeptService 组件所有方法要被切入追加功能
within(cn.xdl.service.DeptService)
//cn.xdl.service 包下所有类所有方法
within(cn.xdl.service.*)
//cn.xdl.service 包及子包下所有类所有方法
within(cn.xdl.service..*)
Bean 名称限定表达式
bean(Spring 容器中组件的 id 名 )
//id=deptService 组件的所有方法
bean(deptService)
//id 以 Service 结尾的组件的所有方法
bean(*Service)
3. 通知(什么时候加?) Advice
通知用于决定切面组件追加的时机,例如在原有组件方法前、方法后、抛出异常之后等。
try{
// 追加逻辑 -- 》前置通知 <aop:before>
// 原有组件的方法
// 追加逻辑 -- 》后置通知 <aop:after-returning>
} catch(){
// 追加逻辑 -- 》异常通知 <aop:after-throwing>
}finally{
// 追加逻辑 -- 》最终通知 <aop:after>
}
//环绕通知:等价于前置 + 后置综合效果 <aop:around>
3,Demo
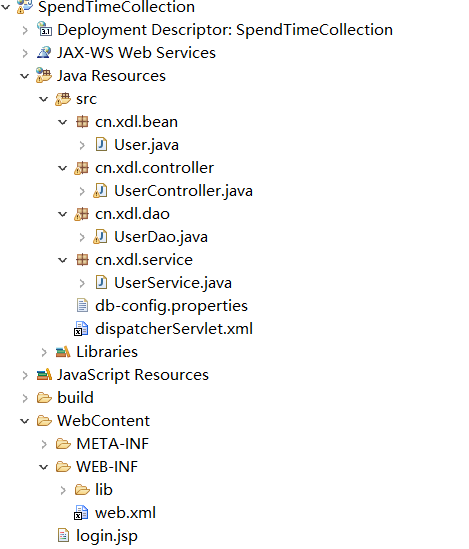
首先利用注解的方式把SpringMVC的框架搭建好。下面是项目的结构图:
User类:


package cn.xdl.bean;

public class User {
    private int id;
    private String name;
    private String password;
    public User() {
        super();
    }
    public User(int id, String name, String password) {
        super();
        this.id = id;
        this.name = name;
        this.password = password;
    }
    public int getId() {
        return id;
    }
    public void setId(int id) {
        this.id = id;
    }
    public String getName() {
        return name;
    }
    public void setName(String name) {
        this.name = name;
    }
    public String getPassword() {
        return password;
    }
    public void setPassword(String password) {
        this.password = password;
    }
}
UserController类:
package cn.xdl.controller;

import java.util.HashMap;
import java.util.Map;

import org.springframework.beans.factory.annotation.Autowired;
import org.springframework.stereotype.Controller;
import org.springframework.web.bind.annotation.PathVariable;
import org.springframework.web.bind.annotation.RequestMapping;
import org.springframework.web.bind.annotation.RequestMethod;
import org.springframework.web.bind.annotation.ResponseBody;

import cn.xdl.bean.User;
import cn.xdl.dao.UserDao;
import cn.xdl.service.UserService;

@Controller
public class UserController {

    @Autowired
     private UserDao userDao;

    @RequestMapping(value="user/{uname}/{upass}",method=RequestMethod.POST)
    @ResponseBody
    public Object userLogin(@PathVariable("uname") String uname,@PathVariable("upass") String upass) {
        //进行数据库的查询
        User user=userDao.selectUserByNameAndPassword(new User(1,uname,upass));
        Map<String,String> map=new HashMap<String,String>();
        if(user!=null){
            map.put("loginResult","恭喜你!"+user.getName()+",登录成功");
        }else{
            map.put("loginResult","登录失败");
        }
        return map;
    }

}
UserDao类:
package cn.xdl.dao;

import org.springframework.jdbc.core.BeanPropertyRowMapper;
import org.springframework.jdbc.core.RowMapper;
import org.springframework.jdbc.core.support.JdbcDaoSupport;

import cn.xdl.bean.User;

public class UserDao extends JdbcDaoSupport {

    public User selectUserByNameAndPassword(User user){
        String sql="select * from myUser where name=? and password=?";

        return getJdbcTemplate().queryForObject(sql,new Object[]{user.getName(),user.getPassword()},new BeanPropertyRowMapper<User>(User.class));
    }
}
这里结果接收语句也可以不使用 BeanPropertyRowMapper 类,使用RowMapper代替也可以。如果查询的结果是List集合,那么可以这样写:
    public List<User> selectUsers(){
        String sql="select * from myUser";

        return getJdbcTemplate().query(sql, new BeanPropertyRowMapper<User>(User.class));
    }
不过需要注意, BeanPropertyRowMapper 类是采用反射的机制,所以User类中的字段要和MyUser表中的字段对应。
UserService类:
package cn.xdl.service;

import org.springframework.beans.factory.annotation.Autowired;

import cn.xdl.bean.User;
import cn.xdl.dao.UserDao;

public class UserService {

    @Autowired
    private UserDao userdao;

    public User queryUserByNameAndPassword(User user){
        return userdao.selectUserByNameAndPassword(user);
    }
}
db-config.properties
db.url=jdbc:oracle:thin:@localhost:1521:xe
db.username=system
db.password=517839
db.dirverClass=oracle.jdbc.OracleDriver
dispatcherServlet.xml文件
<?xml version="1.0" encoding="UTF-8"?>
<beans xmlns="http://www.springframework.org/schema/beans"
    xmlns:xsi="http://www.w3.org/2001/XMLSchema-instance"
    xmlns:context="http://www.springframework.org/schema/context"
    xmlns:jdbc="http://www.springframework.org/schema/jdbc"
    xmlns:jee="http://www.springframework.org/schema/jee"
    xmlns:tx="http://www.springframework.org/schema/tx"
    xmlns:aop="http://www.springframework.org/schema/aop"
    xmlns:mvc="http://www.springframework.org/schema/mvc"
    xmlns:util="http://www.springframework.org/schema/util"
    xmlns:jpa="http://www.springframework.org/schema/data/jpa"
    xsi:schemaLocation="
        http://www.springframework.org/schema/beans http://www.springframework.org/schema/beans/spring-beans-4.1.xsd
        http://www.springframework.org/schema/context http://www.springframework.org/schema/context/spring-context-4.1.xsd
        http://www.springframework.org/schema/jdbc http://www.springframework.org/schema/jdbc/spring-jdbc-4.1.xsd
        http://www.springframework.org/schema/jee http://www.springframework.org/schema/jee/spring-jee-4.1.xsd
        http://www.springframework.org/schema/tx http://www.springframework.org/schema/tx/spring-tx-4.1.xsd
        http://www.springframework.org/schema/data/jpa http://www.springframework.org/schema/data/jpa/spring-jpa-1.3.xsd
        http://www.springframework.org/schema/aop http://www.springframework.org/schema/aop/spring-aop-4.1.xsd
        http://www.springframework.org/schema/mvc http://www.springframework.org/schema/mvc/spring-mvc-4.1.xsd
        http://www.springframework.org/schema/util http://www.springframework.org/schema/util/spring-util-4.1.xsd">
        <!--
            开启注解扫描
         -->
         <context:component-scan base-package="cn"></context:component-scan>
         <!--
             开启mvc注解扫描
          -->
        <mvc:annotation-driven/>

        <mvc:default-servlet-handler/>
  <!-- 获取properties配置文件 -->
  <bean id="config" class="org.springframework.beans.factory.config.PropertyPlaceholderConfigurer">
    <property name="locations">
      <list>
        <value>classpath:db-config.properties</value>
      </list>
  </property>
  </bean>

  <!-- 获取数据源 -->
  <bean id="dataSource" class="org.apache.commons.dbcp.BasicDataSource">
    <property name="driverClassName">
      <value>${db.dirverClass}</value>
    </property>
    <property name="url">
      <value>${db.url}</value>
    </property>
    <property name="username">
      <value>${db.username}</value>
    </property>
    <property name="password">
      <value>${db.password}</value>
    </property>
  </bean>

  <!--
        给jdbc模板注入数据源
       在JdbcTemplate里有一个对应的私有属性dataSource
  -->
  <bean id="jdbcTemplate" class="org.springframework.jdbc.core.JdbcTemplate">
    <property name="dataSource" ref="dataSource"></property>
  </bean>

  <!--
         给userDao(负责和数据库打交道)注入模板
        在com.spring.db.UserDao里应该设有一个JdbcTemplate jdbcTemplate的私有属性,并且setter
   -->
  <bean id="userDao" class="cn.xdl.dao.UserDao">
    <property name="jdbcTemplate" ref="jdbcTemplate"></property>
  </bean>

  <!--定义视图 通过internalResourceView来表示 使用的是Servlet/jsp技术-->
  <bean id="viewResolver"    class="org.springframework.web.servlet.view.InternalResourceViewResolver">
    <property name="viewClass">
      <value>org.springframework.web.servlet.view.InternalResourceView</value>
    </property>
    <!--jsp存放的目录-->
    <property name="prefix">
      <value>/view/</value>
    </property>
    <!--jsp文件的后缀-->
    <property name="suffix">
      <value>.jsp</value>
    </property>
  </bean>
</beans>
web.xml文件
<?xml version="1.0" encoding="UTF-8"?>
<web-app xmlns:xsi="http://www.w3.org/2001/XMLSchema-instance" xmlns="http://xmlns.jcp.org/xml/ns/javaee" xsi:schemaLocation="http://xmlns.jcp.org/xml/ns/javaee http://xmlns.jcp.org/xml/ns/javaee/web-app_3_1.xsd" id="WebApp_ID" version="3.1">
  <display-name>mydb2</display-name>
  <welcome-file-list>
    <welcome-file>welcome.html</welcome-file>
  </welcome-file-list>

  <!-- 这里是一个总控制器 -->
  <servlet>
    <servlet-name>spring</servlet-name>
    <servlet-class>org.springframework.web.servlet.DispatcherServlet</servlet-class>
        <init-param>
            <param-name>contextConfigLocation</param-name>
            <param-value>classpath:dispatcherServlet.xml</param-value>
        </init-param>
  </servlet>
  <servlet-mapping>
    <servlet-name>spring</servlet-name>
    <url-pattern>/</url-pattern>
  </servlet-mapping>

  <!-- 解决POST提交乱码问题 -->
  <filter>
    <filter-name>EncodingName</filter-name>
    <filter-class>org.springframework.web.filter.CharacterEncodingFilter</filter-class>
    <init-param>
      <param-name>encoding</param-name>
      <param-value>utf-8</param-value>
    </init-param>
  </filter>
  <filter-mapping>
    <filter-name>EncodingName</filter-name>
    <url-pattern>/</url-pattern>
  </filter-mapping>

</web-app>
login.jsp文件:
<%@ page language="java" contentType="text/html; charset=utf-8"
    pageEncoding="utf-8"%>
<!DOCTYPE html PUBLIC "-//W3C//DTD HTML 4.01 Transitional//EN" "http://www.w3.org/TR/html4/loose.dtd">
<html>
<head>
<meta http-equiv="Content-Type" content="text/html; charset=utf-8">
<title>用户登录</title>
<script src="https://cdn.bootcss.com/jquery/1.10.2/jquery.min.js"></script>

<script type="text/javascript">
function userlogin(){
    $.ajax({
        url:"user/"+$("#uname").val()+"/"+$("#upass").val(),
        dataType:"JSON",
        type:"POST",
        success:function(data){
            alert(data.loginResult);
        },
        error:function(){
        }
    });

}
</script>
</head>
<body>
<h1>用户登录</h1>
<input type="text" id="uname"/><br/>
<input type="password" id="upass"/><br/>
<input type="button" onclick="userlogin()" value="登录">
</body>
</html>
上面是一个利用 oracle数据库+SpringMVC注解+Ajax请求+Rest风格 的一个框架了,那么其中有几点需要注意:关于Spring框架的搭建可以参考Spring的框架搭建。Ajax请求可以参考文章浅析Ajax的使用。还有就是Rest编程风格,如果读者在这里的Ajax使用Rest发送中文,那么将会乱码,关于更多可以参考 SpringMVC之Rest编程风格。
现在一个基本上的框架就是搭建好了,接下来是AOP的第一个应用:
第一个AOP的应用是为程序中处理组件追加性能监测日志,记录哪个方法执行了多长时间。
首先在dispatcherServer.xml开启注解扫描.
         <!--指定扫描的包-->
        <context:component-scan base-package="cn.xdl.aop"></context:component-scan>
        <!--开启Aop注解-->
        <aop:aspectj-autoproxy proxy-target-class="true"/>
如果不使用注解的方式,可以使用如下的方式:
<!-- AOP 配置 -->
<bean id="watchBean" class="cn.xdl.aop.WatchBean">
</bean>
<aop:config>
<!--  指定切面组件 -->
<aop:aspect ref="watchBean">
<!--  指定通知和切入点 -->
<aop:before method="watch" pointcut="execution(* cn.xdl..*.*(..))"/>
</aop:aspect>
</aop:config>
不过这种方式不推荐,推荐使用注解的方式。
在cn.xdl.aop加入WatchBean.java文件:
package cn.xdl.aop;

import java.io.File;
import java.io.FileOutputStream;
import java.io.PrintWriter;
import java.text.SimpleDateFormat;
import java.util.Date;

import org.aspectj.lang.ProceedingJoinPoint;
import org.aspectj.lang.annotation.Around;
import org.aspectj.lang.annotation.Aspect;
import org.springframework.stereotype.Component;

import cn.xdl.util.WatchUtil;

@Component
@Aspect
public class WatchBean {

    @Around("within(cn.xdl..*)")
    public Object watch(ProceedingJoinPoint pjp) throws Throwable{
        //加前置逻辑,在原有组件方法前调用
        long begin = System.currentTimeMillis();
        Object obj = pjp.proceed();//执行原有组件的方法
        //加后置逻辑,在原有组件方法后调用
        long end = System.currentTimeMillis();
        long time = end-begin;//用时(毫秒)
        //获取目标方法信息
        String targetClass = pjp.getTarget().getClass().getName();//获取目标组件类型名
        String methodName = pjp.getSignature().getName();//获取执行的目标方法名

        //将信息写入到本地文件中

        String loginfo=targetClass+"类的"+methodName+"方法耗时"+time+"毫秒";

        WatchUtil.writeInfo(loginfo);

        return obj;
    }

}
和在cn.xdl.util包下面加入WatchUtil.java文件:
package cn.xdl.util;

import java.io.File;
import java.io.FileNotFoundException;
import java.io.FileOutputStream;
import java.io.PrintWriter;
import java.text.SimpleDateFormat;
import java.util.Date;

public class WatchUtil {

    public static void writeInfo(String loginfo,File logPathFile) throws Exception{

        if(!logPathFile.exists()){
            logPathFile.mkdirs();
        }
        Date date = new Date();
        SimpleDateFormat sdf = new SimpleDateFormat("yyyy-MM-dd");
        String day = sdf.format(date);
        //创建每天的文件
        File dayFile = new File(logPathFile, day+".txt");
        if(!dayFile.exists()){
            dayFile.createNewFile();
        }
        PrintWriter pw = new PrintWriter(new FileOutputStream(dayFile,true));

        SimpleDateFormat sdf2 = new SimpleDateFormat("HH-mm-ss-sss");

        String occurtime = sdf2.format(date);
        pw.println(occurtime+": "+loginfo);

        pw.flush();
        pw.close();
    }

       public static void writeInfo(String loginfo){
            try {
                writeInfo(loginfo,new File("F://log"));
            } catch (Exception e1) {
                // TODO Auto-generated catch block
                e1.printStackTrace();
            }
        }
}
这样一来,一个记录组件性能的日志就做好了。关于使用Redis优化,可以查看这篇文章,解析Redie和Java数据的传递
接下来是AOP的第二个应用:
第二个AOP的应用是一个记录异常信息日志的。
同样还是需要在dispatcherServer.xml中开启注解扫描,这里就不写出来了,
接下来在cn.xdl.aop包中加入ExceptionBean.java文件:
package cn.xdl.aop;

import org.aspectj.lang.annotation.AfterThrowing;
import org.aspectj.lang.annotation.Aspect;
import org.springframework.stereotype.Component;

import cn.xdl.util.ExceptionUtil;

@Component
@Aspect
public class ExceptionBean {

    @AfterThrowing(throwing="e",pointcut="within(cn.xdl.controller..*)")
    public void ExceptionCollection(Exception e){
        ExceptionUtil.toException(e);
    }
}
和在工具包cn.xdl.util包中加入ExceptionUtil.java文件:
package cn.xdl.util;

import java.io.File;
import java.io.FileOutputStream;
import java.io.PrintWriter;
import java.text.SimpleDateFormat;
import java.util.Date;

/**
 * 用来收集异常日志
 *
 *    JavaEE  web阶段
 *
 *    当产生异常时, 应把异常收集起来 ,
 *
 *        存储到
 *            本地文件
 *            网络存储
 *            短信发送
 *            邮件
 */
public class ExceptionUtil {

    /**
     *
     * 存储:
     *     在存储的目录下 ,按照每天的日期创建单独文件夹
     *
     *                 每天的文件夹中, 异常日志存储的文件, 一个异常一个文件, 文件名称按照时-分-秒-毫秒的格式存储
     *
     *
     * @param e 要存储的异常信息
     * @param exceptionPath 要存储的位置: 是一个文件夹, 文件夹可以不存在
     * @throws Exception
     */
    public static void toException(Exception e,File exceptionPath) throws Exception{
        if(!exceptionPath.exists()){
            //创建文件夹
            exceptionPath.mkdirs();
        }
        Date date = new Date();
        SimpleDateFormat sdf = new SimpleDateFormat("yyyy-MM-dd");
        String day = sdf.format(date);
        //创建每天的异常文件夹
        File dayDir = new File(exceptionPath, day);
        if(!dayDir.exists())
            dayDir.mkdirs();
        //创建本次异常存储的文件
        SimpleDateFormat sdf2 = new SimpleDateFormat("HH-mm-ss-sss");

        String fileName = sdf2.format(date);
        File file = new File(dayDir, fileName+".txt");
        //创建一个字符打印流 , 指向创建的这个文件
        PrintWriter pw = new PrintWriter(new FileOutputStream(file));
        //将异常信息输出至这个文件
        e.printStackTrace(pw);
        pw.close();
    }
    /**
     *
     * @param e 要存储的异常信息 , 存储的位置 ,在F://log文件夹中
     */
    public static void toException(Exception e){
        try {
            toException(e,new File("F://log"));
        } catch (Exception e1) {
            // TODO Auto-generated catch block
            e1.printStackTrace();
        }
    }


}
这样的话,记录异常日志的也做好了。那么在SpringMVC中,还有一种方式也可以做到记录异常日志,就是使用SpringMVC提供的HandlerExceptionResolver接口,具体参加SpringMVC之异常处理。当然如果不嫌麻烦可以在每一个捕获的异常里面进行异常信息的存储,可以参见Java中自定义异常类,显然每一个try..catch..里面进行存储存储,对于一个项目来说工作量巨大。这时候我们可以使用SpringMVC框架提供给我们的方法,也就是前两者,使用任何一种都可以。
4,AOP的原理
AOP的原理就是动态代理技术,当使用 Spring AOP 切入目标组件之后,从 Spring 容器再获取目标组件,容器返回的是一个动态生成的类型(代理类)对象,该代理类对象重写原有目标组件的方法,在重写方法中调用原有组件方法功能 + 切面组件的追加功能。这种动态代理的实现分为两种技术,一种是创建一个新的组件,组件实现原有的接口并且重写其所有方法和重写切面组件中追加的功能方法。另一种就是采用继承的方式,创建的新的组件,组件继承原有的目标组件,并且重写目标组件中的所有方法和切面组件中追加功能的所有方法。第二种方式是采用 CGLIB 工具,推荐使用这种方式,在进行AOP配置的时候可以强制指定Spring容器采用这种方式,通过如果配置即可:
<aop:aspectj-autoproxy proxy-target-class="true"/>