在一些业务场景中,CP定单提交过来,需要提交到不同的通道进行业务处理
本文通过Dubbo以定义一个interface,各个通道方来实现这个接口。通过group来区分不同的通道
有需要的同学可以下载 示例代码
项目结构如下:interface,provider,consumer

1.创建接口
public interface HelloService {
    String sayHello(String name);
    //支付接口
    PayResult pay(PayInfo pay);
}
2.创建provider
pom中添加依赖
<dependency>
            <groupId>com.alibaba.boot</groupId>
            <artifactId>dubbo-spring-boot-starter</artifactId>
            <version>0.2.1-SNAPSHOT</version>
        </dependency>

        <!-- Dubbo -->
        <dependency>
            <groupId>com.alibaba</groupId>
            <artifactId>dubbo</artifactId>
            <version>2.6.5</version>
        </dependency>
        <!-- Spring Context Extras -->
        <dependency>
            <groupId>com.alibaba.spring</groupId>
            <artifactId>spring-context-support</artifactId>
            <version>1.0.2</version>
        </dependency>
编写接口两个实现
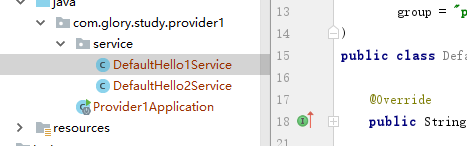
@Service(
        version = "1.0.0",
        application = "${dubbo.application.id}",
        protocol = "${dubbo.protocol.id}",
        registry = "${dubbo.registry.id}",
        group = "pay1"
)
public class DefaultHello1Service implements HelloService {

    @Override
    public String sayHello(String name) {
        return name+"aaaaaaas";
    }

    @Override
    public PayResult pay(PayInfo pay) {
        PayResult result=new PayResult();
        result.setResult(true);
        result.setMsg("from pay1");
        return result;
    }
}
添加Dubbo配置项
dubbo.scan.basePackages  = com.glory.study.provider1.service

# Dubbo Config properties
## ApplicationConfig Bean
dubbo.application.id = dubbo-provider-demo
dubbo.application.name = dubbo-provider-demo

## ProtocolConfig Bean
dubbo.protocol.id = dubbo
dubbo.protocol.name = dubbo
dubbo.protocol.port = 30102

## RegistryConfig Bean
dubbo.registry.id = my-registry
dubbo.registry.address = zookeeper://127.0.0.1:2181
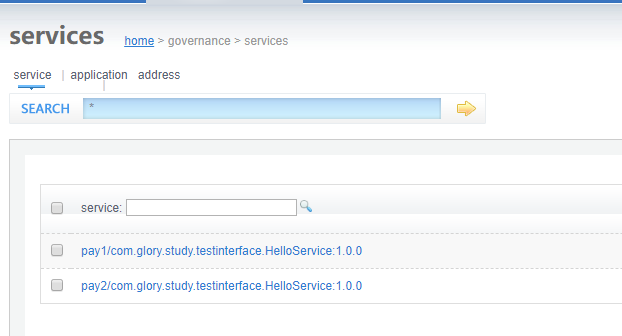
启动,成功,通过dubboadmin可以看到刚才的两个服务分别属于pay1和pay2两个分组
3.服务好了,下面消费都通过ReferenceConfig动态调用
public class PayUtils {


    private static ApplicationConfig application = new ApplicationConfig();

    private static Map<String, RegistryConfig> registryConfigCache = new ConcurrentHashMap<>();

    private static Map<String, ReferenceConfig<HelloService>> referenceCache = new ConcurrentHashMap<>();

    static {
        application.setName("test");
    }


    private static RegistryConfig getRegistryConfig(String address,String group, String version) {
        String key = address + "-" + group + "-" + version;
        RegistryConfig registryConfig = registryConfigCache.get(key);
        if (null == registryConfig) {
            registryConfig = new RegistryConfig();
            registryConfig.setAddress(address);
            registryConfigCache.put(key, registryConfig);
        }
        return registryConfig;
    }

    /**
     * 获取服务的代理对象
     *
     */
    private static ReferenceConfig<HelloService> getReferenceConfig( String group,String address,
                                                                              String version) {
        String referenceKey = group;
        ReferenceConfig<HelloService> referenceConfig = referenceCache.get(referenceKey);
        if (null == referenceConfig) {
            referenceConfig = new ReferenceConfig<>();
            referenceConfig.setApplication(application);
            referenceConfig.setRegistry(getRegistryConfig(address, group, version));
            referenceConfig.setInterface(HelloService.class);
            referenceConfig.setVersion(version);
            referenceConfig.setGroup(group);
            referenceCache.put(referenceKey, referenceConfig);
        }
        return referenceConfig;
    }


    /**
     * 调用远程服务
     *
     */
    public static PayResult invoke(PayInfo dto) {
        String group=dto.getType();
        String add=dto.getAddress();
        String version=dto.getVersion();
        ReferenceConfig<HelloService> reference = getReferenceConfig(group, add, version);
        if (null != reference) {
            HelloService helloService = reference.get();
            if (null != helloService) {
                return helloService.pay(dto);
            }
        }
        return null;
    }
}
页面调用
@RequestMapping("/dubbotest1")
public PayResult dubbotest1() {
PayInfo p=new PayInfo();
p.setAddress(address);
p.setVersion(version);
p.setType("pay1");
return PayUtils.invoke(p);
}
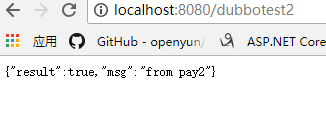
@RequestMapping("/dubbotest2")
public PayResult dubbotest2() {
PayInfo p=new PayInfo();
p.setAddress(address);
p.setVersion(version);
p.setType("pay2");
return PayUtils.invoke(p);
}
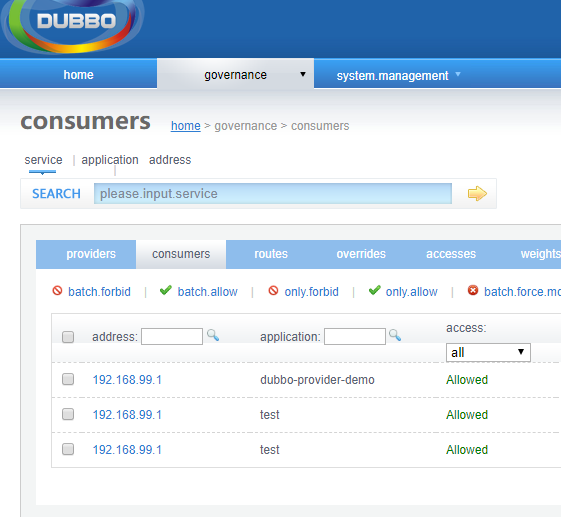
启动服务成功,我们看到了我们的消费者
不同的参数访问不同的接口