Spring.NET对分布式程序的支持是有目共睹的。在1.3.1之前的版本,对Remoting和Webservice支持的很好,并且有其对应的解析器,但对WCF支持的不是很完美。然而1.3.1版本加入了WCF的命名空间解析器功能。我们导入 xmlns:wcf="http://www.springframework.net/wcf“ 命名空间后,便可以使用解析器提供的配置了。
一、新建一个WCF契约程序集:WcfContract。
建立接口ISpringContract
namespace WcfContract
{
[ServiceContract]
public interface ISpringContract
{
[OperationContract]
string GetData(int value);
}
}
{
[ServiceContract]
public interface ISpringContract
{
[OperationContract]
string GetData(int value);
}
}
二、建立WCF的服务器端项目WcfServer。
新建SpringService.svc文件,其SpringService类继承ISpringContract
 SpringService

namespace WcfServer
{
public class SpringService : ISpringContract
{
public string GetData(int value)
{
return string.Format("你输入的是: {0}", value);
}
}
}
{
public class SpringService : ISpringContract
{
public string GetData(int value)
{
return string.Format("你输入的是: {0}", value);
}
}
}
三、建立WCF客户端项目WcfClient
配置app.config
app.config
<?xml version="1.0"?>
<configuration>
<configSections>
<sectionGroup name="spring">
<section name="context" type="Spring.Context.Support.ContextHandler, Spring.Core"/>
<section name="objects" type="Spring.Context.Support.DefaultSectionHandler, Spring.Core"/>
</sectionGroup>
</configSections>
<spring>
<context>
<resource uri="assembly://WcfClient/WcfClient.Config/Wcf.xml"/>
</context>
</spring>
<system.serviceModel>
<bindings>
<basicHttpBinding>
<binding name="BasicHttpBinding_ISpringContract" closeTimeout="00:01:00"
openTimeout="00:01:00" receiveTimeout="00:10:00" sendTimeout="00:01:00"
allowCookies="false" bypassProxyOnLocal="false" hostNameComparisonMode="StrongWildcard"
maxBufferSize="65536" maxBufferPoolSize="524288" maxReceivedMessageSize="65536"
messageEncoding="Text" textEncoding="utf-8" transferMode="Buffered"
useDefaultWebProxy="true">
<readerQuotas maxDepth="32" maxStringContentLength="8192" maxArrayLength="16384"
maxBytesPerRead="4096" maxNameTableCharCount="16384" />
<security mode="None">
<transport clientCredentialType="None" proxyCredentialType="None"
realm="" />
<message clientCredentialType="UserName" algorithmSuite="Default" />
</security>
</binding>
</basicHttpBinding>
</bindings>
<client>
<endpoint address="http://localhost:50784/SpringService.svc"
binding="basicHttpBinding" bindingConfiguration="BasicHttpBinding_ISpringContract"
contract="WcfContract.ISpringContract" name="BasicHttpBinding_ISpringContract" />
</client>
</system.serviceModel>
<startup><supportedRuntime version="v4.0" sku=".NETFramework,Version=v4.0"/></startup></configuration>
四、在WCF客户端增加配置文件Wcf.xml
Wcf.xml
<?xml version="1.0" encoding="utf-8" ?>
<objects xmlns="http://www.springframework.net"
xmlns:wcf="http://www.springframework.net/wcf">
<wcf:channelFactory id="SpringProxy"
channelType="WcfContract.ISpringContract,WcfContract"
endpointConfigurationName="BasicHttpBinding_ISpringContract">
<!--身份验证-->
<wcf:property name="Credentials.Windows.ClientCredential" value="Domain\Login:Password" />
</wcf:channelFactory>
</objects>
这样,我可以无需“添加服务引用”,来实现动态调用WCF。注意的是我们需要引用WcfContract项目。
五、WCF客户端调用部分代码
Program
class Program
{
static void Main(string[] args)
{
IApplicationContext ctx = ContextRegistry.GetContext();
WcfContract.ISpringContract proxy = ctx.GetObject("SpringProxy") as WcfContract.ISpringContract;
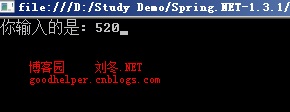
var msg = proxy.GetData(520);
Console.Write(msg);
Console.ReadLine();
}
}
{
static void Main(string[] args)
{
IApplicationContext ctx = ContextRegistry.GetContext();
WcfContract.ISpringContract proxy = ctx.GetObject("SpringProxy") as WcfContract.ISpringContract;
var msg = proxy.GetData(520);
Console.Write(msg);
Console.ReadLine();
}
}
运行效果:
出处:http://www.cnblogs.com/GoodHelper/archive/2010/12/22/SpringNet131Wcf.html
欢迎转载,但需保留版权。