简单的四句介绍
Quartz是一个二维绘图引擎,使用的是CoreGraphics库,同时支持iOS和Mac系统
CGContextRef:获取图形上下文.或者叫作用域,即画布,他是专门用来保存绘画期间的各种数据的
UIBezierPath是对CGPathRef的封装。创建矢量图形时,拆解成一条或者多条线段,拼接起来,每条下端的终点都是下一条线段的起点
当我们绘制路径时,Path的信息就会被Graphics context重置。 如果我们想要保存path信息,并多次使用它,我们就可以用到CGPathCreatMutable申请路径,然后用CGPathAddLintToPoint等方法来添加路径。
一起学习,共同进步,可下载对应Demo
1.设置点和线
介绍属性
- 先设置一个起点
- 添加一个中间点
- 画一个矩形
- 画一个圆形
- 画一个扇形
- 二阶曲线
- 三阶曲线
| CGContextRef | UIBezierPath | CGMutablePathRef |
|---|---|---|
| CGContextMoveToPoint | moveToPoint | CGPathMoveToPoint |
| CGContextAddLineToPoint | addLineToPoint | CGPathAddRect |
| CGContextAddRect | bezierPathWithRect | CGPathAddRect |
| CGContextAddEllipseInRect | bezierPathWithOvalInRect | CGPathAddEllipseInRect |
| CGContextAddArc | addArcWithCenter | CGPathAddArcToPoint |
| CGContextAddQuadCurveToPoint | addQuadCurveToPoint | CGPathAddQuadCurveToPoint |
| CGContextAddCurveToPoint | addCurveToPoint | CGPathAddCurveToPoint |
2、设置线的属性
这些设置线属性的API都是通用的
- 线宽
CGContextSetLineWidth - 线的颜色
CGContextSetStrokeColorWithColor - 填充颜色
CGContextSetFillColorWithColor - line join
CGContextSetLineCap - line cap
CGContextSetLineJoin - 透明度
CGContextSetAlpha - 设置阴影
CGContextSetShadow - 设置阴影颜色
CGContextSetShadowWithColor - 切割操作
CGContextClip
思维导图
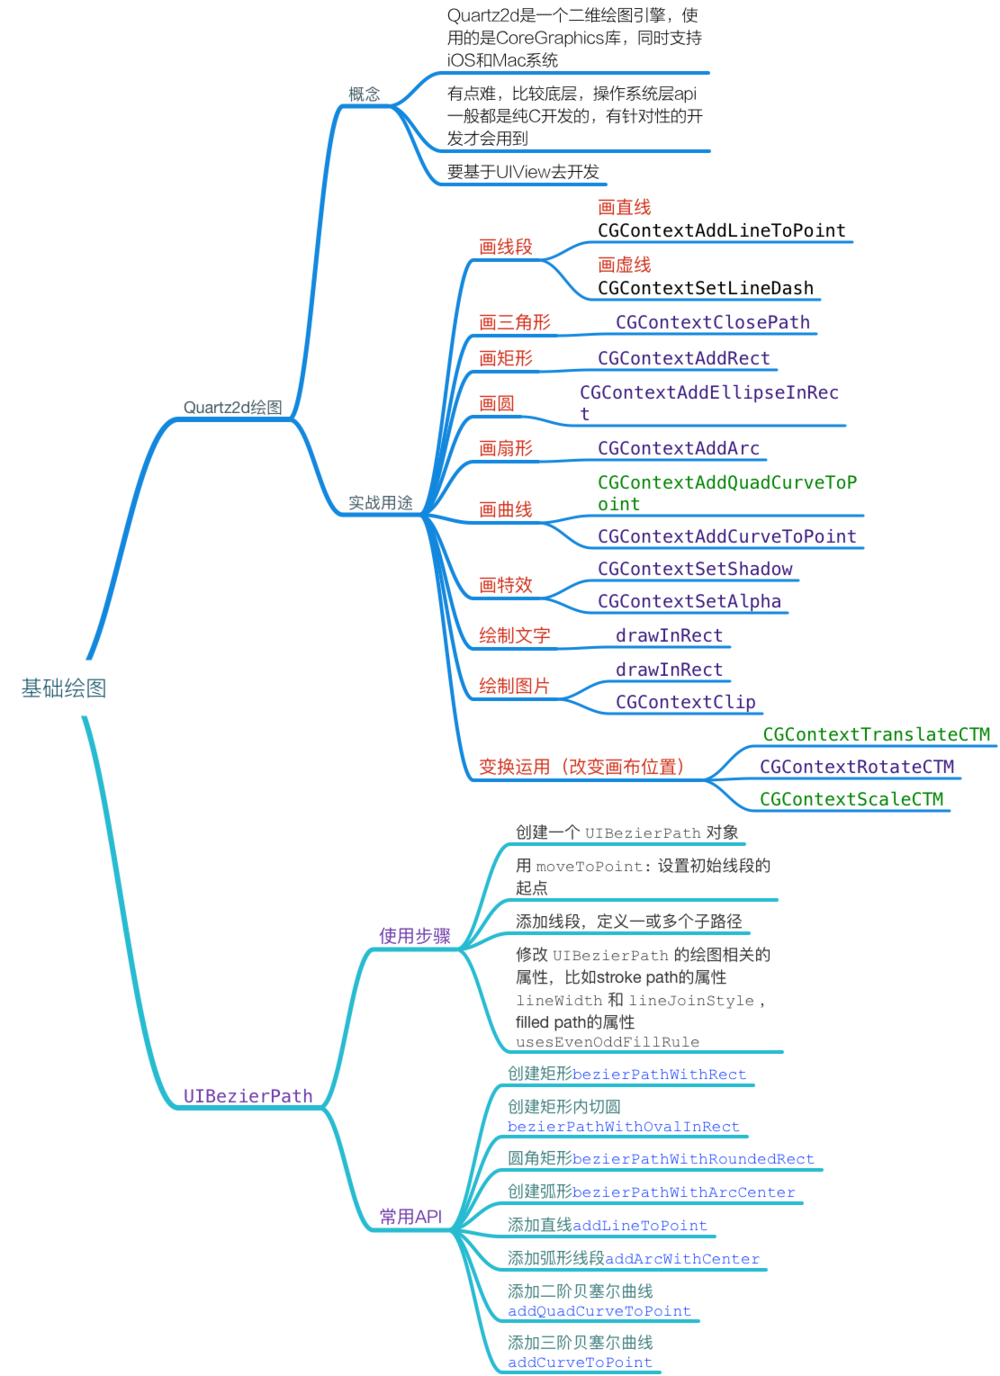
CGContextRef介绍
Quartz2d是一个二维绘图引擎,使用的是CoreGraphics库,同时支持iOS和Mac系统
有点难,比较底层,操作系统层api一般都是纯C开发的,有针对性的开发才会用到
要基于UIView去开发
实战用途
画线段
-
画直线CGContextAddLineToPoint
-
画虚线CGContextSetLineDash
画三角形
- CGContextClosePath
画矩形
- CGContextAddRect
画圆
- CGContextAddEllipseInRect
画扇形
- CGContextAddArc
画曲线
-
CGContextAddQuadCurveToPoint
-
CGContextAddCurveToPoint
画特效
-
CGContextSetShadow
-
CGContextSetAlpha
绘制文字
- drawInRect
绘制图片
-
drawInRect
-
CGContextClip
变换运用(改变画布位置)
-
CGContextTranslateCTM
-
CGContextRotateCTM
-
CGContextScaleCTM
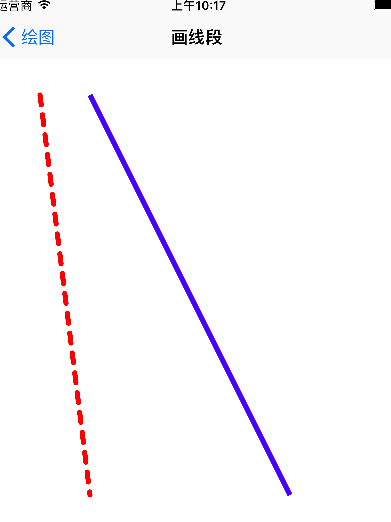
1、CGContextRef之画线段
CGContextRef 具有贯穿全局的效果,我们设置一个全局变量创建 一次 就可以了虚线
- (void)drawLine1{
    //获取图形上下文.或者叫作用域,即画布,他是专门用来保存绘画期间的各种数据的
    CGContextRef contextRef = UIGraphicsGetCurrentContext();

    //路径设置
    //先设置一个起点
    CGContextMoveToPoint(contextRef, 50, 100);
    //设置终点
    CGContextAddLineToPoint(contextRef, 100, 500);

    //设置样式
    //设置线宽
    CGContextSetLineWidth(contextRef, 5.0f);
    //设置线的颜色
    CGContextSetStrokeColorWithColor(contextRef, [UIColor redColor].CGColor);

    //风格  头部和尾部的处理
    CGContextSetLineCap(contextRef, kCGLineCapRound);


    /*
     画虚线
     参数1 作用域
     参数2 起点的偏移量
     参数3 指明虚线是如何交替绘制
     lengths的值{10,10}表示先绘制10个点,再跳过10个点
     如果把lengths值改为{10, 20, 10},则表示先绘制10个点,跳过20个点,绘制10个点,跳过10个点,再绘制20个点,
     参数4 实心部分和虚心部分的循环次数
     */
    CGFloat lenths[] = {10, 10};
    CGContextSetLineDash(contextRef, 0, lenths, 2);


    //渲染
    CGContextStrokePath(contextRef);
}
效果图
2、CGContextRef之画多边形
画三角形
- (void)drawTriangle{
    //获取图形上下文
    CGContextRef contextRef = UIGraphicsGetCurrentContext();

    //设置点
    CGContextMoveToPoint(contextRef, 100, 100);
    CGContextAddLineToPoint(contextRef, 200, 200);
    CGContextAddLineToPoint(contextRef, 100, 200);

    //把点封闭起来
    CGContextClosePath(contextRef);

    //设置线宽
    CGContextSetLineWidth(contextRef, 3.0f);
    //设置线的颜色
    CGContextSetStrokeColorWithColor(contextRef, [UIColor redColor].CGColor);
    //设置填充颜色
    CGContextSetFillColorWithColor(contextRef, [UIColor greenColor].CGColor);


    // 如果写了多种渲染方式,那么只执行第一种
//    CGContextStrokePath(contextRef);
//    CGContextFillPath(contextRef);

    CGContextDrawPath(contextRef, kCGPathFillStroke);

}
效果图

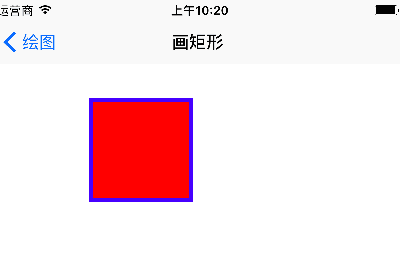
画正方形
//获取图形上下文
   CGContextRef contextRef = UIGraphicsGetCurrentContext();

   CGContextAddRect(contextRef, CGRectMake(100, 100, 100, 100));

   //颜色的填充
   CGContextSetFillColorWithColor(contextRef, [UIColor redColor].CGColor);
   //线宽
   CGContextSetLineWidth(contextRef, 4.0f);
   CGContextSetStrokeColorWithColor(contextRef, [UIColor blueColor].CGColor);

   //渲染
   CGContextDrawPath(contextRef, kCGPathFillStroke);
效果图
3、CGContextRef之画曲线
画圆
 // 绘制图形上下文
    CGContextRef contextRef = UIGraphicsGetCurrentContext();

    CGContextAddEllipseInRect(contextRef, CGRectMake(100, 100, 100, 100));

    CGContextDrawPath(contextRef, kCGPathFillStroke);
扇形
- (void)drawArc1{

    CGContextRef contextRef = UIGraphicsGetCurrentContext();
    /*
     参数1:作用域
     参数2:圆心x坐标
     参数3:圆心y坐标
     参数4:半径
     参数5:开始角度
     参数6:结束角度
     参数7:方向,0表示顺时针,1表示逆时针

     */
    CGContextAddArc(contextRef, 100, 200, 100, 0, M_PI_4, 0);

    CGContextSetLineWidth(contextRef, 5.0f);
    CGContextSetFillColorWithColor(contextRef, [UIColor greenColor].CGColor);
    CGContextSetStrokeColorWithColor(contextRef, [UIColor redColor].CGColor);


//    CGContextAddLineToPoint(contextRef, 100, 200);

    CGContextDrawPath(contextRef, kCGPathFillStroke);


}


- (void)drawArc2{
    CGContextRef contextRef = UIGraphicsGetCurrentContext();


    //第一部分
    CGContextMoveToPoint(contextRef, 250, 400);
    CGContextAddArc(contextRef, 250, 400, 100, 0, M_PI_2, 0);
    CGContextSetFillColorWithColor(contextRef, [UIColor blueColor].CGColor);
    CGContextFillPath(contextRef);


    //第二部分
    CGContextMoveToPoint(contextRef, 250, 400);
    CGContextAddArc(contextRef, 250, 400, 100, M_PI_2, M_PI_2/2*3, 0);
    CGContextSetFillColorWithColor(contextRef, [UIColor redColor].CGColor);
    CGContextFillPath(contextRef);

    // 第三部分
    CGContextMoveToPoint(contextRef, 250, 400);
    CGContextAddArc(contextRef, 250, 400, 100, 0, 225*M_PI/180.0, 1);
    CGContextSetFillColorWithColor(contextRef, [UIColor purpleColor].CGColor);
    CGContextFillPath(contextRef);


}
效果图

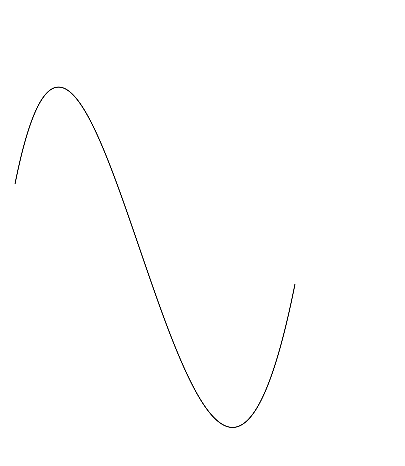
画曲线
    CGContextRef contextRef = UIGraphicsGetCurrentContext();

    //起点
    CGContextMoveToPoint(contextRef, 20, 300);
    /*
     三阶贝塞尔曲线
     参数1:作用域
     参数2:控制点x
     参数3:控制点y
     参数4:控制点x
     参数5:控制点y
     参数6:终点x
     参数7:终点y

     - `CGContextAddQuadCurveToPoint`  二阶贝塞尔曲线
     */
    CGContextAddCurveToPoint(contextRef, 100, -100, 200, 900, 300, 400);
     CGContextStrokePath(contextRef);
效果图
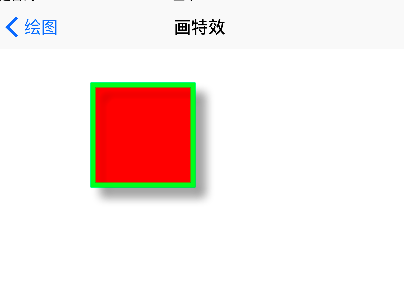
4、CGContextRef之画特效
 CGContextRef contextRef = UIGraphicsGetCurrentContext();


    CGContextAddRect(contextRef, CGRectMake(100, 100, 100, 100));
    CGContextSetFillColorWithColor(contextRef, [UIColor redColor].CGColor);
    CGContextSetStrokeColorWithColor(contextRef, [UIColor greenColor].CGColor);
    CGContextSetLineWidth(contextRef, 5.0f);

    //设置透明度
    //取值范围(0~1,0表示全透明,1是不透明)
     CGContextSetAlpha(contextRef, 1);

    /*
     设置阴影
     参数1:画布
     参数2:右偏移量
     参数3:下偏移量
     参数4:模糊度(0是不模糊,越大越模糊,10就差不多)
     */
    CGContextSetShadow(contextRef, CGSizeMake(10, 10), 10);


    CGContextDrawPath(contextRef, kCGPathFillStroke);
效果图
5、CGContextRef之绘制
绘制文字
 NSDictionary *dic = @{
                          NSFontAttributeName:[UIFont systemFontOfSize:15],
                           NSForegroundColorAttributeName : [UIColor redColor]
                          };
    // 两种的区别drawInRect会自动换行,drawAtPoint:CGPointZero不会自动换行
    [text drawInRect:CGRectMake(20, 100, self.bounds.size.width - 40, 100) withAttributes:dic];
//    [text drawAtPoint:CGPointMake(20, 200) withAttributes:dic];
绘制图片
- (void)drawImage{
    UIImage *image = [UIImage imageNamed:@"image.jpg"];
    [image drawInRect:CGRectMake(100, 100, 250, 250)];
    // 平铺图像,超出部分会自动剪裁
//    [image drawAsPatternInRect:self.bounds];
    // 如果实现文字和图片共存,需要将文字写在后面,防止被图片盖住
    NSDictionary *dic = @{
                          NSFontAttributeName:[UIFont systemFontOfSize:15],
                          NSForegroundColorAttributeName : [UIColor redColor]
                          };
    NSString *text = @"如果实现文字和图片共存,需要将文字写在后面,防止被图片盖住";
    [text drawInRect:CGRectMake(100, 300, 250, 100) withAttributes:dic];
}

-(void)clipImage{
    /*
     思路:先画一个圆,让图片显示在圆的内部,超出的部分不显示。
     注意:显示的范围只限于指定的剪切范围,无论往上下文中绘制什么东西,只要超出了这个范围的都不会显示。
     */


    CGContextRef contextRef = UIGraphicsGetCurrentContext();
    // 先画一个圆形
    CGContextAddEllipseInRect(contextRef, CGRectMake(100, 400, 200, 200));

    // 切割操作
    CGContextClip(contextRef);
    CGContextFillPath(contextRef);


    UIImage *image = [UIImage imageNamed:@"image.jpg"];
    [image drawInRect:CGRectMake(100, 400, 200, 200)];


}
效果图

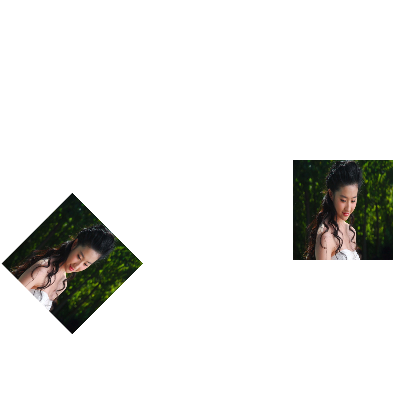
6、CGContextRef之图形变换
 UIImage *image0 = [UIImage imageNamed:@"image.jpg"];
    [image0 drawInRect:CGRectMake(300, 400, 100, 100)];

    CGContextRef contextRef = UIGraphicsGetCurrentContext();
    // 移动变换
    //    CGContextTranslateCTM(contextRef, -100, -100);
    /**
     *  对象沿着x轴移动-100单位,沿着y轴移动-100单位
     */
    // 多个变换会叠加
    // 缩放
    //    CGContextScaleCTM(contextRef, 0.5, 0.5);

    // 获取中心点
//    CGFloat cenX = CGRectGetMidX(self.bounds);
//    CGFloat cenY = CGRectGetMidY(self.bounds);
//

    // 先移动一下
    //    CGContextTranslateCTM(contextRef, cenX, cenY);
    CGContextTranslateCTM(contextRef, 100+100/2.0, 100+100/2.0);

    // 旋转变换
    CGContextRotateCTM(contextRef, M_PI_4);
    // 再移动回去
    CGContextTranslateCTM(contextRef, -(100+100/2.0), -(100+100/2.0));

    /**
     *  旋转可以认为实质是旋转坐标系,会绕着坐标原点旋转,可以先将坐标原点移动到要旋转的图形的中点,然后执行旋转,然后再移动回来,实现绕着图形中心旋转的目的
     */


    UIImage *image = [UIImage imageNamed:@"image.jpg"];
    [image drawInRect:CGRectMake(300, 400, 100, 100)];
效果图
UIBezierPath
使用步骤
-
创建一个 UIBezierPath 对象
-
用 moveToPoint: 设置初始线段的起点
-
添加线段,定义一或多个子路径
-
修改 UIBezierPath 的绘图相关的属性,比如stroke path的属性 lineWidth 和 lineJoinStyle , filled path的属性 usesEvenOddFillRule
常用API
-
创建矩形bezierPathWithRect
-
创建矩形内切圆bezierPathWithOvalInRect
-
圆角矩形bezierPathWithRoundedRect
-
创建弧形bezierPathWithArcCenter
-
添加直线addLineToPoint
-
添加弧形线段addArcWithCenter
-
添加二阶贝塞尔曲线addQuadCurveToPoint
-
添加三阶贝塞尔曲线addCurveToPoint
参考链接
Quartz 2D学习(一)简单绘制图形
iOS的UIBezierPath类和贝塞尔曲线
https://www.jianshu.com/p/5e39624efa26