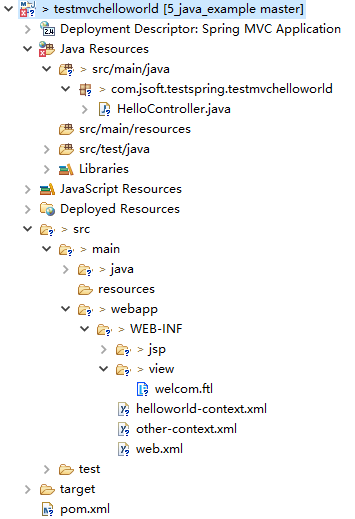
0、整体的项目结构
1、引入POM
<project xmlns="http://maven.apache.org/POM/4.0.0" xmlns:xsi="http://www.w3.org/2001/XMLSchema-instance"
    xsi:schemaLocation="http://maven.apache.org/POM/4.0.0 http://maven.apache.org/maven-v4_0_0.xsd">
    <modelVersion>4.0.0</modelVersion>
    <groupId>com.jsoft.testspring</groupId>
    <artifactId>testmvchelloworld</artifactId>
    <packaging>war</packaging>
    <version>0.0.1-SNAPSHOT</version>
    <name>testmvchelloworld Maven Webapp</name>
    <url>http://maven.apache.org</url>
    <dependencies>
        <dependency>
            <groupId>junit</groupId>
            <artifactId>junit</artifactId>
            <version>3.8.1</version>
            <scope>test</scope>
        </dependency>

        <!-- Servlet Library -->
        <!-- http://mvnrepository.com/artifact/javax.servlet/javax.servlet-api -->
        <dependency>
            <groupId>javax.servlet</groupId>
            <artifactId>javax.servlet-api</artifactId>
            <version>3.1.0</version>
            <scope>provided</scope>
        </dependency>

        <!-- Spring Core -->
        <!-- http://mvnrepository.com/artifact/org.springframework/spring-core -->
        <dependency>
            <groupId>org.springframework</groupId>
            <artifactId>spring-core</artifactId>
            <version>4.1.4.RELEASE</version>
        </dependency>

        <!-- Spring Web -->
        <!-- http://mvnrepository.com/artifact/org.springframework/spring-web -->
        <dependency>
            <groupId>org.springframework</groupId>
            <artifactId>spring-web</artifactId>
            <version>4.1.4.RELEASE</version>
        </dependency>

        <!-- Spring Web MVC -->
        <!-- http://mvnrepository.com/artifact/org.springframework/spring-webmvc -->
        <dependency>
            <groupId>org.springframework</groupId>
            <artifactId>spring-webmvc</artifactId>
            <version>4.1.4.RELEASE</version>
        </dependency>

        <!-- spring-context-support -->
        <!-- https://mvnrepository.com/artifact/org.springframework/spring-context-support -->
        <dependency>
            <groupId>org.springframework</groupId>
            <artifactId>spring-context-support</artifactId>
            <version>4.1.4.RELEASE</version>
        </dependency>

        <!-- https://mvnrepository.com/artifact/org.freemarker/freemarker -->
        <dependency>
            <groupId>org.freemarker</groupId>
            <artifactId>freemarker</artifactId>
            <version>2.3.26-incubating</version>
        </dependency>

    </dependencies>
    <build>
        <finalName>testmvchelloworld</finalName>
        <plugins>
            <!-- Config: Maven Tomcat Plugin -->
            <!-- http://mvnrepository.com/artifact/org.apache.tomcat.maven/tomcat7-maven-plugin -->
            <!-- http://tomcat.apache.org/maven-plugin-2.0/tomcat7-maven-plugin/plugin-info.html -->
            <plugin>
                <groupId>org.apache.tomcat.maven</groupId>
                <artifactId>tomcat7-maven-plugin</artifactId>
                <version>2.2</version>
                <!-- Config: contextPath and Port (Default:8080) -->
                <!--
                <configuration>
                    <path>/</path>
                    <port>8899</port>
                </configuration>
                 -->
            </plugin>
            <!-- Config: Maven Jetty Plugin -->
            <!-- http://mvnrepository.com/artifact/org.mortbay.jetty/jetty-maven-plugin -->
            <!-- http://www.eclipse.org/jetty/documentation/current/jetty-maven-plugin.html -->
            <plugin>
                <groupId>org.eclipse.jetty</groupId>
                <artifactId>jetty-maven-plugin</artifactId>
                <version>9.4.3.v20170317</version>
                <!-- Config: contextPath and Port (Default:8080) -->
                <!--
                <configuration>
                    <httpConnector>
                        <port>8899</port>
                    </httpConnector>
                    <webAppConfig>
                        <contextPath>/</contextPath>
                    </webAppConfig>
                </configuration>
                 -->
            </plugin>
        </plugins>
    </build>
</project>
注意:引入时参考上面不同颜色的引入,尤其是spring-context-support这个JAR包,里面包含了处理FreeMarker的UI组件。
2、配置web.xml
<web-app id="WebApp_ID" version="3.0"
         xmlns="http://java.sun.com/xml/ns/javaee"
         xmlns:xsi="http://www.w3.org/2001/XMLSchema-instance"
            xsi:schemaLocation="http://java.sun.com/xml/ns/javaee
                                 http://java.sun.com/xml/ns/javaee/web-app_3_0.xsd">

   <display-name>Spring MVC Application</display-name>

   <servlet>
       <servlet-name>spring-mvc</servlet-name>
       <servlet-class>org.springframework.web.servlet.DispatcherServlet</servlet-class>
       <!-- 默认:[servlet-name]-servlet.xml -->
       <!-- 通过初始化参数,指定xml文件的位置 -->
       <init-param>
           <param-name>contextConfigLocation</param-name>
           <param-value>/WEB-INF/helloworld-context.xml</param-value>
       </init-param>
       <load-on-startup>1</load-on-startup>
   </servlet>

   <servlet-mapping>
       <servlet-name>spring-mvc</servlet-name>
       <url-pattern>/</url-pattern>
   </servlet-mapping>

   <!-- 添加其它xml配置 -->
   <context-param>
       <param-name>contextConfigLocation</param-name>
       <param-value>/WEB-INF/other-context.xml</param-value>
   </context-param>
   <listener>
       <listener-class>org.springframework.web.context.ContextLoaderListener</listener-class>
   </listener>

</web-app>
3、配置helloworld-context.xml
<?xml version="1.0" encoding="UTF-8"?>
<beans xmlns="http://www.springframework.org/schema/beans"
    xmlns:xsi="http://www.w3.org/2001/XMLSchema-instance"
    xmlns:p="http://www.springframework.org/schema/p"
    xmlns:context="http://www.springframework.org/schema/context"
    xmlns:mvc="http://www.springframework.org/schema/mvc"
    xsi:schemaLocation="http://www.springframework.org/schema/beans
                        http://www.springframework.org/schema/beans/spring-beans.xsd
                        http://www.springframework.org/schema/context
                        http://www.springframework.org/schema/context/spring-context.xsd
                        http://www.springframework.org/schema/mvc
                        http://www.springframework.org/schema/mvc/spring-mvc.xsd">

    <context:component-scan base-package="com.jsoft.testspring" />

    <context:annotation-config />

    <!-- 配置FreeMarker -->
    <!--以下三种视图配置根据需要任选一种即可 -->

    <!-- 一般的视图配置 -->
    <!-- <bean class="org.springframework.web.servlet.view.InternalResourceViewResolver">
        <property name="prefix">
            <value>/WEB-INF/jsp/</value>
        </property>
        <property name="suffix">
            <value>.jsp</value>
        </property>
    </bean> -->

    <!-- 针对FreeMarker的视图配置 -->
    <bean id="viewResolver" class="org.springframework.web.servlet.view.freemarker.FreeMarkerViewResolver">
        <property name="cache" value="true" />
        <property name="prefix" value="" />
        <property name="suffix" value=".ftl" />
        <property name="contentType" value="text/html;charset=UTF-8"/>
        <property name="requestContextAttribute" value="request" />
        <property name="exposeSpringMacroHelpers" value="true" />
        <property name="exposeRequestAttributes" value="true" />
        <property name="exposeSessionAttributes" value="true" />
    </bean>
    <bean id="freemarkerConfig" class="org.springframework.web.servlet.view.freemarker.FreeMarkerConfigurer">
        <property name="templateLoaderPath" value="/WEB-INF/view" />
        <property name="freemarkerSettings">
            <props>
                <prop key="template_update_delay">0</prop>
                <prop key="default_encoding">UTF-8</prop>
                <prop key="number_format">0.##########</prop>
                <prop key="datetime_format">yyyy-MM-dd HH:mm:ss</prop>
                <prop key="classic_compatible">true</prop>
                <prop key="template_exception_handler">ignore</prop>
            </props>
        </property>
    </bean>

    <!-- 查看解析器也可以使用ResourceBundles或XML文件进行配置。如果您需要基于区域设置的不同视图解析,则必须使用资源束解析器。 -->
    <!-- 这个是针对返回视图还是json值的视图配置 来分别处理同步和异步请求 -->
    <!-- <bean class="org.springframework.web.servlet.view.ContentNegotiatingViewResolver">
        <property name="mediaTypes">
            <map>
                <entry key="html" value="text/html" />
                <entry key="json" value="application/json" />
            </map>
        </property>
        <property name="favorParameter" value="true" />
        <property name="viewResolvers">
            <list>
                <bean class="org.springframework.web.servlet.view.BeanNameViewResolver" />
                <bean id="viewResolver" class="org.springframework.web.servlet.view.freemarker.FreeMarkerViewResolver">
                    <property name="cache" value="true" />
                    <property name="prefix" value="" />
                    <property name="suffix" value=".ftl" />
                    <property name="contentType" value="text/html;charset=UTF-8"/>
                    <property name="requestContextAttribute" value="request" />
                    <property name="exposeSpringMacroHelpers" value="true" />
                    <property name="exposeRequestAttributes" value="true" />
                    <property name="exposeSessionAttributes" value="true" />
                </bean>
            </list>
        </property>
        <property name="defaultContentType" value="text/html" />
    </bean> -->

</beans>
说明:other-context.xml这个文件其实没有什么内容,当然,也可以将上述一些配置引入到这个文件上,效果是一致的。
4、新建模板页面welcom.ftl
<!DOCTYPE html PUBLIC "-//W3C//DTD XHTML 1.0 Transitional//EN" "http://www.w3.org/TR/xhtml1/DTD/xhtml1-transitional.dtd">
<html xmlns="http://www.w3.org/1999/xhtml" xml:lang="zh-CN" dir="ltr">
<head>
 <title>test!</title>
 <meta http-equiv="Content-Type" content="text/html; charset=UTF-8"/>
</head>
<body>
    <div>
        直接显示字符串<br />
        String:${strValue}<br/>
        <hr/>
    </div>

    <div>
    显示日期
    date:${myDate?date}<br/>
    <hr/>
    显示时间
    time:${myDate?time}<br/>
    <hr/>
    显示时间戳
    datetime:${myDate?datetime}<br/>
    <hr/>
    </div>

    <div>
    访问对象数组
    ObjectArray:
    ${objectArray[0]},${objectArray[1]},${objectArray[2]}
    <br />
    <hr/>
    </div>

    <div>
    遍历Set中的元素
    SetData:<br />
    <#list setData as value>
        ${value}
    </#list>
    <hr/>
    </div>

    <div>
    遍历List中的元素
    strList:<br/>
    <#list strList as strValue >
    <#if strValue_index == 0>
        ${strValue} is first element
    <#elseif !strValue_has_next>
        ${strValue} is last element
    <#else>
        ${strValue}
    </#if>
    <br />
    </#list>
    <hr/>
    </div>

    <div>
    获取map中的值
    <br/>
    map:
    key1=${map.key1},key2=${map.key2},key3=${map.key3}
    <hr/>
    </div>


</body>
</html>
5、编写HelloController.java
package com.jsoft.testspring.testmvchelloworld;

import java.util.ArrayList;
import java.util.Date;
import java.util.HashMap;
import java.util.HashSet;
import java.util.List;
import java.util.Map;
import java.util.Set;

import javax.servlet.http.HttpServletRequest;

import org.springframework.stereotype.Controller;
import org.springframework.ui.ModelMap;
import org.springframework.web.bind.annotation.RequestMapping;
import org.springframework.web.bind.annotation.RequestMethod;
import org.springframework.web.servlet.ModelAndView;

@Controller
@RequestMapping("/hello")
public class HelloController {

    @RequestMapping(method=RequestMethod.GET)
    public String printHello(ModelMap model){
        model.addAttribute("message","Hello Spring MVC Framework!");
        return "hello";
    }

    @RequestMapping(value = "/welcome", method = { RequestMethod.GET })
    public ModelAndView getFirstPage(HttpServletRequest request) {

        String strValue = "this is String";
        Date myDate = new Date();
        Object[] objectArray = new Object[] { 1, "str", 1.2 };

        Set<Object> setData = new HashSet<Object>();
        setData.add("dataValue1");
        setData.add("dataValue2");
        setData.add("dataValue3");

        List<String> strList = new ArrayList<String>();
        strList.add("字符串1");
        strList.add("字符串2");
        strList.add("字符串3");

        Map<String, Object> map = new HashMap<String, Object>();
        map.put("key1", "value1");
        map.put("key2", "value2");
        map.put("key3", "value3");

        //welcom就是视图的名称(welcom.ftl)
        ModelAndView mv = new ModelAndView("welcom");
        mv.addObject("strValue", strValue);
        mv.addObject("objectArray", objectArray);
        mv.addObject("strList", strList);
        mv.addObject("map", map);
        mv.addObject("myDate", myDate);
        mv.addObject("setData", setData);
        return mv;
    }
}
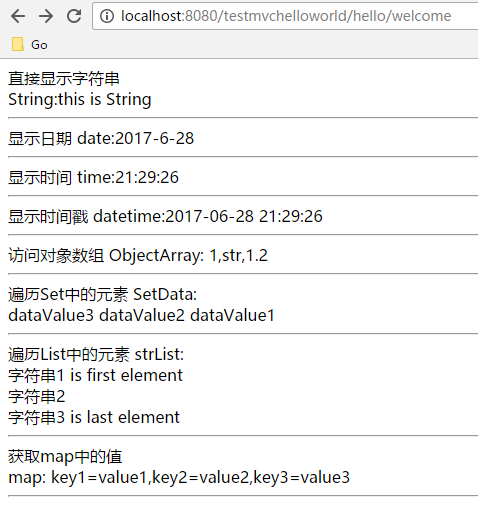
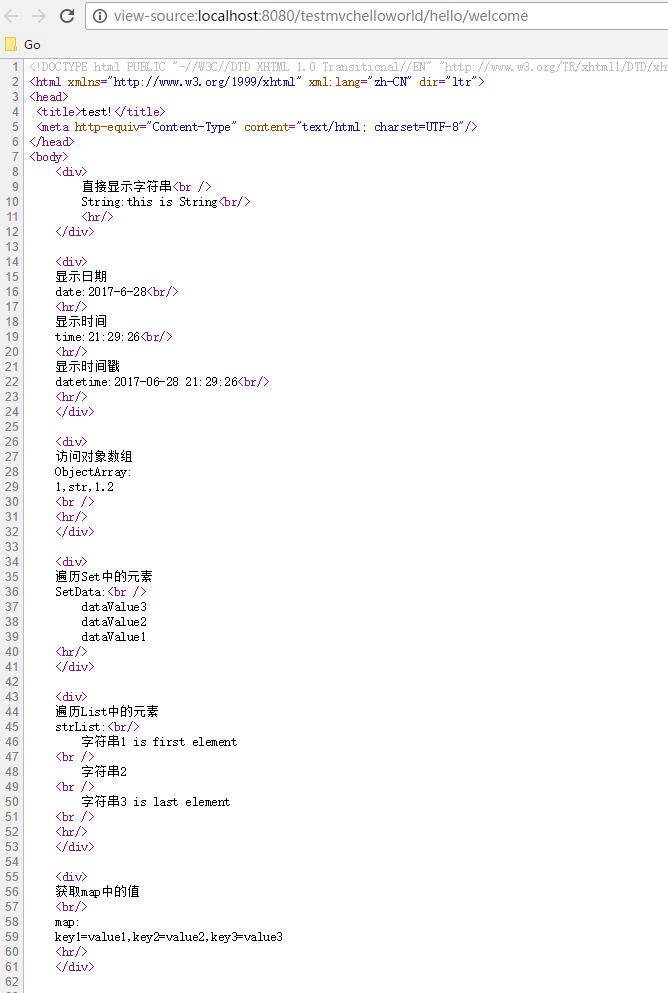
6、测试效果
通过命令运行:mvn tomcat7:run
测试工程:https://github.com/easonjim/5_java_example/tree/master/freemarker/test4
参考: