建议参考官方文档:http://flume.apache.org/FlumeUserGuide.html
示例一:用tail命令获取数据,下沉到hdfs
类似场景:

创建目录:
mkdir /home/hadoop/log
不断往文件中追加内容:
while true
do
echo 111111 >> /home/hadoop/log/test.log
sleep 0.5
done
查看文件内容:
tail -F test.log
启动Hadoop集群。
检查下hdfs式否是salf模式:
hdfs dfsadmin -report
tail-hdfs.conf的内容如下:
# Name the components on this agent
a1.sources = r1
a1.sinks = k1
a1.channels = c1
#exec 指的是命令
# Describe/configure the source
a1.sources.r1.type = exec
#F根据文件名追中, f根据文件的nodeid追中
a1.sources.r1.command = tail -F /home/hadoop/log/test.log
a1.sources.r1.channels = c1
# Describe the sink
#下沉目标
a1.sinks.k1.type = hdfs
a1.sinks.k1.channel = c1
#指定目录, flum帮做目的替换
a1.sinks.k1.hdfs.path = /flume/events/%y-%m-%d/%H%M/
#文件的命名, 前缀
a1.sinks.k1.hdfs.filePrefix = events-
#10 分钟就改目录
a1.sinks.k1.hdfs.round = true
a1.sinks.k1.hdfs.roundValue = 10
a1.sinks.k1.hdfs.roundUnit = minute
#文件滚动之前的等待时间(秒)
a1.sinks.k1.hdfs.rollInterval = 3
#文件滚动的大小限制(bytes)
a1.sinks.k1.hdfs.rollSize = 500
#写入多少个event数据后滚动文件(事件个数)
a1.sinks.k1.hdfs.rollCount = 20
#5个事件就往里面写入
a1.sinks.k1.hdfs.batchSize = 5
#用本地时间格式化目录
a1.sinks.k1.hdfs.useLocalTimeStamp = true
#下沉后, 生成的文件类型,默认是Sequencefile,可用DataStream,则为普通文本
a1.sinks.k1.hdfs.fileType = DataStream
# Use a channel which buffers events in memory
a1.channels.c1.type = memory
a1.channels.c1.capacity = 1000
a1.channels.c1.transactionCapacity = 100
# Bind the source and sink to the channel
a1.sources.r1.channels = c1
a1.sinks.k1.channel = c1
执行命令:
bin/flume-ng agent -c conf -f conf/tail-hdfs.conf -n a1

前端页面查看下, master:50070


示例二:多个Agent串联
类似场景:

从tail命令获取数据发送到avro端口,另一个节点从avro端口接收数据,下沉到logger。
在weekend10机器上配置tail-avro.conf,在weekend01机器上配置avro-logger.conf。
tail-avro.conf配置文件:
# Name the components on this agent
a1.sources = r1
a1.sinks = k1
a1.channels = c1
# Describe/configure the source
a1.sources.r1.type = exec
a1.sources.r1.command = tail -F /home/hadoop/log/test.log
a1.sources.r1.channels = c1
# Describe the sink
#绑定的不是本机, 是另外一台机器的服务地址, sink端的avro是一个发送端, avro的客户端, 往weekend01这个机器上发
a1.sinks = k1
a1.sinks.k1.type = avro
a1.sinks.k1.channel = c1
a1.sinks.k1.hostname = weekend01
a1.sinks.k1.port = 4141
a1.sinks.k1.batch-size = 2
# Use a channel which buffers events in memory
a1.channels.c1.type = memory
a1.channels.c1.capacity = 1000
a1.channels.c1.transactionCapacity = 100
# Bind the source and sink to the channel
a1.sources.r1.channels = c1
a1.sinks.k1.channel = c1
avro-logger.conf配置文件:
# Name the components on this agent
a1.sources = r1
a1.sinks = k1
a1.channels = c1
# Describe/configure the source
#source中的avro组件是接收者服务, 绑定本机
a1.sources.r1.type = avro
a1.sources.r1.channels = c1
a1.sources.r1.bind = 0.0.0.0
a1.sources.r1.port = 4141
# Describe the sink
a1.sinks.k1.type = logger
# Use a channel which buffers events in memory
a1.channels.c1.type = memory
a1.channels.c1.capacity = 1000
a1.channels.c1.transactionCapacity = 100
# Bind the source and sink to the channel
a1.sources.r1.channels = c1
a1.sinks.k1.channel = c1
先在weekend01上启动:bin/flume-ng agent -c conf -f conf/avro-logger.conf -n a1 -Dflume.root.logger=INFO,console
再在weekend110上启动:bin/flume-ng agent -c conf -f conf/tail-avro.conf -n a1
并在weekend110执行:while true ; do echo 11111111 >> /home/hadoop/log/test.log; sleep 1; done
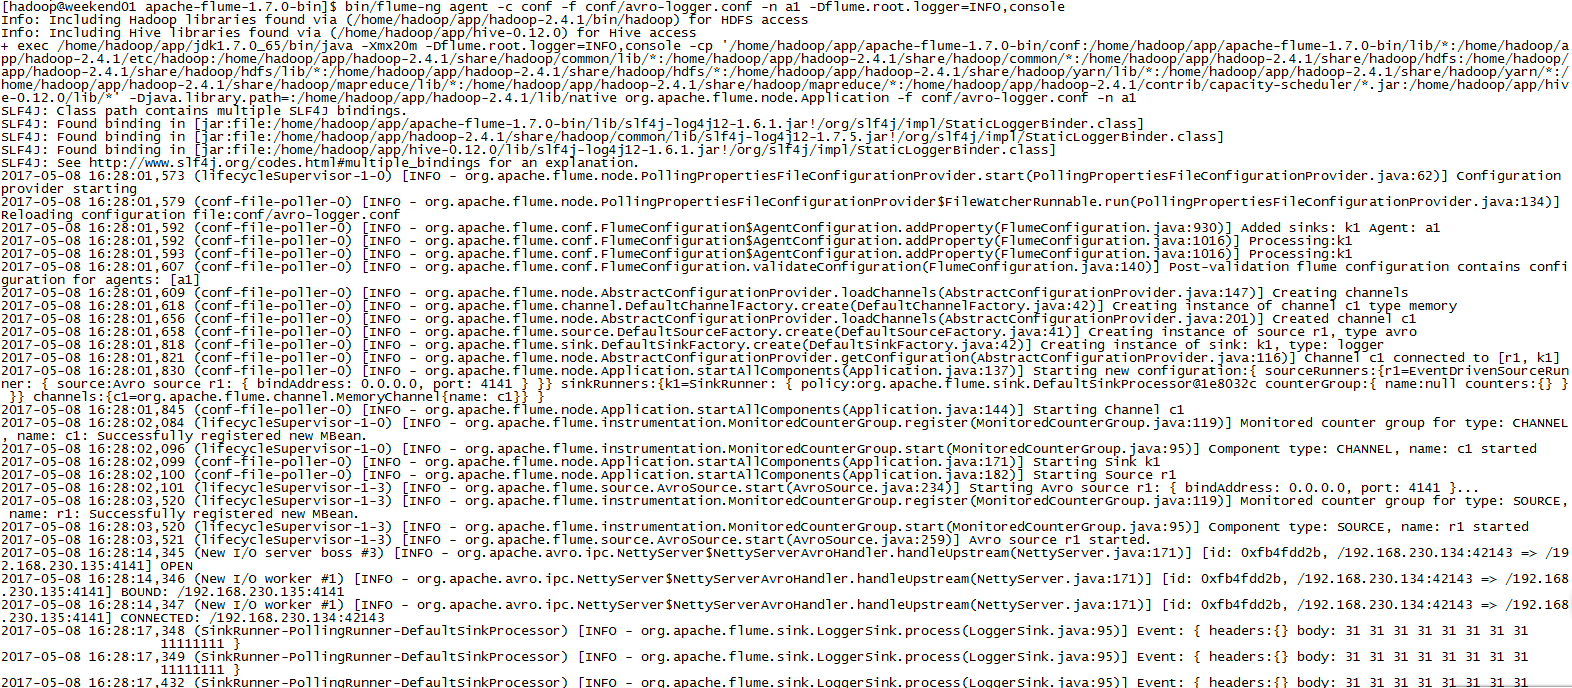
显示效果如下:


或者直接在weekend110上执行:bin/flume-ng avro-client -H weekend01 -p 4141 -F /home/hadoop/log/test.log
同样的效果。