Linux 配置yum源.
环境:虚拟机中安装了RedHat ,在进行安装mariadb的时候,出现如下错误。是因为yum源的问题,需要进行配置yum源。本教程是配置本地yum源。
1 [root@localhost yum.repos.d]# yum groups install mariadb mariadb-client -y
2 Loaded plugins: langpacks, product-id, search-disabled-repos, subscription-manager
3 This system is not registered with an entitlement server. You can use subscription-manager to register.
4 There are no enabled repos.
5  Run "yum repolist all" to see the repos you have.
6  To enable Red Hat Subscription Management repositories:
7      subscription-manager repos --enable <repo>
8  To enable custom repositories:
9      yum-config-manager --enable <repo>
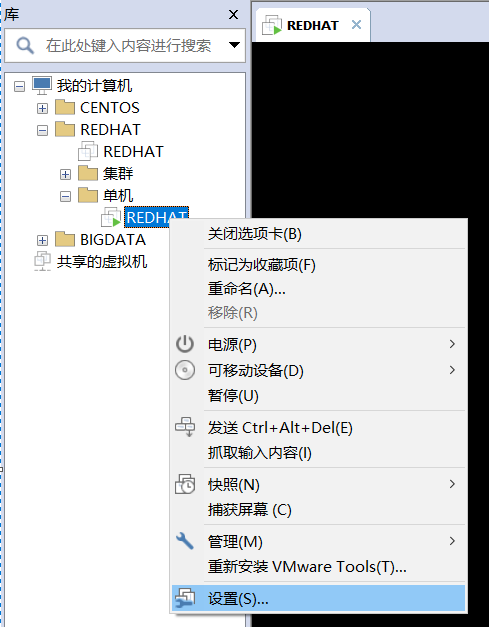
选中虚拟机中的操作系统,鼠标:右键-->>设置
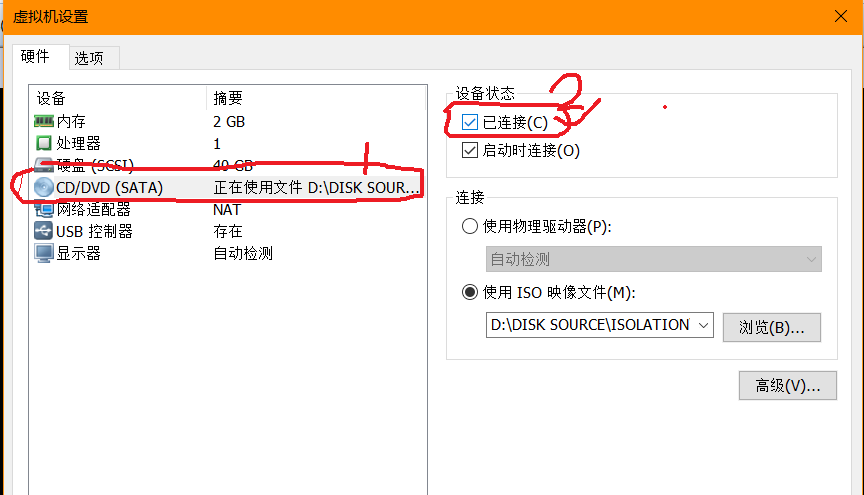
在弹出的“虚拟机设置” 窗口中,选择:CD/DVD -->>设备状态(已连接,确保打上勾即可)
在Linux的终端输入:mount 指令,可以查看到有块设备被加载进来了,见红色标注,相关信息如下:
 1 [root@localhost yum.repos.d]# mount
 2 sysfs on /sys type sysfs (rw,nosuid,nodev,noexec,relatime,seclabel)
 3 proc on /proc type proc (rw,nosuid,nodev,noexec,relatime)
 4 devtmpfs on /dev type devtmpfs (rw,nosuid,seclabel,size=917580k,nr_inodes=229395,mode=755)
 5 securityfs on /sys/kernel/security type securityfs (rw,nosuid,nodev,noexec,relatime)
 6 tmpfs on /dev/shm type tmpfs (rw,nosuid,nodev,seclabel)
 7 devpts on /dev/pts type devpts (rw,nosuid,noexec,relatime,seclabel,gid=5,mode=620,ptmxmode=000)
 8 tmpfs on /run type tmpfs (rw,nosuid,nodev,seclabel,mode=755)
 9 tmpfs on /sys/fs/cgroup type tmpfs (ro,nosuid,nodev,noexec,seclabel,mode=755)
10 cgroup on /sys/fs/cgroup/systemd type cgroup (rw,nosuid,nodev,noexec,relatime,xattr,release_agent=/usr/lib/systemd/systemd-cgroups-agent,name=systemd)
11 pstore on /sys/fs/pstore type pstore (rw,nosuid,nodev,noexec,relatime)
12 cgroup on /sys/fs/cgroup/hugetlb type cgroup (rw,nosuid,nodev,noexec,relatime,hugetlb)
13 cgroup on /sys/fs/cgroup/devices type cgroup (rw,nosuid,nodev,noexec,relatime,devices)
14 cgroup on /sys/fs/cgroup/freezer type cgroup (rw,nosuid,nodev,noexec,relatime,freezer)
15 cgroup on /sys/fs/cgroup/memory type cgroup (rw,nosuid,nodev,noexec,relatime,memory)
16 cgroup on /sys/fs/cgroup/cpu,cpuacct type cgroup (rw,nosuid,nodev,noexec,relatime,cpuacct,cpu)
17 cgroup on /sys/fs/cgroup/perf_event type cgroup (rw,nosuid,nodev,noexec,relatime,perf_event)
18 cgroup on /sys/fs/cgroup/blkio type cgroup (rw,nosuid,nodev,noexec,relatime,blkio)
19 cgroup on /sys/fs/cgroup/cpuset type cgroup (rw,nosuid,nodev,noexec,relatime,cpuset)
20 cgroup on /sys/fs/cgroup/net_cls,net_prio type cgroup (rw,nosuid,nodev,noexec,relatime,net_prio,net_cls)
21 cgroup on /sys/fs/cgroup/pids type cgroup (rw,nosuid,nodev,noexec,relatime,pids)
22 configfs on /sys/kernel/config type configfs (rw,relatime)
23 /dev/mapper/rhel-root on / type xfs (rw,relatime,seclabel,attr2,inode64,noquota)
24 selinuxfs on /sys/fs/selinux type selinuxfs (rw,relatime)
25 systemd-1 on /proc/sys/fs/binfmt_misc type autofs (rw,relatime,fd=35,pgrp=1,timeout=0,minproto=5,maxproto=5,direct,pipe_ino=13695)
26 hugetlbfs on /dev/hugepages type hugetlbfs (rw,relatime,seclabel)
27 debugfs on /sys/kernel/debug type debugfs (rw,relatime)
28 mqueue on /dev/mqueue type mqueue (rw,relatime,seclabel)
29 nfsd on /proc/fs/nfsd type nfsd (rw,relatime)
30 /dev/sda1 on /boot type xfs (rw,relatime,seclabel,attr2,inode64,noquota)
31 sunrpc on /var/lib/nfs/rpc_pipefs type rpc_pipefs (rw,relatime)
32 tmpfs on /run/user/1000 type tmpfs (rw,nosuid,nodev,relatime,seclabel,size=186704k,mode=700,uid=1000,gid=1000)
33 fusectl on /sys/fs/fuse/connections type fusectl (rw,relatime)
34 gvfsd-fuse on /run/user/1000/gvfs type fuse.gvfsd-fuse (rw,nosuid,nodev,relatime,user_id=1000,group_id=1000)
35 tmpfs on /run/user/0 type tmpfs (rw,nosuid,nodev,relatime,seclabel,size=186704k,mode=700)
36 /dev/sr0 on /run/media/hk-super/RHEL-7.4 Server.x86_64 type iso9660 (ro,nosuid,nodev,relatime,uid=1000,gid=1000,iocharset=utf8,mode=0400,dmode=0500,uhelper=udisks2)
使用root账号(切换root指令:su - root),在/mnt 目录下创建一个目录。
指令: mkdir /mnt/dvd
然后卸载/dev/sr0 ,然后挂在到/mnt/dvd ,进入的/mnt/dvd,就可以查看到镜像内的文件了。
相关指令如下:
卸载: umount /dev/sr0
重新挂在: mount /dev/sr0 /mnt/dvd
进入dvd目录: cd /mnt/dvd(此时也进入到镜像文件内了)
查看镜像内的文件:ls -l ( l是字母 )

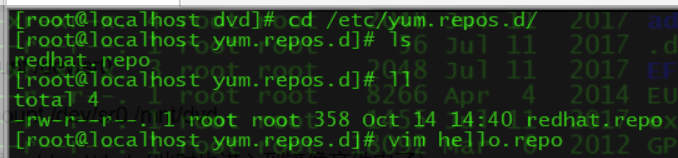
镜像加载到Linux之后,开始配置repo文件,相关指令如下:
cd /etc/yum.repos.d/
vim hello.repo (名字随便起,但后缀名必须是:.repo)
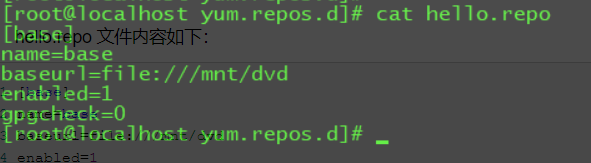
hello.repo 文件内容如下:
1 [base]
2 name=base
3 baseurl=file:///mnt/dvd
4 enabled=1
5 gpgcheck=0
然后分别输入如下指令:
yum clean all
yum makecache
 1 [root@localhost yum.repos.d]# yum clean all
 2 Loaded plugins: langpacks, product-id, search-disabled-repos, subscription-manager
 3 This system is not registered with an entitlement server. You can use subscription-manager to register.
 4 Cleaning repos: base
 5 Cleaning up everything
 6 Maybe you want: rm -rf /var/cache/yum, to also free up space taken by orphaned data from disabled or removed repos
 7 [root@localhost yum.repos.d]#
 8 [root@localhost yum.repos.d]#
 9 [root@localhost yum.repos.d]#
10 [root@localhost yum.repos.d]# yum makecache
11 Loaded plugins: langpacks, product-id, search-disabled-repos, subscription-manager
12 This system is not registered with an entitlement server. You can use subscription-manager to register.
13 base                                                                                                       | 4.1 kB  00:00:00
14 (1/5): base/filelists_db                                                                                   | 3.4 MB  00:00:00
15 (2/5): base/group_gz                                                                                       | 137 kB  00:00:00
16 (3/5): base/other_db                                                                                       | 1.5 MB  00:00:00
17 (4/5): base/productid                                                                                      | 1.6 kB  00:00:00
18 (5/5): base/primary_db                                                                                     | 4.0 MB  00:00:00
19 Metadata Cache Created
20 [root@localhost yum.repos.d]#
上面操作反显的日志,说明yum源配置完成。
然后再次输入安装指令:yum groups install mariadb mariadb-client -y 无报错信息,marridb安装成功。
如有问题,欢迎纠正!!!
如有转载,请标明源处:https://www.cnblogs.com/Charles-Yuan/p/9786415.html