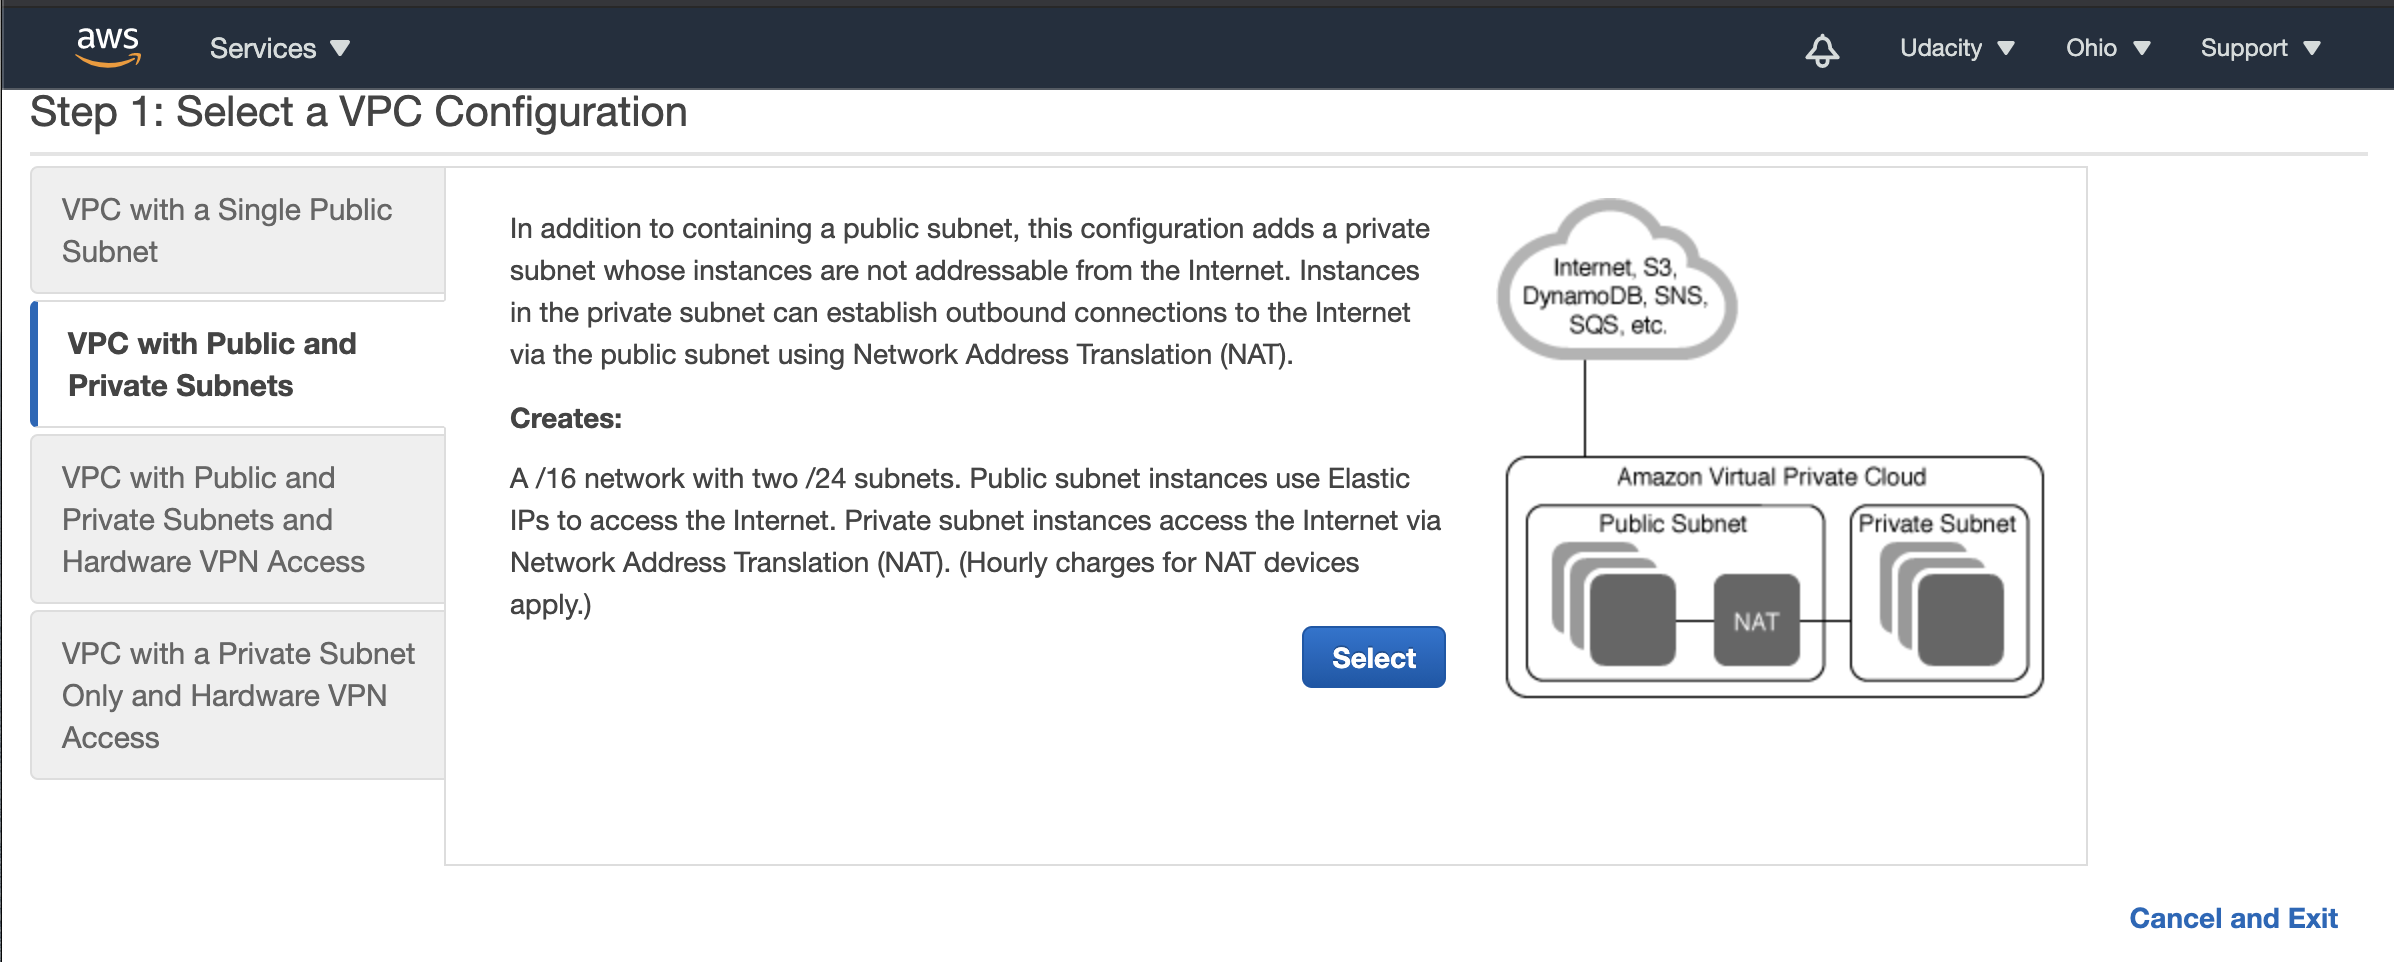
Let's learn how to create your custom VPC. From the VPC Dashboard, click the Launch VPC Wizard. It is a two-step process, as mentioned below.

Snapshot 1. Launch the VPC Wizard, and select one of the pre-defined network structure.
Step 1: Network Structure
Select the Network Structure from the options below:
- VPC with a Single Public Subnet
- VPC with Public and Private Subnets
- VPC with Public and Private Subnets and Hardware VPN Access
- VPC with a Private Subnet Only and Hardware VPN Access

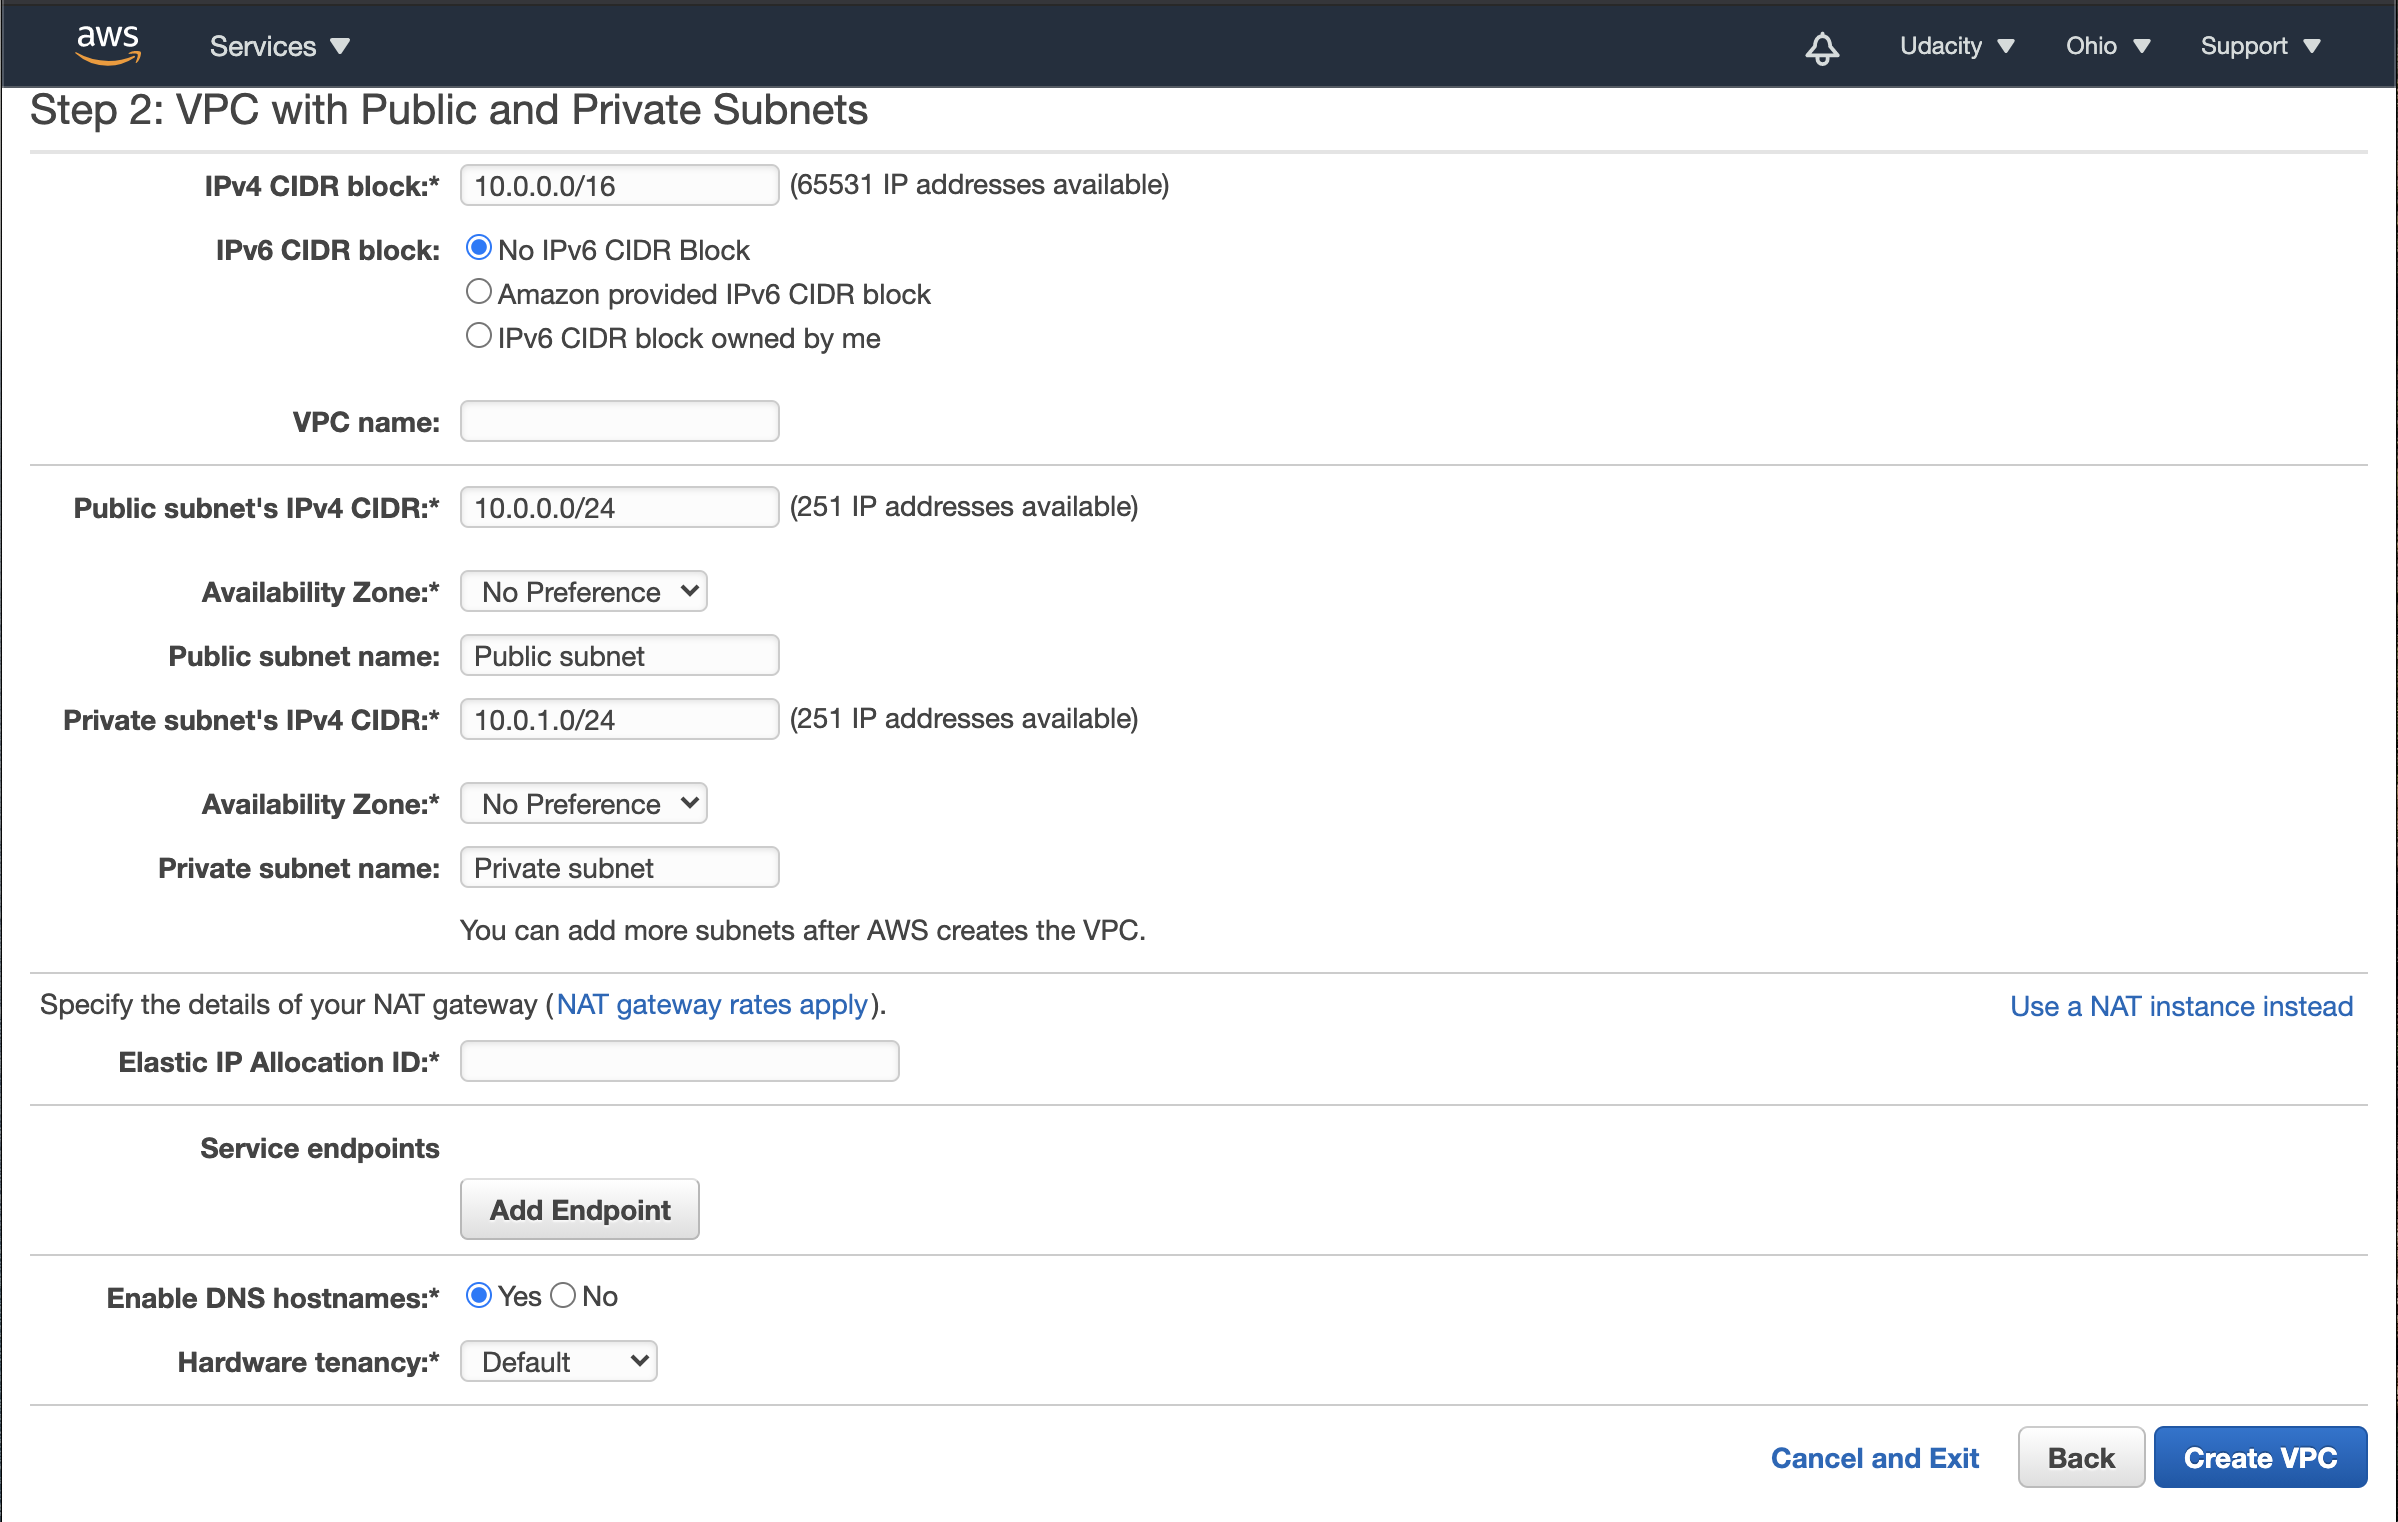
Snapshot 2. Specify the VPC configuration
Step 2: Specify the VPC configuration
The VPC configuration includes:
-
The IP address in the VPC follows a classless inter-domain routing (CIDR) block of IP addresses. You will have to specify the IPv4/IPv6 CIDR block to be allocated to the VPC. In the snapshot above, it uses an IPv4
10.0.0.0/16block, which allocates2^(32-16) = 65,536IP addresses. A few IP addresses are reserved, so you get65531IP addresses for further allocation. -
You will have to specify the range of IP address from the allocated CIDR block for each subnet. In the example above, the public subnet has been allotted the
10.0.0.0/24range, which comprises2^(32-24) = 256IP addresses. But, again a few IP addresses are reserved, so you get 251 available for resources in that subnet.
- Similarly, for the private subnet in the snapshot above, you will get 251 IP addresses.
- Specify the AZ for each subnet, NAT gateway or elastic IP allocation ID, and the service endpoints that will allow you to privately connect your VPC to supported AWS services.