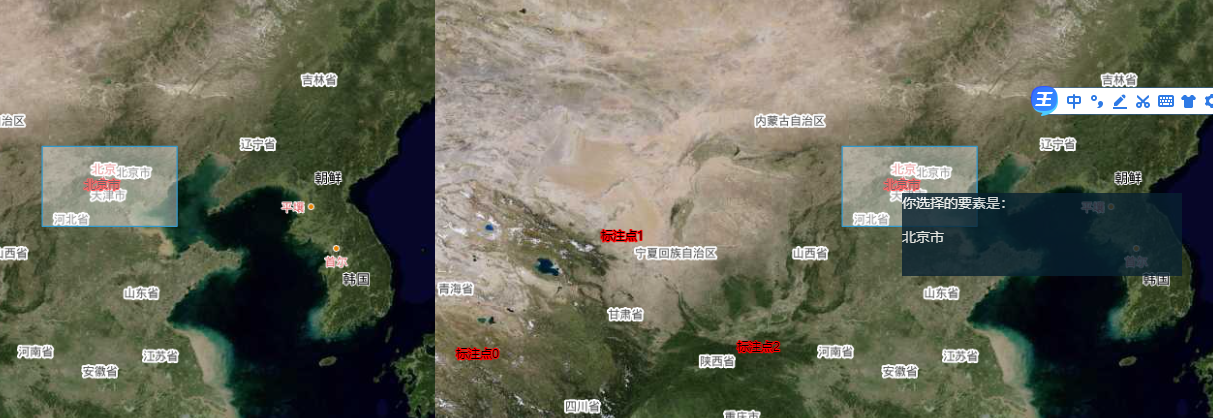
实现的效果:

通过绘制矩形框选要素,然后使用popup以弹窗的形式展示获取的要素属性。
// 选择要素事件开始
      const btn_select = document.getElementById("btn_select");
      btn_select.addEventListener("click", () => {
        this.map1.removeInteraction(this.draw);
        this.map1.removeInteraction(this.snap);
        this.map1.removeLayer(this.vectorLayer2);
        this.map2.removeInteraction(this.snap);
        this.map2.removeLayer(this.vectorLayer2);

        this.source = new VectorSource();
        this.vectorLayer2 = new VectorLayer({
          source: this.source,
        });
        this.map1.addLayer(this.vectorLayer2);
        this.map2.addLayer(this.vectorLayer2);
        this.draw = new Draw({
          source: this.source,
          type: "Circle",
          style: new Style({
            // 将点设置成圆形样式
            image: new CircleStyle({
              // 点的颜色
              fill: new Fill({
                color: "#F00",
              }),
              // 圆形半径
              radius: 5,
            }),
            // 线样式
            stroke: new Stroke({
              color: "#0F0",
              lineCap: "round", // 设置线的两端为圆头
               5,
            }),
          }),

          geometryFunction: createBox(), // 使画出来的现状为矩形
        });
        // 使用popup进行要素属性的演示
        this.overlay = new Overlay(
          /** @type {olx.OverlayOptions} */ ({
            element: container,
            autoPan: true,
            autoPanAnimation: {
              duration: 250, //当Popup超出地图边界时,为了Popup全部可见,地图移动的速度.
            },
          })
        );

        this.snap = new Snap({ source: this.source });
        this.map1.addInteraction(this.draw);
        this.draw.on("drawend", (evt) => {
          //  map.removeLayer(vectorLayer2);

          var polygon = evt.feature.getGeometry();
          setTimeout(() => {
            var extent = polygon.getExtent();
            var features = vectorLayer.getSource().getFeaturesInExtent(extent); //先缩小feature的范围
            var str = "";
            for (var i = 0; i < features.length; i++) {
              var newCoords = features[i].getGeometry().getCoordinates();
              if (features[i].get("name")) {
                str += "  " + features[i].get("name");
              }
            }
            // document.getElementById('selectedFeatures').innerHTML = str
            container.innerHTML = "<p>你选择的要素是:</p>" + str + "";
            this.overlay.setPosition(newCoords);
            this.map2.addOverlay(this.overlay); //将选中要素的属性信息在this.overlay图层通过popup进行显示
          }, 300);
        });
      });
    },
    // 选择要素事件结束
参考资料:https://www.cnblogs.com/wwj007/p/14029494.html
// 选择要素事件开始
const btn_select = document.getElementById("btn_select");
btn_select.addEventListener("click", () => {
this.map1.removeInteraction(this.draw);
this.map1.removeInteraction(this.snap);
this.map1.removeLayer(this.vectorLayer2);
this.map2.removeInteraction(this.snap);
this.map2.removeLayer(this.vectorLayer2);
this.source = new VectorSource();
this.vectorLayer2 = new VectorLayer({
source: this.source,
});
this.map1.addLayer(this.vectorLayer2);
this.map2.addLayer(this.vectorLayer2);
this.draw = new Draw({
source: this.source,
type: "Circle",
style: new Style({
// 将点设置成圆形样式
image: new CircleStyle({
// 点的颜色
fill: new Fill({
color: "#F00",
}),
// 圆形半径
radius: 5,
}),
// 线样式
stroke: new Stroke({
color: "#0F0",
lineCap: "round", // 设置线的两端为圆头
width: 5,
}),
}),
geometryFunction: createBox(), // 使画出来的现状为矩形
});
// 使用popup进行要素属性的演示
this.overlay = new Overlay(
/** @type {olx.OverlayOptions} */ ({
element: container,
autoPan: true,
autoPanAnimation: {
duration: 250, //当Popup超出地图边界时,为了Popup全部可见,地图移动的速度.
},
})
);
this.snap = new Snap({ source: this.source });
this.map1.addInteraction(this.draw);
this.draw.on("drawend", (evt) => {
// map.removeLayer(vectorLayer2);
var polygon = evt.feature.getGeometry();
setTimeout(() => {
var extent = polygon.getExtent();
var features = vectorLayer.getSource().getFeaturesInExtent(extent); //先缩小feature的范围
var str = "";
for (var i = 0; i < features.length; i++) {
var newCoords = features[i].getGeometry().getCoordinates();
if (features[i].get("name")) {
str += " " + features[i].get("name");
}
}
// document.getElementById('selectedFeatures').innerHTML = str
container.innerHTML = "<p>你选择的要素是:</p>" + str + "";
this.overlay.setPosition(newCoords);
this.map2.addOverlay(this.overlay); //将选中要素的属性信息在this.overlay图层通过popup进行显示
}, 300);
});
});
},
// 选择要素事件结束