下载Nginx
首先安装的依赖包:
gcc automake autoconf libtool make gcc gcc-c++ openssl openssl-devel
wget http://zlib.net/zlib-1.2.11.tar.gz
wget http://downloads.sourceforge.net/project/pcre/pcre/8.35/pcre-8.35.tar.gz
1.在服务器上新建文件夹 /home/soft/ ;
2.cd /home/soft/ => 执行命令下载Nginx wget http://nginx.org/download/nginx-1.7.4.tar.gz ;
wget http://cn2.php.net/distributions/php-7.0.0.tar.gz
3.解压下载后的压缩包到/opt/software/ => tar -zvxf nginx-1.7.4.tar.gz -C /opt/software/ ;
4.cd /opt/software/nginx-1.7.4/ => ./configure --prefix=/usr/local/nginx/ ;
5.make && make install ;
6.启动nginx => /usr/local/nginx/sbin/nginx
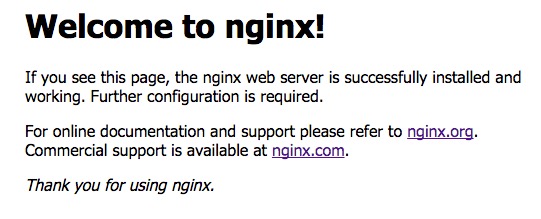
7.打开浏览器访问此机器的 IP,如果浏览器出现 Welcome to nginx! 则表示 Nginx 已经安装并运行成功。

8. 重启:/usr/local/nginx/sbin/nginx –s reload
停止:/usr/local/nginx/sbin/nginx –s stop
测试配置文件是否正常:/usr/local/nginx/sbin/nginx –t
强制关闭:pkill nginx
下载php
1. cd /home/soft/ 下载php:wget https://www.php.net/distributions/php-7.2.25.tar.gz ;
2. 解压php-7.2.25.tar.gz => tar -zvxf php-7.2.25.tar.gz -C /opt/software/ ;
3. cd /opt/software/php-7.2.25/;
4. 先安装php所需的依赖:
yum update
yum -y install libjpeg libjpeg-devel libpng libpng-devel freetype freetype-devel libxml2 libxml2-devel MySQL pcre-devel
yum -y install curl-devel
yum -y install libxslt-devel
yum install openssl openssl-devel
5. ./configure --prefix=/usr/local/php --with-curl --with-freetype-dir --with-gd --with-gettext --with-iconv-dir --with-kerberos --with-libdir=lib64 --with-libxml-dir --with-mysqli --with-openssl --with-pcre-regex --with-pdo-mysql --with-pdo-sqlite --with-pear --with-png-dir --with-xmlrpc --with-xsl --with-zlib --enable-fpm --enable-bcmath --enable-libxml --enable-inline-optimization --enable-gd-native-ttf --enable-mbregex --enable-mbstring --enable-opcache --enable-pcntl --enable-shmop --enable-soap --enable-sockets --enable-sysvsem --enable-xml --enable-zip
6. make && make install
7. php做配置信息:
cp /opt/software/php-7.2.25/php.ini-development /usr/local/php/lib/php.ini
cp /usr/local/php/etc/php-fpm.conf.default /usr/local/php/etc/php-fpm.conf
cp /usr/local/php/etc/php-fpm.d/www.conf.default /usr/local/php/etc/php-fpm.d/www.conf
cp -R /opt/software/php-7.2.25/sapi/fpm/php-fpm /etc/init.d/php-fpm
* 需要注意的是php7中www.conf这个配置文件配置phpfpm的端口号等信息,如果你修改默认的9000端口号需在这里改,再改nginx的配置
Ngin解析php:
1.更改nginx的配置文件 => vim /usr/local/nginx/etc/nginx/nginx.conf
location ~ .php$ {
root /usr/share/nginx/html; #指定php的根目录
fastcgi_pass 127.0.0.1:9000; #php-fpm的默认端口是9000
fastcgi_index index.php;
fastcgi_param SCRIPT_FILENAME $document_root$fastcgi_script_name; #路径
include fastcgi_params;
}
2.php 配置开机自启动:
vim /usr/lib/systemd/system/php-fpm.service
[Unit]
Description=php
After=network.target
[Service]
Type=forking
ExecStart=/usr/local/php/sbin/php-fpm
ExecStop=/bin/pkill -9 php-fpm
PrivateTmp=true
[Install]
WantedBy=multi-user.target
3. killall /etc/init.d/php-fpm
4. 启动php
systemctl restart php-fpm.service
systemctl enable php-fpm.service