一、什么是Vuex
1.Vuex 是一个专为 Vue.js 应用程序开发的状态管理模式。(可以当成全局对象理解。)
2.Vuex 和单纯的全局对象有两点不同:
Vuex 的状态存储是响应式的。
改变 store 中的状态的唯一途径就是显式地提交 (commit) mutation。
3.Vuex的核心是store(仓库),store包含着应用中大部分的状态 (state:组件中的共享状态)。
二、Vuex的安装
在项目根目录终端输入:
npm install vuex --save
在main.js中加入:
import store from './store'//注意是否在src目录下新建store文件目录,并创建store实例
三、Vuex的核心概念
1、State
state 可以看作是所有组件的 data,用于保存所有组件的公共数据。
2、Getters
getters 可以看作是所有组件的 computed 属性,getters 的返回值会根据它的依赖被缓存起来,只有当它的依赖值发生改变才会被重新计算。
3、Mutations
mutations 可以看作是 store 中的 methods,其中保存着更改数据的回调函数。
4、Actions
actions 类似于 mutations,区别在于:
- actions 提交的是 mutations 而非直接变更状态
- actions 中可以包含异步操作,而mutations 中不允许出现异步
5、Modules
由于使用单一状态树,当应用变得非常复杂时,store 对象会变得相当臃肿,Vuex 允许将 store 分割成模块(module)。每个模块拥有自己的 state、mutations、actions、getters、甚至是嵌套子模块——从上至下进行同样方式的分割:
const moduleA = {
  state: { ... },
  mutations: { ... },
  actions: { ... },
  getters: { ... }
}

const moduleB = {
  state: { ... },
  mutations: { ... },
  actions: { ... }
}

const store = new Vuex.Store({
  modules: {
    a: moduleA,
    b: moduleB
  }
})

store.state.a // -> moduleA 的状态
store.state.b // -> moduleB 的状态
四、创建Vuex实例
在项目的src目录下新建一个目录store,在该目录下新建一个index.js文件,然后在该文件中引入vue和vuex,创建Vuex.Store实例保存到变量store中,最后使用export default导出store:
import Vue from 'vue'
import Vuex from 'vuex'
Vue.use(Vuex);
const store = new Vuex.Store({
    state: {
        count: 1
    }
});
export default store;
五、Vuex获取store数据
<h2>{{this.$store.state.count}}</h2>
六、Vuex获取改变后的store数据(Getters 可用于监听、state中的值的变化)
<h2>我是从Getters中获取的计算后的值:{{this.$store.getters.getStateCount}}</h2>
import Vue from 'vue'
import Vuex from 'vuex'
Vue.use(Vuex);
const store = new Vuex.Store({
    state: {
        count: 1
    },
    getters:{
        getStateCount:function(state){
            return state.count+1;
        }
    }
});
export default store;
七、Vuex修改store数据(mutations)
<template>
  <div class="hello">
    <h2>{{this.$store.state.count}}</h2>
    <button @click="addFun">+</button>
    <button @click="reductionFun">-</button>
  </div>
</template>

<script>
export default {
  name: 'HelloWorld',
  methods:{
    addFun(){
      this.$store.commit('add');
    },
    reductionFun(){
      this.$store.commit('reduction');
    }
  }
}
</script>
在mutations中定义的两个函数主要是用来修改count的值:
import Vue from 'vue'
import Vuex from 'vuex'
Vue.use(Vuex);
const store = new Vuex.Store({
    state: {
        count: 1
    },
    getters:{
        getStateCount:function(state){
            return state.count+1;
        }
    },
    mutations:{
        add(state){
            state.count = state.count + 1;
        },
        reduction(state){
            state.count = state.count - 1;
        }
    }
});
export default store;
到此,操作运行页面,点击+、- 按钮操作查看数据是否改变。
上面我们的操作虽然值改变了,但是官方并不建议我们直接去修改store里面的值,而是让我们去提交一个actions,在actions中提交mutation再去修改状态值,接下来我们修改index.js文件,先定义actions提交mutation的函数:
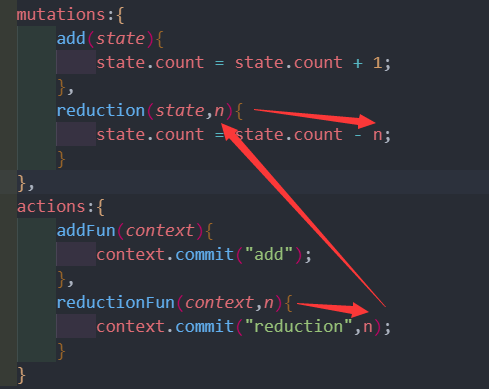
import Vue from 'vue'
import Vuex from 'vuex'
Vue.use(Vuex);
const store = new Vuex.Store({
    state: {
        count: 1
    },
    getters:{
        getStateCount:function(state){
            return state.count+1;
        }
    },
    mutations:{
        add(state){
            state.count = state.count + 1;
        },
        reduction(state,n){
            state.count = state.count - n;
        }
    },
    actions:{
        addFun(context){
            context.commit("add");
        },
        reductionFun(context,n){
            context.commit("reduction",n);
        }
    }
});
export default store;
然后我们去修改Hello World.vue文件:
<template>
  <div class="hello">
    <!-- <h2>我是从页面上直接获取的:{{count1}}</h2> -->
    <h2>{{this.$store.state.count}}</h2>
    <button @click="addFun">+</button>
    <button @click="reductionFun">-</button>
  </div>
</template>

<script>
export default {
  name: 'HelloWorld',
  data () {
    return {

    }
  },
  methods:{
    addFun(){
      this.$store.dispatch('addFun');
    },
    reductionFun(){this.$store.dispatch('reductionFun');
    }
  }
}
</script>
这里我们把commit提交mutations修改为使用dispatch来提交actions;我们点击页面,效果是一样的。
好了,我们这里已经实现了一个基本的vuex修改状态值的完整流程,如果我们需要指定加减的数值,那么我们直接传入dispatch中的第二个参数,然后在actions中的对应函数中接受参数在传递给mutations中的函数进行计算:
let n = 10;
this.$store.dispatch('reductionFun',n);
这个时候我们再去点击“ - ”按钮就会发现不再是减1了,而是减去10了。