搭建Git服务器需要准备一台运行Linux的机器,本文以Centos6.8纯净版系统为例搭建自己的Git服务。
准备工作:以root用户登陆自己的Linux服务器。
第一步安装依赖库
[root@localhost ~]# yum install curl-devel expat-devel gettext-devel openssl-devel zlib-devel
[root@localhost ~]# yum install  gcc perl-ExtUtils-MakeMaker
第二步卸载旧版git
加入原先有用yum安装过git,则需要先卸载一下
[root@localhost ~]# yum remove git
第三步下载源码
下载git-2.10.0.tar.gz 到 /usr/local/src
(查找git版本可以到https://www.kernel.org/pub/software/scm/git/下查看git的版本号自行选择下载)
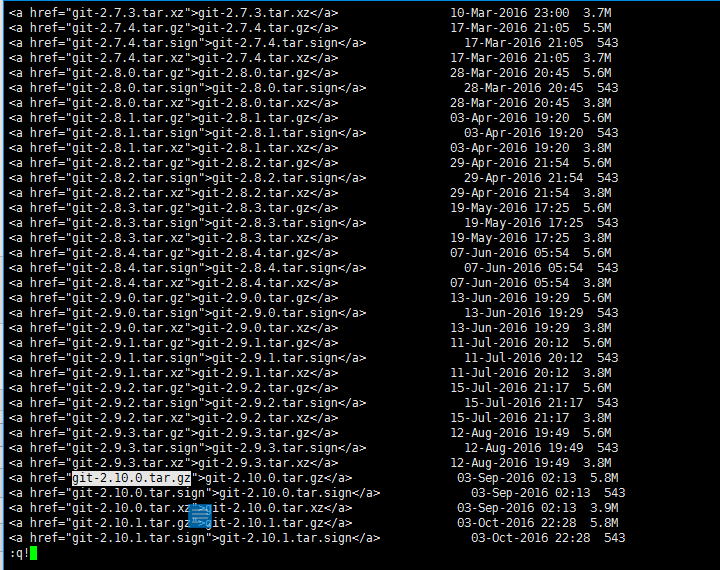
查看版本方法:
[root@iZbp1ap7v4yegqdgzrh7cuZ ~]# wget -v https://www.kernel.org/pub/software/scm/git/
[root@iZbp1ap7v4yegqdgzrh7cuZ ~]# vi index.html
复制想下载的版本 --> Esc --> :q! --> 回车!

这里我选择下载git-2.10.0.tar.gz
[root@localhost ~]# cd /usr/local/src
[root@localhost ~]# wget https://www.kernel.org/pub/software/scm/git/git-2.10.0.tar.gz
第四步解压、编译和安装
[root@localhost ~]# tar -zvxf git-2.10.0.tar.gz
[root@localhost ~]# cd git-2.10.0
[root@localhost ~]# make prefix=/usr/local/git all
[root@localhost ~]# make prefix=/usr/local/git install
第五步将git目录加入PATH
[root@localhost ~]# echo 'export PATH=$PATH:/usr/local/git/bin' >> /etc/bashrc
[root@localhost ~]# source /etc/bashrc
安装成功后就可以查看到git版本了。
[root@localhost ~]# git --version
git version 2.10.0
第六步创建git账号并设置密码
[root@localhost ~]# useradd -m git
[root@localhost ~]# passwd git
Changing password for user git.
New password:
BAD PASSWORD: is too simple
Retype new password:
passwd: all authentication tokens updated successfully.
第七步创建git仓库并初始化
[root@localhost ~]# mkdir -p /home/git/repositories/test.git
[root@localhost ~]# cd /home/git/repositories/test.git
[root@localhost test.git]# git --bare init
Initialized empty Git repository in /home/git/repositories/test.git/
第八步给git仓库目录设置用户和用户组并设置权限
[root@localhost test.git]# chown -R git:git /home/git/repositories
[root@localhost test.git]# chmod 755 /home/git/repositories
第九步限制git账号的ssh连接
查找git-shell所在目录
[root@localhost ~]# whereis git-shell
git-shell: /usr/src/git-2.10.0/git-shell
编辑passwd文件
[root@localhost ~]# vi /etc/passwd
找到这一行
git:x:500:500::/home/git:/bin/bash
将最后的/bin/bash改为:git-shell的目录 /usr/src/git-2.10.0/git-shell 如下:
git:x:500:500::/home/git:/usr/src/git-2.10.0/git-shell
Esc --> :wq! --> 回车!
完成搭建,去克隆提交试试吧!
clone地址:
ssh://git@服务器ip地址:端口/home/git/repositories/test.git
附加:以后每次新建仓库时,只需执行上面第七、八步即可!